
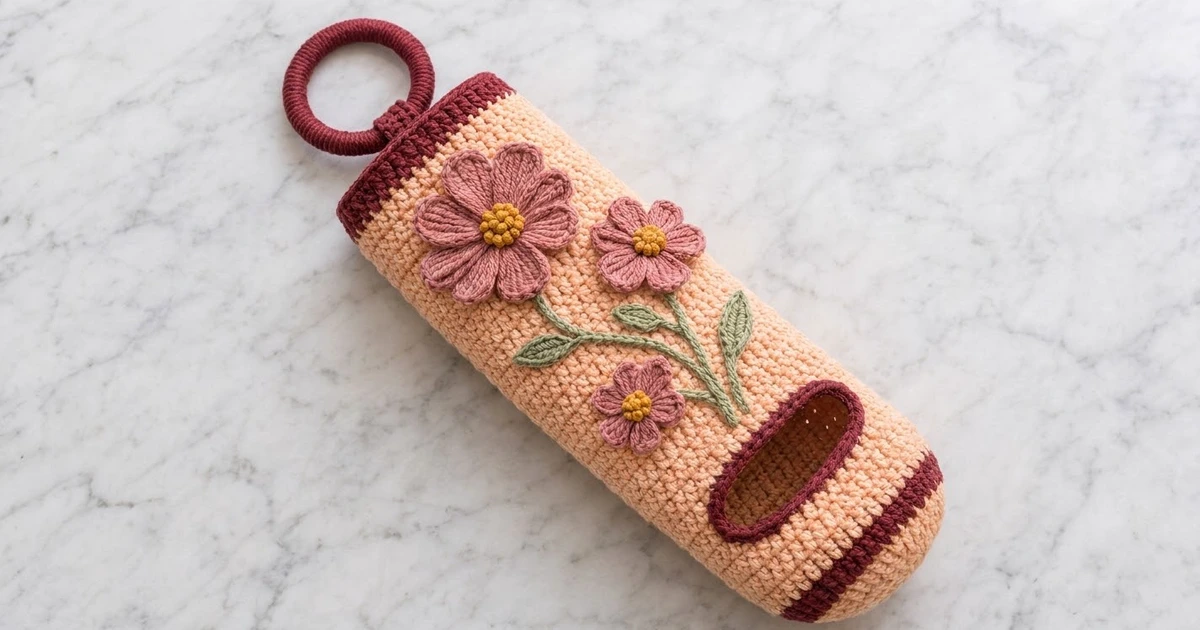
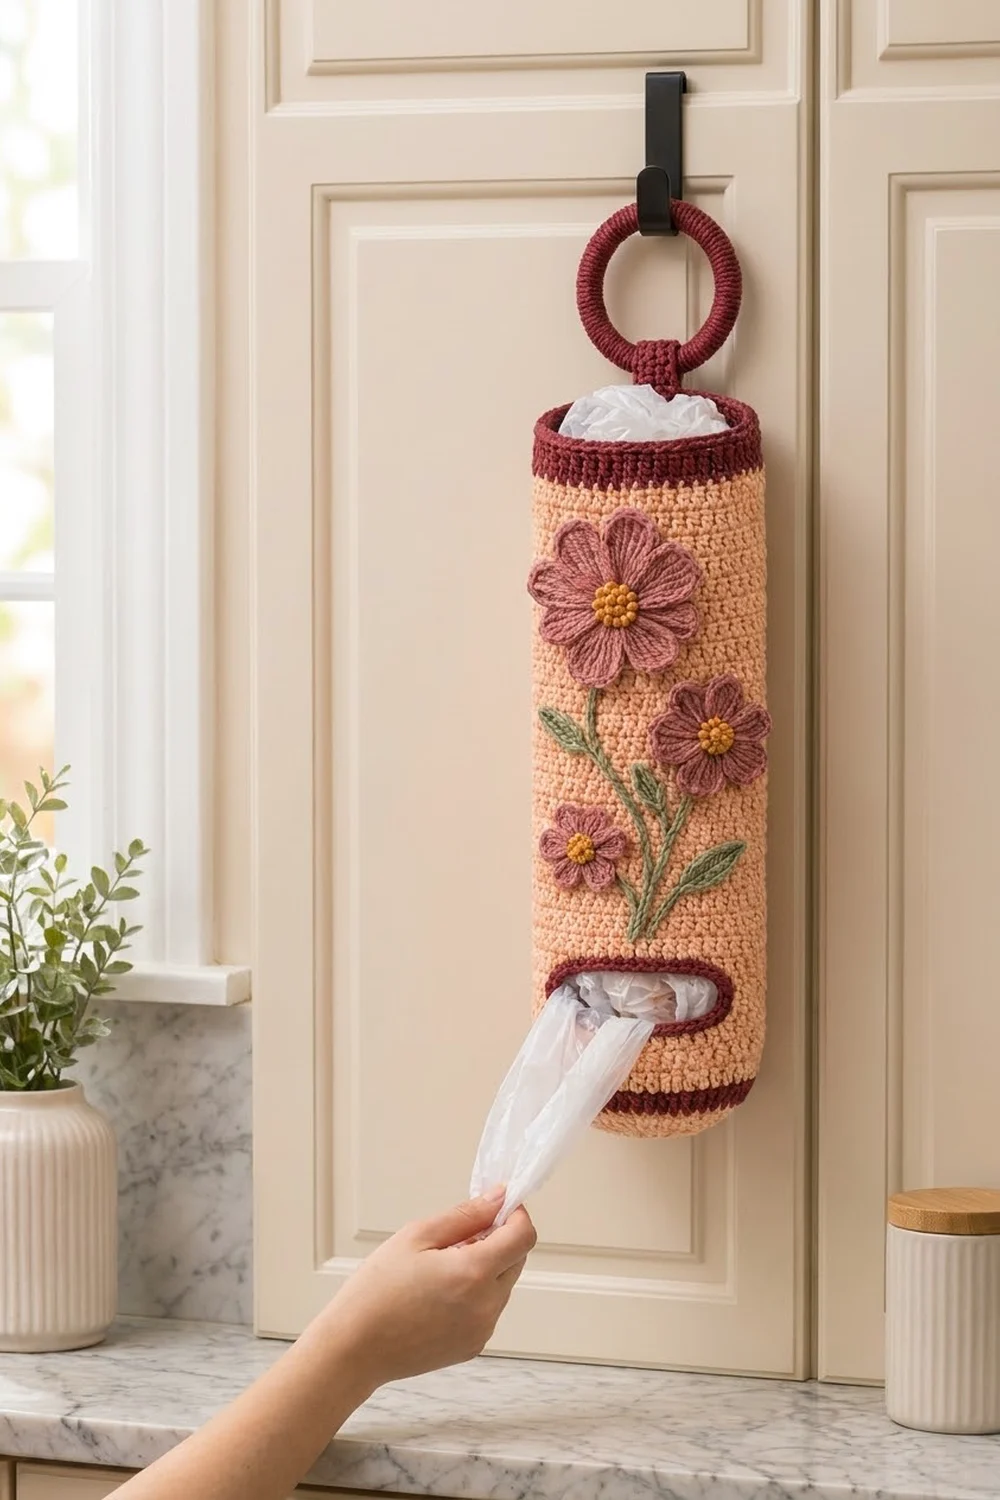
This holder keeps grocery bags tidy and looks nice doing it. It’s a tall, soft tube with an oval base, and a slot near the bottom lets you pull out one bag at a time. You stuff bags in through the top and hang the holder by its covered ring.
The main color is warm light peach, with burgundy accents at the base, around the slot, at the top rim and on the ring. A bouquet of dusty-rose flowers with mustard centers and sage-green stems and leaves decorates the front. The look is cottage-style and works well on a pantry or cabinet door. For a softer version, swap the peach for cream and keep every accent color the same.
The finished holder is 6 in (15.2 cm) wide laid flat and 18 in (45.7 cm) tall, not counting the hanger. The pattern uses US crochet terms throughout.
You work the body in one piece from the bottom up. You start with an oval base, turn it upward into a tube, work the slot in short rows and finish with a burgundy rim. After that, you make the ring, strap, flowers, stems and leaves separately and sew them on.
Finished Size and Construction
- Finished size: 6 in (15.2 cm) wide flat × 18 in (45.7 cm) tall; about 22 in (55.9 cm) including the hanger
- Skill level: Easy–Intermediate
- Terminology: US
- Yarn weight: Worsted (#4 medium), cotton or cotton blend
- Hook: 5.0 mm (H-8)
- Number of pieces: 1 body, plus 1 ring, 1 strap, 3 flowers, 3 stems and 5 leaves
- Layout: Vertical tube, with the slot on the front near the base and the bouquet above it
- Base: Oval, about 5 × 2 in (12.7 × 5.1 cm)
- Body circumference: 48 sts = 12 in (30.5 cm)
- Size before top band: 17 in (43.2 cm) tall
- Top band depth: 1 in (2.5 cm)
Materials
Use a smooth cotton or cotton-blend worsted yarn with about 170 m per 100 g. Cotton holds its shape and doesn’t sag when the holder is full. Acrylic also works, but it stretches more. Choose a burgundy dark enough to stand out clearly against the peach, because the bands and the slot edging carry the design.
- Light peach (A): 85 g / 140 m
- Burgundy (B): 20 g / 35 m
- Dusty rose (C): 12 g / 20 m
- Mustard (D): 5 g / 8 m
- Sage green (E): 10 g / 18 m
Tools
- 5.0 mm (H-8) crochet hook
- 2.5 in (6.4 cm) metal, wooden or plastic ring
- Stitch markers
- Tapestry needle
- Scissors
- Measuring tape
- Pins
All quantities include a margin of about 15% for swatching and sewing.
Abbreviations (US Terms)
- ch – chain
- sl st – slip stitch
- sc – single crochet
- hdc – half double crochet
- dc – double crochet
- tr – treble crochet
- BLO – back loop only
- st(s) – stitch(es)
- RS / WS – right side / wrong side
Standing sc: With a slip knot on the hook, insert the hook into the st, yarn over and pull up a loop, then yarn over and pull through both loops.
Gauge and Checkpoints
Gauge: 16 sc × 20 rounds = 4 in (10.2 cm) in joined rounds.
Use the start of the body as your test piece. Work the base and Rounds 4–10, then check them before you commit to the whole tube. These rounds use less than 10 g of yarn and tell you whether the full holder will come out right.
- After Rnd 3: 48 sts. The oval measures about 5 × 2 in (12.7 × 5.1 cm).
- After Rnd 10: The wall is 1.4 in (3.6 cm) tall, and the tube is 6 in (15.2 cm) wide when flattened.
- Slot: 3.5 in (8.9 cm) wide × 1.2 in (3.0 cm) tall before edging.
- After Rnd 53: 10 in (25.4 cm) from the base fold.
- After Rnd 88: 17 in (43.2 cm).
- After Rnd 93: 18 in (45.7 cm).
If the tube is wider than 6 in (15.2 cm), go down half a hook size. If it’s narrower, go up half a size. If the width is right but the rounds come out too short, count rounds instead of measuring, because the stitch counts set the proportions.
Body
Join every round with a sl st to the first sc. Start each round with ch 1, which doesn’t count as a st. Don’t turn unless the pattern tells you to. To change color, finish the last sc of the round in the old color, then work the joining sl st in the new color.
Oval Base (Color A)
Rnd 1: Ch 15. Work 2 sc in the 2nd ch from the hook, sc in the next 12 ch, then 4 sc in the last ch. Working along the opposite side of the chain, sc in the next 12 ch, then 2 sc in the last ch (the same ch as the first sts). Join. (32 sts)
Rnd 2: 2 sc in each of the next 2 sts, sc in the next 12, 2 sc in each of the next 4, sc in the next 12, 2 sc in each of the next 2. Join. (40 sts)
Rnd 3: [Sc in the next st, 2 sc in the next st] 2 times, sc in the next 12, [sc in the next st, 2 sc in the next st] 4 times, sc in the next 12, [sc in the next st, 2 sc in the next st] 2 times. Join. (48 sts)
Stitches 1–24 form the front, centered between sts 12 and 13. Stitches 25–48 form the back.
Wall and Lower Band
Rnd 4: Sc BLO in each st around. Join. (48 sts) This round turns the base upward into the wall.
Rnds 5–6: Sc in each st around. (48 sts)
Rnds 7–10: Change to B. Sc in each st around. (48 sts) This makes the 0.8 in (2.0 cm) burgundy band.
Rnds 11–14: Change to A. Sc in each st around. (48 sts) Place a marker in st 20, then fasten off.
Dispensing Slot
The slot takes up sts 6–19 on the front. You work 6 rows back and forth over the other 34 sts.
Row 15 (RS): Join A with a standing sc in the marked st 20, then sc in sts 21–48 and in sts 1–5. (34 sts)
Rows 16–20: Ch 1, turn, sc in each sc across. (34 sts) Row 20 is a WS row and ends beside st 20.
Rnd 21: Ch 1, then turn so the RS faces you. Sc in each of the 34 sts, ch 14 and join to the first sc. (34 sc + 14 ch = 48 sts)
Rnd 22: Sc in each sc and each ch. Join. (48 sts) From here on, the rounds begin beside the slot. The join doesn’t show, so there’s no need to move it.
Upper Body
Rnds 23–88: Sc in each st around. (48 sts) The piece should measure 10 in (25.4 cm) after Rnd 53 and 17 in (43.2 cm) after Rnd 88.
The top band (Rnds 89–93) is worked in the Border section.
Hanger and Appliqués
Covered Ring (Color B)
Join B to the ring. Work sc around the ring until it’s completely covered, about 56 sc. Keep the sts snug and side by side. Join and fasten off. Turn all the sc tops to the inside edge of the ring so they don’t show.
Strap (Color B)
Row 1: Ch 7. Sc in the 2nd ch from the hook and in each ch across. (6 sts)
Rows 2–20: Ch 1, turn, sc across. (6 sts)
The strap measures 1.5 × 4 in (3.8 × 10.2 cm).
Large Flower (Make 1)
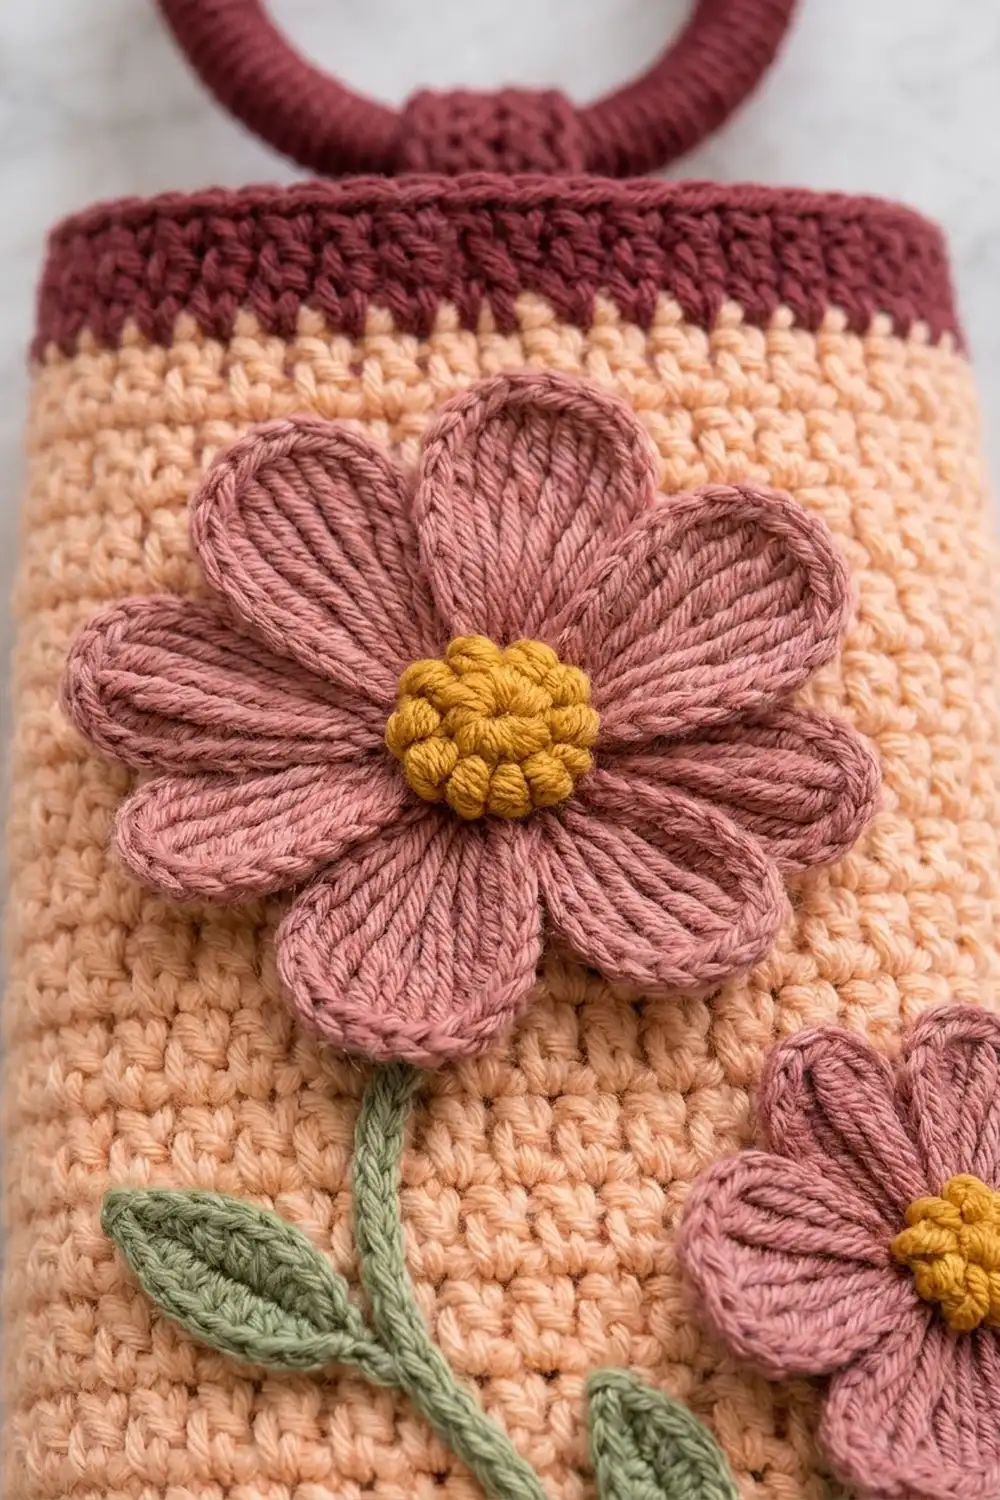
Rnd 1 (D): Work 8 sc into a magic ring. Join. (8 sts) Fasten off.
Rnd 2 (C): Join C. Work 2 sc in each st. Join. (16 sts)
Rnd 3 (C): *Work (hdc, dc, 2 tr, dc, hdc) in the next st, then sl st in the next st; repeat from * 7 more times. (8 petals)
The large flower is about 3 in (7.6 cm) across.
Small Flower (Make 2)
Rnd 1 (D): Work 8 sc into a magic ring. Join and fasten off. (8 sts)
Rnd 2 (C): Join C. In each st, work (sl st, ch 2, 2 dc, ch 2, sl st). (8 petals)
Each small flower is about 1.75 in (4.4 cm) across. To give the centers a bumpy look, add 3–4 French knots in D to the center of each flower, including the large one.
Stems and Leaves (Color E)
Main stem: Ch 30. Sl st in the back bump of the 2nd ch from the hook and of each ch across. (29 sl sts) The main stem is about 6.5 in (16.5 cm) long.
Branch stems (make 2): Ch 11. Sl st in the back bump of the 2nd ch from the hook and of each ch across. (10 sl sts) Each branch is about 2.25 in (5.7 cm) long.
Leaf (make 5): Ch 7. Starting in the 2nd ch from the hook, work sc, hdc, 2 dc, hdc, then 3 sc in the last ch. Working along the opposite side of the chain, work hdc, 2 dc, hdc, sc, then sl st to the first sc. (13 sts) Each leaf is about 1.25 in (3.2 cm) long.
Border
The border is made up of the burgundy top band and the slot edging. It uses the same gauge as the body: 16 sc = 4 in (10.2 cm).
Top Band
Rnds 89–93 (B): Change to B. Sc in each st around. (48 sts per round) Fasten off.
The band is 5 rounds, which is exactly 1 in (2.5 cm) at 5 rounds per inch. It brings the height from 17 in (43.2 cm) to 18 in (45.7 cm). Every round keeps 48 sts, so the rim stays the same width as the tube, 6 in (15.2 cm) flattened, and doesn’t flare or pull in.
Slot Edging
Rnd 1: Join B at a lower corner of the slot. Work 14 sc along the bottom edge, one in each unworked st of Rnd 14. Work 6 sc along the side, one per row end. Then work 14 sc into the underside of the ch-14 and 6 sc along the other side. Join. (40 sts: 14 + 6 + 14 + 6)
Rnd 2: Sl st loosely in each sc. (40 sts) Fasten off.
The long sides match the 14 skipped sts and the 14 chains one for one, so they lie flat. Each short end gets 6 sc over 1.2 in (3.0 cm), which is slightly more than gauge. That little extra rounds the ends into an oval. The finished opening is about 3.25 × 0.75 in (8.3 × 1.9 cm).
Assembly
- Fold the strap in half around the covered ring.
- Center the strap above the slot so that the top band sits between its two ends, with one end outside and one inside. Each end should overlap the body by 1 in (2.5 cm).
- Sew through all the layers with B.
- Pin the large flower so its center is 4.5 in (11.4 cm) below the rim and about 0.75 in (1.9 cm) left of center.
- Pin one small flower on the right, 8 in (20.3 cm) below the rim. Pin the other on the left, 10.5 in (26.7 cm) below the rim.
- Run the main stem down from the large flower so it ends about 2 in (5.1 cm) above the slot edging. Curve the branches out to the small flowers.
- Place the leaves in pairs along the stems.
- Slide a rolled towel into the tube so you don’t sew through both layers. Whipstitch everything in place with matching yarn.
Final Blocking
- Fill the tube with a rolled towel so it measures 6 in (15.2 cm) wide flattened.
- Shape the base into a smooth oval.
- Mist the piece lightly, or steam it from above without letting the iron touch it.
- Smooth the petals and leaves flat with your fingers.
- Let it dry completely, for at least 12 hours.
- Remove the towel and check the measurements again.
Final Quality-Control Checklist
- 48 sts in every body round
- 6 in (15.2 cm) wide flattened, from top to bottom
- 18 in (45.7 cm) tall
- Slot centered on the front, with 40-st edging and no puckers
- Strap centered above the slot and sewn through all layers
- All appliqués secure, with no stitches going through to the back
- Ends woven in on the inside
Troubleshooting
- Base cups or ruffles: Check the counts for Rnds 1–3. If you missed working Rnd 4 in BLO, redo it.
- Tube flares at the top: Your tension loosened over time. Go down a hook size for the top band.
- Stripes show a step at the join: Make sure you work the joining sl st in the new color.
- Slot gapes: Work the Rnd 2 sl sts a little tighter.
- Slot is too tight for bags: Leave out Rnd 2 of the edging.
- Holder hangs crooked: Re-center the strap directly above the slot.
- Ring shows through: Add more sc and push them closer together.
- Petals curl: Block them flat, or work Rnd 3 with a hook half a size larger.
Care
Hand wash in cool water, then reshape and lay flat to dry. Don’t wring it or put it in the dryer.
Final Notes
Each measurement leads to the next. The base has 48 sts, which flatten to a 6 in (15.2 cm) tube. Five rounds make 1 in (2.5 cm), so the slot closes 3.6 in (9.1 cm) above the base fold, and 85 rounds reach 17 in (43.2 cm) before the top band. The 1 in (2.5 cm) band brings the holder to 18 in (45.7 cm). If your gauge is right on the first 10 rounds, the slot, the band and the bouquet placement will all come out as planned.
Happy crocheting!