

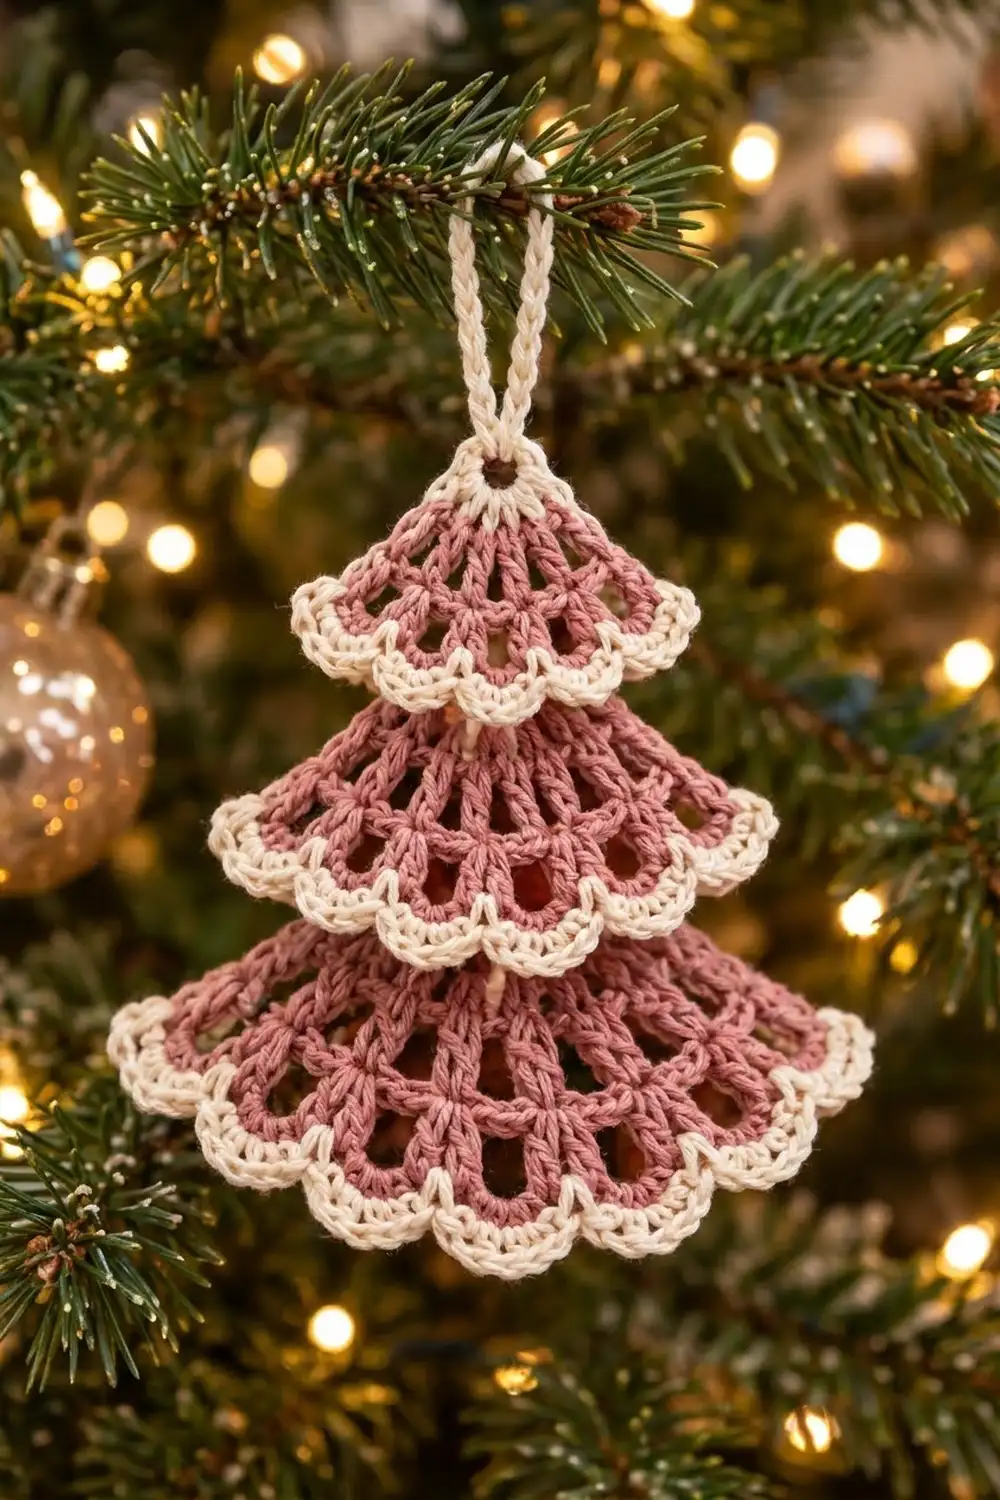
The Rosy Tiers ornament is a little lace Christmas tree made from three open fans stacked on top of each other. Each fan is worked in dusty rose with airy spokes and finished with a soft cream scalloped edge. Together they make a vintage-style tree that looks lovely against green branches and warm lights.
The palette is just two colors: dusty rose for the body of each tier and cream for the edging, the top ring, the hanging loop, and the hidden center cord. The style is light and lacy and a little old-fashioned, like a tiny doily shaped into a tree.
This pattern uses US crochet terms. The finished ornament measures about 4.5 in (11.4 cm) tall and 4.5 in (11.4 cm) wide, plus a 2 in (5.1 cm) hanging loop.
Construction overview: You crochet three separate fans flat in turned rows, starting from a ring at the top point. Each fan gets a cream scallop edging along its curved lower edge. Next you make a short cream slip-stitch cord, called the spine. Last, you sew the tiers onto the spine at set spacings and add the hanging loop to the top tier’s cream ring.
Finished Size and Construction
- Finished size: 4.5 in (11.4 cm) tall × 4.5 in (11.4 cm) wide, not counting the loop
- Hanging loop: 2 in (5.1 cm) tall
- Skill level: Easy / advanced beginner
- Terminology: US
- Yarn weight: Sport weight (#2) cotton
- Hook: 2.75 mm (C-2)
- Number of pieces: 4 (small tier, medium tier, large tier, spine cord)
- Layout: Three tiers in one vertical column, smallest at the top
- Piece sizes (finished, width × height):
- Small: 2.75 in (7.0 cm) × 1.5 in (3.8 cm)
- Medium: 3.75 in (9.5 cm) × 2 in (5.1 cm)
- Large: 4.5 in (11.4 cm) × 2.25 in (5.7 cm)
- Size before border:
- Small: 2.25 in (5.7 cm) × 1.25 in (3.2 cm)
- Medium: 3.25 in (8.3 cm) × 1.6 in (4.1 cm)
- Large: 3.75 in (9.5 cm) × 1.8 in (4.6 cm)
- Border depth:
- Small: 0.25 in (0.6 cm)
- Medium: 0.4 in (1.0 cm)
- Large: 0.45 in (1.1 cm)
Materials
Choose a smooth, mercerized sport-weight cotton. It gives crisp spokes and scallops and holds its shape well after blocking. Acrylic will also work, but the lace will look softer and slightly less defined.
- Dusty Rose (main color): 8 g, about 24 m
- Cream (contrast color): 6 g, about 18 m
These quantities include a generous margin. One ornament actually uses about half of these amounts.
Tools:
– 2.75 mm (C-2) crochet hook
– Tapestry needle
– Scissors
– Rustproof pins and a foam blocking mat
– Spray bottle with water
– Ruler or tape measure
– Optional: fabric stiffener or starch
Abbreviations (US Terms)
- ch – chain
- sl st – slip stitch
- sc – single crochet
- dc – double crochet
- sp(s) – space(s)
- sk – skip
- st(s) – stitch(es)
- RS / WS – right side / wrong side
Special stitch – Back-bump slip-stitch cord: Make a chain. Then, starting in the 2nd ch from the hook, work a sl st into the back bump (the bar on the back) of each chain. This makes a firm, flat cord that does not stretch.
Turning chain: At the start of a row, ch 3 counts as the first dc.
Gauge and Checkpoints
Gauge: 24 dc and 12 dc rows = 4 in (10.2 cm) in a solid swatch. That works out to about 6 dc per inch, with each dc row about 0.33 in tall.
Make the small tier first and treat it as your gauge test. Measure each fan from the top of the starting ring down to the edge, straight through the center spoke.
Checkpoints:
– Small tier: after Row 3, 1.25 in (3.2 cm) tall and 2.25 in (5.7 cm) wide. After edging, 1.5 in (3.8 cm) tall.
– Medium tier: after Row 4, 1.6 in (4.1 cm) tall. After edging, 2 in (5.1 cm) tall.
– Large tier: after Row 5, 1.8 in (4.6 cm) tall. After edging, 2.25 in (5.7 cm) tall.
If your small tier is more than 0.25 in (0.6 cm) too big, go down a hook size, to 2.5 mm. If it is too small, go up to 3.0 mm. Small differences can usually be corrected during blocking. Larger ones change the overlap between tiers.
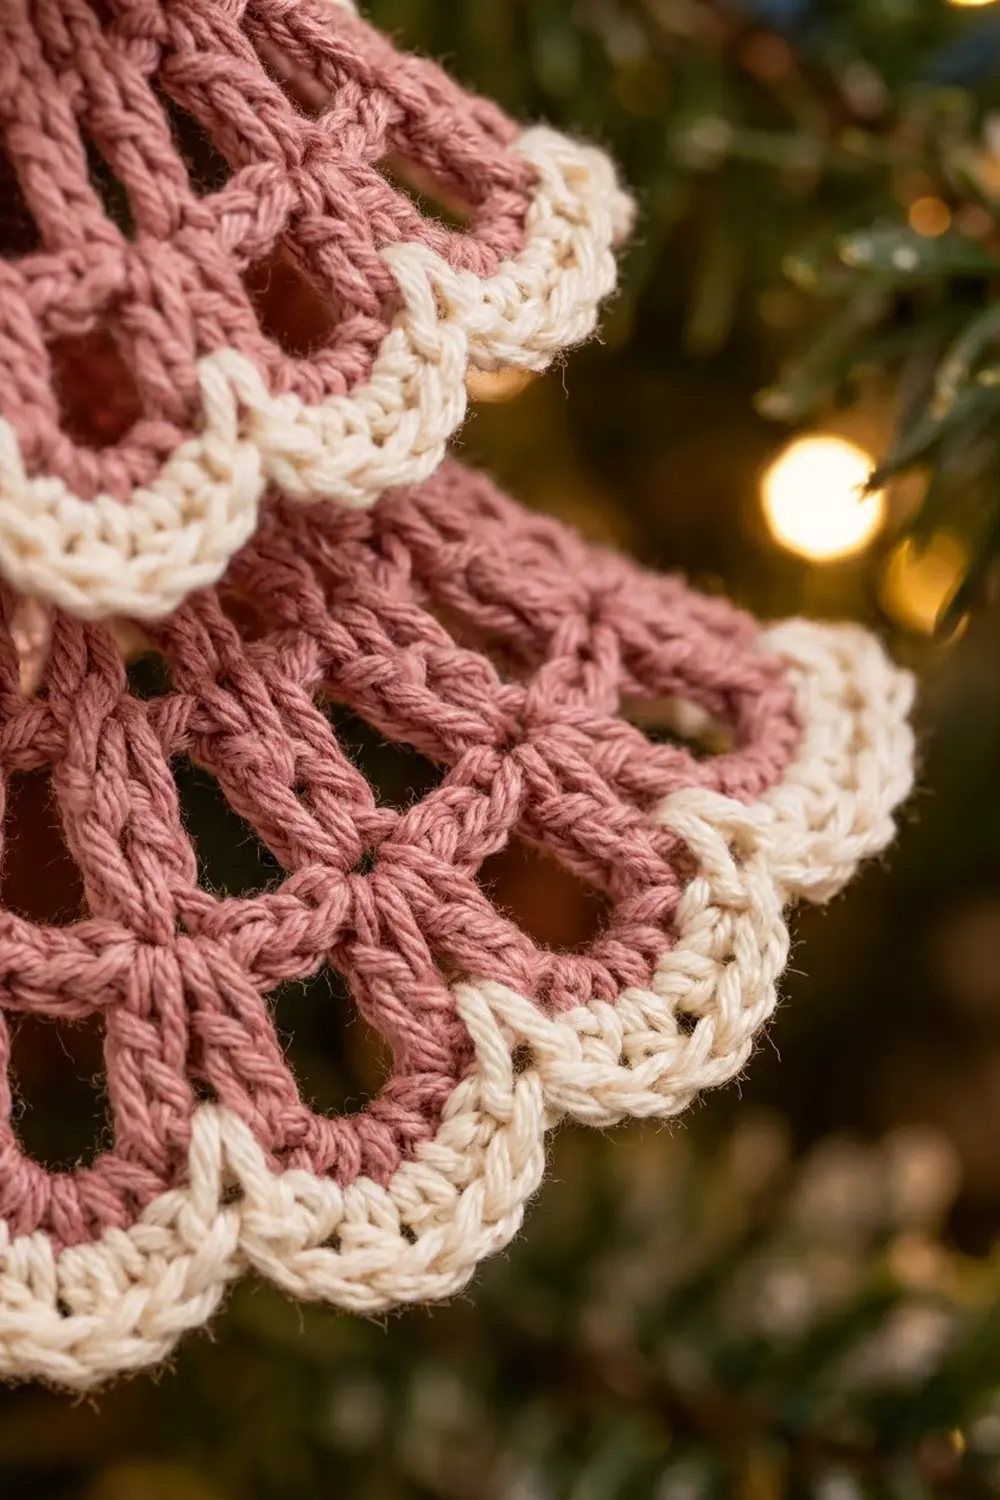
Small Tier (Make 1)
The small tier starts with a cream ring. Part of that ring stays visible above the fan and holds the hanging loop.
Row 0 (Cream): Ch 5, sl st in first ch to form a ring. Ch 1, work 12 sc into the ring, then sl st to the first sc. Fasten off. (12 sc)
Row 1 (Rose): Join Rose in any sc. Ch 3 (counts as dc), then dc in each of the next 6 sc. Turn. (7 dc) The remaining 5 sc stay unworked and form the cream arc at the top.
Row 2: Ch 3 (counts as dc) and dc in the same st. Then ch 1, 2 dc in next dc, and repeat from * 6 times in total. Turn. (14 dc in 7 pairs, 6 ch-1 sps)
Row 3: Ch 3 (counts as dc), dc in next dc. Then ch 2, sk ch-1 sp, dc in each of next 2 dc, and repeat from * 6 times in total. The last dc goes into the top of the turning ch. (14 dc, 6 ch-2 sps) Fasten off.
Each pair of dc forms one spoke. The chain spaces between spokes get wider each row, which opens the piece into a fan.
Medium Tier (Make 1)
Row 1 (Rose): Ch 5, sl st to form a ring. Ch 3 (counts as dc), then 8 dc into the ring. Turn. (9 dc)
Row 2: Ch 3 and dc in the same st. Then ch 1, 2 dc in next dc, and repeat from * 8 times in total. Turn. (18 dc, 8 ch-1 sps)
Row 3: Ch 3, dc in next dc. Then ch 2, sk sp, dc in each of next 2 dc, and repeat from * 8 times in total. Turn. (18 dc, 8 ch-2 sps)
Row 4: Ch 3, dc in next dc. Then ch 3, sk sp, dc in each of next 2 dc, and repeat from * 8 times in total. (18 dc, 8 ch-3 sps) Fasten off.
Large Tier (Make 1)
Row 1 (Rose): Ch 6, sl st to form a ring. Ch 3 (counts as dc), then 10 dc into the ring. Turn. (11 dc)
Row 2: Ch 3 and dc in the same st. Then ch 1, 2 dc in next dc, and repeat from * 10 times in total. Turn. (22 dc, 10 ch-1 sps)
Row 3: Ch 3, dc in next dc. Then ch 2, sk sp, dc in each of next 2 dc, and repeat from * 10 times in total. Turn. (22 dc, 10 ch-2 sps)
Row 4: Work the same as Row 3, but with ch 3 in place of ch 2. Turn. (22 dc, 10 ch-3 sps)
Row 5: Work the same as Row 3, but with ch 4 in place of ch 2. (22 dc, 10 ch-4 sps) Fasten off.
Spine Cord (Make 1)
With Cream, chain until the chain measures 4.25 in (10.8 cm), about 32 ch. Work a back-bump slip-stitch cord along the whole chain. Fasten off and leave a 6 in (15.2 cm) tail at each end for sewing.
Make All Pieces
| Piece | Rose | Cream |
|---|---|---|
| Small tier | Rows 1–3 | Row 0 ring + edging |
| Medium tier | Rows 1–4 | Edging |
| Large tier | Rows 1–5 | Edging |
| Spine cord | — | Whole piece |
| Hanging loop | — | Worked onto small tier |
Layout (front view, top to bottom):
        [ loop ]
        [ SMALL  ]          top at 0 in
      [  MEDIUM  ]          top at 1 in (2.5 cm)
    [    LARGE     ]        top at 2.25 in (5.7 cm)
                            bottom at 4.5 in (11.4 cm)
Work the cream edging on each tier, as described in the Border section, before you join anything.
Joining
Method: Sew each tier to the spine cord with a whipstitch, using the cord tails and the tier tails.
- Place the spine. Lay the small tier WS up. Put the top end of the spine level with the top of the cream ring and run it straight down the center spoke. Whipstitch through the 3 cream sc at the bottom of the ring (the ones under the center dc of Row 1) and through the cord. Pull snugly but don’t pucker it.
- Medium tier. Measure 1 in (2.5 cm) down the spine from the top of the small tier’s ring. Put the top of the medium tier’s ring at that mark. Sew the WS of the ring to the cord with 4–5 stitches all the way around.
- Large tier. Measure 2.25 in (5.7 cm) down from the top. Sew the large tier’s ring there in the same way. The bottom tip of the spine should end about 0.25 in (0.6 cm) above the large tier’s scallops, out of sight.
- Tension. Sew through the ring stitches only, not the spokes, so the tiers can hang freely and flare slightly. Stitches that are too tight will pull the center spoke up into a dimple.
Logic: Each tier is attached at one point only, its ring. The overlaps are fixed by the spacing: the small tier is 1.5 in (3.8 cm) tall and the medium starts at 1 in (2.5 cm), so they overlap by 0.5 in (1.3 cm). The medium tier ends at 3 in (7.6 cm) and the large starts at 2.25 in (5.7 cm), so they overlap by 0.75 in (1.9 cm).
Size checkpoint: The joined tree should measure 4.5 in (11.4 cm) from the top of the ring to the bottom scallop of the large tier.
Hanging loop: Join Cream in the middle sc of the 5 unworked top sc on the small tier. Ch 30 (about 4 in / 10.2 cm), then sl st in the same sc. Fasten off. Folded in half, the loop hangs 2 in (5.1 cm) tall.
Border (Scalloped Edging)
Border gauge: Each scallop is about 0.6 in (1.5 cm) wide, measured along the curved edge.
Work the edging along the last rose row of each tier only. The side edges stay rose. Choose the side you prefer as the RS and keep it facing you.
Small tier edging: Join Cream with a sc in the first dc and sc in the next dc. Then 5 dc in next ch-2 sp, sc in each of next 2 dc, and repeat from * 6 times in total. Fasten off.
Count: 14 sc + 30 dc = 44 sts, 6 scallops.
Medium tier edging: Join Cream with a sc in the first dc and sc in the next dc. Then 6 dc in next ch-3 sp, sc in each of next 2 dc, and repeat from * 8 times in total. Fasten off.
Count: 18 sc + 48 dc = 66 sts, 8 scallops.
Large tier edging: Join Cream with a sc in the first dc and sc in the next dc. Then 7 dc in next ch-4 sp, sc in each of next 2 dc, and repeat from * 10 times in total. Fasten off.
Count: 22 sc + 70 dc = 92 sts, 10 scallops.
Why the math works: The edging places one sc on top of every dc in the last row. That’s 2 sc per spoke: 7, 9 and 11 spokes give 14, 18 and 22 sc. It also places one shell in every chain space: 6, 8 and 10 spaces give 6, 8 and 10 scallops. Each shell is a little longer than its space (5 dc in ch-2, 6 in ch-3, 7 in ch-4). That extra length lets the scallops ruffle very slightly and curve neatly around the fan without cupping.
Final Blocking
- Weave in all tails before blocking. Hide the rose tails along the spokes and the cream tails inside the edging.
- Spritz each tier until it is evenly damp. Don’t soak it.
- Pin each fan flat to the sizes listed above: small 2.75 in (7.0 cm), medium 3.75 in (9.5 cm), large 4.5 in (11.4 cm) wide.
- Straighten every spoke so it points toward the ring.
- Put one pin at the tip of each scallop to round it out.
- Optional: brush on a light coat of stiffener for crisp tiers.
- Let everything dry completely, then check the stacked height of 4.5 in (11.4 cm) again.
Final Quality-Control Checklist
- Small tier has 7 spokes and 6 scallops
- Medium tier has 9 spokes and 8 scallops
- Large tier has 11 spokes and 10 scallops
- Edging stitch counts are 44, 66 and 92
- Cream arc shows above the small tier’s fan
- Overlaps are 0.5 in (1.3 cm) and 0.75 in (1.9 cm)
- Total height is 4.5 in (11.4 cm), plus a 2 in (5.1 cm) loop
- Spine is hidden from the front
- All tails are secure
Troubleshooting
- Fan cups or curls: The chain spaces are too tight. Chain more loosely, or go up a hook size.
- Fan ruffles: The chains are too loose. Chain more firmly, or go down a hook size.
- Scallops look flat: Make sure all the dc go into the space, not into the chains themselves.
- Ring hole closed up: Pull the beginning tail less tightly, or start with an extra ch for the ring.
- Tiers hang crooked: Re-center the spine along the center spoke and re-sew the rings.
- Spine shows below the large tier: Trim the cord with a few sl sts removed, or sew the tip up behind the large tier’s ring.
Care
Hand wash in cool water with mild soap and press out the water in a towel. Reshape the tiers and dry them flat.
Final Notes
The measurement chain is simple:
– Gauge: 6 dc per inch, with rows about 0.33 in tall.
– Tiers before edging: 1.25 in (3.2 cm), 1.6 in (4.1 cm) and 1.8 in (4.6 cm) tall.
– Tiers after edging: 1.5 in (3.8 cm), 2 in (5.1 cm) and 2.25 in (5.7 cm) tall.
– Spine placement: tiers start at 0, 1 in (2.5 cm) and 2.25 in (5.7 cm).
– Finished tree: 4.5 in (11.4 cm) tall and wide, plus the loop.
Check each link in that chain as you go and your tree will come out true to size.
Happy crocheting!