

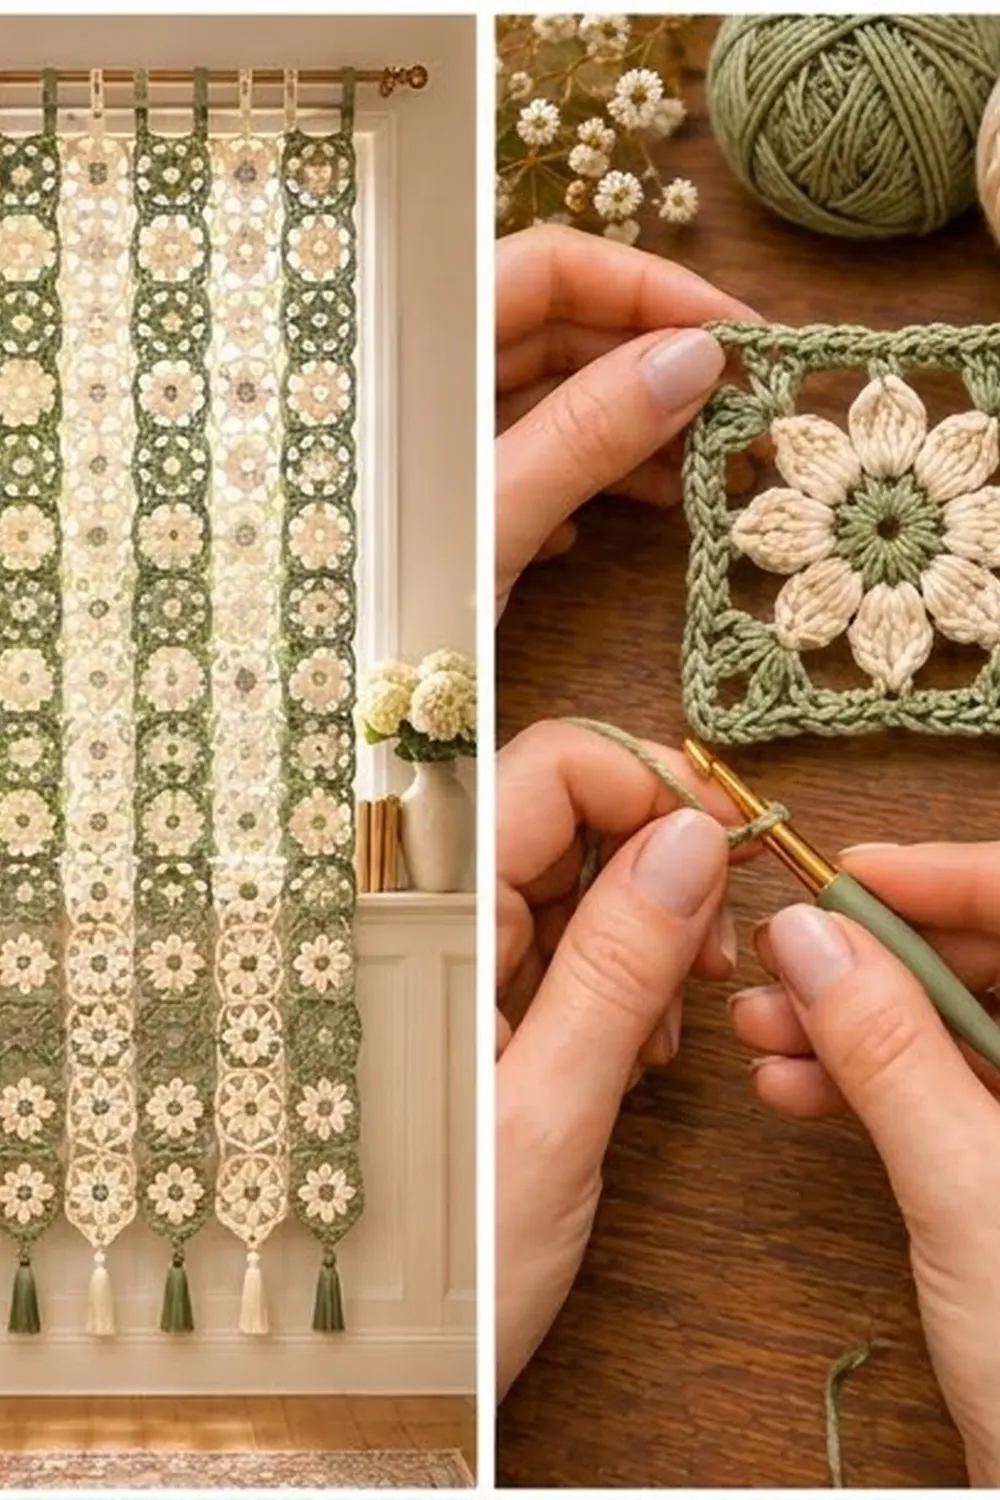
This curtain is made of seven slim strips of flower squares, each hanging from its own pair of tabs. Light passes through the open chain spaces around each bloom, so the panel filters the view without blocking it. The palette is soft and calm: cream petals around a sage green center, set in frames that alternate between sage and cream from strip to strip.
The style is boho-cottage. Each square starts with a small green ring, opens into eight pointed cream petals, and is squared off with corner shells, a lacy chain round, and two solid rounds. A tassel at the bottom of each strip makes the curtain feel finished and swing a little.
This pattern uses US crochet terms. Each finished strip measures 6.5 x 50.5 in (16.5 x 128.3 cm), not counting tabs and tassel. The full curtain is 45.5 in (115.6 cm) wide when the strips hang side by side.
Construction is simple. Make 63 squares, join them in columns of 9, add a 2-round border to each strip, work two tabs at the top, and tie a tassel to the bottom center.
Finished Size and Construction
- Strip size: 6.5 x 50.5 in (16.5 x 128.3 cm)
- Curtain width: 45.5 in (115.6 cm), 7 strips
- Skill level: Intermediate
- Terminology: US
- Yarn weight: Worsted (#4), cotton or cotton blend
- Hook: 5.0 mm (H-8)
- Number of pieces: 63 squares in 7 strips (4 sage-framed, 3 cream-framed)
- Layout: 7 columns x 9 squares; the strips are not joined to each other
- Square size: 5.5 x 5.5 in (14.0 x 14.0 cm)
- Strip size before border: 5.5 x 49.5 in (14.0 x 125.7 cm)
- Border depth: 0.5 in (1.3 cm), 2 rounds of single crochet
Materials
Use a smooth worsted-weight cotton or cotton blend, about 170 m per 100 g. Cotton gives crisp petal points and hangs straight without stretching.
- Sage green: 600 g (1020 m)
- Cream: 650 g (1105 m)
Tools:
– 5.0 mm (H-8) crochet hook
– Tapestry needle
– Scissors
– Stitch markers
– Measuring tape
– Cardboard for the tassels, 6 in (15.2 cm) tall
– Blocking mats and rust-proof pins
– Spray bottle
These yarn amounts include about a 15% margin for gauge differences and for weaving in ends.
Abbreviations (US Terms)
- ch – chain
- sl st – slip stitch
- sc – single crochet
- hdc – half double crochet
- dc – double crochet
- sp – space
- st(s) – stitch(es)
- BLO – back loop only
- rep – repeat
Special stitch – Petal: In the same ch-4 sp, work (sc, hdc, 2 dc, ch 2, 2 dc, hdc, sc). That’s 8 stitches with a ch-2 tip at the point.
Gauge and Checkpoints
Gauge: 21 sc = 5.5 in (14.0 cm); 4 rows of sc = 1 in (2.5 cm).
Make one complete square and block it before you start the full set. Every later measurement depends on this square. Measure it at each stage:
- After Round 1: 1.25 in (3.2 cm) across
- After Round 3: 3.75 in (9.5 cm) from petal tip to opposite petal tip
- After Round 4: 4.25 in (10.8 cm) square
- After Round 5: 5 in (12.7 cm) square
- After Round 6: 5.5 in (14.0 cm) square
If your square is bigger than 5.75 in (14.6 cm), go down to a 4.5 mm hook. If it’s smaller than 5.25 in (13.3 cm), go up to a 5.5 mm hook. Change hooks rather than stitch counts, because the border math depends on 21 stitches per side.
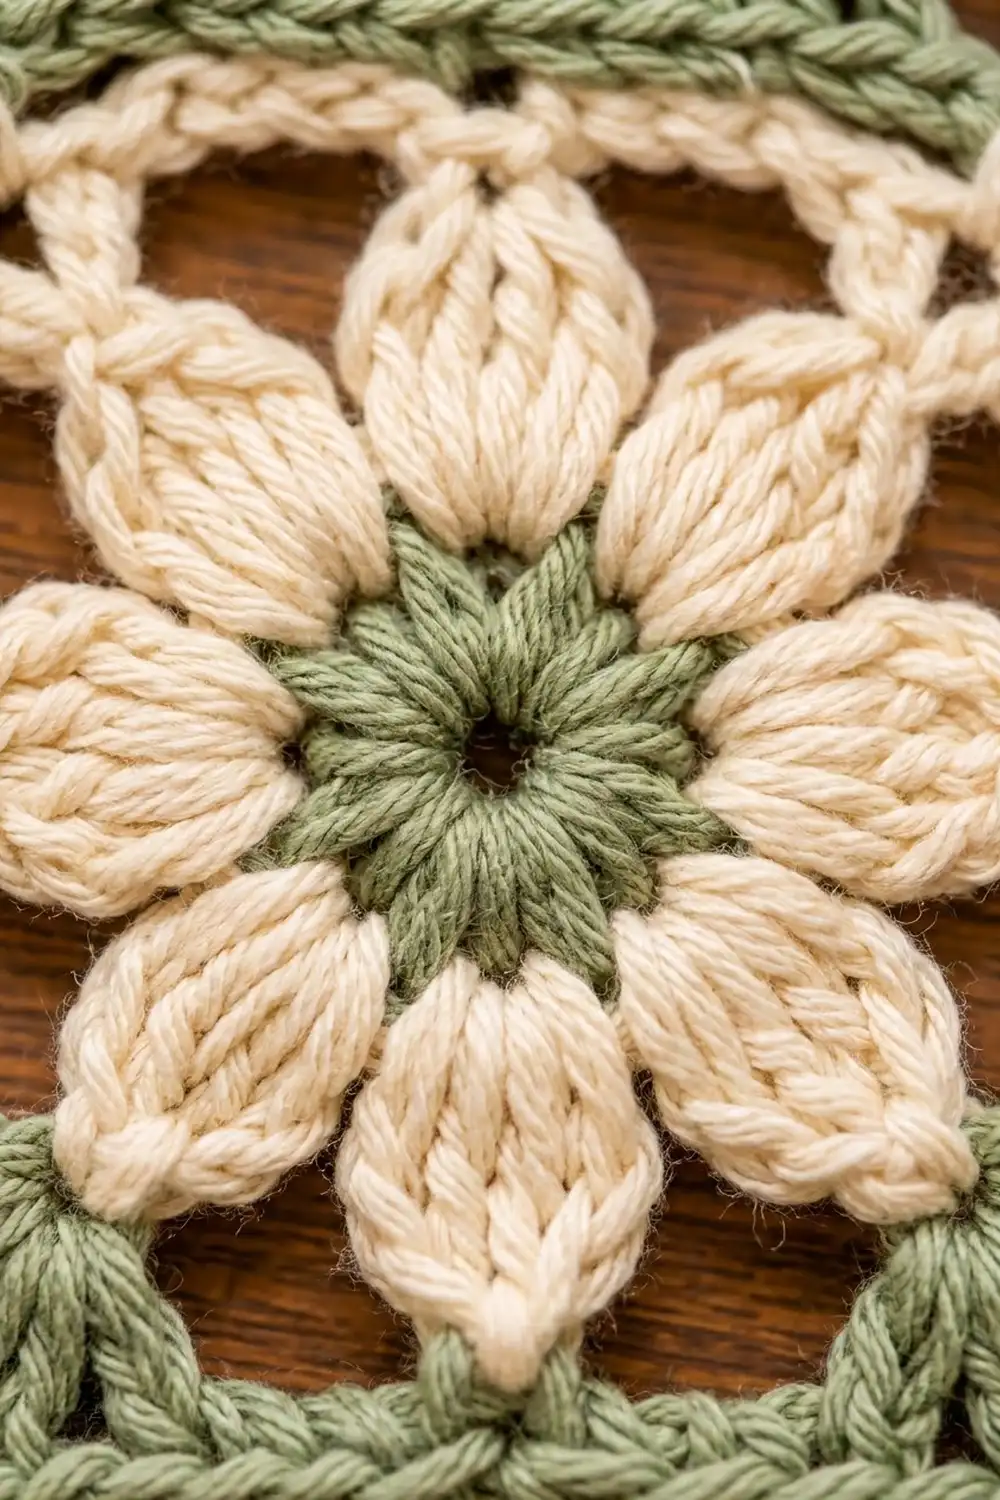
Flower Square
Make 36 squares with Colorway A and 27 with Colorway B.
- Colorway A: Rounds 1 in sage, Rounds 2–3 in cream, Rounds 4–6 in sage.
- Colorway B: Round 1 in sage, Rounds 2–6 in cream.
Every round starts with the right side facing you. Do not turn.
Round 1 (sage): Make a magic ring. Ch 3 (counts as dc), work 15 dc in the ring. Pull the ring closed and sl st to the top of the ch-3. Fasten off. (16 dc)
Round 2 (cream): Join in any dc. Ch 1, sc in the same st, ch 4, skip next dc. (Sc in next dc, ch 4, skip next dc) 7 times. Sl st to the first sc. (8 sc, 8 ch-4 sps)
These open spaces make the light ring around the green center.
Round 3 (cream): Sl st into the next ch-4 sp. Work a Petal in each ch-4 sp around, then sl st to the first sc. Fasten off. (8 petals: 64 sts and 8 ch-2 tips)
The petals should cup slightly before blocking. Check the tip-to-tip size: 3.75 in (9.5 cm).
Round 4 (frame color): Join in any ch-2 petal tip.
- Ch 3 (counts as dc). Work (2 dc, ch 3, 3 dc) in the same tip for the first corner.
- Ch 5, sc in the next petal tip, ch 5.
- (3 dc, ch 3, 3 dc) in the next tip for a corner. Ch 5, sc in the next tip, ch 5. Rep from * 2 more times.
- Sl st to the top of the starting ch-3.
(24 dc, 4 sc, 8 ch-5 sps, 4 corner ch-3 sps)
Each side now has 3 dc, a ch-5 sp, 1 sc, a ch-5 sp, and 3 dc. Petal tips sit at the 4 corners and the middle of each of the 4 sides.
Round 5 (frame color): Sl st in the next 2 dc and into the corner ch-3 sp. Ch 3 (counts as dc), then work (ch 2, dc) in the same sp.
- Dc in each of the next 3 dc, 5 dc in the ch-5 sp, dc in the sc, 5 dc in the next ch-5 sp, dc in each of the next 3 dc. (17 dc)
- Work (dc, ch 2, dc) in the corner sp.
- Rep steps 1–2 two more times, then work step 1 once more.
- Sl st to the top of the ch-3.
(76 dc; 19 dc per side, including 1 corner dc at each end; 4 ch-2 corner sps)
Round 6 (frame color): Ch 1. Sc in each dc around, and work (sc, ch 2, sc) in each corner ch-2 sp. Sl st to the first sc and fasten off.
This is a conversion round. Each side has 19 sc (1 per dc) + 2 added corner sc = 21 sc per side. Total: 84 sc and 4 ch-2 corner sps.
The 21 sc per side already include that side’s 2 corner stitches. The corner ch-2 sps are not counted as stitches.
Weave in all ends on the wrong side and lightly block each square to 5.5 in (14.0 cm).
Make All Pieces
- Colorway A (sage frame): 36 squares, 4 strips of 9
- Colorway B (cream frame): 27 squares, 3 strips of 9
- Total: 63 squares
Layout from left to right. Each column is one separate strip:
Strip:  1  2  3  4  5  6  7
Row 1:  A  B  A  B  A  B  A
Row 2:  A  B  A  B  A  B  A
Row 3:  A  B  A  B  A  B  A
Row 4:  A  B  A  B  A  B  A
Row 5:  A  B  A  B  A  B  A
Row 6:  A  B  A  B  A  B  A
Row 7:  A  B  A  B  A  B  A
Row 8:  A  B  A  B  A  B  A
Row 9:  A  B  A  B  A  B  A
Every strip uses just one colorway, so its frame color is the same from top to bottom.
Joining
Join each strip using the frame color of its squares. The strips are not joined to each other.
Method: Slip stitch through the back loops only, with wrong sides together.
- Hold 2 squares with wrong sides together and the edges lined up.
- Insert the hook through both corner ch-2 sps and sl st.
- Sl st through the BLO of each matching pair of sc across: 21 sl sts.
- Sl st through both of the next corner ch-2 sps. (23 sl sts per seam)
- Fasten off. Add the next square to the bottom of the one you just joined.
Stitch-to-stitch logic: Both squares have exactly 21 sc on the edge being joined, so each sc pairs with exactly one sc. Nothing is skipped or doubled. On the right side, the front loops form a flat chain line between the squares.
Tension: Keep the slip stitches as loose as your Round 6 stitches. If you have trouble, go up a hook size just for joining. A tight seam will pucker and shorten the strip.
You will have 8 seams per strip.
Checkpoint: Lay the joined strip flat. It should measure 5.5 x 49.5 in (14.0 x 125.7 cm). If it’s shorter than 49 in (124.5 cm), your seams are too tight.
Border
Work the border in the strip’s frame color.
Border gauge: The same as the square, 21 sc per 5.5 in (14.0 cm).
Starting counts:
– Long side: 9 squares x 21 sc = 189 sc
– Short side: 1 square x 21 sc = 21 sc
At each seam, the 2 joined corner ch-2 sps are used up by the join. Don’t work into them. Go straight from the last sc of one square to the first sc of the next. This adds nothing at the seams.
Border Round 1: Join in the ch-2 sp at the top right corner of the strip. Ch 1, then work (sc, ch 2, sc) in the corner sp.
- Sc in each sc down the long side, skipping the seam corners.
- Work (sc, ch 2, sc) in each outer corner sp.
- Sc in each sc across the short sides.
Sl st to the first sc.
This is a conversion round:
– Long side: 189 (1 per sc) + 2 corner sc = 191 sc
– Short side: 21 + 2 corner sc = 23 sc
– Total: 2 x 191 + 2 x 23 = 428 sc, plus 4 ch-2 corner sps
Border Round 2: Ch 1. Sc in each sc around, and work (sc, ch 2, sc) in each corner ch-2 sp. Sl st to the first sc. Don’t fasten off yet if you’re working the top edge next.
- Long side: 191 + 2 = 193 sc
- Short side: 23 + 2 = 25 sc
- Total: 2 x 193 + 2 x 25 = 436 sc, plus 4 ch-2 corner sps
Why the math works: Border stitches are the same size as the square stitches, so 1 sc per existing sc keeps the edges flat. You add only 2 stitches per corner per round, which is the usual amount needed to turn a single crochet corner. This keeps the corners square without ruffling.
The strip grows by 0.25 in (0.6 cm) per round on each edge. Two rounds add 0.5 in (1.3 cm) on each edge, so the strip goes from 5.5 x 49.5 in (14.0 x 125.7 cm) to 6.5 x 50.5 in (16.5 x 128.3 cm).
Hanging Tabs
Work the tabs into the 25 sc on the top short edge, numbering them 1–25 from right to left:
- Sts 1–2: skip
- Sts 3–9: Tab 1 (7 sts)
- Sts 10–16: gap (7 sts)
- Sts 17–23: Tab 2 (7 sts)
- Sts 24–25: skip
That’s 2 + 7 + 7 + 7 + 2 = 25 sts.
Tab:
1. Row 1: Join in st 3. Ch 1, sc in the same st and in each of the next 6 sts. (7 sc)
2. Rows 2–18: Ch 1, turn, sc in each sc across. (7 sc)
3. Fasten off, leaving a 12-in (30.5 cm) tail.
Each tab is 1.8 in (4.6 cm) wide and 4.5 in (11.4 cm) long.
Fold the tab to the back. Whipstitch Row 18 to the back of Border Round 1, behind the same 7 stitches. This makes a 2-in (5.1 cm) loop that fits a rod up to 1.25 in (3.2 cm) across.
Repeat for Tab 2, starting in st 17.
Tassel
- Wrap yarn in the frame color around a 6-in (15.2 cm) piece of cardboard 20 times.
- Tie the top with a 10-in (25.4 cm) strand, then cut the bottom loops.
- Wrap a second strand tightly around the tassel 0.75 in (1.9 cm) below the tie, then trim the ends evenly.
- Use the ties to sew the tassel to the center stitch of the bottom edge, st 13 of 25.
Final Blocking
- Weave in all remaining ends, going through at least 1 in (2.5 cm) of matching color.
- Lay one strip flat on blocking mats with the right side up.
- Pin the 4 corners to 6.5 x 50.5 in (16.5 x 128.3 cm).
- Pin the long edges every 2 in (5.1 cm), keeping them straight.
- Shape each petal tip with your fingers so it points outward.
- Spray until damp, not soaked.
- Let the strip dry completely before you unpin it, usually 12–24 hours.
- Steam the tassel lightly and comb it straight. Trim it to 6 in (15.2 cm) if needed.
- Repeat for every strip.
Final Quality-Control Checklist
- Every square has 21 sc per side and 4 ch-2 corners.
- Each square has 8 petals, each with a sharp ch-2 tip.
- Petal tips land on the 4 corners and the 4 side centers.
- Each strip has 9 squares and 8 seams, all lying flat.
- Each border long side has 193 sc and each short side 25 sc after Round 2.
- Each strip measures 6.5 x 50.5 in (16.5 x 128.3 cm).
- Each strip has 2 tabs, sewn securely and level.
- Each tassel is centered and 6 in (15.2 cm) long.
- The strip order across the rod is A, B, A, B, A, B, A.
Troubleshooting
The petals ruffle or flip up. Round 2 chains are too loose. Try ch 3 instead of ch 4, or use a smaller hook for Rounds 2–3.
The square domes in the middle. The Round 4 ch-5 sps are too tight. Keep those chains relaxed, or go up to ch 6.
The corners curl. Check that you worked (sc, ch 2, sc) in each corner and not 3 sc.
The seams pucker. Re-join with a looser tension or with a hook 0.5 mm larger.
The border waves. You probably worked into the corner spaces at the seams. Pull it out and work only into the sc.
The strip twists when hung. Block it again and pin the edges more tightly. Check that both tabs are the same length.
Care
Hand wash in cool water with a mild soap. Press out the water in a towel, then dry flat and reshape. Don’t hang the curtain while it’s wet, or the strips will stretch.
Final Notes
Everything in this pattern follows one measurement chain:
- A 5.5-in (14.0 cm) square with 21 sc per side
- 9 squares make a 49.5-in (125.7 cm) strip with 189 sc per long side
- 2 border rounds bring each strip to 6.5 x 50.5 in (16.5 x 128.3 cm)
- 7 strips make a 45.5-in (115.6 cm) curtain
Get the first square right and the rest will fall into place.
Happy crocheting!