

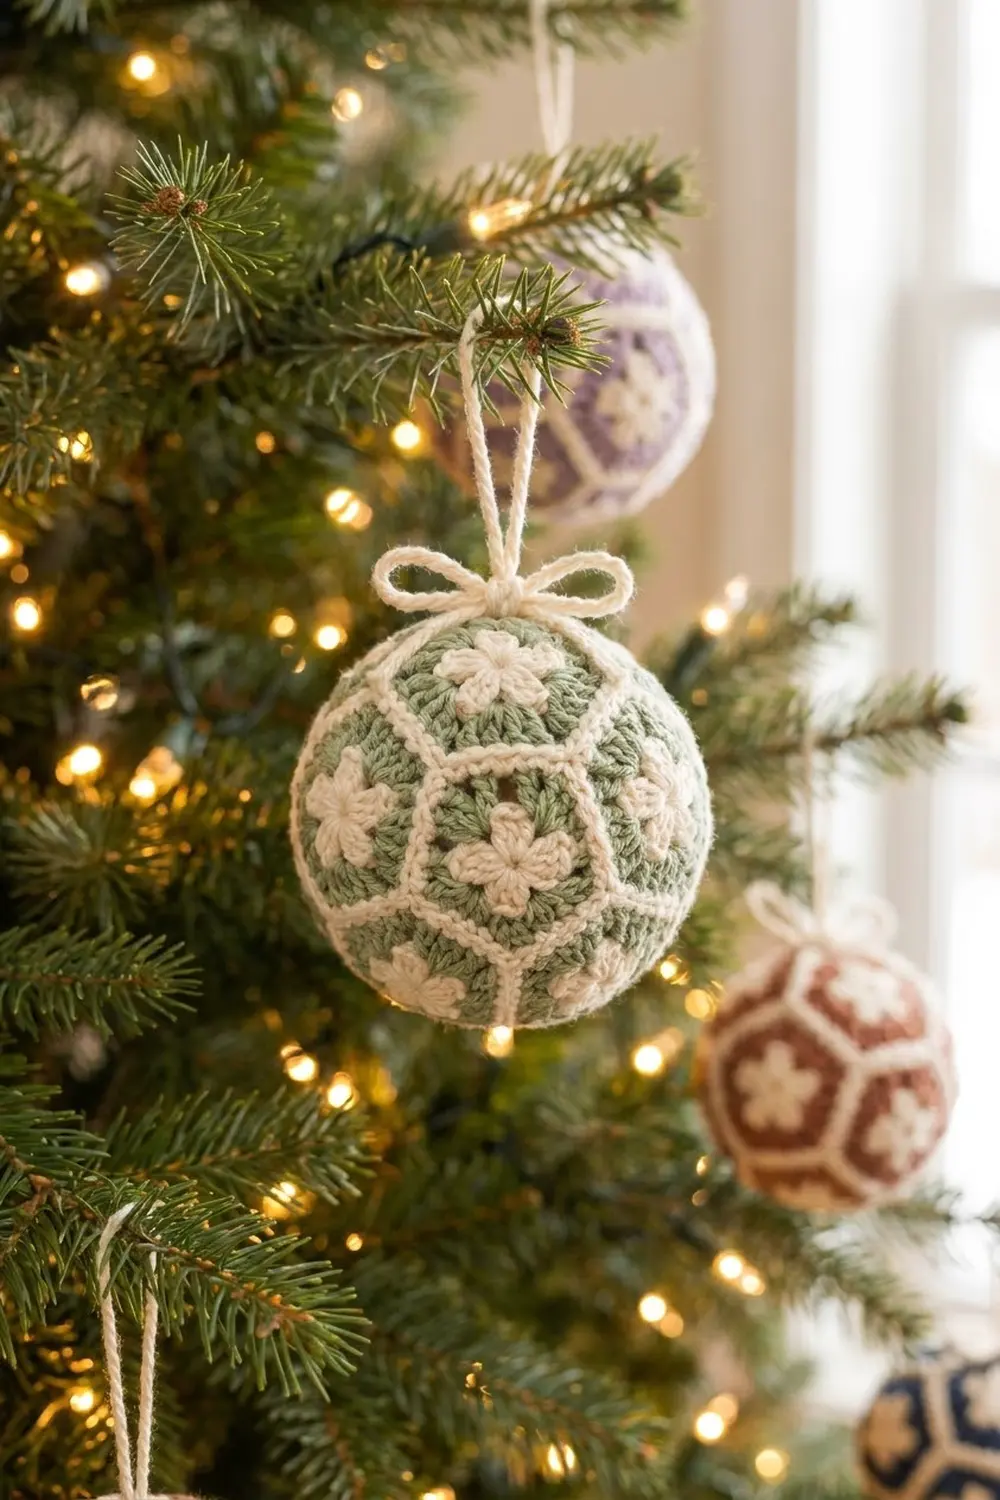
The Sage Blossom Ball is a round tree ornament built from small flower motifs. Twelve pentagons and twenty hexagons each carry a cream blossom on a sage-green ground. Cream seam ridges trace every edge, so the finished ball reads like a soft, floral soccer ball.
The palette is calm and vintage: muted sage with warm cream. The same pattern also works in lavender, rust or navy with cream, so you can make a full set for the tree. This pattern uses US crochet terms throughout.
The finished, stuffed ornament measures about 4.5 in (11.4 cm) in diameter, with a circumference of about 14.1 in (35.8 cm). Each motif edge is about 0.9 in (2.3 cm) long.
Construction is simple and repetitive. You crochet the flower centers in cream and the outer rounds in green. Then you join the motifs with cream single crochet seams on the right side, working from the bottom up. Once the shell is shaped like a bowl, you stuff it, close the top with the last pentagon and add the hanging loop and bow.
Finished Size and Construction
- Finished size: about 4.5 in (11.4 cm) diameter, stuffed
- Skill level: Intermediate (small motifs, careful seaming)
- Terminology: US crochet terms
- Yarn weight: Fingering (Super Fine, #1)
- Hook: 2.25 mm (US B-1)
- Number of pieces: 32 motifs (12 pentagons, 20 hexagons)
- Layout: truncated icosahedron (soccer-ball layout), in 6 layers
- Piece size: edge length 0.9 in (2.3 cm). The pentagon is 1.5 in (3.8 cm) wide; the hexagon is 1.8 in (4.6 cm) point to point.
- Size before border: the motifs are joined without the last pentagon, then the final cream closing seam is worked
- Border (seam ridge) depth: about 1/8 in (0.3 cm)
Materials
Use a smooth fingering-weight yarn with good stitch definition. Mercerized cotton, cotton blends and firm wool blends all work well. Avoid fuzzy or very splitty yarns, because the seams need to be crisp.
- Sage green (MC): 25 g / about 100 m
- Cream (CC): 25 g / about 100 m
These quantities are based on about 400 m per 100 g and include a margin for swatching and tails.
Tools:
– 2.25 mm (US B-1) crochet hook
– Tapestry needle
– About 15 g polyester fiberfill
– Stitch markers (at least 6)
– Scissors
– Pins or clips for holding motifs together
– Ruler or tape measure
Abbreviations (US Terms)
- ch – chain
- sl st – slip stitch
- sc – single crochet
- hdc – half double crochet
- dc – double crochet
- sp – space
- st(s) – stitch(es)
- MR – magic ring
- rep – repeat
Special stitch – Petal: (hdc, dc, hdc) all in the same stitch.
Gauge and Checkpoints
Gauge: 36 sc and 40 rows = 4 in (10.2 cm) in sc worked flat with a 2.25 mm hook. This is a firm tension, which keeps the stuffing hidden.
Make one pentagon and one hexagon before anything else, and measure them:
- After Round 2 (flower): pentagon about 0.8 in (2.0 cm) across; hexagon about 0.9 in (2.3 cm) across.
- After Round 3: pentagon about 1.2 in (3.0 cm) across; hexagon about 1.5 in (3.8 cm) point to point.
- After Round 4: edge length 0.9 in (2.3 cm) on both shapes. The pentagon should be 1.5 in (3.8 cm) wide and the hexagon 1.8 in (4.6 cm) point to point.
If your motifs are too big, go down to a 2.0 mm hook. If they are too small, go up to a 2.5 mm hook. Matching edge length matters most. The pentagon and hexagon edges must be the same length, or the ball will pucker.
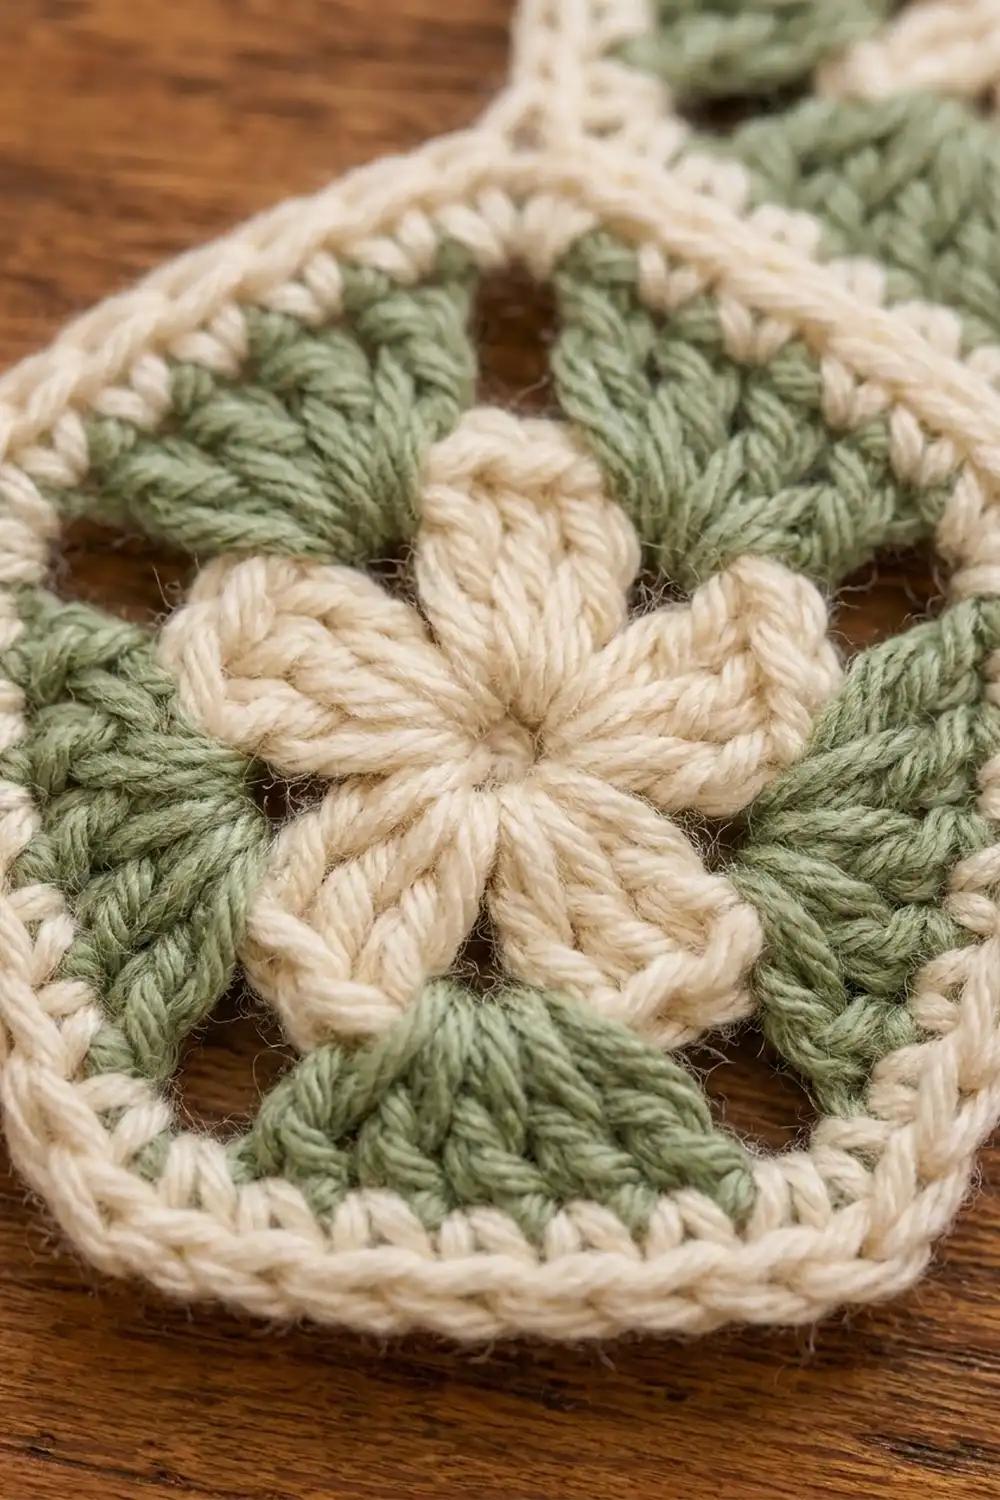
Pentagon (Make 12)
Round 1 (CC): MR, ch 1, 10 sc in ring, sl st to first sc to join. Pull the ring tight. (10 sts)
Round 2 (CC): Petal in next st, sl st in next st; rep from * 4 more times, ending with the last sl st in the joining st. (5 petals; 20 sts: 15 petal sts + 5 sl sts)* Fasten off CC.
Round 3 (MC): Join MC with a sl st in the center dc of any petal. Ch 3 (counts as dc), ch 2, dc in same st (first corner made). Ch 1, dc in next sl st, ch 1, (dc, ch 2, dc) in center dc of next petal; rep from * 3 more times. Ch 1, dc in last sl st, ch 1, sl st to top of beg ch-3. (15 dc, 10 ch-1 sps, 5 ch-2 corner sps)*
The ch-1 spaces next to each petal leave the small open windows between the flower and the green ground.
Round 4 (MC): Sl st into the first ch-2 corner sp. Ch 1, 3 sc in same sp. Sc in next dc, sc in ch-1 sp, sc in next dc, sc in ch-1 sp, sc in next dc, 3 sc in next ch-2 corner sp; rep from * 3 more times. Sc in next dc, sc in ch-1 sp, sc in next dc, sc in ch-1 sp, sc in next dc, sl st to first sc to join. (40 sc)*
Count check: Each side has 5 sc between the corner groups, and each corner group has 3 sc (5 × 8 = 40). The center sc of each 3-sc group is the corner stitch. Each side, counting both of its corner stitches, has 9 stitches: corner, 7 side stitches, corner.
Fasten off and leave a 6 in (15.2 cm) tail. Weave in all tails on the wrong side.
Hexagon (Make 20)
Round 1 (CC): MR, ch 1, 12 sc in ring, sl st to first sc to join. (12 sts)
Round 2 (CC): Petal in next st, sl st in next st; rep from * 5 more times. (6 petals; 24 sts: 18 petal sts + 6 sl sts)* Fasten off CC.
Round 3 (MC): Join MC in the center dc of any petal. Ch 3 (counts as dc), ch 2, dc in same st. Ch 1, dc in next sl st, ch 1, (dc, ch 2, dc) in center dc of next petal; rep from * 4 more times. Ch 1, dc in last sl st, ch 1, sl st to top of beg ch-3. (18 dc, 12 ch-1 sps, 6 ch-2 corner sps)*
Round 4 (MC): Work exactly as Pentagon Round 4, around 6 corners. (48 sc: 6 × 8)
Each side again has 9 stitches including both corner stitches. Because this matches the pentagon, every seam works stitch for stitch.
Fasten off and weave in the tails.
Make All Pieces
- Pentagons: 12. Each uses CC for Rounds 1–2 and MC for Rounds 3–4.
- Hexagons: 20. Each uses CC for Rounds 1–2 and MC for Rounds 3–4.
- Total motifs: 32.
Lightly steam or pin each motif flat before joining (see Final Blocking).
Layout grid (bottom to top, P = pentagon, H = hexagon):
Layer A (bottom):  P
Layer B (ring):    H H H H H
Layer C (ring):    P H P H P H P H P H
Layer D (ring):    H P H P H P H P H P
Layer E (ring):    H H H H H
Layer F (top):     P   <- closing piece
Totals: 1 + 5 + 10 + 10 + 5 + 1 = 32 motifs. Pentagons: 1 + 5 + 5 + 1 = 12. Hexagons: 5 + 5 + 5 + 5 = 20.
Golden rule: pentagons only ever touch hexagons. Every hexagon edge alternates between a pentagon neighbor and a hexagon neighbor.
Joining
Method: cream sc seam on the right side. Hold two motifs with wrong sides together and right sides facing out. Work through both loops of both layers. This makes the raised cream ridge that outlines every edge.
Stitch-to-stitch logic: Line up the two edges corner to corner. Join CC in the first pair of corner stitches. Work 1 sc in that pair, 1 sc in each of the next 7 stitch pairs, and 1 sc in the last corner pair. That is 9 sc per seam.
Each corner stitch belongs to two sides, so you will work into it twice, once in each seam that meets there. This is intended. Do not add extra stitches at the vertices.
Order of seams:
- Layer B: Seam each of the 5 hexagons to one edge of the bottom pentagon (5 seams). Then seam each pair of neighboring hexagons together (5 seams). (10 seams)
- Layer C: Set a pentagon into each notch between two Layer B hexagons and seam it to both (10 seams). Then seam a hexagon to the middle free edge of each Layer B hexagon (5 seams), and seam each of these to the pentagons on both sides (10 seams). (25 seams)
- Layer D: Place a hexagon against the free edge of each Layer C pentagon. Seam it to that pentagon and to the hexagon edges on either side (15 seams). Fit a pentagon against the middle free edge of each Layer C hexagon (5 seams). Then seam each Layer D hexagon to the pentagons beside it (10 seams). (30 seams)
- Layer E: Fit each hexagon into the space between two Layer D pentagons and below one Layer D hexagon (15 seams). Then seam neighboring Layer E hexagons together (5 seams). (20 seams)
That makes 85 seams (765 sc). The shell is now a deep bowl with a pentagon-shaped opening at the top.
Tension advice: Keep the seam stitches the same height as your Round 4 stitches. If the ridge ripples, your seam is too loose. If the edges cup inward, it is too tight. Where possible, work several seams in a row without fastening off, and slip stitch along a finished ridge to reach the next seam.
Size checkpoint: With Layers A–E joined, the bowl opening should be about 1.5 in (3.8 cm) across, and the bowl should measure about 4.5 in (11.4 cm) at its widest.
Border: Closing Seam
On this ornament, the border is the last cream seam ring that closes the ball.
Border gauge: 9 seam sc per motif edge of 0.9 in (2.3 cm).
- Turn any loose tails to the inside. Stuff the ball firmly through the opening with about 15 g of fiberfill. Mold it into a round shape as you go, and add stuffing until the seams sit smooth but not strained.
- Place the last pentagon in the opening, wrong side against the stuffing, and line up its corners with the vertices.
- Closing round (CC): Join CC in a corner pair. Work 9 sc along the edge (corner, 7 side stitches, corner); rep from * 4 more times, starting each new edge in the same pentagon corner stitch you just finished. Sl st to first sc. (45 sc: 9 per side × 5 sides)*
Why the math works: Each side has one piece along it, and that piece’s side count is 9 (1 × 9 = 9). Every hexagon edge also has 9 stitches, so the seams match exactly. The pentagon’s 40 stitches give 45 seam sc because each of its 5 corner stitches is worked twice, once for each edge that meets it (40 + 5 = 45). No stitches are added at the seams beyond that.
Hanging loop (CC): Join CC at the magic ring center of the top pentagon. Ch 36 (about 4 in / 10.2 cm), then sl st back into the same spot. This makes a loop about 2 in (5.1 cm) tall. Knot the ends on the inside and hide them in the stuffing.
Bow (CC): Ch 63 (about 7 in / 17.8 cm). Sl st in the 2nd ch from the hook and in each ch across (62 sl sts). Tie the cord into a bow around the base of the loop. Each bow loop should be about 1 in (2.5 cm), so the bow is about 2 in (5.1 cm) wide. Tack the knot to the top pentagon with a few stitches.
Final Blocking
- Before joining, pin each motif flat to its checkpoint size. The edges should be 0.9 in (2.3 cm).
- Hover a steam iron about 1 in (2.5 cm) above the motifs without touching them. Let them cool and dry fully.
- After closing, roll the stuffed ball firmly between your palms to even out the stuffing.
- Lightly steam the ball’s surface, again without touching it. Pat the cream ridges straight with your fingers.
- Shape the bow loops, steam them lightly and let everything dry before hanging.
If your yarn is acrylic, use only very light steam, because heat can flatten it.
Final Quality-Control Checklist
- [ ] 12 pentagons with 40 sc each and 20 hexagons with 48 sc each
- [ ] Every petal points into a corner
- [ ] Every edge measures 0.9 in (2.3 cm)
- [ ] 90 seams with 9 sc each, and all ridges on the right side
- [ ] Pentagons touch only hexagons
- [ ] Ball is about 4.5 in (11.4 cm) across and evenly round
- [ ] No stuffing shows through the motifs or seams
- [ ] Loop is about 2 in (5.1 cm) tall and the bow is secure
- [ ] All tails woven in or hidden inside
Troubleshooting
The ball has flat spots. Add stuffing in small amounts and roll the ball between your palms.
The seams pucker. Your seams are tighter than your motifs. Go up a hook size for joining only.
The pentagons pop outward. Your pentagon edges are longer than your hexagon edges. Remake them at a tighter tension.
A motif won’t fit. Check the layout. A pentagon may be sitting next to another pentagon.
Stuffing shows through the windows. Use a stuffing color that matches the green, or put a thin layer of matching felt under the windows.
There are gaps at the vertices. Close them on the inside with a cream tail.
Care
Spot-clean with cool water and mild soap, then reshape and air-dry. Store the ornament in a box so the bow and ball keep their shape.
Final Notes
The measurement chain is short and reliable. The gauge is 36 sc per 4 in (10.2 cm). That gives a 0.9 in (2.3 cm) edge with 9 stitches on every pentagon and hexagon side. Those edges make 9-sc seams, 90 seams in all, and the stuffed ball comes out at about 4.5 in (11.4 cm). As long as each motif hits its edge checkpoint, the ball will close neatly.
Make one in sage, then try lavender, rust or navy for a matching set.
Happy crocheting!