

This hanging organizer holds three spare toilet rolls in a soft, open honeycomb net. A long mesh back panel narrows to a solid tab that wraps around a wooden ring. Three round pockets with solid bases and firm rims are sewn to the front, one above the other.
The sample uses one sage green cotton. The open net makes the holder look light on the wall, and the solid single crochet bands give the pockets enough structure to keep their shape with a roll inside.
The pattern uses US crochet terms. Finished, the holder is 6 1/4 in (15.9 cm) wide and 23 1/2 in (59.7 cm) long from the bottom edge to the top of the folded tab, not counting the ring.
Construction is simple. You work the back panel flat in rows and each pocket in joined rounds from the base up. Then you sew the pockets to the panel, add a two-row border around the panel, and fold the tab over the ring.
Finished Size and Construction
- Finished size: 6 1/4 in x 23 1/2 in (15.9 cm x 59.7 cm), plus the ring
- Skill level: Easy to intermediate
- Terminology: US
- Yarn weight: Worsted (#4) cotton
- Hook: 5 mm (H-8)
- Number of pieces: 4 (1 back panel, 3 pockets)
- Layout: 1 column of 3 pockets on 1 panel
- Pocket size: 4 3/4 in (12.1 cm) across, 4 1/2 in (11.4 cm) tall
- Panel size before border: 5 1/4 in x 22 in (13.3 cm x 55.9 cm)
- Border depth: 1/2 in (1.3 cm)
Materials
Use a smooth, firm worsted-weight cotton or cotton blend. Cotton holds the pocket shape and copes with bathroom humidity. Avoid splitty or very soft yarns, because the net loops will sag.
- Sage green: 300 g / about 570 m (623 yd)
- Back panel: about 100 g
- Each pocket: about 55 g
The quantities include a margin of about 10–15%.
Tools:
– 5 mm (H-8) crochet hook
– 3 in (7.6 cm) wooden ring
– Tapestry needle
– 6 locking stitch markers
– Tape measure
– Blocking mat and pins
– Spray bottle
Abbreviations (US Terms)
- ch – chain
- sc – single crochet
- dc – double crochet
- sl st – slip stitch
- sk – skip
- st(s) – stitch(es)
- BLO – back loop only
- RS / WS – right side / wrong side
Special stitch – ch-5 loop (honeycomb net): Ch 5, then sc into the next loop or stitch as directed. Each new loop sits over the middle of a loop from the row below, so the openings stagger into a honeycomb pattern.
Gauge and Checkpoints
- Solid sc: 16 sc and 16 rows = 4 in (10.2 cm)
- Net: 4 ch-5 loops = 4 in (10.2 cm) wide; 4 net rows = 3 in (7.6 cm) tall
Make one pocket first. It’s the quickest full test of both gauges.
Pocket checkpoints:
– After Round 10, the base is 4 3/4 in (12.1 cm) across.
– After Round 13, the solid side band is 3/4 in (1.9 cm) tall.
– After Round 17, the side is 3 3/4 in (9.5 cm) tall.
– After Round 20, the side is 4 1/2 in (11.4 cm) tall.
Panel checkpoints:
– After Row 3, the panel is 5 1/4 in (13.3 cm) wide.
– After Row 24, it is 16 1/2 in (41.9 cm) long.
– After Row 31, it is 21 3/4 in (55.2 cm) long.
– After Row 32, it is 22 in (55.9 cm) long.
If your work is too big, go down 0.5 mm. If it is too small, go up 0.5 mm. Loose net rows can also be fixed by working each ch-5 as a ch-4. Keep the stitch counts exactly as written.
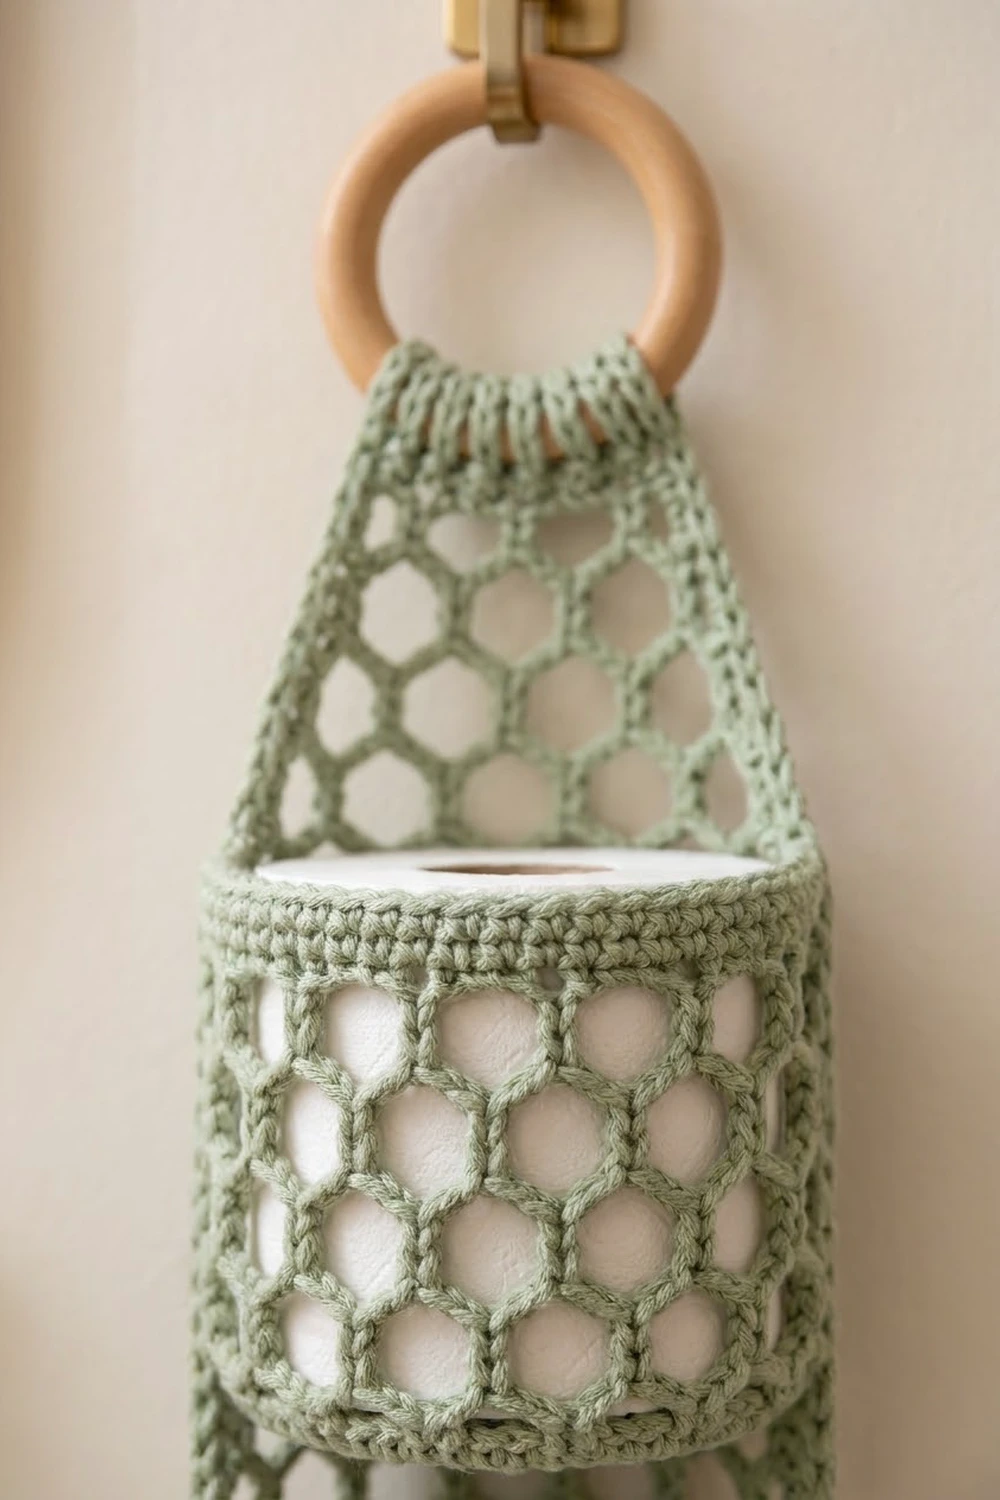
Back Panel
Work flat in rows. Turn at the end of every row.
Row 1 (RS): Ch 22, sc in 2nd ch from hook and in each ch across. (21 sc)
Rows 2–3: Ch 1, sc in each st across. (21 sc)
Row 4 (net set-up): Ch 1, sc in first st, *ch 5, sk 3 sts, sc in next st; repeat from * 4 more times. (5 loops, 6 sc)
Row 5 (offset row): Ch 5 (counts as dc + ch 2), sc in first loop, *ch 5, sc in next loop; repeat from * 3 more times, ch 2, dc in last sc. (4 full loops + 2 half loops)
Row 6 (full row): Ch 1, sc in dc, *ch 5, sc in next full loop; repeat from * 3 more times, ch 5, sc in 3rd ch of turning ch. (5 loops)
Rows 7–24: Repeat Rows 5–6 nine more times. Row 24 is a full row with 5 loops. The net section from Row 4 through Row 24 is 21 rows, which measures 15 3/4 in (40.0 cm).
Taper
Each decrease row drops one loop by starting the row inside the first loop.
Row 25 (decrease): Ch 1, sc in first loop, *ch 5, sc in next loop; repeat from * 3 more times. (4 loops, 5 sc)
Row 26 (offset): Ch 5 (counts as dc + ch 2), sc in first loop, *ch 5, sc in next loop; repeat from * 2 more times, ch 2, dc in last sc. (3 full loops + 2 half loops)
Row 27: Ch 1, sc in dc, *ch 5, sc in next full loop; repeat from * 2 more times, ch 5, sc in 3rd ch of turning ch. (4 loops)
Row 28 (decrease): Ch 1, sc in first loop, *ch 5, sc in next loop; repeat from * 2 more times. (3 loops, 4 sc)
Row 29 (offset): Ch 5, sc in first loop, ch 5, sc in next loop, ch 5, sc in next loop, ch 2, dc in last sc. (2 full loops + 2 half loops)
Row 30: Ch 1, sc in dc, *ch 5, sc in next full loop; repeat from * once more, ch 5, sc in 3rd ch of turning ch. (3 loops)
Row 31 (decrease): Ch 1, sc in first loop, *ch 5, sc in next loop; repeat from * once more. (2 loops, 3 sc)
The taper covers Rows 25–31 (7 rows) and measures 5 1/4 in (13.3 cm). The panel narrows from 5 1/4 in (13.3 cm) to about 2 1/4 in (5.7 cm).
Row 32 (trim row): Ch 1, sc in first sc, 3 sc in next loop, sc in next sc, 3 sc in next loop, sc in last sc. That’s 3 sc worked one into each existing sc, plus 6 sc worked into the loops, for 9 sc in total. (9 sc)
Ring Tab
Rows 33–40: Ch 1, sc in each st across. (9 sc)
The tab is 2 in (5.1 cm) long and 2 1/4 in (5.7 cm) wide. Fasten off and leave a 12 in (30.5 cm) tail.
Pockets (Make 3)
Work in joined rounds with the RS facing. Don’t turn. Join each round with a sl st to the first sc and start the next round with ch 1, which does not count as a stitch.
Round 1: 6 sc in a magic ring. (6)
Round 2: 2 sc in each st around. (12)
Round 3: Sc in next st, 2 sc in next st; repeat from * around. (18)
Round 4: Sc in next 2 sts, 2 sc in next st; repeat from * around. (24)
Round 5: Sc in next 3 sts, 2 sc in next st; repeat from * around. (30)
Round 6: Sc in next 4 sts, 2 sc in next st; repeat from * around. (36)
Round 7: Sc in next 5 sts, 2 sc in next st; repeat from * around. (42)
Round 8: Sc in next 6 sts, 2 sc in next st; repeat from * around. (48)
Round 9: Sc in next 7 sts, 2 sc in next st; repeat from * around. (54)
Round 10: Sc in next 8 sts, 2 sc in next st; repeat from * around. (60)
The base is 4 3/4 in (12.1 cm) across, with a circumference of 15 in (38.1 cm).
Round 11: Sc in BLO of each st around. (60) The free front loops make a crisp fold where the base turns up into the side.
Rounds 12–13: Sc in each st around. (60) This is the solid bottom band.
Round 14 (net set-up): Ch 1, sc in first st, *ch 5, sk 3 sts, sc in next st; repeat from * 13 more times, ch 5, sk last 3 sts, sl st to first sc. (15 loops)
Round 15: Sl st in first 2 ch of next loop, ch 1, sc in same loop, *ch 5, sc in next loop; repeat from * 13 more times, ch 5, sl st to first sc. (15 loops)
Rounds 16–17: Repeat Round 15. (15 loops)
The net section covers Rounds 14–17 and measures 3 in (7.6 cm).
Round 18 (trim round): Ch 1, sc in same st as join, 3 sc in next loop, *sc in next sc, 3 sc in next loop; repeat from * 13 more times, sl st to first sc. That’s 15 sc worked one into each existing sc, plus 45 sc worked into the loops, for 60 sc in total. (60)
Rounds 19–20: Sc in each st around. (60) This is the solid rim.
Fasten off and leave an 18 in (45.7 cm) tail for sewing. The join line of the rounds marks the center back of the pocket.
Make All Pieces
- Back panel: 1 in sage green
- Pockets: 3 in sage green
Layout, from top to bottom, with the panel measured from its bottom edge (Row 1):
[ ring + tab ]
[ taper      ]
[ net, 1 1/2 in gap ]
[ POCKET 3 ]  10 1/2 – 15 in
[ gap 3/4 in ]
[ POCKET 2 ]  5 1/4 – 9 3/4 in
[ gap 3/4 in ]
[ POCKET 1 ]  0 – 4 1/2 in
In cm: Pocket 1 runs from 0 to 11.4 cm, Pocket 2 from 13.3 to 24.8 cm, and Pocket 3 from 26.7 to 38.1 cm. There is a 3.8 cm gap above Pocket 3.
Joining
Lay the panel flat with the RS up. Use the bottom edge of Row 1 as your zero line.
- On each pocket, place markers 6 sts to the right and 6 sts to the left of the join line on Round 20 and on Round 13. Each marked section is 12 sts, or 3 in (7.6 cm), centered on the back.
- Pin Pocket 1 so that its Round 11 fold sits level with the bottom edge of the panel, centered across the 5 1/4 in (13.3 cm) width.
- Whipstitch the 12 marked rim sts of Round 20 to the panel, going through one rim st and then the nearest sc or chain of the panel for every stitch. Then whipstitch the 12 marked sts of Round 13 the same way. That’s one stitch into one stitch, 12 to a line.
- Repeat for Pocket 2, with its fold at 5 1/4 in (13.3 cm), and Pocket 3, with its fold at 10 1/2 in (26.7 cm).
Tension: Pull each stitch just snug. If the panel puckers or narrows behind a pocket, loosen up. The panel must stay 5 1/4 in (13.3 cm) wide.
Checkpoint: The rim of Pocket 3 sits at 15 in (38.1 cm), and there is 1 1/2 in (3.8 cm) of net showing above it.
Border
The border uses the solid sc gauge: 4 sc per 1 in (2.5 cm). It runs down one long side, across the bottom, and up the other long side. The tab is not bordered.
Border Row 1 (RS): Join the yarn at the right end of Row 32.
- Right side: Work down the side as follows. Total: 95 sc.
- 1 sc in the end of Row 32
- 4 sc in the end of each taper row (Rows 31–25): 28 sc
- 3 sc in the end of each net row (Rows 24–4): 63 sc
- 1 sc in the end of each of Rows 3–1: 3 sc
- Bottom edge: Working into the free loops of the foundation ch, work 3 sc in the first st, sc in the next 19 sts, and 3 sc in the last st. Total: 25 sc. This count includes both 3-sc corner groups.
- Left side: Work up the side in reverse order. Total: 95 sc. This side count does not include corner sts.
Row 1 total: 95 + 25 + 95 = 215 sc. Turn.
Border Row 2 (WS): Ch 1, sc in each st, working 3 sc in the center sc of each corner group. That’s 215 sc worked one per existing stitch, plus 2 extra sc at each of the 2 corners, for 219 sc in total. Fasten off.
Why the math works:
– The 21 net rows measure 15 3/4 in (40.0 cm). At 4 sc per inch, that needs 63 sc, which is 3 per row.
– The 3 sc rows measure 3/4 in (1.9 cm), so they need 3 sc.
– The taper edge is slanted and longer than the row height, so it gets 4 sc per row.
– The bottom has 21 foundation sts plus 2 extra sts at each corner, for 25.
The border adds 1/2 in (1.3 cm) to each side and to the bottom. The panel becomes 6 1/4 in (15.9 cm) wide and 22 1/2 in (57.2 cm) long up to Row 32.
Final Blocking
- Spray the whole holder until it is damp but not dripping.
- Lay the panel flat with the WS down and the pockets facing up.
- Pin the panel to 6 1/4 in x 22 1/2 in (15.9 cm x 57.2 cm), keeping the long edges straight.
- Open the net loops evenly with your fingers so the honeycomb shape shows.
- Stuff each pocket with a toilet roll wrapped in a plastic bag so the pockets dry round.
- Let it dry completely, which takes 12–24 hours.
- Slide the ring onto the tab. Fold the tab to the WS so that Row 40 meets Row 32, and whipstitch the 9 sts to the 9 sts using the 12 in (30.5 cm) tail.
- Weave in all ends.
Final Quality-Control Checklist
- The panel measures 6 1/4 in (15.9 cm) wide.
- The length to the fold of the tab is 23 1/2 in (59.7 cm).
- Each pocket holds 60 sts in Rounds 10–13 and 18–20.
- Each pocket has 15 loops in every net round.
- The gaps between pockets are 3/4 in (1.9 cm).
- The pocket seams are centered and the panel does not pucker.
- The border corners lie flat.
- The ring is fully enclosed by the tab.
Troubleshooting
- The pocket flares at the rim: Your trim round is too loose. Work 2 sc into each loop instead of 3, then add 15 evenly spaced increases in Round 19 to get back to 60 sts.
- The pocket cups inward: Go up a hook size for Rounds 14–17 only.
- The panel twists: Check that every row has the right loop count, and block it again flat.
- The border ruffles: Work 2 sc per net row on every third row.
- The border pulls in: Add 1 sc on the taper rows.
- A pocket sags forward: Add a third whipstitch line through the center of its base.
Care
Hand wash in cool water with mild soap, press out the water in a towel, and reshape the holder to dry flat. Don’t tumble dry. Heat can shrink the cotton and distort the net.
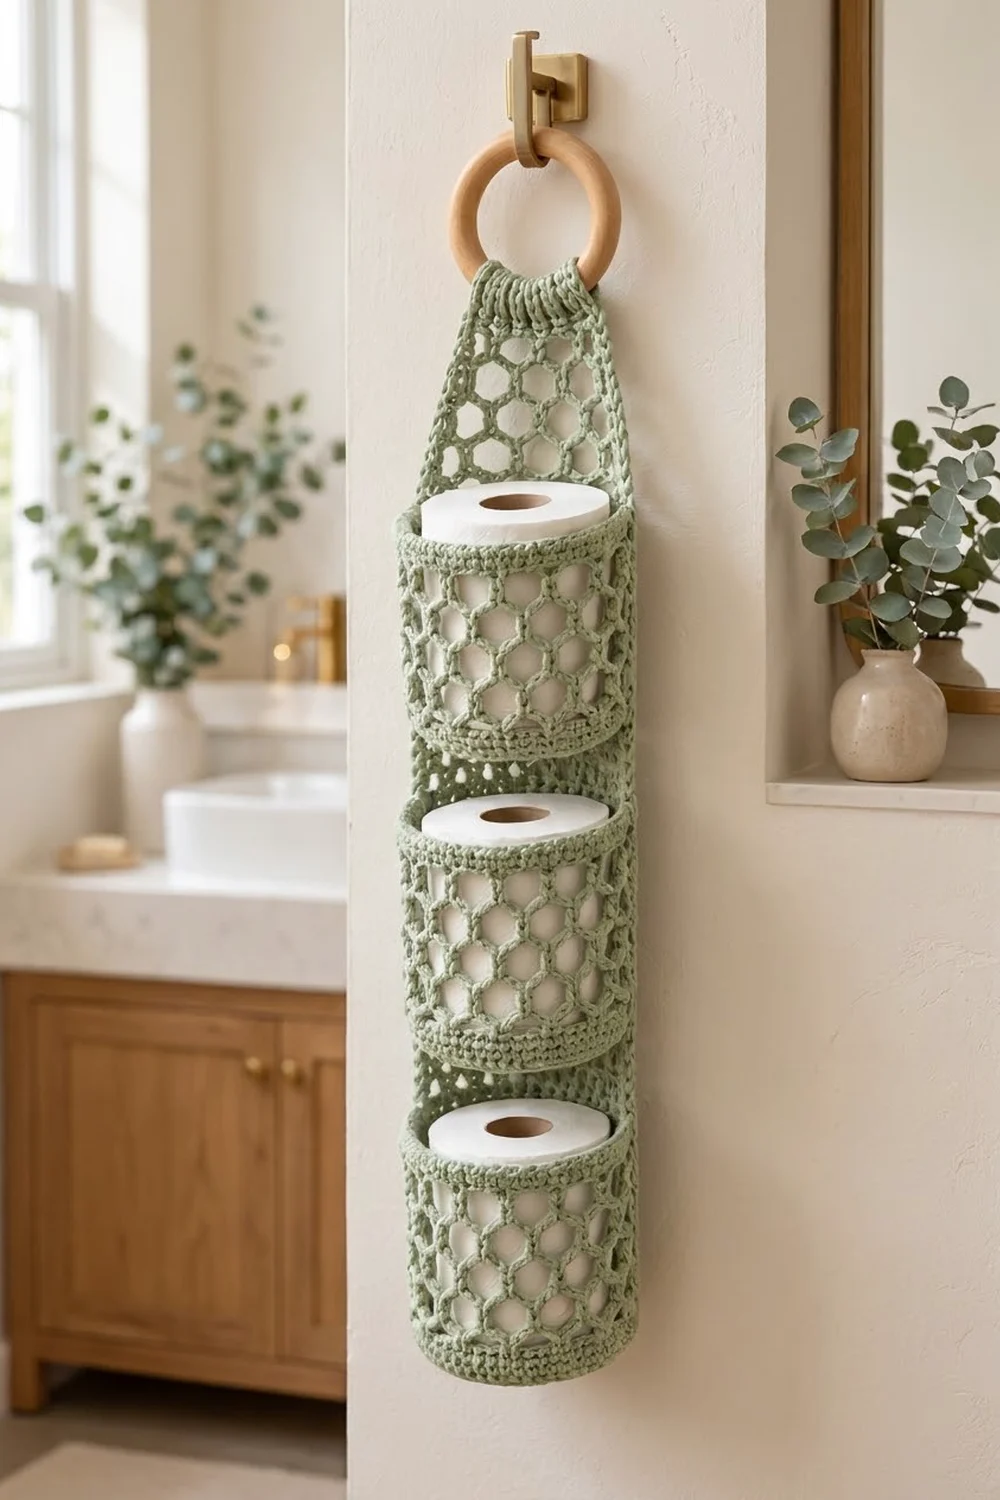
Final Notes
Everything depends on gauge. At 16 sc per 4 in (10.2 cm), Row 1 is 5 1/4 in (13.3 cm) wide and each pocket base is 60 sts around. The 21 net rows give 15 3/4 in (40.0 cm), and the 7 taper rows bring the panel to 22 in (55.9 cm). The border then takes it to 6 1/4 in x 22 1/2 in (15.9 cm x 57.2 cm), and the folded tab finishes at 23 1/2 in (59.7 cm). If you check each of those numbers as you go, the three rolls will sit neatly in a straight column.
Happy crocheting!