

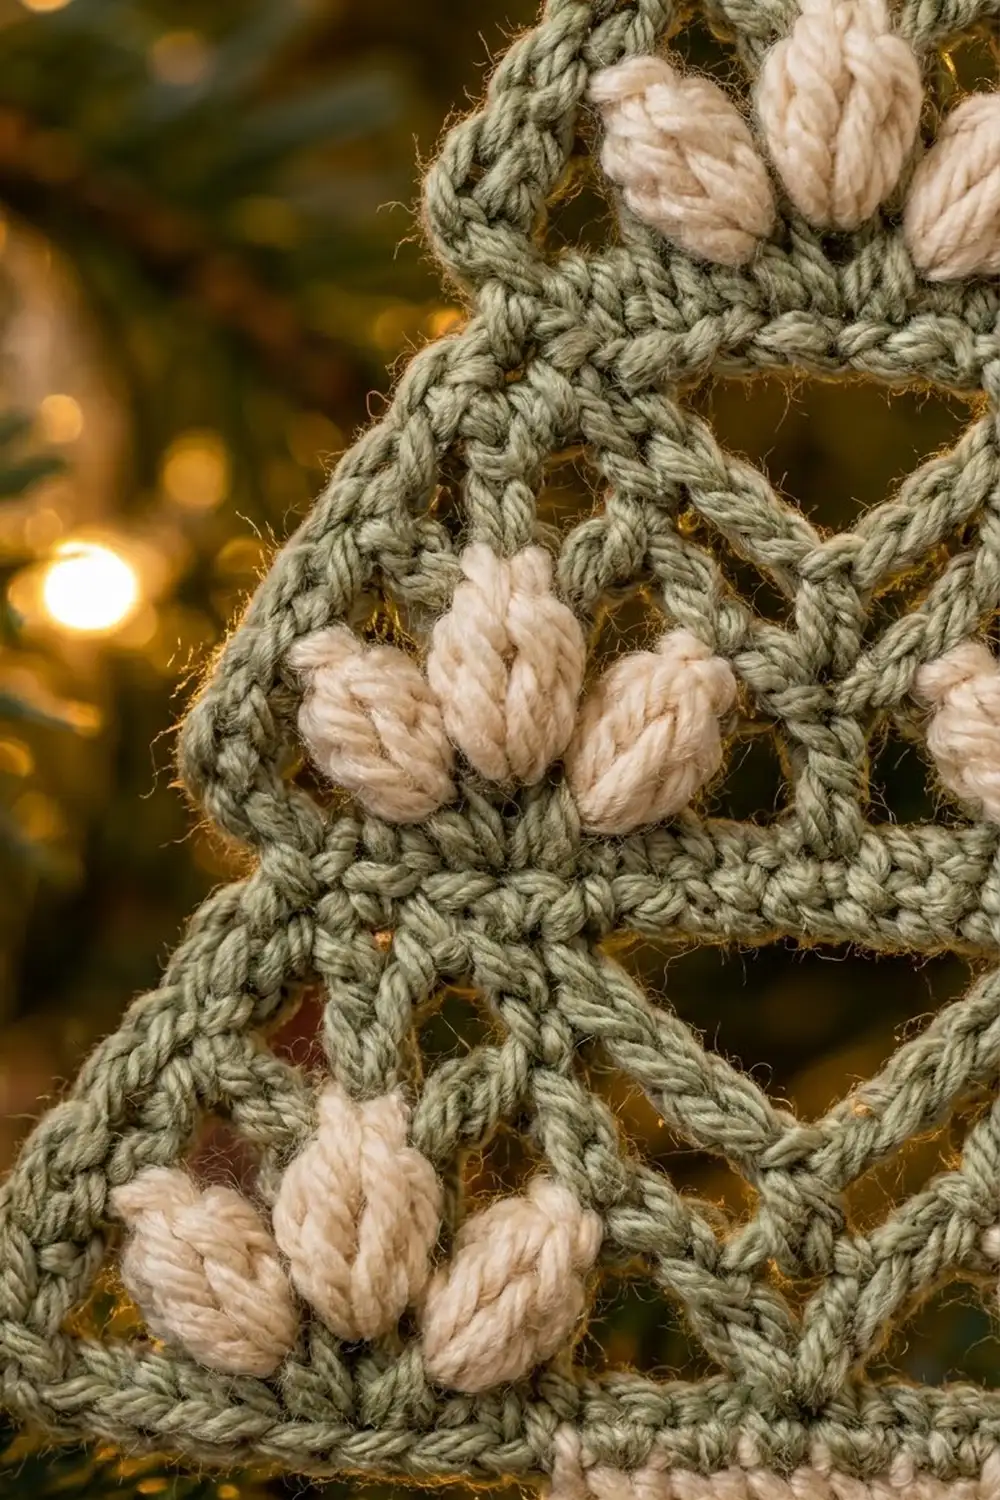
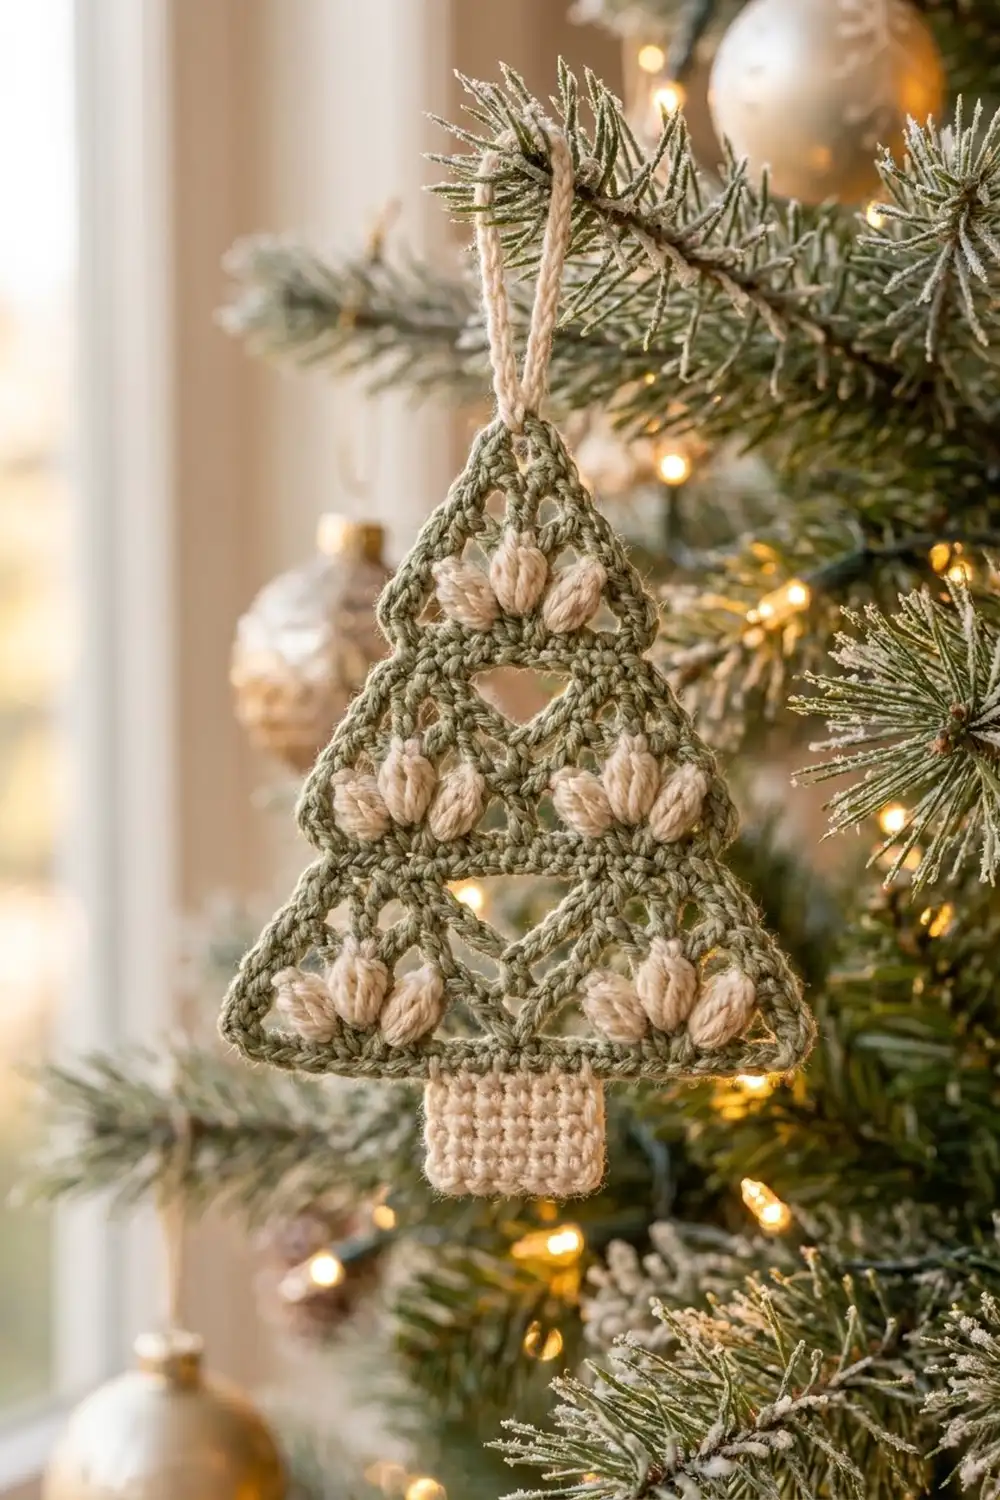
This little tree ornament is one flat, lacy piece. A sage green triangle holds three tiers of open lattice, and each tier ends in a row of plump cream puff stitches. A small cream trunk and a textured cream hanging loop finish the design.
The palette is quiet and natural: soft sage green with warm cream. It looks good on a real pine tree, tied to a gift, or hung in a window. You can make a whole set if you like, but each ornament is a separate piece and nothing is joined.
This pattern uses US crochet terms. The finished ornament measures 5 in (12.7 cm) wide and 5.8 in (14.7 cm) tall from the top point to the bottom of the trunk. The hanging loop adds about 2 in (5.1 cm) above that.
The tree is worked flat in rows from the top point down, adding one stitch at each edge on every row. Next, you work one round of green sc around all three sides. Last, you add the cream trunk in rows onto the bottom edge and make the hanging loop at the top point.
Finished Size and Construction
- Finished size: 5 in (12.7 cm) wide x 5.8 in (14.7 cm) tall, not counting the loop
- Skill level: Intermediate (color changes, puff stitches, edge increases)
- Terminology: US crochet terms
- Yarn weight: DK (light #3) cotton or cotton blend
- Hook: 3.5 mm (US E-4)
- Number of pieces: 1 (one single ornament; nothing is joined)
- Layout: One triangle with a trunk added to the bottom edge and a loop at the top point
- Triangle size before border: 4.6 in (11.7 cm) wide x 4.4 in (11.2 cm) tall
- Border depth: 0.2 in (0.5 cm) on each side
- Trunk: 1.4 in (3.6 cm) wide x 1 in (2.5 cm) tall
Materials
Choose a smooth DK cotton, either mercerized or matte. Cotton keeps the open lattice crisp and shows off the puffs. A very fuzzy yarn will hide the chain spaces.
- Color A, Sage Green: 8 g / 18 m (about 20 yd)
- Color B, Cream: 4 g / 9 m (about 10 yd)
These amounts are for one ornament. They already include a margin of about 20 percent for gauge testing and yarn tails.
Tools:
– 3.5 mm (US E-4) crochet hook
– Tapestry needle
– Scissors
– 2 stitch markers
– Ruler or tape measure
– Blocking mat and rust-proof pins
– Spray bottle with water
Abbreviations (US Terms)
- ch – chain
- sl st – slip stitch
- sc – single crochet
- dc – double crochet
- sk – skip
- st(s) – stitch(es)
- tch – turning chain
- RS / WS – right side / wrong side
Puff stitch (puff): [Yarn over, insert hook in the indicated st, yarn over and pull up a loop to dc height] 4 times (9 loops on hook). Yarn over and draw through all 9 loops. Don’t add a closing chain, because the next st locks the puff. A puff counts as 1 st.
Stitch-counting rule: In this pattern, every ch-1 counts as a st, and the ch-3 tch counts as 1 dc. “Dc in first st” means working into the base of the tch, which makes the edge increase. “Last st” is the top of the previous row’s tch.
Color changes: Work the last yarn over of the st before a color change with the new color. On puff rows, lay the unused color along the top of the row below and work over it so it stays hidden. Cut cream at the end of each puff row, leaving a 4 in (10.2 cm) tail.
Gauge and Checkpoints
Gauge: 20 dc and 10 rows = 4 in (10.2 cm) in dc. In sc: 20 sts and 20 rows = 4 in (10.2 cm).
This means each st or ch-1 is 0.2 in (0.5 cm) wide, and each dc row is 0.4 in (1.0 cm) tall.
Make one ornament before you start a full set. The tree itself is your gauge swatch. Lay it flat without stretching and measure at these checkpoints:
- After Row 4: 1.8 in (4.6 cm) wide across the last row, 1.6 in (4.1 cm) tall
- After Row 8: 3.4 in (8.6 cm) wide, 3.2 in (8.1 cm) tall
- After Row 11: 4.6 in (11.7 cm) wide, 4.4 in (11.2 cm) tall
- After the border: 5 in (12.7 cm) wide, 4.8 in (12.2 cm) tall
- After the trunk: 5.8 in (14.7 cm) tall overall
If your tree is too big, go down 0.5 mm in hook size. If it’s too small, go up 0.5 mm. If the width is right but the rows are too tall, pull up your dc loops a little less. Puffs should be the same height as the dc. If they stand above the row, shorten each pulled-up loop.
Tree Pattern
Use Color A unless told otherwise. Each row has 2 more sts than the row before it: 1 extra at each edge.
How the tiers work: Each tier has the same order. First come one or two lattice rows, then a puff row, then a solid dc divider row. The top tier is short, so its lattice is just a single ch-1 space. The middle and bottom tiers each have two lattice rows, set off from each other so the open spaces line up on the diagonal.
Row 1 (RS): Ch 4, 2 dc in 4th ch from hook. (3 sts; the skipped 3 ch count as the first dc.) The base of these sts is the top point of the tree.
Row 2 (WS): Ch 3 (counts as dc here and throughout), turn, dc in first st, ch 1, sk next st, 2 dc in last st. (5 sts: 4 dc, 1 ch-1)
Row 3 (RS, top puffs): Ch 3, turn, dc in first st, changing to B on the last yarn over. Puff in next dc, puff in next ch, puff in next dc, changing to A on the last yarn over of the third puff. 2 dc in last st. (7 sts: 4 dc, 3 puffs)
Row 4 (WS, divider): Ch 3, turn, dc in first st, dc in next 5 sts, 2 dc in last st. (9 dc)
This ends Tier 1.
Row 5 (RS, lattice): Ch 3, turn, dc in first st, [ch 1, sk next st, dc in next st] 3 times, ch 1, sk next st, 2 dc in last st. (11 sts: 7 dc, 4 ch-1)
Row 6 (WS, offset lattice): Ch 3, turn, dc in first st, [ch 1, sk next st, dc in next ch] 4 times, ch 1, sk next st, 2 dc in last st. (13 sts: 8 dc, 5 ch-1)
Each dc in Row 6 sits above a ch-1 from Row 5. This moves the open spaces over by half a step, which creates the diagonal lattice lines.
Row 7 (RS, puffs): Ch 3, turn, dc in first st, changing to B. Puff in next 3 sts, changing to A. Dc in next 5 sts, changing to B. Puff in next 3 sts, changing to A. 2 dc in last st. (15 sts: 9 dc, 6 puffs)
Row 8 (WS, divider): Ch 3, turn, dc in first st, dc in next 13 sts, 2 dc in last st. (17 dc)
This ends Tier 2. Check your size now: it should be 3.4 in (8.6 cm) wide and 3.2 in (8.1 cm) tall.
Row 9 (RS, lattice): Ch 3, turn, dc in first st, [ch 1, sk next st, dc in next st] 7 times, ch 1, sk next st, 2 dc in last st. (19 sts: 11 dc, 8 ch-1)
Row 10 (WS, offset lattice): Ch 3, turn, dc in first st, [ch 1, sk next st, dc in next ch] 8 times, ch 1, sk next st, 2 dc in last st. (21 sts: 12 dc, 9 ch-1)
Row 11 (RS, bottom puffs): Ch 3, turn, dc in first st, dc in next st, changing to B. Puff in next 3 sts, changing to A. Dc in next 11 sts, changing to B. Puff in next 3 sts, changing to A. Dc in next st, 2 dc in last st. (23 sts: 17 dc, 6 puffs)
Count check for Row 11: 2 + 1 + 3 + 11 + 3 + 1 + 2 = 23. Don’t fasten off Color A. Go straight into the border.
Border
Border gauge: 20 sc = 4 in (10.2 cm), so each sc is 0.2 in (0.5 cm). One round of sc adds 0.2 in (0.5 cm) to every edge.
Count definition: Each corner gets a 3-sc group. The side counts below do NOT include the corner groups. The corners are counted separately so nothing is counted twice.
Round 1 (RS): Ch 1, do not turn.
- 3 sc in the top of the last dc you made (first bottom corner group).
- Turn the piece and work along the slanted side: 2 sc in each row-end from Row 11 up to Row 1. (22 sc)
- 3 sc in the base of Row 1, the single ch that holds the first 3 dc (top corner group).
- Work down the other slanted side: 2 sc in each row-end from Row 1 down to Row 11. (22 sc)
- 3 sc in the first st of Row 11 (second bottom corner group).
- Work along the bottom: sc in each of the next 21 sts of Row 11. (21 sc)
- Sl st to the first sc. Fasten off and weave in the ends.
Round 1 total: 22 + 22 + 21 + (3 x 3) = 74 sc.
Why the math works: Each row-end is 0.4 in (1.0 cm) tall and steps out 0.2 in (0.5 cm), so each row adds about 0.45 in (1.1 cm) of slanted edge. Two sc at 0.2 in (0.5 cm) each cover that length almost exactly, so the sides lie flat without ruffling. The bottom edge is the 23 sts of Row 11: 21 middle sts plus 2 corner sts. Each middle st gets 1 sc, and each corner st gets 3 sc so the edging can turn the corner.
Size check: 5 in (12.7 cm) wide, 4.8 in (12.2 cm) tall.
Trunk
The bottom edge has 21 sc between the two corner groups. Count from either corner group and place a marker in the 8th sc and the 14th sc. This leaves 7 sc on each side of the trunk.
Row 1 (RS): With RS facing, join Color B in the first marked sc. Ch 1, sc in the same st and in each of the next 6 sc, ending in the second marked sc. (7 sc)
Rows 2–5: Ch 1, turn, sc in each st across. (7 sc)
Fasten off. The trunk measures 1.4 in (3.6 cm) wide x 1 in (2.5 cm) tall.
Hanging Loop
Step 1: Join Color B in the center sc of the top corner group. Ch 20, then sl st in that same center sc to close the loop.
Step 2: Sl st in the back bump of each of the 20 ch around the loop, then sl st into the center sc again. (20 sl st)
This second pass turns the chain into a firm, textured cord that helps the ornament hang straight. Fasten off. The loop stands about 2 in (5.1 cm) tall.
Final Blocking
- Weave in all ends through solid dc or border sts, never through the open lattice.
- Spritz the ornament lightly until it’s damp, not soaking wet.
- Lay it RS up on the blocking mat.
- Pin the three corners first: the top point and both bottom corners. Aim for 5 in (12.7 cm) across the bottom and 4.8 in (12.2 cm) from the top point to the bottom border.
- Pin along each slanted side every 1 in (2.5 cm) to keep the edges straight.
- Gently open each ch-1 space with a fingertip so the lattice looks even.
- Pin the trunk into a neat rectangle, 1.4 in (3.6 cm) x 1 in (2.5 cm).
- Don’t pin the puffs, so they stay rounded.
- Let the ornament dry completely before you unpin it.
Final Quality-Control Checklist
- Row 11 has 23 sts and the border has 74 sc.
- The tree measures 5 in (12.7 cm) wide x 4.8 in (12.2 cm) tall without the trunk.
- Tier 1 has 1 puff group and Tiers 2 and 3 have 2 groups each, with 3 puffs per group.
- No green shows through the cream puffs, and no cream shows through the green dc.
- The lattice rows alternate, so the open spaces form diagonal lines.
- The trunk is centered, with 7 border sc on each side.
- The overall height with the trunk is 5.8 in (14.7 cm).
- The loop is firm and sits in the center sc of the top point.
- All ends are hidden and secure.
Troubleshooting
Sides are wavy: The border has too many sc. Use exactly 2 sc per row-end.
Sides pull in or the tree cups: The border has too few sc, or the sc are too tight. Loosen your tension, or go up one hook size for the border only.
Puffs lean or look flat: Pull every loop up to dc height and keep all 4 loops the same size.
Carried yarn peeks through: Keep the carried strand relaxed and lay it right on top of the stitches you’re working into.
Lattice spaces close up: You may be working into a dc instead of the ch-1. In offset rows, every dc goes into a ch.
Stitch count is off: Check the edges first. Every row needs “dc in first st” and “2 dc in last st”, and the ch-3 counts as 1 st.
Trunk flares at the bottom: Your sc tension is looser than the gauge. Go down 0.5 mm for the trunk.
Trunk is off-center: Count the 21 bottom sc again. The markers go in the 8th and 14th sc.
Care
Hand wash in cool water with mild soap, roll the ornament in a towel to press out the water, and dry it flat, re-pinning if needed. Store it flat and away from heavy items so the puffs keep their shape.
Final Notes
Here is the measurement chain from start to finish. The gauge makes each st 0.2 in (0.5 cm) wide and each row 0.4 in (1.0 cm) tall. Eleven rows growing to 23 sts give a tree 4.6 in x 4.4 in (11.7 cm x 11.2 cm). The 74-sc border brings it to 5 in x 4.8 in (12.7 cm x 12.2 cm). The trunk, 7 sc wide and 5 rows tall, brings the total height to 5.8 in (14.7 cm). If every checkpoint matches, every ornament in your set will match too.
Happy crocheting!