
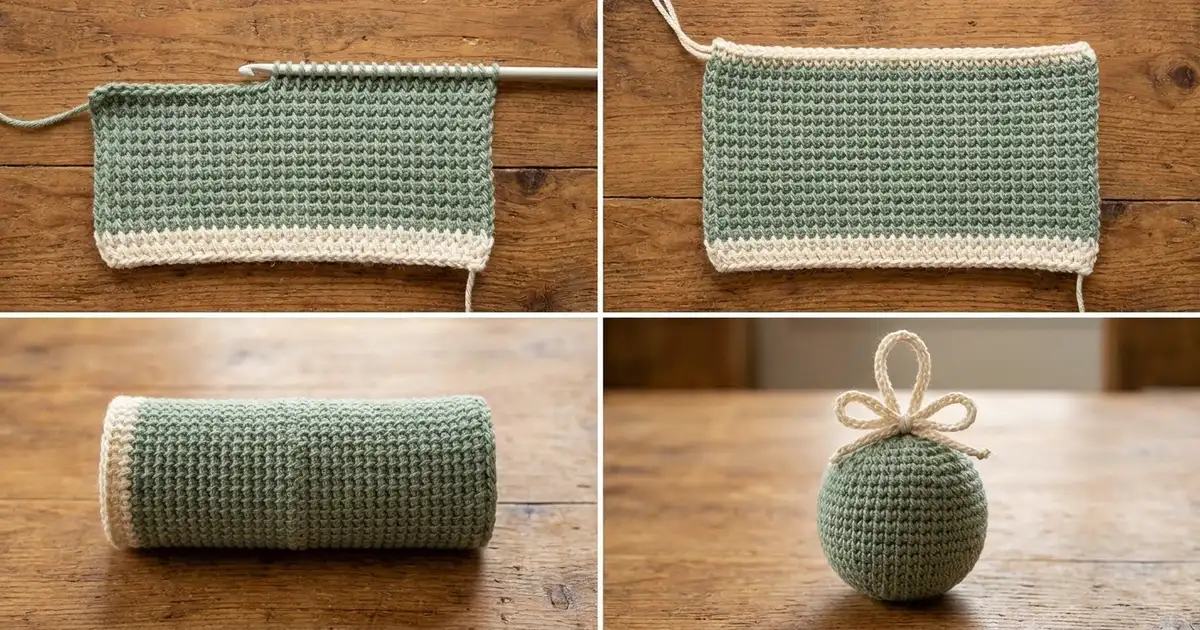
This little bauble is made from one flat panel of Tunisian simple stitch. The stitch gives a neat woven grid of vertical bars and horizontal strands. Worked in soft sage green with a cream edge, the panel is seamed into a tube, gathered at both ends, stuffed and finished with a cream hanging loop and bow.
The style is cozy and simple, with a Scandinavian feel. Cream ridges at the top and bottom of the panel become small gathered “starbursts” at the poles of the ball. These echo the bow and help the ornament look tailored.
This pattern uses US crochet terms. The finished ornament is about 2.75 in (7.0 cm) in diameter, with a circumference of about 8.6 in (21.8 cm), plus a 2 in (5.1 cm) hanging loop. The flat panel measures 8 in (20.3 cm) wide by 5 in (12.7 cm) tall before assembly.
Construction is short: work one rectangle in Tunisian simple stitch, add the cream top edge, block it flat, mattress-stitch the side edges into a tube, gather the bottom, stuff, gather the top, then add the loop and bow.
Finished Size and Construction
- Finished size: about 2.75 in (7.0 cm) in diameter; 8.6 in (21.8 cm) around
- Skill level: Easy (beginner-friendly Tunisian crochet)
- Terminology: US crochet terms
- Yarn weight: Worsted (#4)
- Hook: 5.5 mm (I-9) Tunisian hook, 10 in (25.4 cm) or longer
- Number of pieces: 1 panel
- Layout: a single rectangle, seamed into a tube and gathered into a ball
- Piece size: 8 in × 5 in (20.3 cm × 12.7 cm), 36 sts × 20 rows
- Size before border: 8 in × 4.75 in (20.3 cm × 12.1 cm), Rows 1–19
- Border depth: 0.25 in (0.6 cm), cream Row 20 plus bind-off
Materials
Choose a smooth worsted yarn in wool, wool blend or acrylic. Smooth yarn shows the Tunisian grid clearly. Avoid fuzzy or very splitty yarns, since you insert the hook under the vertical bars over and over.
- Color A, sage green: 12 g (about 24 m)
- Color B, cream: 6 g (about 12 m), for the edges, gathering, hanging loop and bow
Both quantities include a margin of roughly 20%, which covers your gauge swatch and longer tails.
Tools:
- 5.5 mm (I-9) Tunisian hook, at least 10 in (25.4 cm) long (a straight standard hook with an even shaft also works for 36 loops)
- Tapestry needle
- Polyester fiberfill, about 6–8 g
- Scissors
- 4 locking stitch markers
- Spray bottle, blocking mat and rust-proof pins
Abbreviations (US Terms)
- ch – chain
- sl st – slip stitch
- st(s) – stitch(es)
- yo – yarn over
- FwP – forward pass
- RetP – return pass
- TSS – Tunisian simple stitch
- RS – right side
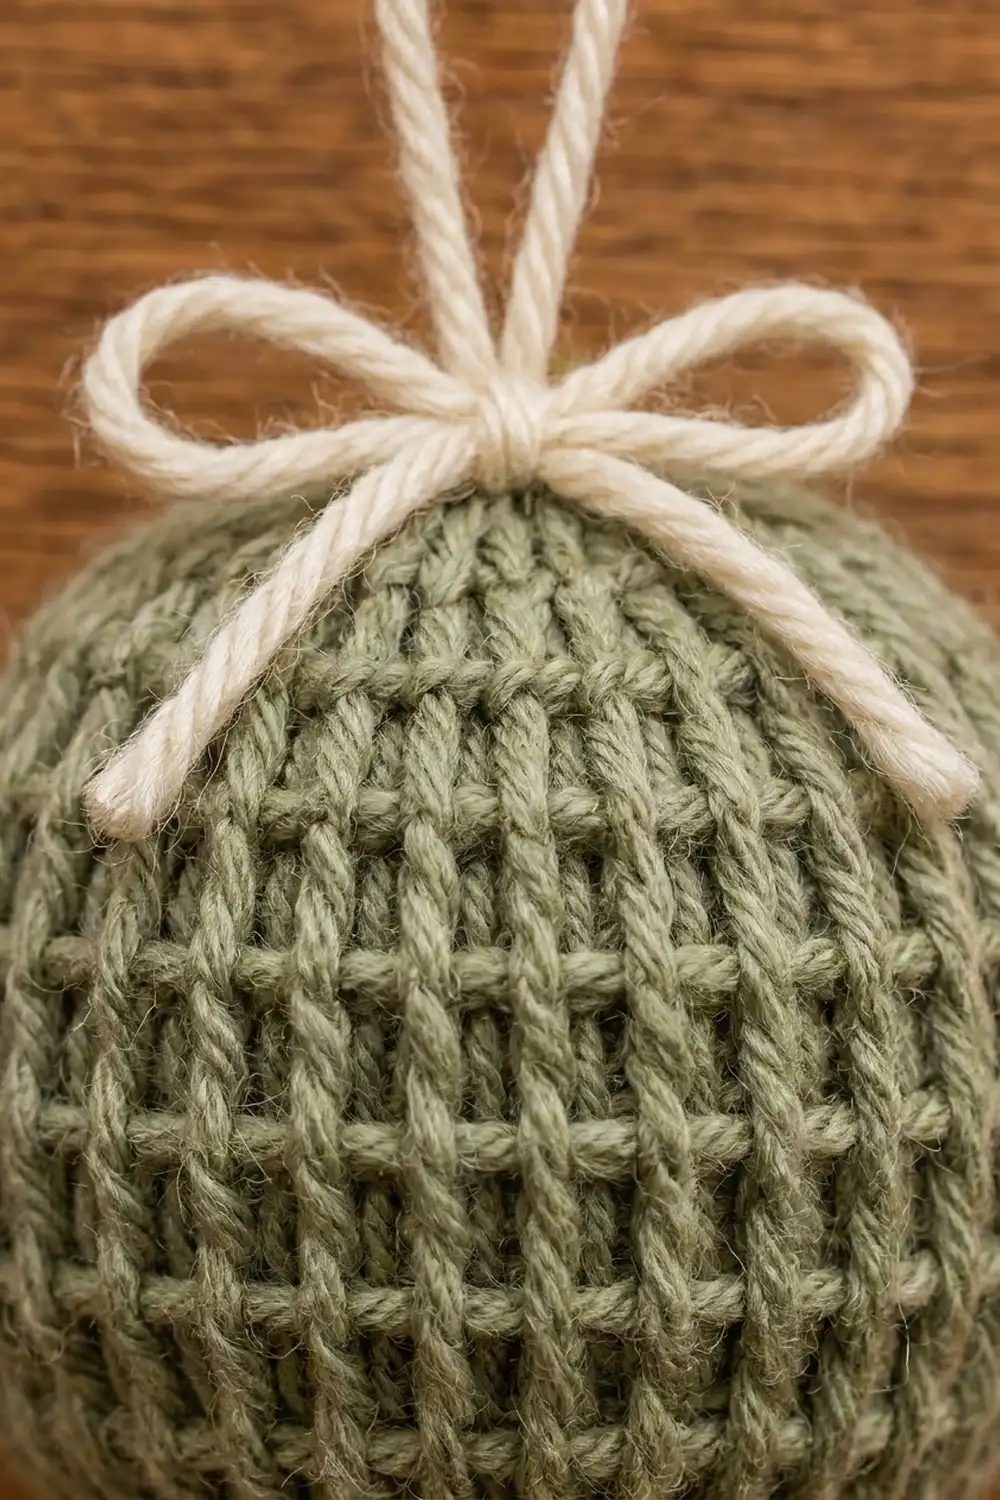
Special stitch: Tunisian simple stitch (TSS). Each row has two passes. On the forward pass, the loop on the hook counts as the first st. Skip the first vertical bar, then insert the hook from right to left under the next vertical bar, yo, pull up a loop to the last st. For the last st, insert under both strands of the edge bar so the side stays firm. You now hold 36 loops. On the standard return pass, yo and pull through 1 loop, then yo and pull through 2 loops until 1 loop remains. That loop is the first st of the next row.
Color change: work the final “yo, pull through 2” of a return pass with the new color. The new color then starts cleanly on the next forward pass.
Gauge and Checkpoints
Gauge: 18 sts and 16 rows = 4 in (10.2 cm) in TSS, measured after light blocking. That is 4.5 sts and 4 rows per inch.
Test with one panel first. This ornament is small, so the panel itself works as the gauge swatch. Measure at each checkpoint and adjust early.
- After Row 1: width 8 in (20.3 cm). Anything from 7.75 in (19.7 cm) to 8.25 in (21.0 cm) is fine.
- After Row 10: height 2.5 in (6.4 cm).
- After Row 19: height 4.75 in (12.1 cm).
- After the bind-off: 8 in × 5 in (20.3 cm × 12.7 cm).
- Seamed tube, flattened: 4 in (10.2 cm) wide by 5 in (12.7 cm) tall.
If your panel is too big: go down to a 5 mm (H-8) hook, or check that you aren’t pulling up tall loops on the forward pass. If it is too small: go up to a 6 mm (J-10) hook. Tunisian crochet usually needs a hook one or two sizes larger than standard crochet with the same yarn.
Height matters more than width here. Each row should be about 0.25 in (0.6 cm) tall. If your rows run short, add one green row; if they run tall, leave one out. Keep the cream rows as written.
Pattern: The Panel
Work on the RS throughout; Tunisian crochet is never turned. Every row has 36 sts.
Foundation chain (Color B, cream): Ch 36 loosely. If your chains are tight, make the chain with a 6 mm (J-10) hook, then switch back.
Row 1 (cream):
FwP: Insert the hook into the back bump of the 2nd ch from the hook, yo, pull up a loop. Repeat in each ch across. (36 loops on hook)
RetP: Yo, pull through 1 loop, yo, pull through 2 loops until 2 loops remain. Change to Color A (green) for the final yo and pull through. (36 sts)
Cut cream, leaving a 12 in (30.5 cm) tail. You will use this tail to gather the bottom of the ornament.
Rows 2–19 (green):
FwP: Skip the first vertical bar, then TSS in each bar across, finishing under both strands of the edge bar. (36 loops on hook)
RetP: Standard return pass. (36 sts)
Work 18 green rows in total. On the RetP of Row 19, change to Color B (cream) for the final yo and pull through. Cut green, leaving a 24 in (61.0 cm) tail for seaming.
Checkpoint: the panel now measures 8 in × 4.75 in (20.3 cm × 12.1 cm). Rows 2–19 form a green grid 4.5 in (11.4 cm) tall, with one cream row along the bottom edge.
Place a locking marker at each corner. These help you match the edges later.
Border: Cream Top Edge
The border is the cream band along the top of the panel. It matches the cream foundation row, so both open ends of the tube are framed in cream.
Border gauge: same as the panel, 4.5 sts and 4 rows per inch. The band is 1 row plus a slip-stitch bind-off, for 0.25 in (0.6 cm) of depth.
Row 20 (cream):
FwP: TSS across as in Rows 2–19. (36 loops on hook)
RetP: Standard return pass. (36 sts)
Bind-off (cream): With 1 loop on the hook (the edge st), insert the hook under the next vertical bar, yo, pull through the bar and the loop on the hook. Repeat across, working the last sl st under both strands of the edge bar. (35 sl sts)
Fasten off, leaving an 18 in (45.7 cm) tail for gathering the top.
Counts per side:
- Top edge: 36 sts (1 edge st already on the hook + 35 sl sts)
- Bottom edge: 36 foundation chains
- Each side edge: 20 row ends (Rows 1–20)
Why the math works: You chain 36, every row holds 36 sts, and the bind-off closes all 36 sts without adding any. That means the top and bottom edges match exactly. Both gather into the same tight ring, so the ball stays symmetrical. At 4.5 sts per inch, 36 sts is exactly 8 in (20.3 cm). At 4 rows per inch, 20 rows is exactly 5 in (12.7 cm). The side seams then join 20 row ends to 20 row ends, one to one, with nothing to ease in.
Final Blocking and Shaping
Tunisian simple stitch curls toward the front, so block the panel flat before you assemble it. Stuffing the ball then acts as the final shaping step.
- Pin: Lay the panel RS up on a blocking mat. Pin it to 8 in × 5 in (20.3 cm × 12.7 cm), setting pins along the edges about 1 in (2.5 cm) apart.
- Mist: Spray until damp but not soaked. For acrylic, hover a steam iron 1 in (2.5 cm) above the fabric instead, and never let it touch.
- Dry: Leave pinned until fully dry, about 2–4 hours.
- Seam: Fold the panel so the two side edges meet, RS facing out. Thread the green tail and mattress-stitch the edges. Go under the edge-stitch bar on one side, then the matching bar on the other side, row for row: Row 1 to Row 1, and so on up to Row 20 to Row 20. That makes 20 pairs. Pull every 3–4 stitches until the seam just closes, but not so tight that it puckers. Tie off and weave in the green tail.
- Check the tube: Flattened, it should measure 4 in (10.2 cm) wide by 5 in (12.7 cm) tall, with a cream ring at each end.
- Gather the bottom: Thread the 12 in (30.5 cm) cream tail. Weave it in and out through all 36 foundation chains around the bottom opening. Pull firmly until the hole closes into a small cream starburst. Knot twice and push the tail inside.
- Stuff: Add fiberfill in small tufts, about 6–8 g in all. Shape it as you go so the ball is round and firm but not stretched enough to open gaps between bars.
- Gather the top: Thread the 18 in (45.7 cm) cream tail through all 36 bind-off sts. Pull tight, knot twice and keep the tail.
- Hanging loop: Cut a 12 in (30.5 cm) cream strand. Thread it under several gathered sts at the top center. Tie the ends in a firm overhand knot so the loop stands 2 in (5.1 cm) above the ball. Trim the ends and tuck the knot into the gather.
- Bow: Cut a 14 in (35.6 cm) cream strand. Tie it around the base of the loop in a bow, with loops about 1 in (2.5 cm) wide and tails about 1.5 in (3.8 cm) long. Let the tails drape down the sides of the ball.
- Final shaping: Roll the ball gently between your palms, then lightly steam or mist it and leave it to dry. It should measure about 2.75 in (7.0 cm) in diameter.
Final Quality-Control Checklist
- Every row holds 36 sts, and the side edges are straight, not slanting.
- The flat panel blocked to 8 in × 5 in (20.3 cm × 12.7 cm).
- There is exactly one cream row at the bottom and one cream row plus bind-off at the top.
- The side seam matches 20 row ends to 20 row ends and lies flat.
- Both poles are tightly closed, with no fiberfill showing.
- The ball is round, about 2.75 in (7.0 cm) across, and the grid is even all over.
- The hanging loop is 2 in (5.1 cm) tall and firmly anchored.
- The bow sits centered over the top gather.
- All tails are knotted and buried inside the ball.
Troubleshooting
The panel slants or narrows. You are probably skipping the last st. Always work the final loop under both strands of the edge bar, and count 36 loops on every forward pass.
The bottom edge is tight and puckered. The foundation chain is too firm. Chain with a larger hook and pick up loops in the back bumps.
The panel curls badly. This is normal for TSS. Blocking flattens it, and once the panel is a stuffed ball the curl no longer shows.
Gaps show between the bars after stuffing. The ball is overstuffed or your gauge is loose. Take out some fiberfill, or remake the panel with a smaller hook.
The ball looks egg-shaped. Your rows are too tall. Remove one green row (making Rows 2–18 green) and keep the cream Row 20 as the top border.
The poles won’t close fully. Pass the gathering yarn through every st, not every other one, and pull in stages. A second pass through the same sts closes any remaining gap.
Color changes look blurry. Make sure the change happens on the last “yo, pull through” of the return pass, not at the start of the forward pass.
Care
Hand wash in cool water if needed, press out the water in a towel, and reshape the ball to dry. Store the ornament loosely in tissue so the bow and loop are not crushed.
Final Notes
Everything here follows one measurement chain. The 36-st foundation gives an 8 in (20.3 cm) width. Rows 1–19 build 4.75 in (12.1 cm) of height, and the cream border brings the panel to 5 in (12.7 cm). Seaming turns that into a tube 8 in (20.3 cm) around. Gathering 36 sts at each end and stuffing then gives a round bauble about 2.75 in (7.0 cm) across.
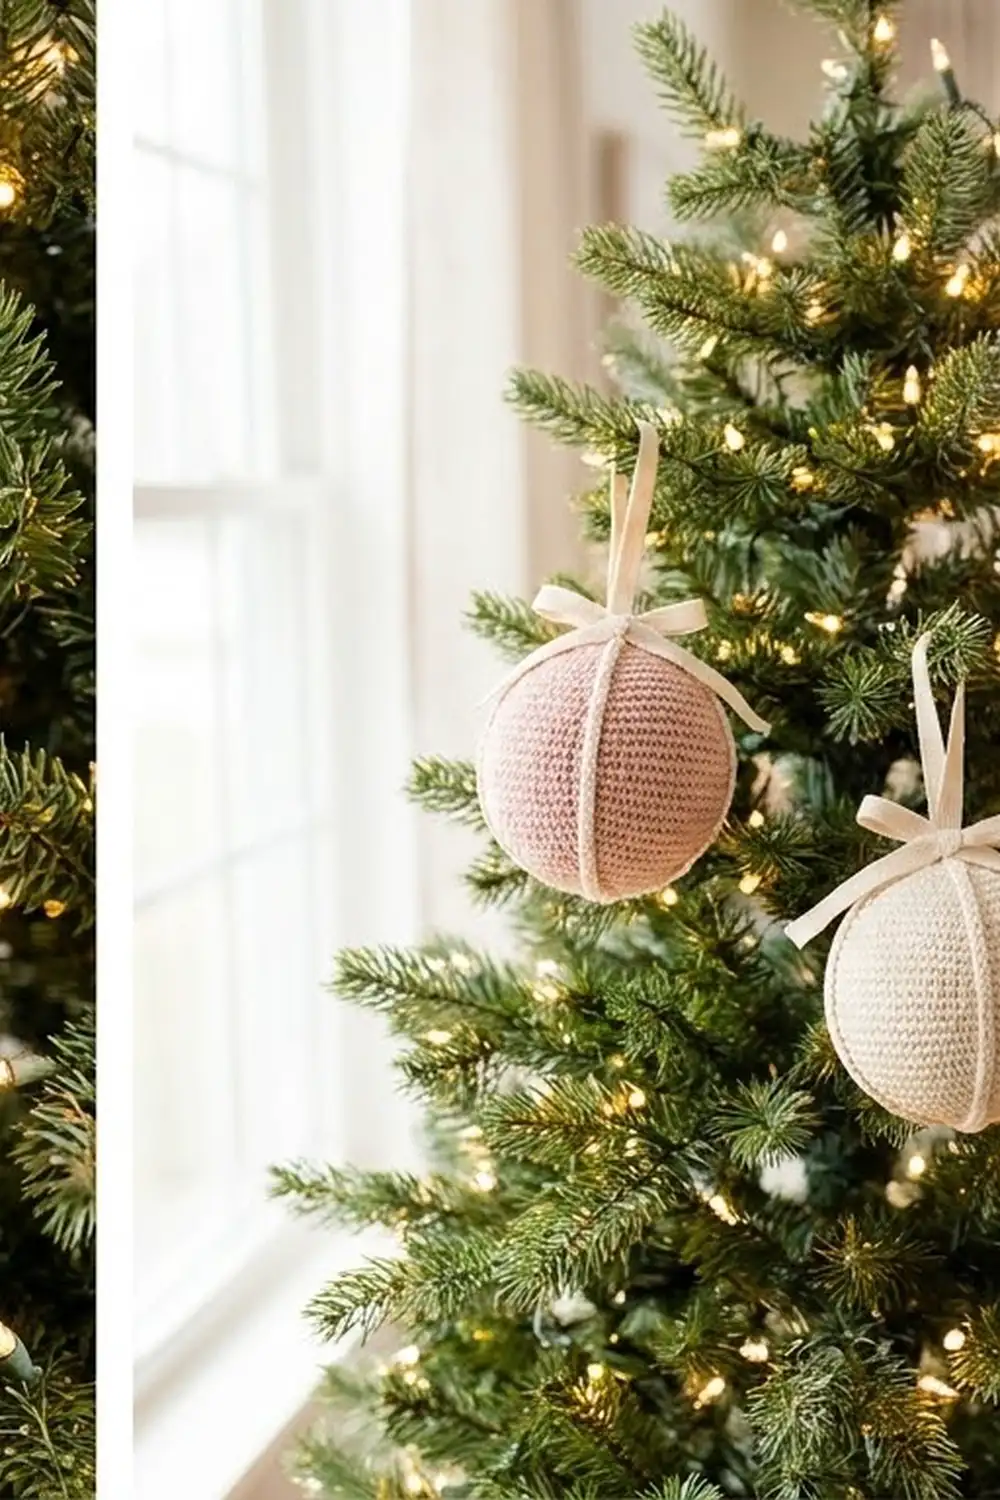
If your gauge holds at each checkpoint, the finished ball will too. Once you know the panel, it is easy to make the same ornament in other colors, such as blush pink, all-cream or mustard, keeping the cream edges and bow so a set looks coordinated.
Happy crocheting!