

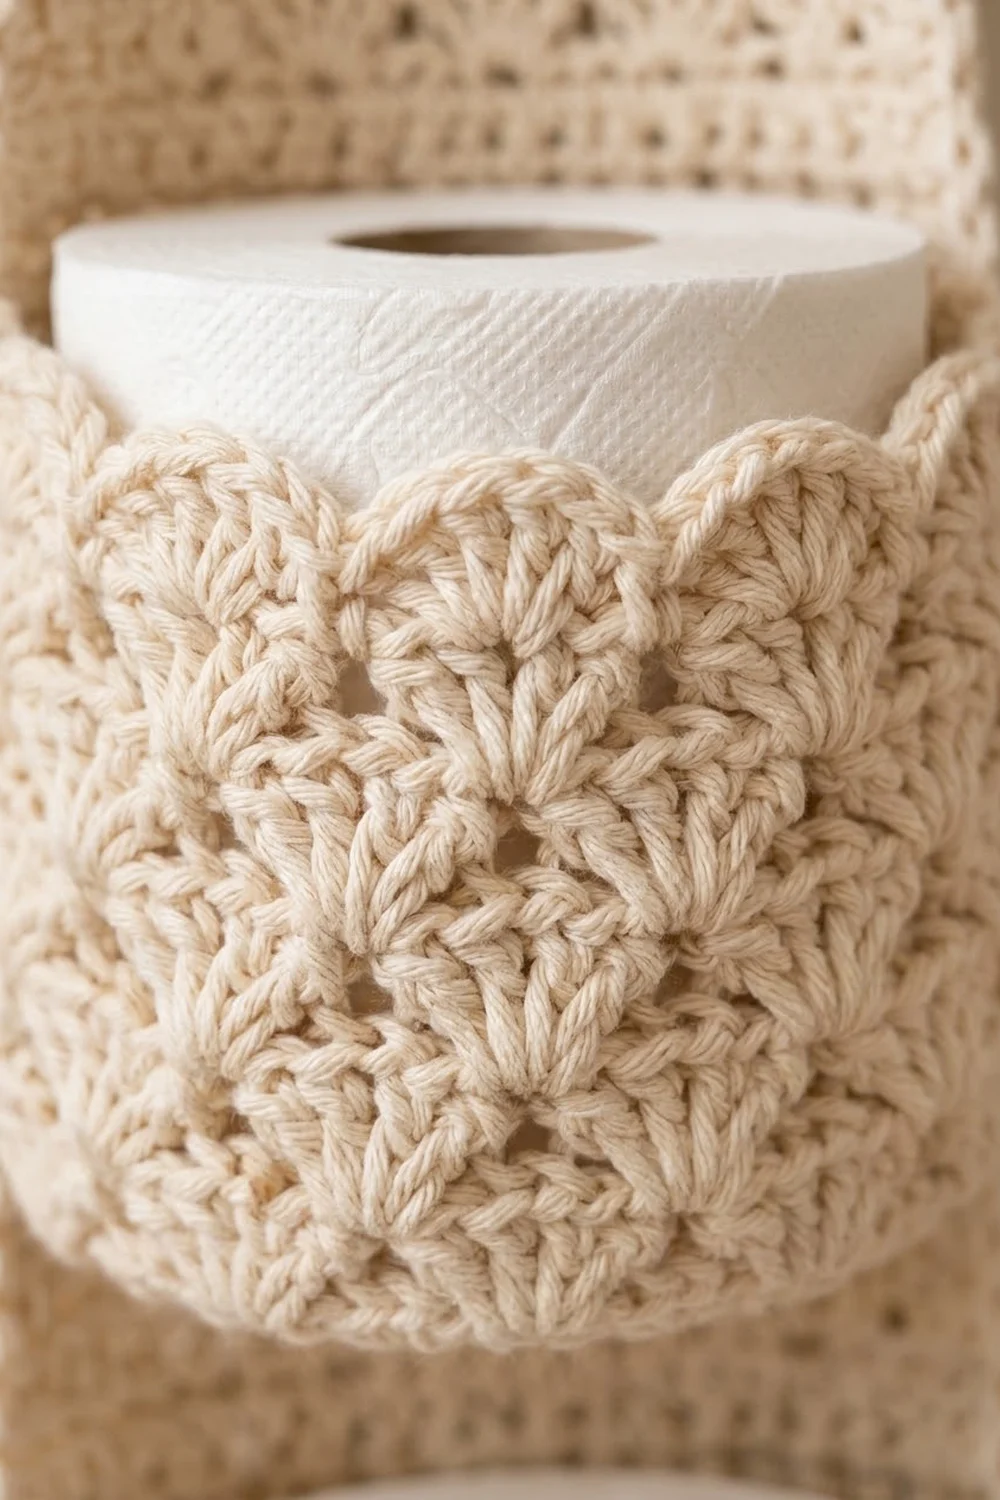
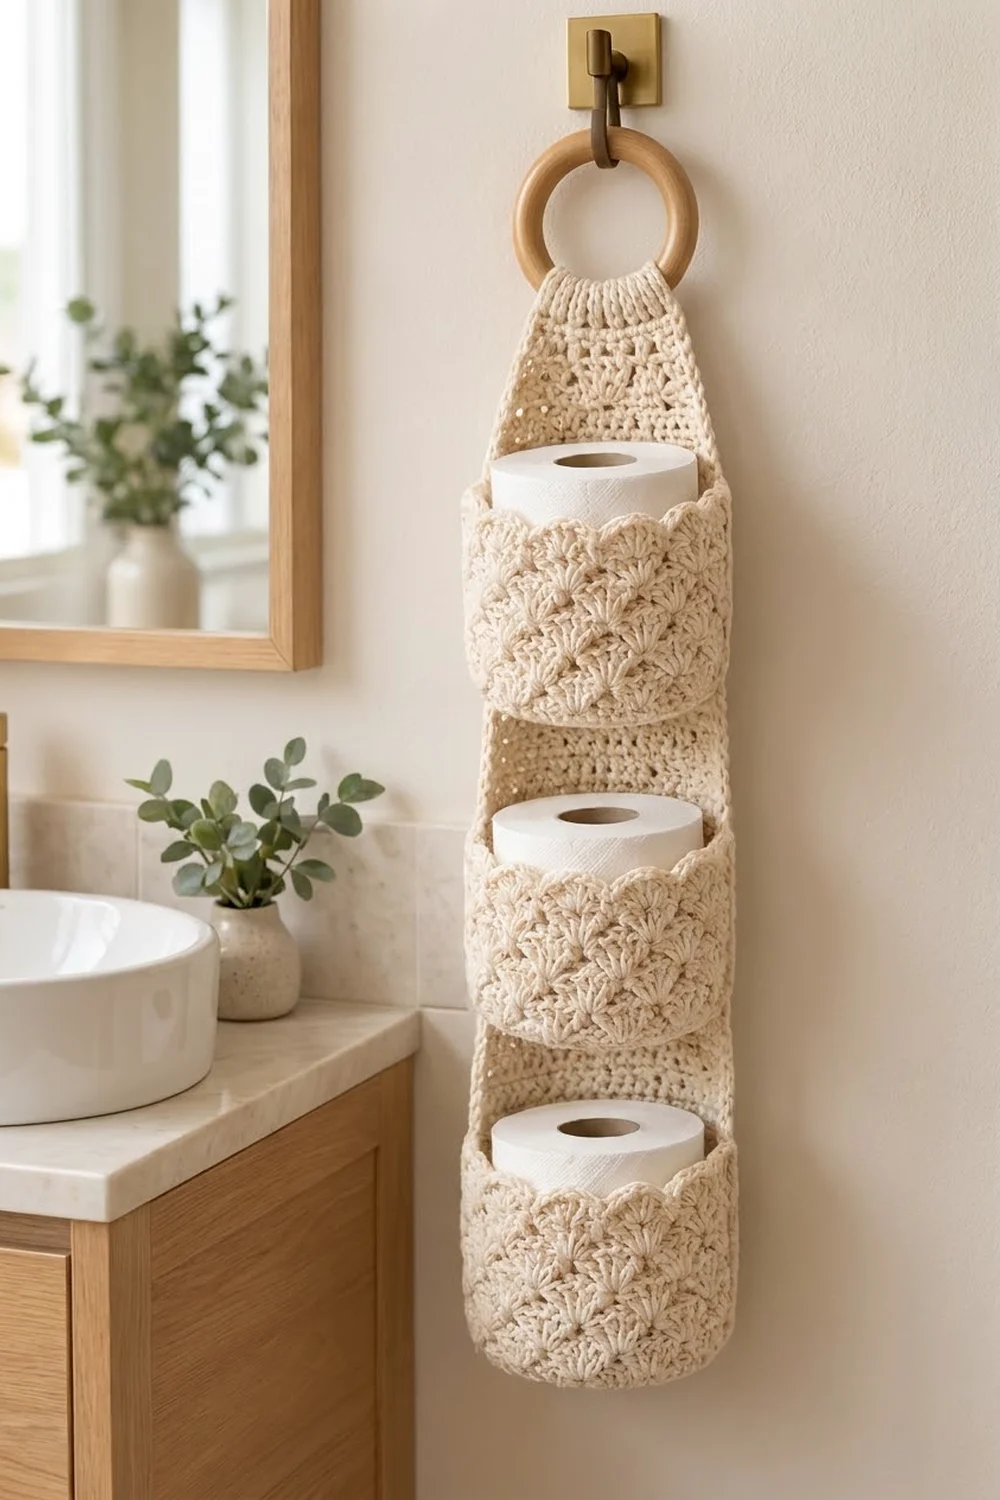
This hanging toilet paper holder is a long back panel with three round pockets stacked down the front, and it hangs from a wooden ring. Every surface uses a deep shell stitch texture, and each pocket ends in a row of big scallops that frame the top of the roll.
The design uses one color, a soft natural cream, so the shell texture does the decorating. It suits a calm Scandinavian or spa-style bathroom and looks good next to light wood, brass and white ceramic.
The pattern uses US crochet terms. The back panel measures 5.25 in (13.3 cm) wide and 24.25 in (61.6 cm) long before you fold it over the ring. The finished holder hangs about 25 in (63.5 cm) long including the ring. Each pocket is 5 in (12.7 cm) across and 3.25 in (8.3 cm) tall, and fits a standard 4.5 in (11.4 cm) roll.
You crochet four pieces. The back panel is worked flat from the bottom up in shell rows, tapered in single crochet, and finished with a narrow strap. Each pocket starts with a flat single crochet base, and the walls are shell rounds. You add a border to the panel, sew on the pockets, then wrap the strap around the ring.
Finished Size and Construction
- Finished size: panel 5.25 x 24.25 in (13.3 x 61.6 cm) unfolded; about 25 in (63.5 cm) hanging, ring included
- Skill level: Easy-Intermediate
- Terminology: US
- Yarn weight: Worsted (medium #4) cotton
- Hook: 5.0 mm (H-8)
- Number of pieces: 4 (1 back panel, 3 pockets)
- Layout: pockets stacked vertically, with their bases 12 panel rows (6 in / 15.2 cm) apart
- Pocket size: 5 in (12.7 cm) diameter, 3.25 in (8.3 cm) tall
- Panel size before border: 4.75 x 23.75 in (12.1 x 60.3 cm)
- Border depth: 0.25 in (0.6 cm) on each edge
Materials
Choose a smooth worsted cotton or cotton blend. Cotton holds the pockets firm, keeps the shells crisp and stands up to bathroom humidity. Acrylic works too, but the pockets will be a little softer.
- Cream: 200 g, about 340 m (372 yd)
- Back panel: about 60 g (102 m)
- Each pocket: about 35 g (60 m), so 105 g (179 m) for all three
These amounts include a margin of roughly 20% over the 165 g (281 m) the holder actually uses.
Tools:
- 5.0 mm (H-8) crochet hook
- One 3 in (7.6 cm) wooden ring
- Tapestry needle
- Scissors
- 4 locking stitch markers
- Rust-proof pins and a blocking mat
- Measuring tape
Abbreviations (US Terms)
- ch – chain
- sl st – slip stitch
- sc – single crochet
- dc – double crochet
- sc2tog – single crochet 2 together
- BLO – back loop only
- MR – magic ring
- st(s) – stitch(es)
- rep – repeat
- Rnd – round
Special stitches:
- Shell: 5 dc in the same stitch. The 3rd dc is the center dc.
- Scallop: 7 dc in the same stitch. It is used only on the top round of each pocket.
Gauge and Checkpoints
Single crochet gauge: 16 sc and 16 rows = 4 in (10.2 cm).
Shell pattern gauge: 16 sts and 8 rows = 4 in (10.2 cm). One shell repeat of 6 sts is 1.5 in (3.8 cm) wide, and each shell row is 0.5 in (1.3 cm) tall.
Make one pocket first. It works as your gauge swatch and tells you right away whether a roll will fit.
Checkpoints:
- Pocket base after Rnd 10: 5 in (12.7 cm) across, lying flat
- Pocket wall after Rnd 16: 2.75 in (7.0 cm) tall
- Finished pocket after Rnd 17: 3.25 in (8.3 cm) tall
- Panel after Row 37: 4.75 x 18.5 in (12.1 x 47.0 cm)
- Panel after Row 58: 4.75 x 23.75 in (12.1 x 60.3 cm) at the widest point
If the base is too big or its edge ruffles, go down half a hook size. If the base cups or the roll fits too tightly, go up half a hook size. Check gauge again before you start the panel.
Pocket (Make 3)
Base
Rnd 1: Make a MR, ch 1, 6 sc in ring, sl st to first sc. (6 sts)
Rnd 2: Ch 1, 2 sc in each st around, sl st to first sc. (12 sts)
Rnd 3: Ch 1, sc in next st, 2 sc in next st rep around, sl st to first sc. (18 sts)
Rnd 4: Ch 1, sc in next 2 sts, 2 sc in next st rep around, sl st to first sc. (24 sts)
Rnd 5: Ch 1, sc in next 3 sts, 2 sc in next st rep around, sl st to first sc. (30 sts)
Rnd 6: Ch 1, sc in next 4 sts, 2 sc in next st rep around, sl st to first sc. (36 sts)
Rnd 7: Ch 1, sc in next 5 sts, 2 sc in next st rep around, sl st to first sc. (42 sts)
Rnd 8: Ch 1, sc in next 6 sts, 2 sc in next st rep around, sl st to first sc. (48 sts)
Rnd 9: Ch 1, sc in next 7 sts, 2 sc in next st rep around, sl st to first sc. (54 sts)
Rnd 10: Ch 1, sc in next 8 sts, 2 sc in next st rep around, sl st to first sc. (60 sts)
Checkpoint: 5 in (12.7 cm) across, with a circumference of 15 in (38.1 cm).
Walls
Rnd 11 (turning round): Ch 1, sc in BLO of each st around, sl st to first sc. (60 sts = 60 worked 1-per-existing-stitch + 0 added)
Working in the back loop leaves a ridge on the outside and turns the wall upward, which gives the pocket its flat bottom.
Rnd 12 (shell setup): Ch 1, sc in first st, skip 2 sts, shell in next st, skip 2 sts, sc in next st 9 times, skip 2 sts, shell in next st, skip 2 sts, sl st to first sc. (10 shells + 10 sc = 60 sts)
Rnd 13: Sl st in next 2 dc to reach the center dc of the first shell. Ch 1, sc in same center dc, shell in next sc, sc in center dc of next shell rep around, ending with shell in last sc. Sl st to first sc. (10 shells + 10 sc = 60 sts)
Each new shell sits above an sc from the round before, which creates the offset fan texture.
Rnds 14–16: Rep Rnd 13. (60 sts each round)
Checkpoint: 2.75 in (7.0 cm) from the base ridge to the top of Rnd 16.
Rnd 17 (scallop edge): Sl st in next 2 dc to the center dc of the first shell. Ch 1, sc in same center dc, scallop in next sc, sc in center dc of next shell rep around, ending with scallop in last sc. Sl st to first sc. (10 scallops + 10 sc = 80 sts)
The 7-dc scallops flare slightly past the wall and give the rim its wave. Fasten off and leave a 24 in (61.0 cm) tail for sewing.
Back Panel
The panel is worked flat over a multiple of 6 + 1 sts.
Foundation: Ch 20.
Row 1: Sc in 2nd ch from hook, skip 2 ch, shell in next ch, skip 2 ch, sc in next ch rep across. Turn. (3 shells + 4 sc = 19 sts)
Row 2: Ch 3 (counts as dc), 2 dc in first sc, sc in center dc of next shell, shell in next sc, work from * twice in total, sc in center dc of last shell, 3 dc in last sc. Turn. (2 half shells of 3 dc + 2 shells + 3 sc = 19 sts)
Row 3: Ch 1, sc in first dc, shell in next sc, sc in center dc of next shell rep across, working the last sc in the top of the turning ch. Turn. (3 shells + 4 sc = 19 sts)
Rows 4–37: Rep Rows 2 and 3, ending with a Row 3 repeat. (19 sts every row)
Checkpoint: 4.75 x 18.5 in (12.1 x 47.0 cm).
Taper
Row 38 (conversion row): Ch 1, sc in each st across. Turn. (19 sts = 19 worked 1-per-existing-stitch + 0 added)
Row 39: Ch 1, sc2tog, sc in each st to last 2 sts, sc2tog. Turn. (17 sts)
Row 40: Ch 1, sc in each st across. Turn. (17 sts)
Rows 41–42: Rep Rows 39–40. (15 sts)
Rows 43–44: Rep Rows 39–40. (13 sts)
Rows 45–46: Rep Rows 39–40. (11 sts)
Rows 47–48: Rep Rows 39–40. (9 sts)
The taper is 2.5 in (6.4 cm) long.
Strap
Rows 49–58: Ch 1, sc in each st across. Turn. (9 sts each row)
The strap is 2.25 in (5.7 cm) wide and 2.5 in (6.4 cm) long. Do not fasten off. Go straight on to the border.
Make All Pieces
- Cream: 1 back panel
- Cream: 3 pockets
Layout (front view, top to bottom):
        ( ring )
          |||        strap, Rows 49–58
         /   \       taper, Rows 38–48
        |     |      Rows 26–37: open, 2.75 in (7.0 cm)
        [ P3  ]      base on top of Row 25
        |     |      gap 2.75 in (7.0 cm)
        [ P2  ]      base on top of Row 13
        |     |      gap 2.75 in (7.0 cm)
        [ P1  ]      base on top of Row 1
        |_____|      bottom border
Border (Back Panel)
Border gauge: Each shell row is 0.5 in (1.3 cm) tall, the height of two 0.25 in (0.6 cm) sc, so work 2 sc into the end of each shell row. Work 1 sc into the end of each sc row and 1 sc into each stitch or foundation chain.
Rnd 1: With the working loop still on your hook at the end of Row 58, ch 1. Turn the corner and work down the first long side:
- Long side 1: 1 sc in each of the 21 sc row ends (Rows 58–38), then 2 sc in each of the 37 shell row ends (Rows 37–1). (21 + 74 = 95 sts)
- Bottom: 3 sc in the first foundation ch, 1 sc in each of the next 17 ch, 3 sc in the last ch. (17 + 6 = 23 sts)
- Long side 2: 2 sc in each of the 37 shell row ends, then 1 sc in each of the 21 sc row ends. (74 + 21 = 95 sts)
- Strap top: 3 sc in the first st of Row 58, 1 sc in each of the next 7 sts, 3 sc in the last st. (7 + 6 = 13 sts)
Sl st to first sc. (95 + 23 + 95 + 13 = 226 sts) Fasten off.
Why the math works: Each border stitch matches the 0.25 in (0.6 cm) sc gauge, so the edges lie flat without stretching or ruffling. The corner groups are counted only in the bottom and strap-top totals, so no corner is counted twice. The bordered panel is 4.75 + 0.5 = 5.25 in (13.3 cm) wide and 23.75 + 0.5 = 24.25 in (61.6 cm) long.
Joining
Method: Whipstitch with the pocket tail and the tapestry needle, catching both loops of the panel.
Stitch-to-stitch logic:
- Lay the panel face up. Mark the center 15 sts at the top of Row 1, which leaves 2 sts free on each side inside the border.
- On the pocket, mark 15 consecutive sts on the BLO ridge (Rnd 11). That is one quarter of its 60 sts, and it becomes the pocket back.
- Sew the 15 pocket sts to the 15 panel sts, one to one.
- From each end of that seam, sew straight up the pocket wall to the top of Rnd 16. Follow a single panel stitch column and catch one panel sc-height for every 0.25 in (0.6 cm) of wall.
- Tack the back of Rnd 16 to the panel at its center. Leave the Rnd 17 scallops free.
- Repeat for pocket 2 on top of Row 13 and pocket 3 on top of Row 25.
Tension: Make each stitch snug but not tight. If the panel puckers behind a pocket, the seam is too tight. If the pocket tips forward, it is too loose.
Size checkpoint: Measured from the bordered bottom edge, the pocket bases sit at 0.75 in (1.9 cm), 6.75 in (17.1 cm) and 12.75 in (32.4 cm). The rims sit at 4 in (10.2 cm), 10 in (25.4 cm) and 16 in (40.6 cm). That leaves 2.75 in (7.0 cm) of open shell panel above the top pocket.
Ring: Pass the strap through the wooden ring from front to back. Fold it down behind the taper so that 1.5 in (3.8 cm) of strap lies flat against the back. Whipstitch the 13 strap-top border sts across the back of the panel. The ring gathers the strap into soft ridges.
Final Blocking
- Wet the holder in cool water, then press it in a towel to remove excess water.
- Lay it face up and pin the panel to 5.25 in (13.3 cm) wide along its full length.
- Pin out the scallops on each pocket rim.
- Put a 4.5 in (11.4 cm) roll, or a rolled-up towel, inside each pocket to shape the walls.
- Let it dry completely, about 24 hours, before you remove the pins.
Final Quality-Control Checklist
- Panel is 5.25 in (13.3 cm) wide with straight, parallel sides
- Every shell row has 19 sts and the edges don’t drift
- Each pocket has 10 evenly spaced shells and 10 scallops
- Pocket bases lie flat and the BLO ridge is visible
- Pockets are centered, level and 6 in (15.2 cm) apart, base to base
- Strap seam is secure and the ring sits centered
- All ends are woven in on the back
Troubleshooting
- Pocket base cups: you’re crocheting tightly or missed an increase. Count each round.
- Base ruffles: there are extra stitches or your tension is loose. Go down a hook size.
- Roll doesn’t fit: your gauge is tight. Remake the pocket with a 5.5 mm (I-9) hook.
- Shells lean: check that each shell goes into an sc and each sc goes into a center dc.
- Panel edges wave: there are too many border sts. Use exactly 2 per shell row.
- Pocket sags: add another tack at the rim on each side of the center.
- Holder twists: re-sew the strap fold so it sits exactly at the center, then block again.
Care
Hand wash in cool water with mild soap, press out the water and dry flat. Reshape the pockets while they’re damp.
Final Notes
Every measurement follows from gauge. 16 sts and 8 shell rows make 4 in (10.2 cm). That gives a 60-st pocket base 5 in (12.7 cm) across and a pocket 3.25 in (8.3 cm) tall. The 19-st panel measures 4.75 x 23.75 in (12.1 x 60.3 cm), and the 226-st border brings it to 5.25 x 24.25 in (13.3 x 61.6 cm). With the pockets placed 12 rows apart, the holder hangs about 25 in (63.5 cm) from its ring. Check your gauge on the first pocket and the rest will follow.
Happy crocheting!