
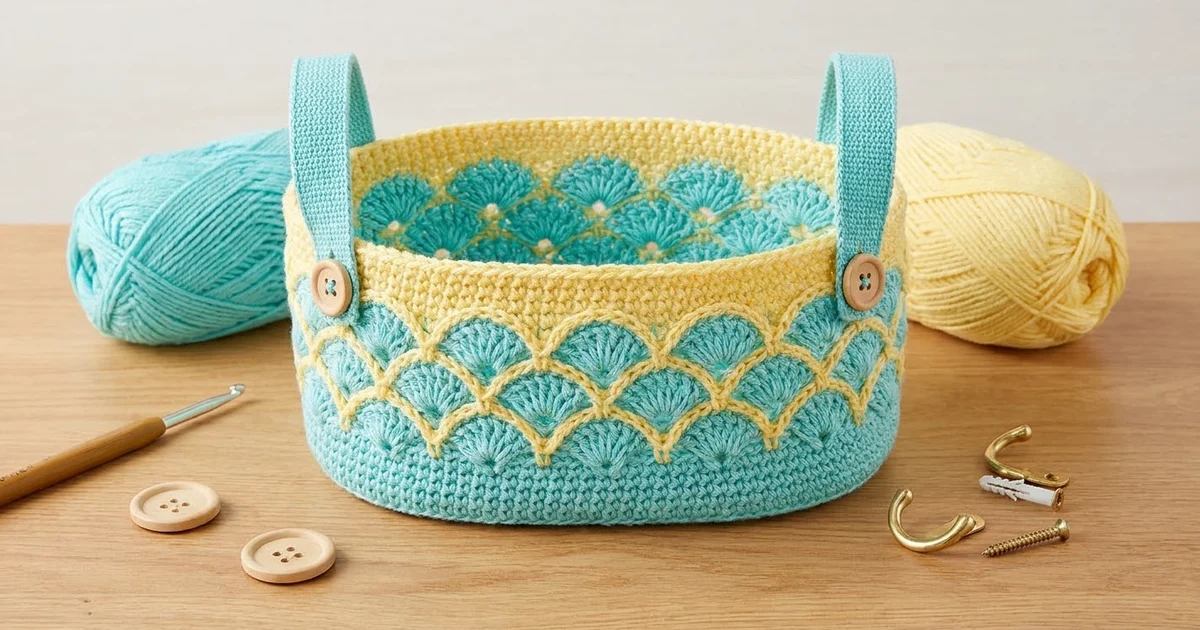
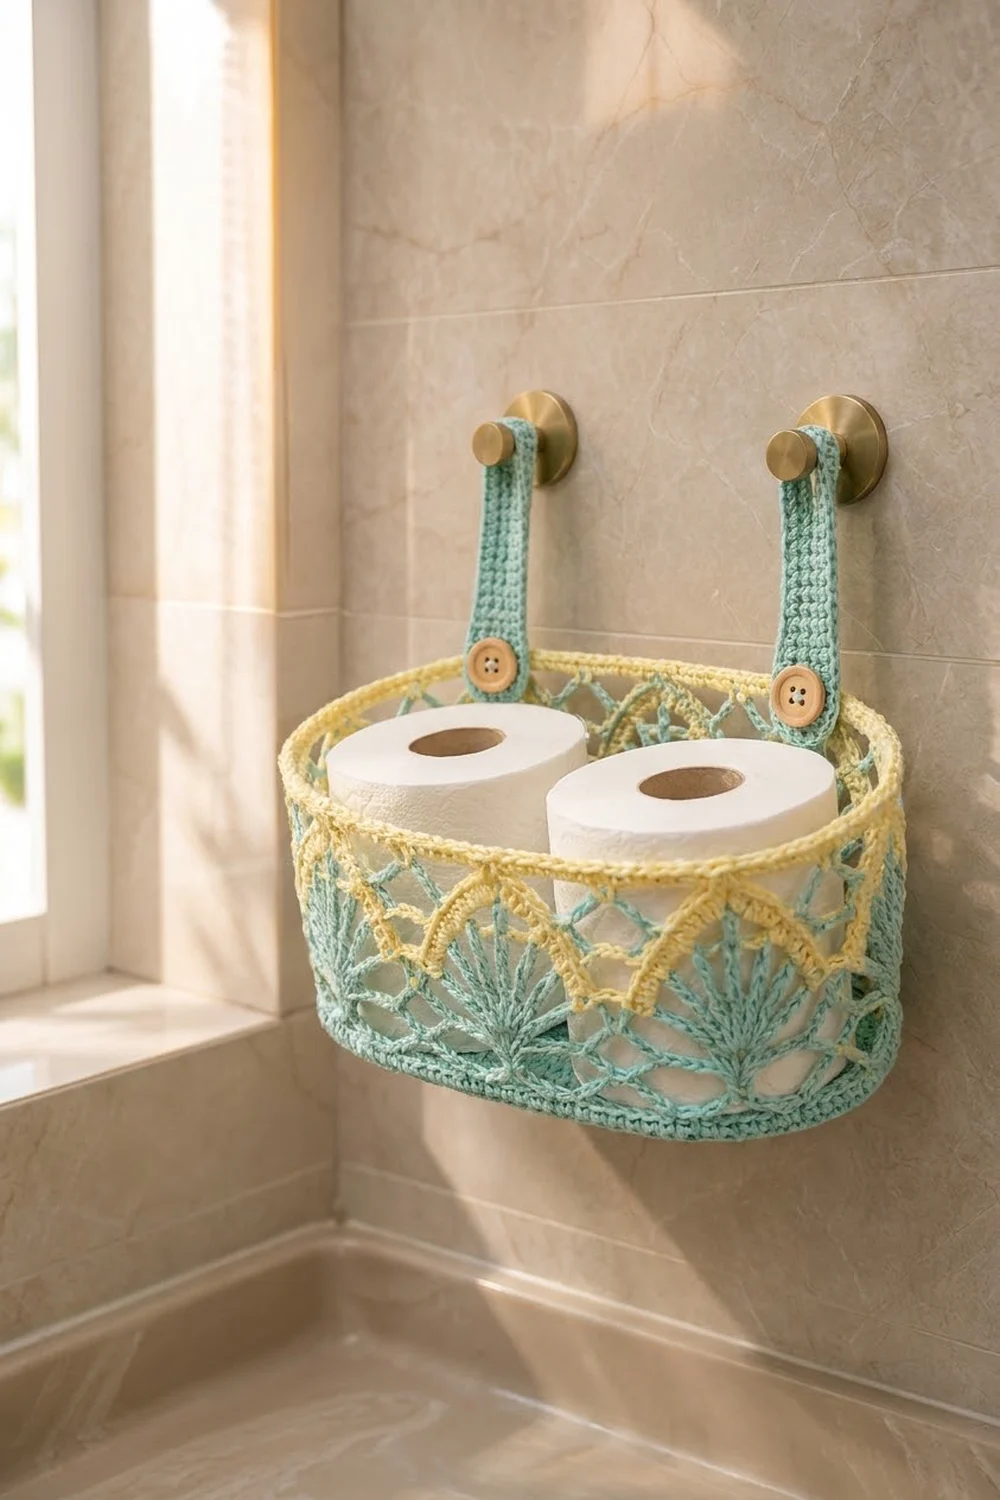
This oval hanging basket mixes a sturdy solid base with lacy sides. The walls have two tiers of aqua seashell fans, each framed by a pointed yellow arch, and a solid yellow rim at the top. Two button-trimmed straps let the basket hang from wall hooks, so it works well as a bathroom toilet paper holder.
The colors are a soft aqua and a pale butter yellow. They give the basket a fresh, beachy look against tile or wood. Because the base and rim are solid, the basket keeps its shape even though the middle of the wall is open lace.
The pattern uses US crochet terms. The finished basket measures about 10.75 in long × 5 in deep × 4.75 in tall (27.3 × 12.7 × 12.1 cm). It holds two standard toilet paper rolls side by side.
Construction is simple. You crochet an oval base in rounds, then work the walls straight up from the base without turning. You add the yellow arches and finish with the yellow rim. Last, you crochet two straps and attach them with buttons.
Finished Size and Construction
- Finished size: 10.75 in × 5 in × 4.75 in (27.3 × 12.7 × 12.1 cm)
- Skill level: Intermediate
- Terminology: US crochet terms
- Yarn weight: DK (3), 100% cotton
- Hook: 4.0 mm (G-6)
- Number of pieces: 3 crocheted pieces (1 basket body, 2 straps) plus 2 buttons
- Layout: One oval basket with both straps on the back long side, 6 in (15.2 cm) apart center to center
- Base size: 10.75 × 5 in (27.3 × 12.7 cm)
- Wall height before rim: about 3.5 in (8.9 cm) at the arch tips
- Rim depth: about 1.25 in (3.2 cm)
- Strap size: about 1.5 × 8.25 in (3.8 × 21.0 cm)
Materials
Use a smooth mercerized or combed cotton in DK weight. Cotton holds its shape, shows the lace clearly and stands up to a humid bathroom. Avoid soft, splitty acrylic, because the basket will sag.
- Color A, aqua: 80 g / about 200 m (219 yd)
- Color B, pale yellow: 40 g / about 100 m (109 yd)
You will also need:
– 4.0 mm (G-6) crochet hook
– 2 wooden four-hole buttons, 0.75 in (1.9 cm)
– 2 wall hooks with screws and anchors
– Tapestry needle
– Stitch markers
– Sewing needle and matching thread
– Blocking mat and rust-proof pins
The quantities above include a margin of about 15% for your gauge swatch and weaving in ends.
Abbreviations (US Terms)
- ch – chain
- sl st – slip stitch
- sc – single crochet
- hdc – half double crochet
- dc – double crochet
- tr – treble crochet
- sc2tog – single crochet 2 together
- BLO – back loop only
- sp – space
- sk – skip
- st(s) – stitch(es)
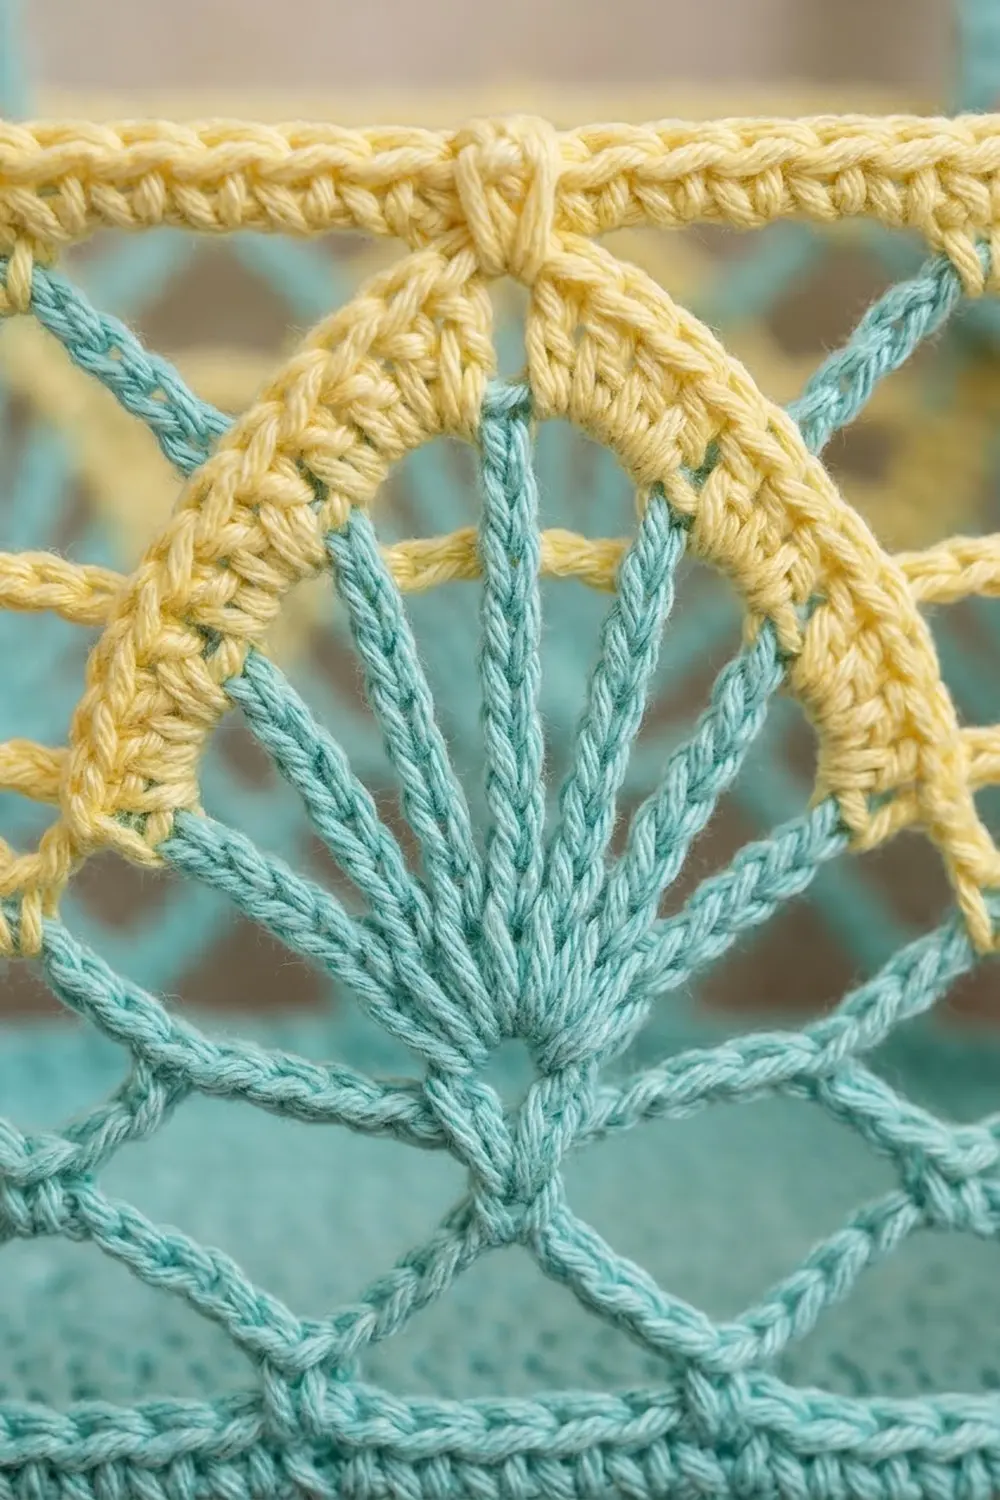
Fan (special stitch): 9 tr worked into the same stitch. The tr open upward like the ribs of a shell.
Valley: the low point where two yellow arches meet.
Gauge and Checkpoints
- Dc gauge: 16 dc × 8 rounds = 4 in (10.2 cm)
- Sc gauge (straps): 18 sc × 20 rows = 4 in (10.2 cm)
Work the base first and use it as your swatch. It is the part of the basket that sets every later count.
- After Rnd 1: 6.75 × 1 in (17.1 × 2.5 cm)
- After Rnd 3: 8.75 × 3 in (22.2 × 7.6 cm)
- After Rnd 5: 10.75 × 5 in (27.3 × 12.7 cm)
- After Rnd 7: circumference 27 in (68.6 cm)
- After Rnd 9: wall height 1.75 in (4.4 cm)
- After Rnd 12: wall height 3.5 in (8.9 cm)
- After Rnd 16: wall height 4.75 in (12.1 cm)
If the base is more than 0.25 in (0.6 cm) too big, change to a 3.75 mm hook. If it is too small, change to a 4.5 mm hook. Don’t add or remove stitches to fix the size. The lace needs exactly 108 stitches.
Basket Body
Base (Color A)
Start each round with ch 2. This ch 2 does not count as a stitch. Join each round with a sl st to the first dc.
Foundation: Ch 27.
Rnd 1: Work 5 dc in the 3rd ch from the hook. Dc in the next 23 ch. Work 6 dc in the last ch. Rotate the work and dc in the free loops of the next 23 ch. Work 1 dc in the same ch as the first 5 dc. Join. (58 dc: two ends of 6 dc each and two straight sides of 23 dc each.)
Each round starts partway around end 1. The last stitches of each round finish end 1.
Rnd 2: 2 dc in each of the next 5 sts. Dc in the next 23. 2 dc in each of the next 6. Dc in the next 23. 2 dc in the last st. (70 dc; each end has 12.)
Rnd 3: Dc in the next st, 2 dc in the next st 5 times. Dc in the next 23. Dc in the next st, 2 dc in the next st 6 times. Dc in the next 23. Dc in the next st, 2 dc in the last st. (82 dc; each end has 18.)
Rnd 4: Dc in the next 2, 2 dc in the next 5 times. Dc in the next 23. Dc in the next 2, 2 dc in the next 6 times. Dc in the next 23. Dc in the next 2, 2 dc in the last st. (94 dc; each end has 24.)
Rnd 5: Dc in the next 3, 2 dc in the next 5 times. Dc in the next 23. Dc in the next 3, 2 dc in the next 6 times. Dc in the next 23. Dc in the next 3, 2 dc in the last st. (106 dc; each end has 30.)
The base should now lie flat and measure 10.75 × 5 in (27.3 × 12.7 cm).
Turning Ridge and Solid Band (Color A)
Rnd 6 (conversion): Ch 1. Working in the BLO, sc in the next 10, 2 sc in the next, sc in the next 14. Sc in the next 23. Sc in the next 14, 2 sc in the next, sc in the next 15. Sc in the next 23. Sc in the last 5. Join.
Count: 106 sc worked 1 per st + 2 added = 108 sc.
Working in the back loops leaves a ridge that turns the wall upward. The 2 added stitches give 108, which divides evenly into 9 lace repeats of 12 stitches.
Rnd 7: Ch 2. Dc in each st around. Join. (108 dc)
Lower Fan Tier
Rnd 8 (A): Ch 1. Sc in the first st, sk 5, Fan in the next st, sk 5. Sc in the next st, sk 5, Fan in the next st, sk 5 8 times. Join. Fasten off A.
(9 Fans and 9 sc = 90 sts. Each repeat uses 12 base stitches, and 12 × 9 = 108.)
Rnd 9 (B): Join B with a sc in the first tr of any Fan. Sc in the next 3 tr. In the next tr, work (sc, ch 2, sc). Sc in the next 4 tr. Sk the sc. Sc in the next 4 tr, (sc, ch 2, sc) in the next tr, sc in the next 4 tr, sk the sc 8 times. Join. Fasten off B.
(90 sc and 9 ch-2 tip spaces. Each arch has 10 sc.)
Each Fan now has a pointed yellow arch over it. The skipped sc make a sharp valley between arches.
Upper Net and Fan Tier
Rnd 10 (A): Join A with a sc in any ch-2 tip space. Ch 5. Sc in the valley, between the last sc of this arch and the first sc of the next arch. Ch 5. Sc in the next tip space. Repeat around, ending with ch 5 and a join to the first sc instead of the last sc.
(18 sc and 18 ch-5 spaces.)
Rnd 11 (A): Sl st in the next 3 ch. Ch 1. Sc in the ch-5 space, ch 2, Fan in the next valley sc, ch 2, sc in the next ch-5 space, ch 5. Repeat 9 times in total, skipping each tip sc under its ch 5. Join to the first sc. Fasten off A.
(9 Fans, 18 sc, 18 ch-2 spaces and 9 ch-5 spaces.)
The upper Fans sit over the valleys, between the lower arches, just as in the photo.
Rnd 12 (B): Join B with a sc in the first tr of any Fan. Sc in the next 3 tr. Work (sc, ch 2, sc) in the next tr. Sc in the next 4 tr. Ch 3, sc in the next ch-5 space, ch 3. Sc in the next 4 tr, (sc, ch 2, sc) in the next tr, sc in the next 4 tr, ch 3, sc in the next ch-5 space, ch 3 8 times. Join.
(99 sc, 9 ch-2 tip spaces and 18 ch-3 spaces.)
Check the wall: it should measure 3.5 in (8.9 cm) from the ridge to the arch tips.
Make All Pieces
- Color A: 1 basket body (base and aqua lace rounds) and 2 straps
- Color B: the arch rounds and rim of the body (worked in place)
Here is the layout, viewed from above:
        [Strap]          [Strap]
           |   6 in apart   |
   (======== back long side =========)
   (                                 )
   (         oval basket body        )
   (                                 )
   (======== front long side ========)
Straps (make 2, Color A)
Ch 8.
Row 1: Sc in the 2nd ch from the hook and in each ch across. (7 sc)
Rows 2–36: Ch 1, turn. Sc in each st. (7 sc)
Row 37: Ch 1, turn. Sc in the next 2 sts, ch 3, sk 3, sc in the next 2 sts. (4 sc and 1 ch-3 space)
Row 38: Ch 1, turn. Sc in 2, 3 sc in the ch-3 space, sc in 2. (7 sc)
Rows 39–40: Ch 1, turn. Sc in each st. (7 sc)
Row 41: Ch 1, turn. Sc2tog, sc in the next 3, sc2tog. (5 sc) This rounds off the hook end.
Edging: Ch 1. Sc evenly around the whole strap, working 3 sc at each corner. Join and fasten off.
The finished strap measures 1.5 × 8.25 in (3.8 × 21.0 cm). The hole slips over a wall hook up to 0.75 in (1.9 cm) wide.
Joining
The straps are sewn to the rim, so finish the rim and block the basket before you attach them.
- Fold the basket flat and find the center of the back long side. Mark a point 3 in (7.6 cm) to each side of it. The straps will be 6 in (15.2 cm) apart, center to center.
- Lay the bottom end of a strap (the end without the hole) on the outside of the rim, so it overlaps 1.5 in (3.8 cm). Line up the strap’s 7 sc with 7 rim stitches, 1 stitch to 1 stitch.
- Whipstitch both side edges and the bottom edge of the strap to the rim using Color A. Keep the stitches firm but not tight, so the rim doesn’t pucker.
- Sew a button through the strap and the rim, centered 0.75 in (1.9 cm) above the strap’s bottom edge. Pass the thread through each hole 3 times so it can carry the weight.
- Checkpoint: Both straps should stand 6.75 in (17.1 cm) above the rim, measured to the center of each hole.
Border (Rim, Color B)
The rim uses sc and hdc at the same gauge as the base: 108 sts = 27 in (68.6 cm).
Rnd 13: Sl st in the next 4 sc and into the tip space. Ch 1. 3 sc in the tip space, ch 4, tr in the next valley sc (the sc worked into the ch-5 space), ch 4. Repeat 9 times. Join.
(27 sc, 9 tr and 18 ch-4 spaces.)
Rnd 14: Ch 1. Sc in the next 3 sc, 4 sc in the ch-4 space, sc in the tr, 4 sc in the next ch-4 space. Repeat 9 times. Join.
(108 sc: 3 + 4 + 1 + 4 = 12 per repeat, × 9 = 108.)
Rnd 15: Ch 2 (does not count). Hdc in each st. Join. (108 hdc)
Rnd 16: Ch 1. Sc in each st. Join. (108 sc) Fasten off and weave in the ends.
Why the math works: Rnd 14 brings the count back to exactly 108, the same as Rnd 7. The rim is therefore the same size as the base wall, and the basket stays straight-sided. The 108 rim stitches sit in the same places as the base: 31 across each curved end and 23 along each long side, the same split as Rnd 6.
Final Blocking
- Soak the basket in cool water for 10 minutes. Gently press out the water. Do not wring.
- Roll the basket in a towel to remove the extra moisture.
- Stuff it firmly with a folded towel or two toilet paper rolls wrapped in plastic.
- Shape the oval to 10.75 × 5 in (27.3 × 12.7 cm), with the walls straight up.
- Pin each Fan open and pin each arch tip up to a sharp point.
- Let it dry completely, which takes about 24 hours.
- Block the straps flat to 1.5 × 8.25 in (3.8 × 21.0 cm).
Final Quality-Control Checklist
- The base lies flat and measures 10.75 × 5 in (27.3 × 12.7 cm).
- Rnds 6, 7, 14, 15 and 16 each have 108 sts.
- There are 9 lower Fans and 9 upper Fans, and the upper ones sit over the valleys.
- Every arch has a sharp ch-2 tip.
- The rim is level all the way around.
- The straps are 6 in (15.2 cm) apart and both buttons are sewn on securely.
- All ends are woven in at least 1.5 in (3.8 cm).
Troubleshooting
- The base ruffles: Your tension is loose or the increases are uneven. Go down a hook size.
- The base cups: Check that each end grows by exactly 6 dc per round.
- The Fans are crowded: Check that you skipped 5 sts on each side of every Fan in Rnd 8.
- The arches are rounded instead of pointed: Work the (sc, ch 2, sc) in the 5th tr, not between stitches.
- The rim wavers: Recount Rnd 14. It must have exactly 108 sts.
- The basket tilts when hung: Re-measure the strap spacing and center it on the back side.
Care
Hand wash in cool water and lay flat to dry, stuffed so it keeps its shape. Don’t tumble dry.
Final Notes
The measurements build on each other. A base of 10.75 × 5 in (27.3 × 12.7 cm) gives a wall of 27 in (68.6 cm) around. That gives 108 stitches, which is 9 lace repeats, and Rnd 14 returns to the same 108 stitches. The walls rise to 4.75 in (12.1 cm), and two 8.25 in (21.0 cm) straps hang the basket. If you check your gauge on the base, everything after it will fit.
Happy crocheting!