

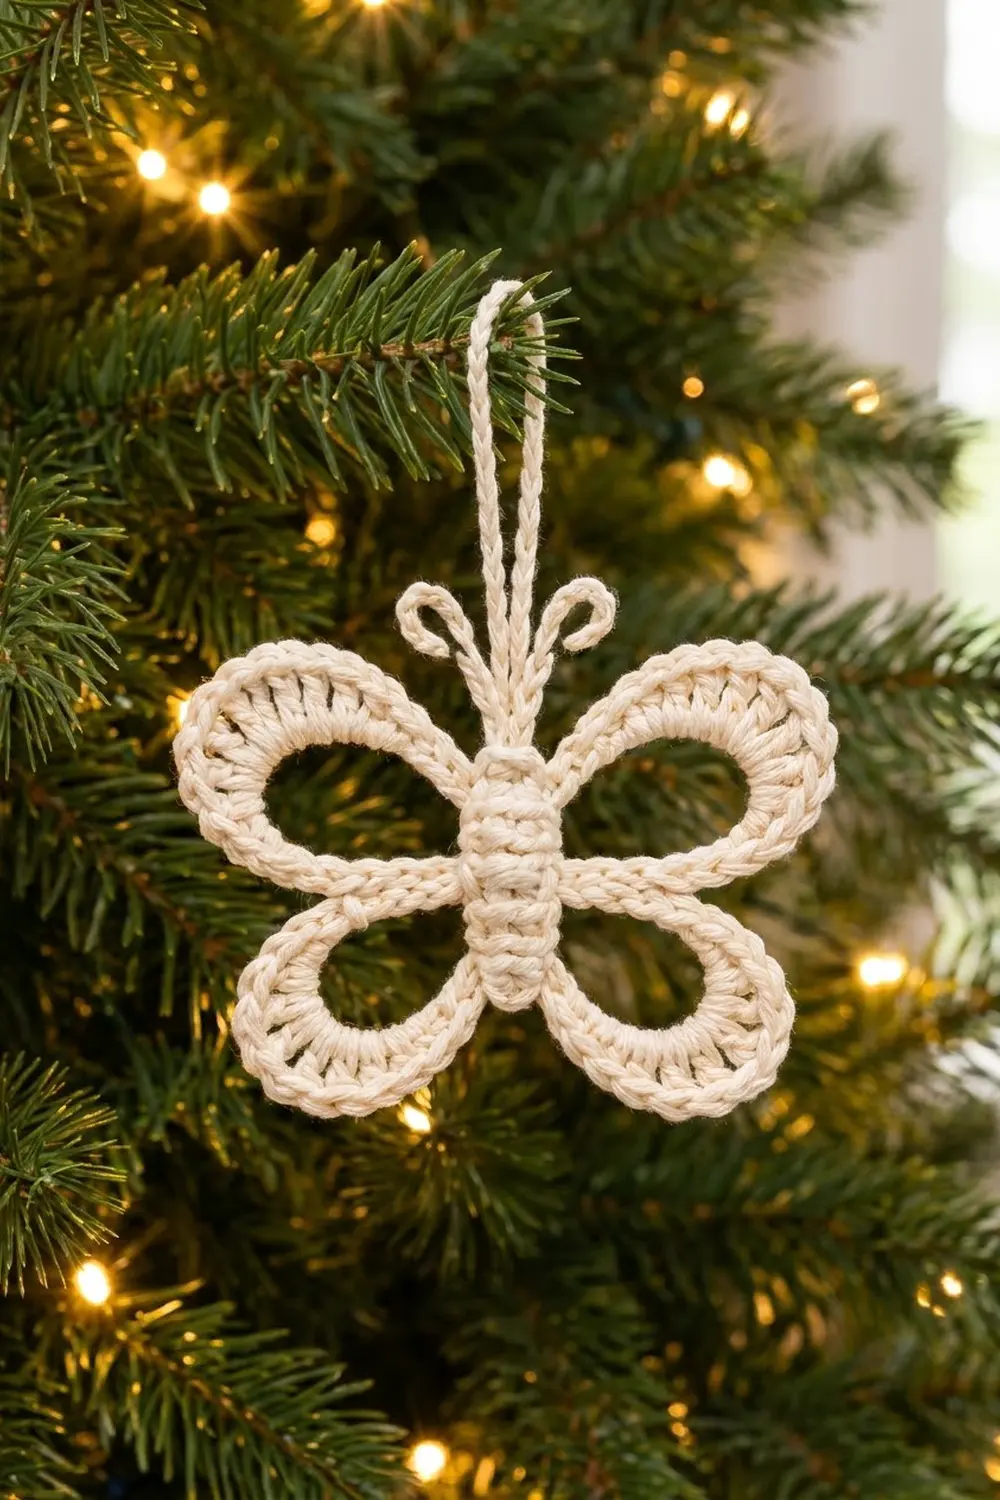
The Snowlace Butterfly is a small, airy ornament worked in one continuous piece of cream cotton. It has four open, ring-shaped wings around a ribbed body, two antennae with curled tips, and a slim hanging loop, so it’s ready for the tree as soon as you fasten off.
All the texture comes from simple stitches. The body is a narrow strip of back-loop single crochet, which makes neat horizontal ridges. Each wing begins as a bare chain loop, and an edging of single and double crochet then wraps that loop. The edging leaves the center of each wing open, like lace.
This pattern uses US crochet terms. The finished butterfly measures 4 in (10.2 cm) wide by 3 in (7.6 cm) tall across the wings. With the antennae it is 3.75 in (9.5 cm) tall, and the hanging loop adds another 2.5 in (6.4 cm).
Construction runs in four short stages: crochet the ribbed body, chain the four wing loops around it, work the wing edging back around all four loops, then add the antennae and hanging loop at the top center. The yarn is never cut until the very end.
Finished Size and Construction
- Finished size: 4 in (10.2 cm) wide × 3 in (7.6 cm) tall (wings only)
- Height with antennae: 3.75 in (9.5 cm)
- Hanging loop: 2.5 in (6.4 cm) tall when folded
- Skill level: Easy / advanced beginner
- Terminology: US crochet terms
- Yarn weight: Sport-weight (#2) mercerized cotton
- Hook: 3.0 mm (US C/2 or D/3)
- Number of pieces: 1
- Layout: Single motif; no assembly
- Body size: 0.55 in (1.4 cm) wide × 1.7 in (4.3 cm) tall
- Size before wing edging: 3.5 in (8.9 cm) × 2.5 in (6.4 cm)
- Wing edging depth: 0.25 in (0.6 cm) on each outer edge
Materials
Yarn: Choose a smooth, mercerized cotton in sport weight. Cotton holds the open wing shape well after blocking and shows the stitch definition clearly. Avoid fuzzy or very soft acrylics, because the wings will droop.
- Cream / ivory: 10 g, about 34 m (37 yd)
This quantity includes a margin of about 20 percent for your gauge swatch and tails. One ornament uses roughly 8 g, so a 50 g ball will make five butterflies.
Tools:
- 3.0 mm (US C/2 or D/3) crochet hook
- Tapestry needle
- Scissors
- 2 stitch markers
- Rustproof pins and a foam blocking mat
- Spray bottle with water; spray starch (optional)
Abbreviations (US Terms)
- ch – chain
- sl st – slip stitch
- sc – single crochet
- dc – double crochet
- blo – back loop only
- st(s) – stitch(es)
- sp – space
- row-end – the side edge of a row, where you work into the turning chain or side of the end stitch
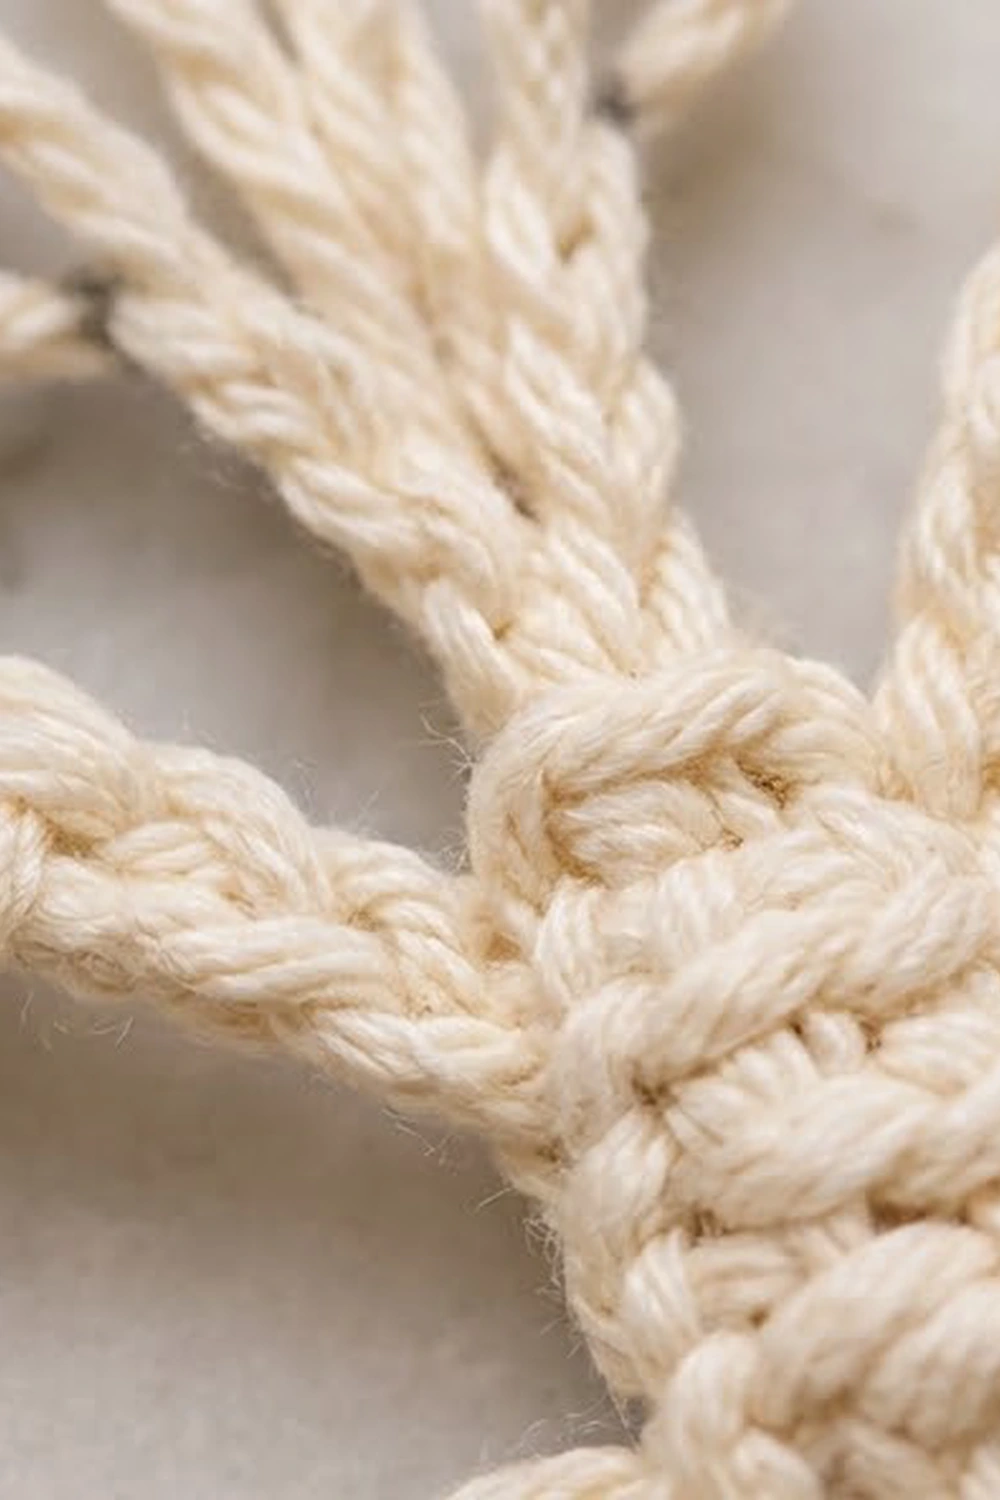
Special technique – working into a chain space: Insert the hook under the whole chain loop instead of into individual chains. The new stitches wrap around the chain and slide along it, so you can pack them tightly.
Gauge and Checkpoints
Gauge: 11 sc × 12 rows = 2 in (5.1 cm) in back-loop single crochet, and 12 ch = 2 in (5.1 cm).
Gauge matters here because the size of each wing comes straight from the chain lengths. Make one complete butterfly as your test piece before making a set, and measure it at three checkpoints:
- After the body (Row 10): 0.55 in (1.4 cm) wide × 1.7 in (4.3 cm) tall
- After the wing loops: about 3.5 in (8.9 cm) wide × 2.5 in (6.4 cm) tall, gently laid flat
- After the wing edging: 4 in (10.2 cm) × 3 in (7.6 cm) before blocking, within 0.125 in (0.3 cm)
If the body is too big, switch to a 2.75 mm hook. If it’s too small, go up to a 3.25 mm hook. Your chain gauge matters most: 24 chains should measure 4 in (10.2 cm) when relaxed. If your chains are tight, use a hook one size larger just for the wing loops.
Pattern
Part 1 – Body
Leave a 6 in (15.2 cm) tail.
Row 1: Ch 4, sc in 2nd ch from hook and in each of next 2 ch. (3 sc)
Rows 2–10: Ch 1, turn, sc blo in each st across. (3 sc per row)
Working in back loops makes a raised ridge on every row. Together the ridges form the segmented look of the body.
Checkpoint: The body measures 0.55 in (1.4 cm) × 1.7 in (4.3 cm), with 10 row-ends on each side. Do not fasten off.
Hold the body upright with Row 10 at the top. Your hook is at the top left corner (the end of Row 10). Place one marker in row-end 6 on the left side and one in row-end 6 on the right side. These are the anchors where the upper and lower wings meet.
Part 2 – Wing Loops
Do not twist the chains as you work. Each loop should lie flat beside the body.
Upper left wing loop: Ch 24, sl st into marked row-end 6 on the left side. (one ch-24 loop)
Lower left wing loop: Ch 18, sl st into row-end 1 on the left side (bottom left corner). (one ch-18 loop)
Travel across the bottom: Working in the free loops of the foundation chain, sl st in each of the 3 sts. (3 sl sts; you are now at the bottom right corner)
Lower right wing loop: Ch 18, sl st into marked row-end 6 on the right side.
Upper right wing loop: Ch 24, sl st into row-end 10 on the right side (top right corner).
Checkpoint: You have four bare loops (two ch-24 and two ch-18) and the piece looks like a simple chain-outline butterfly. Laid flat, it should measure about 3.5 in (8.9 cm) × 2.5 in (6.4 cm). Each ch-24 loop is 4 in (10.2 cm) of chain and each ch-18 loop is 3 in (7.6 cm).
The chain loops count as the foundation of the wings. Remove the markers, or move them up into the sl sts at row-end 6 if that helps you see the anchors.
Part 3 – Wing Edging
This round wraps every chain loop. A few sc near each anchor keep the inner wing edges flat and plain, and the dc in the middle make the fan around the outer curve. Work every stitch into the chain space (under the whole loop), not into individual chains.
You are now at the top right corner and will work back around the butterfly in the opposite direction.
Upper right wing: In the ch-24 sp work 4 sc, 24 dc, 4 sc; sl st into row-end 6 on the right side. (32 sts)
Lower right wing: In the ch-18 sp work 3 sc, 18 dc, 3 sc; sl st into row-end 1 on the right side. (24 sts)
Travel across the bottom: Sl st in each of the 3 sl sts made earlier along the bottom, inserting the hook under the top 2 loops of each. (3 sl sts; you are now at the bottom left corner)
Lower left wing: In the ch-18 sp work 3 sc, 18 dc, 3 sc; sl st into row-end 6 on the left side. (24 sts)
Upper left wing: In the ch-24 sp work 4 sc, 24 dc, 4 sc; sl st into row-end 10 on the left side (top left corner). (32 sts)
Edging total: 32 + 24 + 24 + 32 = 112 sts (84 dc and 28 sc), not counting slip stitches.
Push the stitches along each loop as you work so they sit snugly side by side. The dc fan will cup a little until it’s blocked, which is normal.
Part 4 – Antennae and Hanging Loop
Move to center: Sl st in the 1st and 2nd sts of Row 10. Your hook is now in the center top st.
First antenna: Ch 9, sl st in 4th ch from hook to form a small curl. Sl st in each of the remaining 5 ch back down to the body, then sl st into the same center st.
Second antenna: Repeat the first antenna, starting from the same center st.
Hanging loop: Ch 30, sl st into the same center st. Fasten off, leaving an 8 in (20.3 cm) tail.
The 30-chain loop is 5 in (12.7 cm) of chain, which folds into a 2.5 in (6.4 cm) hanger. Each antenna stands about 0.75 in (1.9 cm) above the body.
Finishing the body: Thread the long tail onto the needle. Weave it down through the center of the body and back up once, pulling just enough to round the body slightly so it looks padded. Weave in the starting tail along the bottom edge, then trim both tails.
Border
On this ornament, the wing edging in Part 3 is the border. Here is how its counts work.
Border gauge: 4 edging sts for every 3 chains in the loop, at a depth of 0.25 in (0.6 cm).
Per-wing counts:
- Upper wings: 24 ch × 4/3 = 32 sts, split into 4 sc + 24 dc + 4 sc
- Lower wings: 18 ch × 4/3 = 24 sts, split into 3 sc + 18 dc + 3 sc
Why the math works: A stitch worked into a chain space takes up slightly less length than a chain itself, so a 4:3 ratio covers the loop completely without stretching it or ruffling. In both wing sizes, the dc count equals the chain count. That gives the dc fan exactly one stitch per chain around the outer curve, where the edge is longest, while the sc at each end take up the extra stitches where the loop narrows toward the body.
Adding 0.25 in (0.6 cm) of edging to each outer side takes the width from 3.5 in (8.9 cm) to 4 in (10.2 cm) and the height from 2.5 in (6.4 cm) to 3 in (7.6 cm).
No stitches are added at the anchor points. The slip stitches into the row-ends only connect the wings and are not counted in the totals.
Final Blocking
- Soak the butterfly in cool water for 5 minutes, then press out the water in a towel. Don’t wring it.
- Lay it right side up on the blocking mat.
- Pin the body straight first, 1.7 in (4.3 cm) tall.
- Open each upper wing into a rounded teardrop shape. Pin at the outer tip and at two points along the dc fan.
- Open each lower wing the same way, keeping it slightly smaller than the upper wing.
- Check the overall size: 4 in (10.2 cm) wide × 3 in (7.6 cm) tall. Compare the left and right sides with a ruler.
- Shape each antenna curl with a pin through the center of the small loop.
- For extra stiffness, mist with spray starch.
- Let it dry completely (about 6–8 hours) before removing the pins.
Final Quality-Control Checklist
- [ ] The body has 10 rows with clear ridges and measures 0.55 in (1.4 cm) × 1.7 in (4.3 cm).
- [ ] Each upper wing has 32 edging sts (4 sc, 24 dc, 4 sc).
- [ ] Each lower wing has 24 edging sts (3 sc, 18 dc, 3 sc).
- [ ] No chain loop is twisted.
- [ ] The left and right wings mirror each other in size.
- [ ] Both antennae curl outward and are the same length.
- [ ] The hanging loop is centered between the antennae.
- [ ] The finished size is 4 in (10.2 cm) × 3 in (7.6 cm).
- [ ] All tails are woven in and nothing is visible from the front.
Troubleshooting
The wings ruffle or wave: The chain loops are too short for your stitches. Chain more loosely or use a hook 0.25 mm larger for the chains only.
The chain shows between the dc: The stitches are too spread out. Slide them together along the loop as you work.
One side is bigger than the other: Count the chains in each loop. Being off by even 2 chains makes a visible difference.
The body leans to one side: Make sure you turn after every row and work into the back loops on every row.
The antennae flop: Pull the slip stitches firm along the stem, and starch the antennae while blocking.
The hanging loop twists: Before the final slip stitch, let the chain hang and untwist on its own.
Care
Hand wash in cool water, lay flat to dry, and re-pin the wings if needed. Store flat or hanging, away from damp, so the cotton keeps its shape.
Final Notes
The measurement chain is short and easy to check: a 3-stitch, 10-row body measuring 0.55 in (1.4 cm) × 1.7 in (4.3 cm); four chain loops (24, 18, 18, 24) bringing it to 3.5 in (8.9 cm) × 2.5 in (6.4 cm); and a 112-stitch edging at a 4:3 ratio that adds 0.25 in (0.6 cm) all around to finish at 4 in (10.2 cm) × 3 in (7.6 cm). If you check each stage, every butterfly in your set will match.
Happy crocheting!