

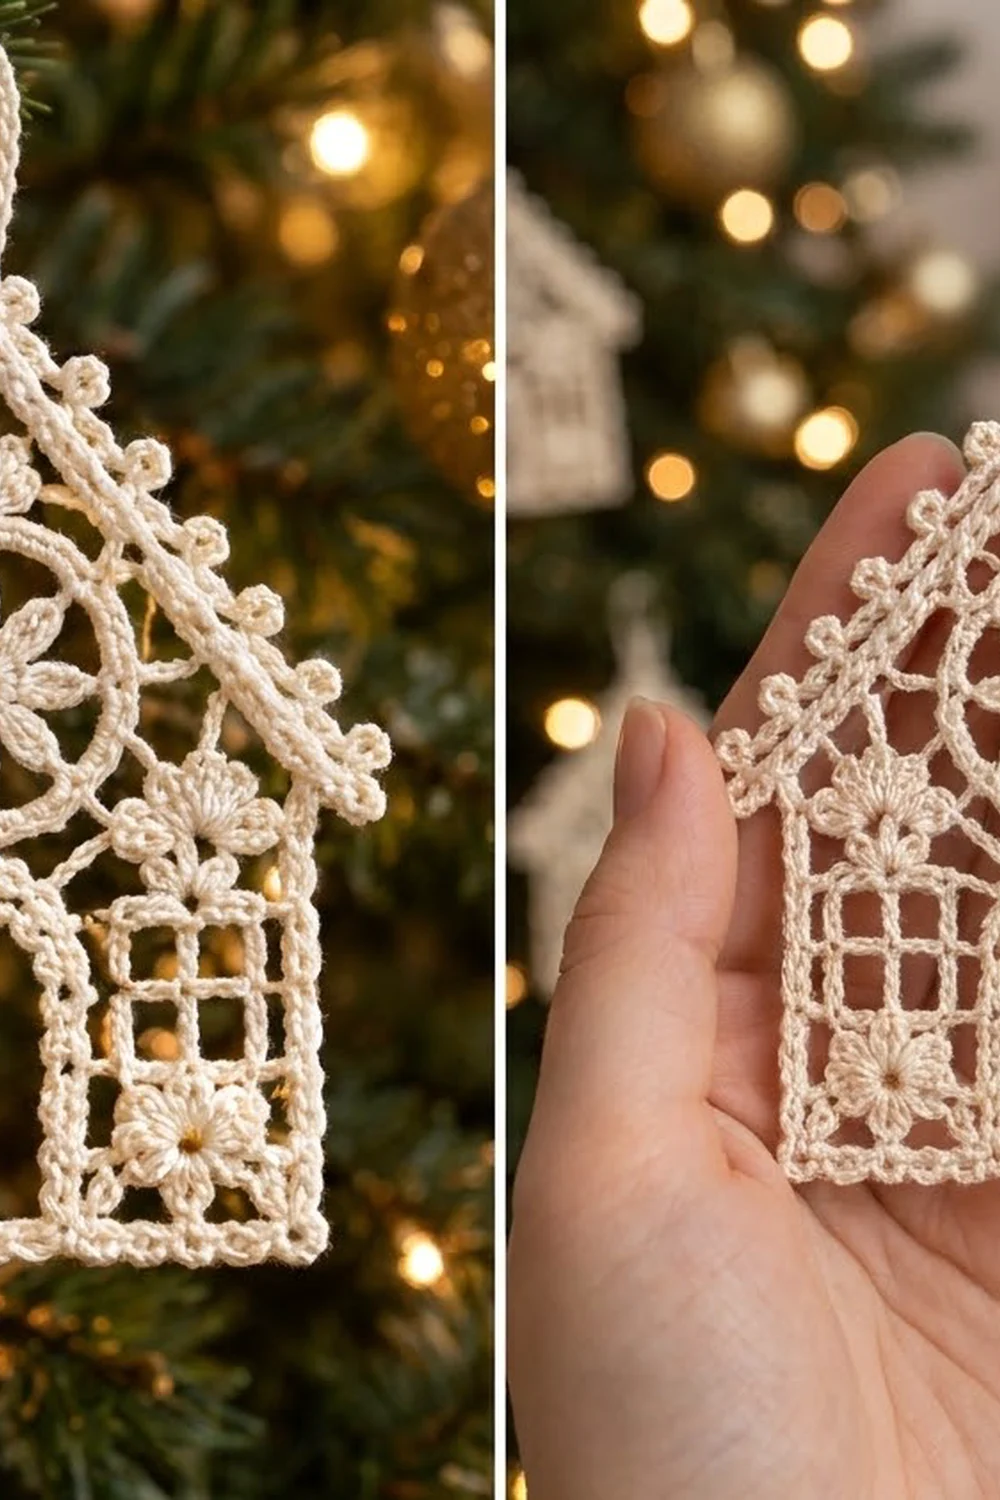
Snowlace Cottage is a small lace house made in cream thread. A round rose-window medallion fills the gable. Below it are an arched doorway, two square grid windows and small popcorn flowers. The roof is a crisp picot-trimmed band ending in tiny eaves, and an sc-covered loop at the peak lets the ornament hang straight on the tree.
The piece uses a single color, so the texture carries the design: open filet meshes, solid blocks and raised popcorns. It has the look of vintage thread lace, but every step uses standard stitches.
This pattern uses US crochet terms. The finished ornament measures 4 in (10.2 cm) wide across the walls, 4.5 in (11.4 cm) across the eaves and 5.5 in (14.0 cm) tall, not counting the 0.75 in (1.9 cm) hanging loop.
Construction overview: you make the medallion first. Then you work the house body in filet rows from the bottom up, splitting the walls around the door and joining the medallion in the last row. Next you chain the roof, work a dc band over that chain and join the medallion twice more. A picot border, the hanging loop and stiffening finish the ornament. The result is one piece with no sewing.
Finished Size and Construction
- Finished size: 4 in (10.2 cm) wide at the walls, 4.5 in (11.4 cm) at the eaves, 5.5 in (14.0 cm) tall, plus a 0.75 in (1.9 cm) loop
- Skill level: Intermediate
- Terminology: US
- Yarn weight: Size 10 cotton crochet thread (lace weight)
- Hook: 1.5 mm (US steel 7)
- Number of pieces: 1 finished ornament (the medallion is joined as you go)
- Layout: Single ornament, no assembly grid
- Piece size: 4 x 5.5 in (10.2 x 14.0 cm)
- Size before border: 3.75 x 5.2 in (9.5 x 13.2 cm)
- Border depth: 0.125 in (0.3 cm) on the walls and base; eave tabs extend 0.25 in (0.6 cm) beyond each wall
Materials
Use mercerized size 10 cotton thread. It gives clean stitch definition and takes stiffener well. Avoid fuzzy blends, because they blur the popcorns and window grids.
- Cream (ivory): about 8 g / 25 m (27 yd)
Tools:
- 1.5 mm (US steel 7) crochet hook
- Fine tapestry needle
- 3 locking stitch markers
- Fabric stiffener or heavy spray starch
- Blocking board, plastic wrap and rust-proof pins
- Small sharp scissors and a ruler
The quantity includes a margin of roughly 20% for a gauge test and weaving in ends.
Abbreviations (US Terms)
- ch: chain
- sl st: slip stitch
- sc: single crochet
- hdc: half double crochet
- dc: double crochet
- tr: treble crochet
- sk: skip
- sp: space
- st(s): stitch(es)
- RS / WS: right side / wrong side
Special stitches
- 3-tr cluster (cl): *Yo twice, insert hook in the st, pull up a loop, (yo, pull through 2) twice; repeat from * twice more in the same st, then yo and pull through all 4 loops on the hook. To begin a round, ch 3 and work a 2-tr cluster in the same way; this counts as the first cl.
- Popcorn (pc): Work 4 dc in the same place. Drop the loop, insert the hook front to back in the first dc, pick up the dropped loop and pull it through. Counts as 1 st.
- Drop-loop join (DJ): Remove the hook, insert it front to back in the named medallion st, pick up the dropped loop and pull it through. Adds no stitch.
- Picot: Ch 3, sl st in the 3rd ch from the hook.
Filet mesh units (each mesh is 3 sts: 2 fill sts + 1 dc post)
- B (block): Dc in the next 2 sts (or 2 dc in a ch-2 sp), dc in the next dc.
- O (open): Ch 2, sk 2 sts, dc in the next dc.
- P (popcorn mesh): Pc in the center of the mesh below, ch 1, dc in the next dc.
Every row starts with ch 3, which counts as the first dc post. A row of n meshes has 3n + 1 sts.
Gauge and Checkpoints
Gauge: 12 dc = 1 in (2.5 cm), and 4 filet rows = 1 in (2.5 cm). One mesh measures 0.25 x 0.25 in (0.6 x 0.6 cm).
Make the medallion first as your gauge test. Laid flat without stretching, it should measure 1.5 in (3.8 cm) across. Its 56-st outer ring sets the gable geometry, so don’t carry on until this measurement is right.
Checkpoints:
- Medallion: 1.5 in (3.8 cm) diameter
- Row 1: 3.75 in (9.5 cm) wide (15 meshes x 0.25 in)
- After Row 4: 1 in (2.5 cm) tall
- After Row 12: 3 in (7.6 cm) tall
- After Row 14: 1.9 in (4.8 cm) from the body top to the peak chain
- After the border: 4 in (10.2 cm) across the walls
Too big? Go down to a 1.25 mm hook. Too small? Go up to a 1.75 mm hook. Remake the medallion after any hook change. If the dc gauge is right but your rows run tall, wrap each yo more snugly.
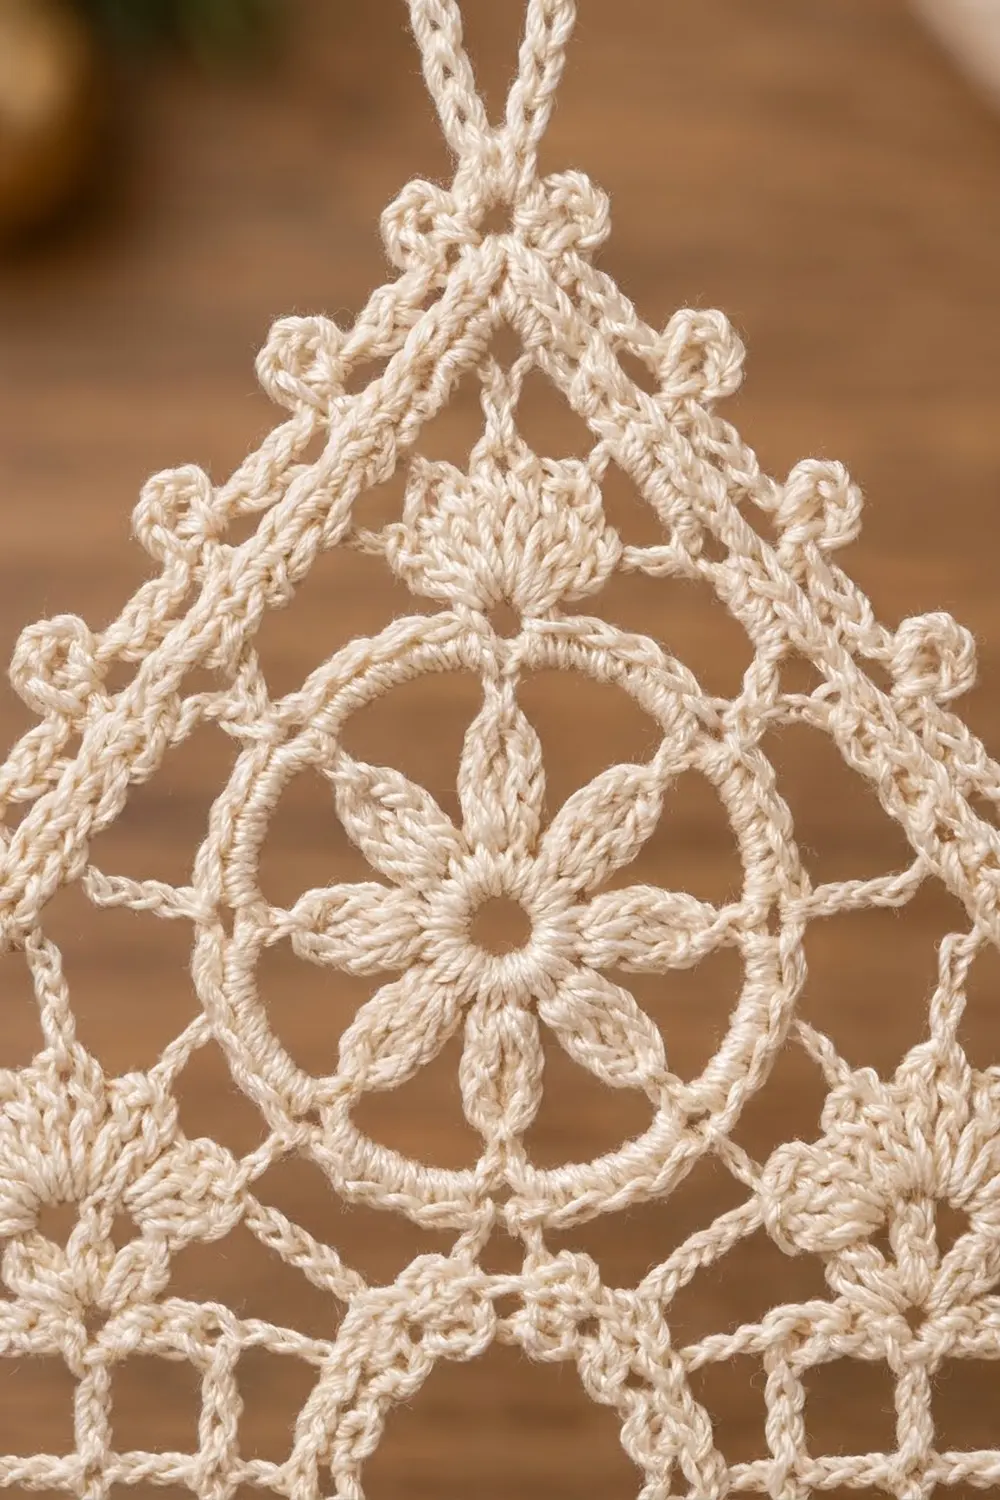
Rose Window Medallion
Rnd 1: Ch 4 and sl st to the first ch to form a ring. Ch 3 (counts as dc), work 15 dc in the ring, sl st to the top of the ch-3. (16 dc)
Rnd 2: Ch 3, 2-tr cl in the same st (counts as first cl), ch 4, sk 1 dc. *Cl in the next dc, ch 4, sk 1 dc; repeat from * 6 more times. Sl st to the top of the first cl. (8 cl, 8 ch-4 sps)
The clusters are the eight petals around an open center.
Rnd 3: Ch 1, sc in the top of the same cl, ch 5. *Sc in the top of the next cl, ch 5; repeat from * 6 more times. Sl st to the first sc. (8 sc, 8 ch-5 loops)
Rnd 4: Ch 3 (counts as dc), 6 dc in the next ch-5 loop. *Dc in the next sc, 6 dc in the next ch-5 loop; repeat from * 6 more times. Sl st to the top of the ch-3. (56 dc: 8 repeats x 7 dc)
Fasten off and weave in the ends.
Mark the join points:
- Mark any dc as the bottom, A.
- Count 21 dc clockwise from A and mark B.
- Count 21 dc counterclockwise from A and mark C.
Fourteen dc remain over the top between B and C. This places B and C 45 degrees down from the top, where the medallion touches the two roof slopes.
House Body
The body is 15 meshes wide and 12 rows tall.
Row 1 (RS, base band): Ch 48. Dc in the 4th ch from the hook (the skipped ch count as dc) and in each ch across. (46 sts = 15 B)
Walls and Door (Rows 2–8)
Count the sts of Row 1 from the end where Row 2 begins:
- Wall A: sts 1–19 (meshes 1–6)
- Door sill: sts 20–27, left unworked
- Wall B: sts 28–46 (meshes 10–15)
Wall A
- Row 2 (WS): Ch 3, turn. B, O, P, P, O, B. (19 sts) Leave the remaining sts unworked.
- Row 3: Ch 3, turn. B, O, P, P, O, B. (19 sts) The four popcorns now form a flower.
- Row 4 (window sill): Ch 3, turn. B six times. (19 sts)
- Rows 5–8: Ch 3, turn. B, O, O, O, O, B. (19 sts) This makes a 4 x 4 window grid.
Fasten off after Row 8. You will be at the door edge.
Wall B
With the WS facing, join the thread in st 28 of Row 1. Work Rows 2–8 exactly as for Wall A (19 sts per row; the sequence is symmetrical). Don’t fasten off.
Row 9 (RS, lintel): Ch 3, turn. Work B six times across Wall B. Ch 8 for the lintel, then dc in the top of the last dc of Wall A’s Row 8. Work B six times across Wall A. (19 + 8 ch + 1 dc + 18 = 46 sts)
Row 10 (WS): Ch 3, turn. B, O, P, P, O, B, O, O, O, B, O, P, P, O, B. (46 sts) Over the lintel, work the posts into the 3rd and 6th ch, under the top loop only.
Row 11: Ch 3, turn. Repeat Row 10. (46 sts) This completes the upper flowers.
Row 12 (WS, medallion join): Ch 3, turn. Work B seven times. For mesh 8: ch 1, DJ into medallion st A, ch 1, dc in the next dc. Work B seven times. (46 sts) Keep the medallion’s RS facing the same way as the body’s RS.
Checkpoint: the body measures 3.75 x 3 in (9.5 x 7.6 cm).
Door arch: With the RS facing, sl st to join at the top of Wall A’s door-side post. Working into the bottom loops of the lintel chain: tr, dc, hdc, sc, sc, hdc, dc, tr. Sl st at the top of Wall B’s door-side post. (8 sts) Fasten off.
The tall end stitches fill the door’s top corners, while the short middle stitches stay high. This rounds the 0.75 in (1.9 cm) wide opening into an arch.
Roof
Row 13 (roof chain): Don’t turn. Ch 65, then sl st in the top of the ch-3 at the opposite end of Row 12. Make sure the chain isn’t twisted. The 33rd ch is the peak, with 32 ch on each side.
Row 14 (roof band): Ch 1 (does not count). Working back along the chain:
- Dc in each of the next 32 ch, working a DJ into medallion st C after the 22nd dc.
- (Dc, ch 2, dc) in the peak ch.
- Dc in each of the next 32 ch, working a DJ into medallion st B after the 11th dc.
- Sl st in the top of the last dc of Row 12.
(66 dc + 1 ch-2 peak sp)
The 22nd dc from either corner sits 1.83 in (4.6 cm) up the slope. That is where a 1.5 in (3.8 cm) circle touches a 2.67 in (6.8 cm) slope above a 3.75 in (9.5 cm) base, so the medallion sits snugly without puckering.
Border
Border gauge: 12 sc = 1 in (2.5 cm). The picots add depth, not width.
Border Row 1 (roof and eaves): Ch 5, turn.
- First eave tab: Sc in the 2nd ch from the hook and in the next 3 ch. (4 sc)
- First slope: *Sc in the next 2 dc, picot; repeat from * 16 times. (32 sc, 16 picots)
- Peak: (Sc, ch 3, sc) in the ch-2 sp.
- Second slope: Repeat the first slope. (32 sc, 16 picots)
- Second eave tab: Ch 5, sc in the 2nd ch from the hook and in the next 3 ch, sl st in the last sc of the slope.
Totals for this row: 74 sc, 32 picots and 1 ch-3 peak loop.
Border Row 2 (walls and base): Keep the RS facing and continue down the wall.
- First side: *3 sc in the next row-end, picot; repeat from * 12 times. (36 sc, 12 picots)
- Corner: Ch 2.
- Base: Working into the foundation ch, sc in the first loop, then *picot, sc in the next 3 loops; repeat from * 15 times. (46 sc, 15 picots)
- Corner: Ch 2.
- Second side: Repeat the first side. (36 sc, 12 picots)
- Finish: Sl st at the base of the first eave tab.
Totals for this row: 118 sc, 39 picots and 2 ch-2 corners. Fasten off.
Why the math works:
- Base: 46 sc for 46 base sts keeps it at 3.75 in (9.5 cm).
- Sides: each side is 12 rows x 0.25 in = 3 in. At 12 sc per inch that needs 36 sc, which is 3 per row-end.
- Corners: the corners are ch-2 spaces, not side sts, so nothing is counted twice.
- Roof: each slope keeps 32 sc over 32 dc, so it stays 2.67 in (6.8 cm).
- Width: the sc and picots add 0.125 in (0.3 cm) per edge, taking 3.75 in (9.5 cm) to 4 in (10.2 cm).
Hanging loop: Join the thread in the peak ch-3 loop. Ch 18, sl st in the same loop, then work 24 sc into the ch-18 loop and sl st to the first sc. Fasten off. The loop stands 0.75 in (1.9 cm) tall.
Final Blocking
- Weave in all ends through the solid blocks, where they hide best.
- Soak the ornament in fabric stiffener and press out the excess in a towel.
- Cover the board with plastic wrap and draw a guide: a 4 in (10.2 cm) wide by 3.125 in (7.9 cm) tall rectangle, with the peak marked 2.375 in (6.0 cm) above its top edge.
- Pin the base corners first, then the wall tops, then the roof peak.
- Pin each roof slope perfectly straight, including the eave tabs.
- Open the door arch, square up each window grid and pin the medallion round.
- Pin out each picot with one pin.
- Let it dry for at least 24 hours before unpinning.
Final Quality-Control Checklist
- Walls are 4 in (10.2 cm) wide and total height is 5.5 in (14.0 cm)
- Both windows show a 4 x 4 open grid
- There are four 2 x 2 popcorn flowers, two below and two above the windows
- The door arch is smooth and symmetrical
- The medallion is joined at A, B and C and lies flat
- Both roof slopes are straight, with 16 picots each
- Each wall has 12 picots and the base has 15
- The hanging loop is centered at the peak
- All ends are secured and invisible from the RS
Troubleshooting
- The medallion buckles in the gable: It is larger than 1.5 in (3.8 cm). Remake it with a smaller hook.
- The roof sags between joins: The Row 13 chain is too loose. Rework it at a firmer tension.
- The popcorns pop to the WS: Push them through to the RS before blocking.
- The door corners look square: Make sure the end tr go into the first and last lintel ch.
- The walls flare at the border: Work 2 sc instead of 3 into any loose row-ends.
- It curls after drying: Re-wet it with stiffener and pin it flat again.
Care
Dust gently with a soft brush and store flat in tissue. If the ornament softens, re-stiffen and re-block it. Never machine wash.
Final Notes
Each stage sets up the next:
- A 1.5 in (3.8 cm) medallion fits the gable over a 3.75 in (9.5 cm) body.
- The body is 3 in (7.6 cm) tall, and the 32-st roof slopes bring the height to 5.2 in (13.2 cm).
- The border finishes the ornament at 4 x 5.5 in (10.2 x 14.0 cm), plus a 0.75 in (1.9 cm) loop.
Check each measurement as you go, and your cottage will block square and hang straight.
Happy crocheting!