
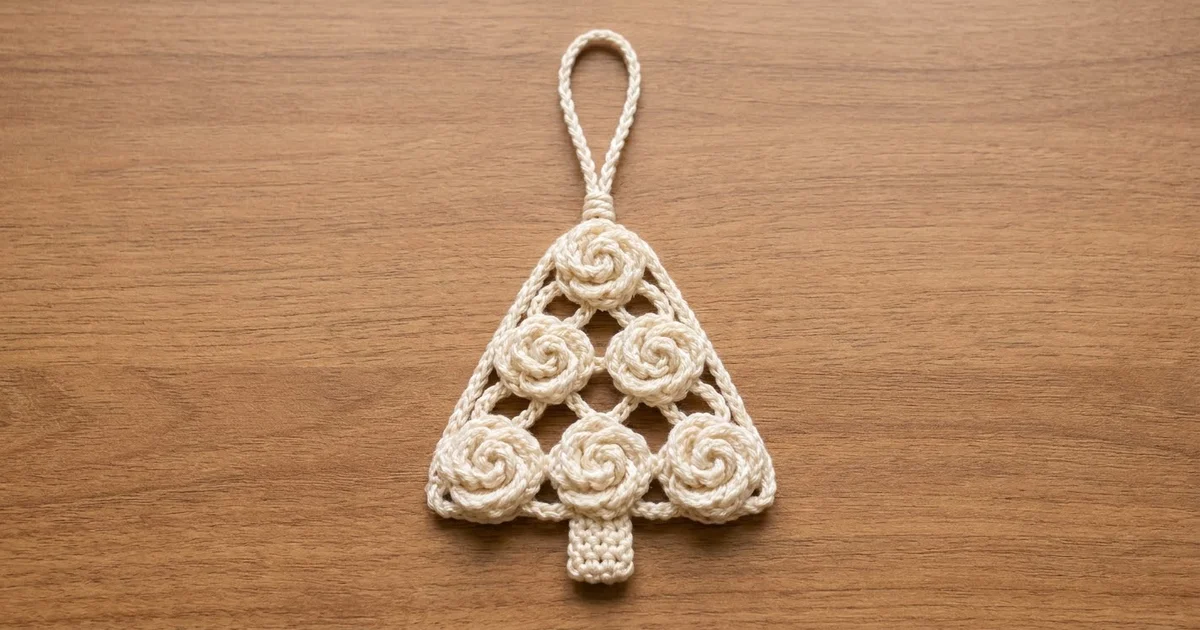
This little tree is made from six spiral rosettes in soft cream cotton. They are joined into a triangle with short doubled-chain bridges, framed by a corded outline, and finished with a small solid trunk and a hanging loop. The open “eye” shapes between the rosettes give it a light, lacy look, which suits a natural or Scandinavian-style tree.
The pattern uses one color, cream, and US crochet terms throughout. The finished ornament measures 4.25 in (10.8 cm) wide and 4.5 in (11.4 cm) tall from the top of the outline to the bottom of the trunk. The hanging loop adds 2.5 in (6.4 cm), so the full hanging height is 7 in (17.8 cm).
Construction is simple to follow. You make six small rosettes in continuous back-loop rounds, and the unused front loops form the swirl. The top rosette gets a slip-stitch rim. The other five are joined to their neighbors as you work their rims. A two-round border outlines the triangle, then the trunk is worked in rows from the bottom edge and the loop goes on top.
Everything below makes one finished ornament. You don’t need any extra assembly beyond what is described here.
Finished Size and Construction
- Finished size: 4.25 in (10.8 cm) wide x 4.5 in (11.4 cm) tall, plus a 2.5 in (6.4 cm) loop
- Skill level: Intermediate (join-as-you-go and counting stitch positions)
- Terminology: US crochet terms
- Yarn weight: Sport (#2) cotton
- Hook: 3.0 mm
- Number of pieces: 6 rosettes, joined as you make them, plus a trunk and loop worked directly onto the ornament
- Layout: Triangle of 1-2-3 rosettes (top to bottom)
- Piece size: each rosette is 1.1 in (2.8 cm) across after Rnd 5
- Size before border: 3.9 in (9.9 cm) wide x 3.5 in (8.9 cm) tall
- Border depth: about 0.2 in (0.5 cm) beyond the outer rosette edges
Materials
Pick a smooth, tightly plied sport-weight cotton. Mercerized cotton shows the swirl best and holds its shape on the tree. Fuzzy or loosely spun yarn will hide the spiral ridges.
- Cream: 20 g (about 62 m / 68 yd)
- 3.0 mm crochet hook
- 6 locking stitch markers
- Tapestry needle
- Scissors
- Blocking mat, rust-proof pins and a spray bottle
- Optional: fabric stiffener or diluted craft glue
The yarn quantity includes a margin of about 40 percent for swatching and weaving in ends. One ornament uses roughly 12-14 g.
Abbreviations (US Terms)
- ch: chain
- sl st: slip stitch
- sc: single crochet
- BLO: back loop only
- MR: magic ring
- st(s): stitch(es)
- sp: space
- RS: right side
- rep: repeat
Bridge (Br): Sl st in the current st of the working rosette. Ch 3, then sl st into the indicated st of the neighboring rosette (insert the hook from front to back under both loops). Ch 3, then sl st again into the same st of the working rosette. Each bridge makes a narrow doubled-chain loop that looks like an open eye between the two rosettes. Bridge chains are not counted in rim stitch totals.
Gauge and Checkpoints
Gauge in sc: 6 sts and 6 rnds = 1 in (2.5 cm) with a 3.0 mm hook. Border gauge along the outline: 15 sc = 2 in (5.1 cm).
Make one complete rosette first and use it as your swatch. Checkpoints:
- After Rnd 4: 1 in (2.5 cm) across
- After Rnd 5: 1.1 in (2.8 cm) across
- After joining all six: 3.9 in (9.9 cm) wide x 3.5 in (8.9 cm) tall
- After Border Rnd 2: 4.25 in (10.8 cm) wide x 3.75 in (9.5 cm) tall
- After the trunk: 4.5 in (11.4 cm) tall in total
If your rosette is larger than 1.1 in (2.8 cm), go down to a 2.75 mm hook. If it is smaller, go up to a 3.25 mm hook. Being off by only 0.1 in (0.3 cm) per rosette adds about 0.3 in (0.8 cm) across the bottom row, so check this before you make the rest.

Rosette (make 6)
Work in a continuous spiral and don’t join the rounds. Place a marker in the last st of each round and move it up as you go.
Rnd 1: Make a MR, 6 sc in ring. Pull the ring closed. (6 sts)
Rnd 2: Working in BLO, 2 sc in each st around. (12 sts)
Rnd 3: Working in BLO, (sc in next st, 2 sc in next st) 6 times. (18 sts)
Rnd 4: Working in BLO, (sc in next 2 sts, 2 sc in next st) 6 times. (24 sts)
The unused front loops of Rnds 1-3 now form a raised line that spirals out from the center. This is the swirl that makes each rosette look like a coiled cord.
Stitch positions: The next stitch you work into is st 1 of Rnd 5. Place a locking marker in it. Rnd 5 is worked through both loops, and its stitches are numbered 1-24 in the order you work them. When you lay a rosette out, turn it so st 1 points straight up. Then, with RS facing for a right-handed crocheter, the key positions are:
- st 1: top (12 o’clock)
- st 3: upper left
- st 5: left side of the outline
- st 7: left (9 o’clock)
- st 9: lower left
- st 11: down-left
- st 13: bottom (6 o’clock)
- st 15: down-right
- st 17: lower right
- st 19: right (3 o’clock)
- st 21: right side of the outline
- st 23: upper right
Each position is 15 degrees from the next. If you crochet left-handed, everything is mirrored, but the tree is symmetrical, so the result is the same.
Rnd 5 (rim, trim round): Sl st in each st around through both loops, then sl st into the first sl st to finish. Count: 24 sts worked 1 per existing st + 0 added = 24 sl sts. Fasten off, leaving a 4 in (10.2 cm) tail.
Only Rosette 1 gets a plain Rnd 5. Stop Rosettes 2-6 after Rnd 4, keep the working loop on a marker, and finish their Rnd 5 in the Joining section.
Make All Pieces
- Cream: 6 rosettes. Rosette 1 is worked through Rnd 5. Rosettes 2-6 are worked through Rnd 4, with their live loops held on markers.
Layout grid (R = rosette number):
        [R1]
     [R2]  [R3]
  [R4]  [R5]  [R6]
Lay the pieces on a flat surface with st 1 of every rosette pointing up. Leave about 0.3 in (0.8 cm) between neighbors. The centers sit 1.4 in (3.6 cm) apart in every direction.
Joining
You join the rosettes while working Rnd 5 of Rosettes 2-6. Work Rnd 5 exactly as written above (24 rim sl sts). When you reach a listed st, work a Bridge in it instead of a plain sl st. The Bridge’s first sl st counts as that rim stitch, so the rim stays at 24 sl sts.
Stitch-to-stitch logic: every bridge connects two points that face each other directly. The six joining directions (upper right, right, down-right, down-left, left, upper left) are 60 degrees apart, so any three neighboring rosettes form an equilateral triangle.
- Rosette 2: at st 23, Br to R1 st 11.
- Rosette 3: at st 3, Br to R1 st 15; at st 7, Br to R2 st 19.
- Rosette 4: at st 23, Br to R2 st 11.
- Rosette 5: at st 3, Br to R2 st 15; at st 7, Br to R4 st 19; at st 23, Br to R3 st 11.
- Rosette 6: at st 3, Br to R3 st 15; at st 7, Br to R5 st 19.
That makes 9 bridges in total: 1 + 2 + 1 + 3 + 2.
Tension advice: keep the ch-3 bridge chains at the same tension as your sc. Tight chains pull the rosettes together and close the eyes. Loose chains let the triangle sag. Before you snug up each joining sl st, lay the work flat and check that the gap is 0.3 in (0.8 cm).
Size checkpoint: the joined triangle should measure 3.9 in (9.9 cm) across the bottom row and 3.5 in (8.9 cm) from the top of R1 to the bottom of R5. Weave in all the rosette tails now along the back of each rim.
Border
Border gauge: 15 sc = 2 in (5.1 cm) along the outline. Work with RS facing. Work the border sts into the Rnd 5 rim sl sts, under both loops.
Anchor points, in working order:
- A1: R1 st 1 (top)
- A2: R1 st 5
- A3: R2 st 5
- A4: R4 st 5
- A5: R4 st 9 (bottom-left corner)
- A6: R4 st 13
- A7: R5 st 13
- A8: R6 st 13
- A9: R6 st 17 (bottom-right corner)
- A10: R6 st 21
- A11: R3 st 21
- A12: R1 st 21
Border Rnd 1 (outline chains): Join yarn with sc in A1. Ch 4, sc in A2, ch 9, sc in A3, ch 9, sc in A4, ch 4, (sc, ch 3, sc) in A5. Ch 4, sc in A6, ch 9, sc in A7, ch 9, sc in A8, ch 4, (sc, ch 3, sc) in A9. Ch 4, sc in A10, ch 9, sc in A11, ch 9, sc in A12, ch 4. Sl st into the first sc.
Count per side, between the top sc and the corner groups: ch 4 + sc + ch 9 + sc + ch 9 + sc + ch 4 = 29 sts. The bottom side, between the two corner groups, is also 29 sts. Total: 3 sides x 29 + 1 top sc + 2 corners x 5 sts (sc, ch 3, sc) = 98 sts.
Border Rnd 2 (corded edge, conversion round): Ch 1. Sc in the top sc. Work 1 sc in each sc and each ch along the left side (29 sc). For the corner, sc in the corner sc, work (2 sc, ch 2, 2 sc) in the ch-3 sp, then sc in the next corner sc. Work 29 sc along the bottom, work the second corner the same way, then work 29 sc up the right side. Sl st into the first sc and fasten off.
Count: 92 sts worked 1 per existing st (the 98 sts of Rnd 1 minus the 6 chains of the two ch-3 corner spaces) + 8 sc added in the corner spaces = 100 sc, plus 2 ch-2 corner spaces.
Why the math works: each side has 29 sc plus about 3 sc shared with the corners and top, so roughly 32 sc. At 15 sc per 2 in (5.1 cm), 32 sc is about 4.27 in (10.8 cm). That matches a 4.25 in (10.8 cm) side on an equilateral triangle 4.25 in (10.8 cm) wide, which is about 3.75 in (9.5 cm) tall. The ch-9 spans cover the 1.4 in (3.6 cm) between rosette centers. The ch-4 spans follow a 60-degree arc of each outer rosette.
Trunk: Count the 29 sts along the bottom side of Border Rnd 2, starting just after the bottom-left corner. St 15 sits directly below R5.
- Row 1: Turn the ornament so the bottom edge faces up. Join yarn in whichever of st 13 or st 17 is on your right, ch 1, then sc in each of the 5 sts from 13 to 17. (5 sts)
- Rows 2-6: Ch 1, turn, sc in each st across. (5 sts)
Fasten off. The trunk measures 0.7 in (1.8 cm) wide x 0.75 in (1.9 cm) tall.
Hanging loop: Join yarn with a sl st in the top sc of Border Rnd 2, then ch 36. Sl st into the same top sc. Sl st into the back bump of each ch around (36 sl sts) to make a firm cord, then sl st into the top sc again. Leave a 12 in (30.5 cm) tail. Wrap the tail 5 times around both strands of the loop, 0.25 in (0.6 cm) above the tree, then thread it under the wraps and bury it. The loop stands 2.5 in (6.4 cm) tall.
Final Blocking
- Weave in all remaining ends along the back of the rims and the outline.
- Mist the ornament until it is damp but not dripping.
- Lay it RS up on the blocking mat.
- Pin the two bottom corners 4.25 in (10.8 cm) apart, then pin the top of R1 3.75 in (9.5 cm) above the bottom edge.
- Pin each bridge eye open, and press each rosette flat with your fingertips so the swirl lies evenly.
- Pin the trunk square and the loop straight.
- Optional: brush on a thin layer of stiffener.
- Let it dry completely, at least 12 hours, before unpinning.
Final Quality-Control Checklist
- Six rosettes, each 1.1 in (2.8 cm) across, with a visible spiral swirl
- 9 bridges, each an open eye about 0.3 in (0.8 cm) long
- Border Rnd 2 count: 100 sc plus 2 corner ch-2 spaces
- Width 4.25 in (10.8 cm) and height 3.75 in (9.5 cm) without the trunk
- Trunk 5 sts x 6 rows, centered under R5
- Loop 2.5 in (6.4 cm) tall, with the neck wrapped neatly
- No visible tails on the RS
Troubleshooting
Rosettes cup: your tension is too tight on the increases. Go up 0.25 mm or relax your grip.
Rosettes ruffle: go down 0.25 mm.
Swirl is faint: make sure Rnds 2-4 go into the back loop only, and use a smoother yarn.
Triangle leans to one side: a bridge is in the wrong position. Recheck the bridge list with st 1 pointing up on every rosette.
Border ripples: the ch-9 spans are too long for your tension. Use ch 8 instead, the same on all six long spans.
Border pulls the rosettes: use ch 10 instead on the long spans.
Trunk off-center: recount the bottom side. There should be 14 sts on each side of st 15.
Care
Hand wash in cool water with mild soap, press out the water in a towel, and lay it flat to dry. If you used stiffener, reapply it after washing.
Final Notes
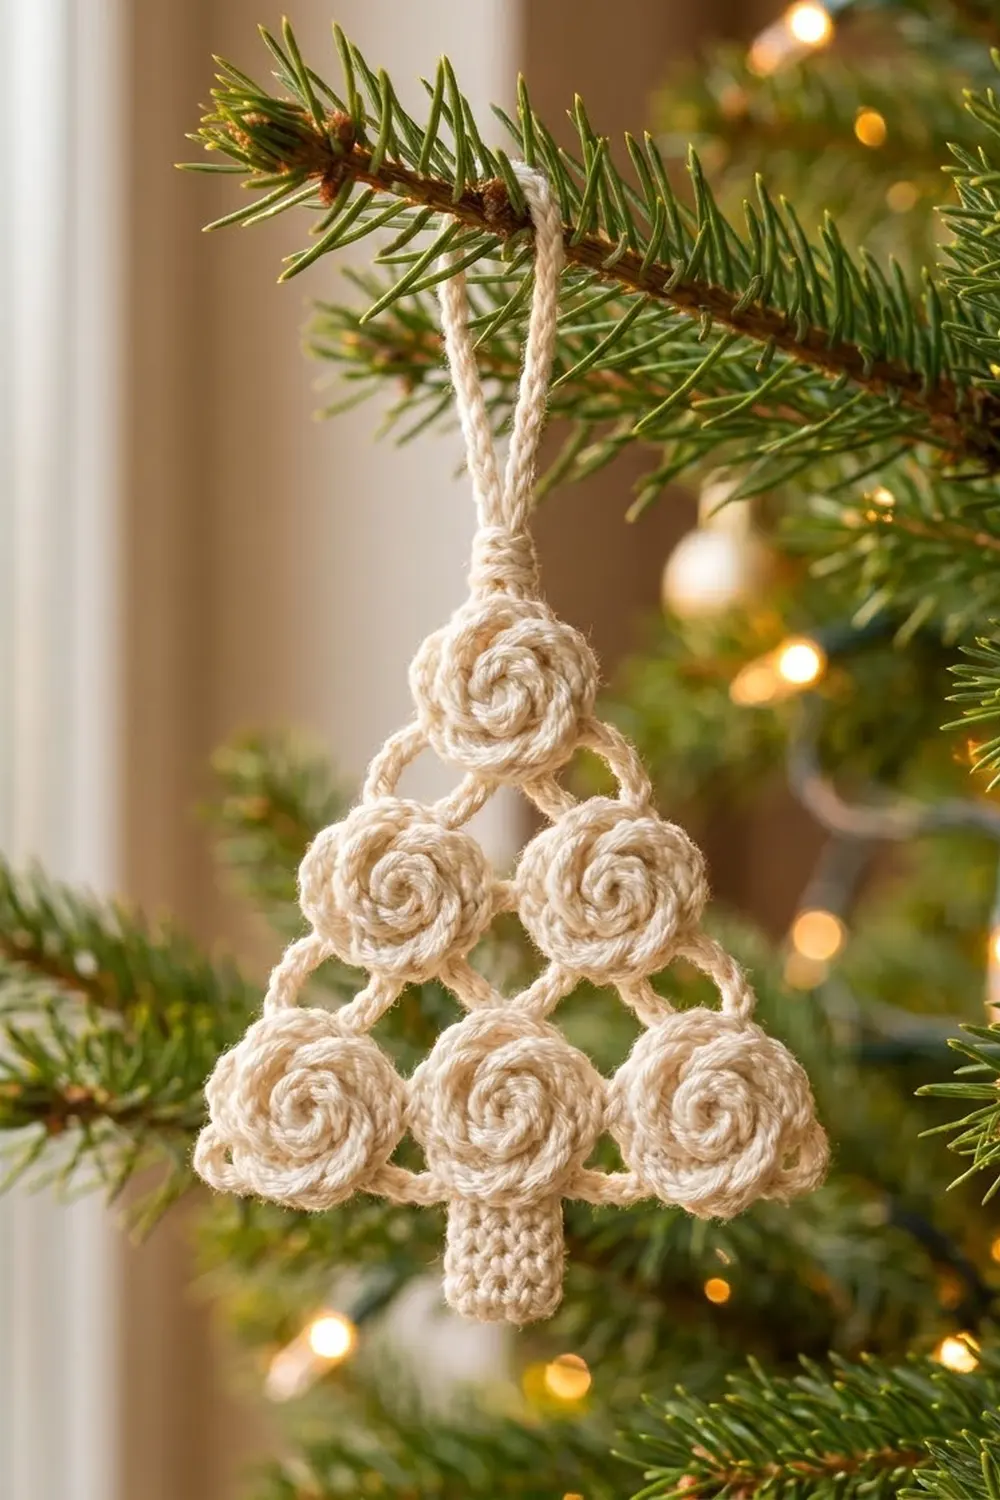
The measurement chain is short and easy to check. Six rosettes at 1.1 in (2.8 cm), with 0.3 in (0.8 cm) bridges, make a triangle 3.9 in (9.9 cm) wide and 3.5 in (8.9 cm) tall. A border with 29 sts per side brings it to 4.25 in (10.8 cm) by 3.75 in (9.5 cm). A 0.75 in (1.9 cm) trunk and a 2.5 in (6.4 cm) loop finish it at a hanging height of 7 in (17.8 cm). Check each stage against these numbers and every ornament will match the last.
Happy crocheting!