

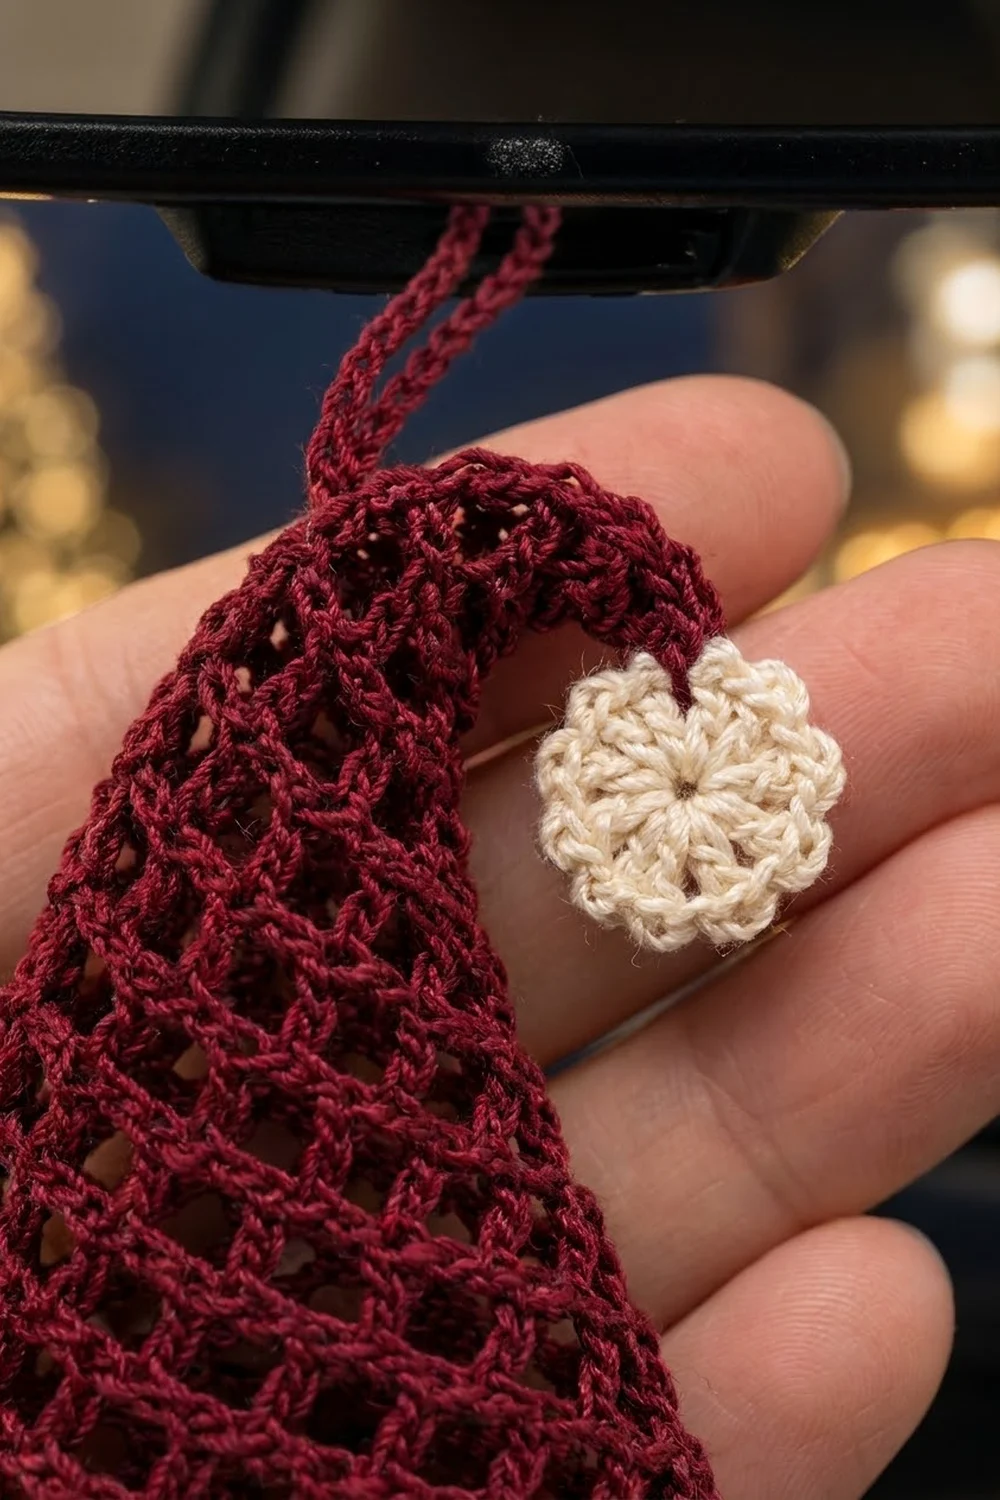
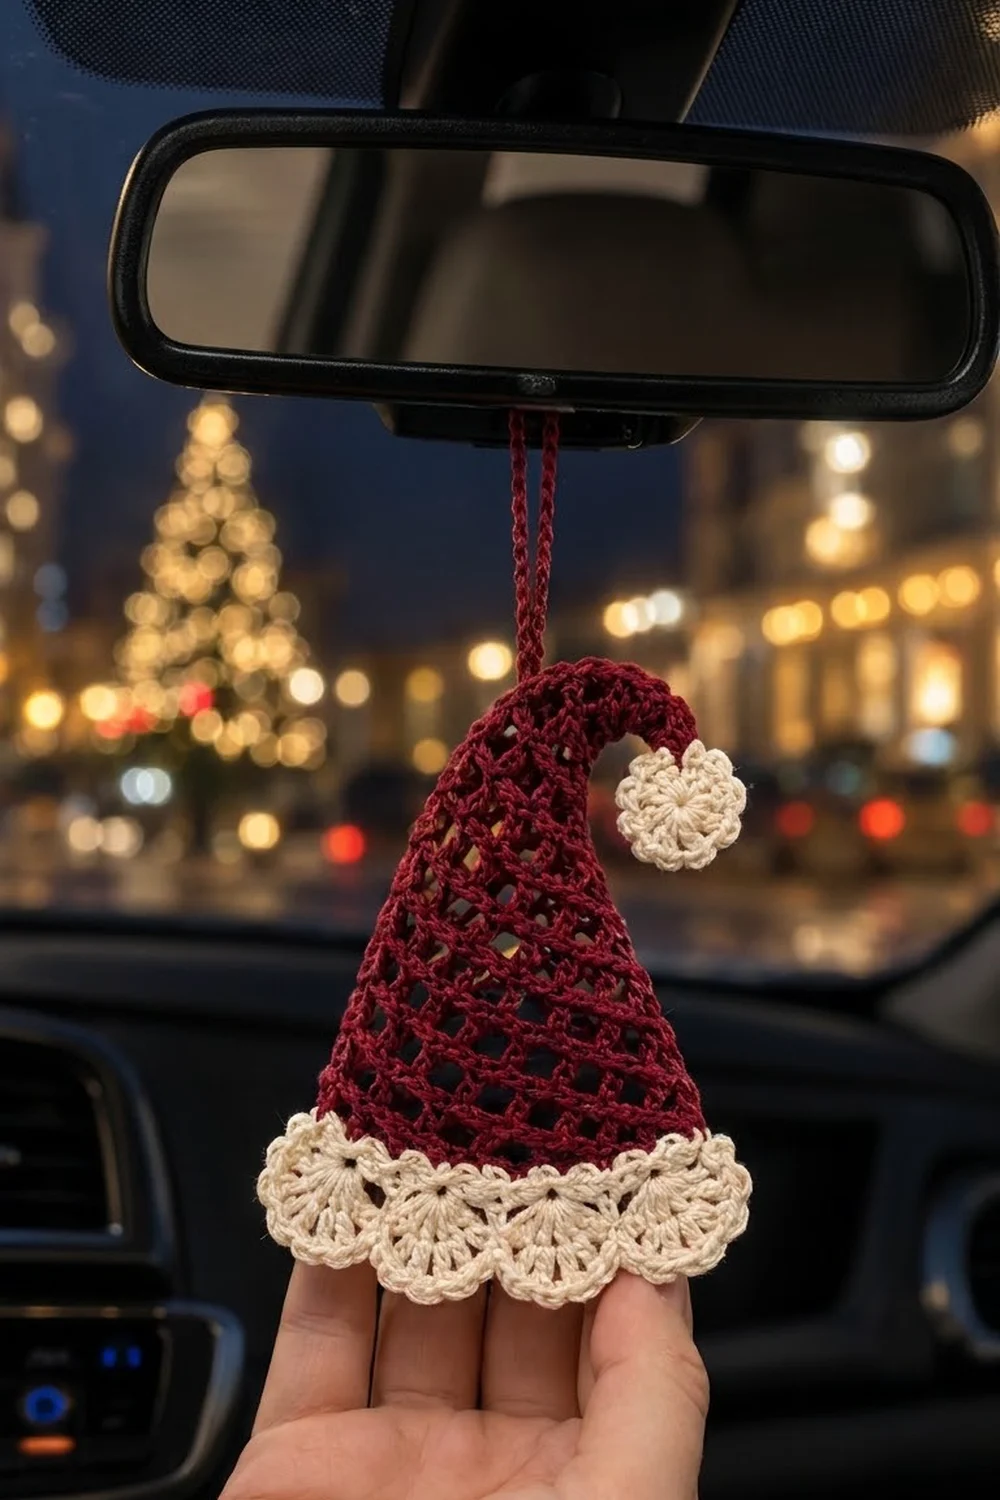
This little Santa hat is made to hang from a rearview mirror, a tree branch, or a window latch. The body is an open diamond mesh in deep burgundy thread, so light shows through it. The top curls over into a soft hook, and a cream pom-pom disc finishes the tip.
The brim is a row of five cream scallops. Each scallop is a fan of spoke-like stitches that ends in a smooth, rounded edge. Burgundy and cream give it a classic look that still feels light.
The pattern uses US crochet terms. The finished ornament measures about 4.5 in (11.4 cm) wide at the brim and 4.75 in (12.1 cm) tall, not counting the hanging loop.
You start with a short curved strip that becomes the tip. The net mesh triangle then grows from that strip, one loop wider every row. After that you edge the slanted sides, work the scalloped brim across the bottom, make the pom-pom disc, and add a chain hanging loop.
Finished Size and Construction
- Finished size: 4.5 in (11.4 cm) wide at the brim × 4.75 in (12.1 cm) tall
- Skill level: Intermediate
- Terminology: US crochet terms
- Yarn weight: Size 3 mercerized cotton crochet thread
- Hook: 2.25 mm (US B-1)
- Number of pieces: 1 hat (worked in one piece) + 1 small pom-pom disc sewn on
- Layout: One flat ornament; no joining of motifs
- Hat body (before edging and brim): 4 in (10.2 cm) wide × 3 in (7.6 cm) tall, plus a 1.2 in (3.0 cm) tip strip
- Size before border: 4 in (10.2 cm) across the bottom of the mesh
- Border depth: Brim adds 1 in (2.5 cm) below the mesh; side edging adds about 0.1 in (0.3 cm)
- Pom-pom: 1 in (2.5 cm) diameter
- Hanging loop: 5 in (12.7 cm) chain, folded to hang about 2.5 in (6.4 cm)
Materials
Use smooth mercerized cotton thread in size 3. It shows the mesh clearly, takes starch well, and stays flat when it hangs. Avoid fuzzy or very stretchy fibers, because the diamonds will blur and the tip won’t hold its curl.
- Burgundy: 8 g / 24 m (26 yd)
- Cream: 5 g / 15 m (16 yd)
These amounts include a margin of about 30 percent, which covers a gauge swatch and longer yarn tails.
Tools:
- 2.25 mm (US B-1) crochet hook
- Tapestry needle
- Rustproof pins and a foam blocking board
- Spray starch or a 1:1 mix of white craft glue and water
- Small scissors
- Ruler or tape measure
Abbreviations (US Terms)
- ch – chain
- sl st – slip stitch
- sc – single crochet
- hdc – half double crochet
- dc – double crochet
- sp – space
- st(s) – stitch(es)
- rep – repeat
- RS – right side
Special stitch: net loop. A net loop is a ch-5 anchored at each end by an sc. When the pattern says “ch 5, sc in next ch-5 sp,” you make one new net loop. Stacking these loops in offset rows makes the diagonal diamond mesh.
Fan: 9 dc worked in the same stitch.
Gauge and Checkpoints
Gauge: 10 sc = 1 in (2.5 cm). In net mesh, 5 loops = 2 in (5.1 cm) wide and 10 rows = 3 in (7.6 cm) tall.
The ornament is small, so make the tip strip and the first 5 mesh rows as a test, then measure before you go on.
Checkpoints:
- Tip strip: about 1.2 in (3.0 cm) long, curving gently toward the sl st end.
- After Row 5: 5 loops, about 2 in (5.1 cm) across the bottom and 1.5 in (3.8 cm) tall.
- After Row 10: 10 loops, 4 in (10.2 cm) across the bottom and 3 in (7.6 cm) tall from the tip strip.
- After the brim: 4.5 in (11.4 cm) wide at the widest point of the scallops.
If your piece is too big, go down to a 2.0 mm hook or tighten your chains. If it’s too small, go up to a 2.5 mm hook. Chain tension matters most: if your ch-5 loops are long, the mesh gets wide and the brim won’t fit.
Tip Strip
With burgundy, ch 13.
Row 1 (RS): Sl st in 2nd ch from hook and in next ch, sc in next 3 ch, hdc in next 3 ch, dc in next 4 ch. (12 sts: 2 sl st, 3 sc, 3 hdc, 4 dc)
Do not fasten off. The stitches get taller along the strip, so it curves on its own. The short sl st end becomes the curled tip and the tall dc end becomes the top point of the hat.
Hat Body (Net Mesh Triangle)
Each row adds one net loop, so the triangle widens evenly on both sides. Row n has n loops and n + 1 sc.
Row 1: Ch 1. Without turning, work (sc, ch 5, sc) in the top of the last dc made. Turn. (1 loop, 2 sc)
Row 2: Ch 1, sc in first sc, ch 5, sc in ch-5 sp, ch 5, sc in last sc. Turn. (2 loops, 3 sc)
Row 3: Ch 1, sc in first sc, ch 5, sc in next ch-5 sp, [ch 5, sc in next ch-5 sp] once, ch 5, sc in last sc. Turn. (3 loops, 4 sc)
Rows 4–10: Ch 1, sc in first sc, ch 5, sc in first ch-5 sp, [ch 5, sc in next ch-5 sp] across to the last ch-5 sp, ch 5, sc in last sc. Turn.
Stitch counts for each row:
- Row 4: 4 loops, 5 sc
- Row 5: 5 loops, 6 sc (checkpoint: 2 in / 5.1 cm wide)
- Row 6: 6 loops, 7 sc
- Row 7: 7 loops, 8 sc
- Row 8: 8 loops, 9 sc
- Row 9: 9 loops, 10 sc
- Row 10: 10 loops, 11 sc (checkpoint: 4 in / 10.2 cm wide, 3 in / 7.6 cm tall)
Do not fasten off. You use this working loop for the side edging.
Because each row starts and ends one loop farther out, the sc anchors stack diagonally. That’s where the slanted diamond lines in the mesh come from.
Pom-Pom Disc
With cream, make a magic ring.
Round 1: Ch 3 (counts as dc), 11 dc in ring. Pull the ring snug, leaving a small center hole. Join with sl st to top of ch-3. (12 dc)
Round 2: Ch 1, (sc, ch 2) in each dc around. Join with sl st to first sc. (12 sc, 12 ch-2 sps)
Fasten off, leaving a 6 in (15.2 cm) tail for sewing. The disc measures 1 in (2.5 cm) across. The ch-2 spaces make its bumpy edge.
Border: Side Edging and Brim
The border has two parts: burgundy sc along both slanted sides, and the cream scalloped brim across the bottom.
Border gauge: 10 sc = 1 in (2.5 cm), the same as the main gauge.
Side Edging (Burgundy)
Each slanted side has 9 edge loops: the outer loop of each row from Row 2 to Row 10. Row 1 sits at the apex and has no side loop.
Edging: Continue from Row 10 and do not turn. Ch 1 and work up the first slanted side: 4 sc in each edge loop for 9 loops. (36 sc)
At the apex, sl st in the top of the last dc of the tip strip. Then work down the second side: 4 sc in each edge loop for 9 loops. (36 sc)
Fasten off.
Per-side counts: 36 sc on the left side, 36 sc on the right side, and 0 along the bottom. The bottom is covered by the brim.
Why it works: Each slanted side runs about 3.6 in (9.1 cm), from a 2 in (5.1 cm) half-width and a 3 in (7.6 cm) height. At 10 sc per inch, 36 sc fits that length, so the edge lies flat without rippling or pulling in.
Brim (Cream)
Hold the hat RS facing with the bottom edge (Row 10) on top.
Brim Row 1: Join cream with sl st in the first sc of Row 10. Ch 1, sc in the same sc, then 4 sc in each ch-5 loop across for 10 loops. Turn. (1 + 40 = 41 sc)
The last sc of Row 10 is not worked separately. The 4 sc in the final loop cover it.
Brim Row 2 (fans): Ch 1, sc in first sc. Skip 3 sc, 9 dc in next sc, skip 3 sc, sc in next sc. Rep from * 4 more times. Turn. (5 fans, 6 sc = 51 sts)
Brim Row 3 (spokes): Ch 1, sc in first sc. [Ch 1, dc in next dc] 9 times, ch 1, sc in next sc. Rep from * 4 more times. Turn. (6 sc, 45 dc, 50 ch-1 sps)
Brim Row 4 (outline): Ch 1, sc in first sc. Skip first ch-1 sp, [sc in next dc, sc in next ch-1 sp] 8 times, sc in next dc, skip last ch-1 sp, sc in next sc. Rep from * 4 more times. (1 + 5 × 18 = 91 sc)
Fasten off.
Why the brim math works: Row 10 has 10 loops. At 4 sc per loop that gives 40 sc, and the first sc brings it to 41. The fan repeat uses 8 sts (skip 3, fan in 1, skip 3, sc in 1), plus 1 extra to balance the row: 5 × 8 + 1 = 41.
In Brim Row 4, each scallop has 17 sc (9 on dc and 8 in the inner ch-1 spaces), plus 1 sc between scallops, for 18 per repeat. Skipping the outer ch-1 space on each side of a scallop gives each scallop a clean valley.
The 41-stitch base matches the 4 in (10.2 cm) mesh width. The fans spread out to 4.5 in (11.4 cm), which gives the brim its slight flare.
Pom-Pom and Hanging Loop
Sew the pom-pom disc to the narrow sl st end of the tip strip so it sits just past the curl. Make 4 or 5 small stitches through the back of the disc only, so they don’t show on the front.
Hanging loop: Join burgundy with sl st in the top of the last dc of the tip strip, at the top point of the hat. Ch 40, then sl st in the same stitch. That makes a 5 in (12.7 cm) loop that hangs about 2.5 in (6.4 cm) above the hat. Fasten off.
Weave in all ends along the sc edges, not through the open mesh.
Final Blocking
- Soak the ornament in cool water for 5 minutes, then roll it in a towel to remove extra water.
- Pin it flat on the blocking board, RS up.
- Pin the bottom of the mesh to 4 in (10.2 cm). Pin each slanted side straight so the triangle is 3 in (7.6 cm) tall.
- Pin through the middle of each loop in Row 10 so the diamonds open evenly.
- Pin each of the 5 scallops into a smooth arc, with the widest point at 4.5 in (11.4 cm).
- Curve the tip strip into a hook and pin the pom-pom end so it points down and outward.
- Spray with starch, or brush on the glue mix lightly. Starching firmly helps the ornament keep its shape in a warm car.
- Let it dry completely, at least 12 hours, before you unpin it.
Final Quality-Control Checklist
- Tip strip has 12 sts and curves smoothly toward the sl st end.
- Row 10 has 10 loops and 11 sc.
- Each slanted side has 36 sc and lies flat.
- Brim Row 1 has 41 sc.
- There are 5 fans with 9 dc each.
- Brim Row 4 has 91 sc, and every scallop is rounded with a clear valley between scallops.
- Mesh is 4 in (10.2 cm) wide and brim is 4.5 in (11.4 cm) wide.
- Pom-pom disc is 1 in (2.5 cm) across and firmly sewn at the tip.
- Hanging loop is secure, and all ends are woven in where they can’t be seen.
Troubleshooting
Mesh looks uneven or crooked. Keep every ch-5 the same length. Pull up the loop on the hook to the same height each time.
Triangle leans to one side. You probably missed the edge loop at the start or end of a row. Count the loops: each row should have exactly as many loops as its row number.
Side edging ripples. You worked more than 4 sc in some loops. Rework those loops with exactly 4 sc each.
Side edging pulls in. Your sc is tighter than your mesh. Go up one hook size for the edging only.
Brim cups or ruffles. Check Brim Row 1 for exactly 41 sc. If the count is right but the brim still ruffles, work the fans with 7 dc instead of 9 and adjust the spoke and outline rows to match.
Tip won’t curl. Starch it again, pin it firmly in a curve, and let it dry fully.
Pom-pom flops forward. Add 2 more anchoring stitches at the top edge of the disc.
Care
Hand wash in cool water with mild soap, press it flat, and re-starch. Keep it out of strong, direct sun so the burgundy doesn’t fade.
Final Notes
Here is the full measurement chain. The 12-stitch tip strip is 1.2 in (3.0 cm) long. The mesh grows to 10 loops, 4 in (10.2 cm) wide and 3 in (7.6 cm) tall. Each slanted side takes 36 sc. The brim starts with 41 sc, which become 5 fans and end at 91 sc, 4.5 in (11.4 cm) wide and 1 in (2.5 cm) deep. Add a 1 in (2.5 cm) pom-pom and a 5 in (12.7 cm) hanging loop, and the ornament is ready to hang.
Check your size at each checkpoint, and every part will fit the next. Happy crocheting!