

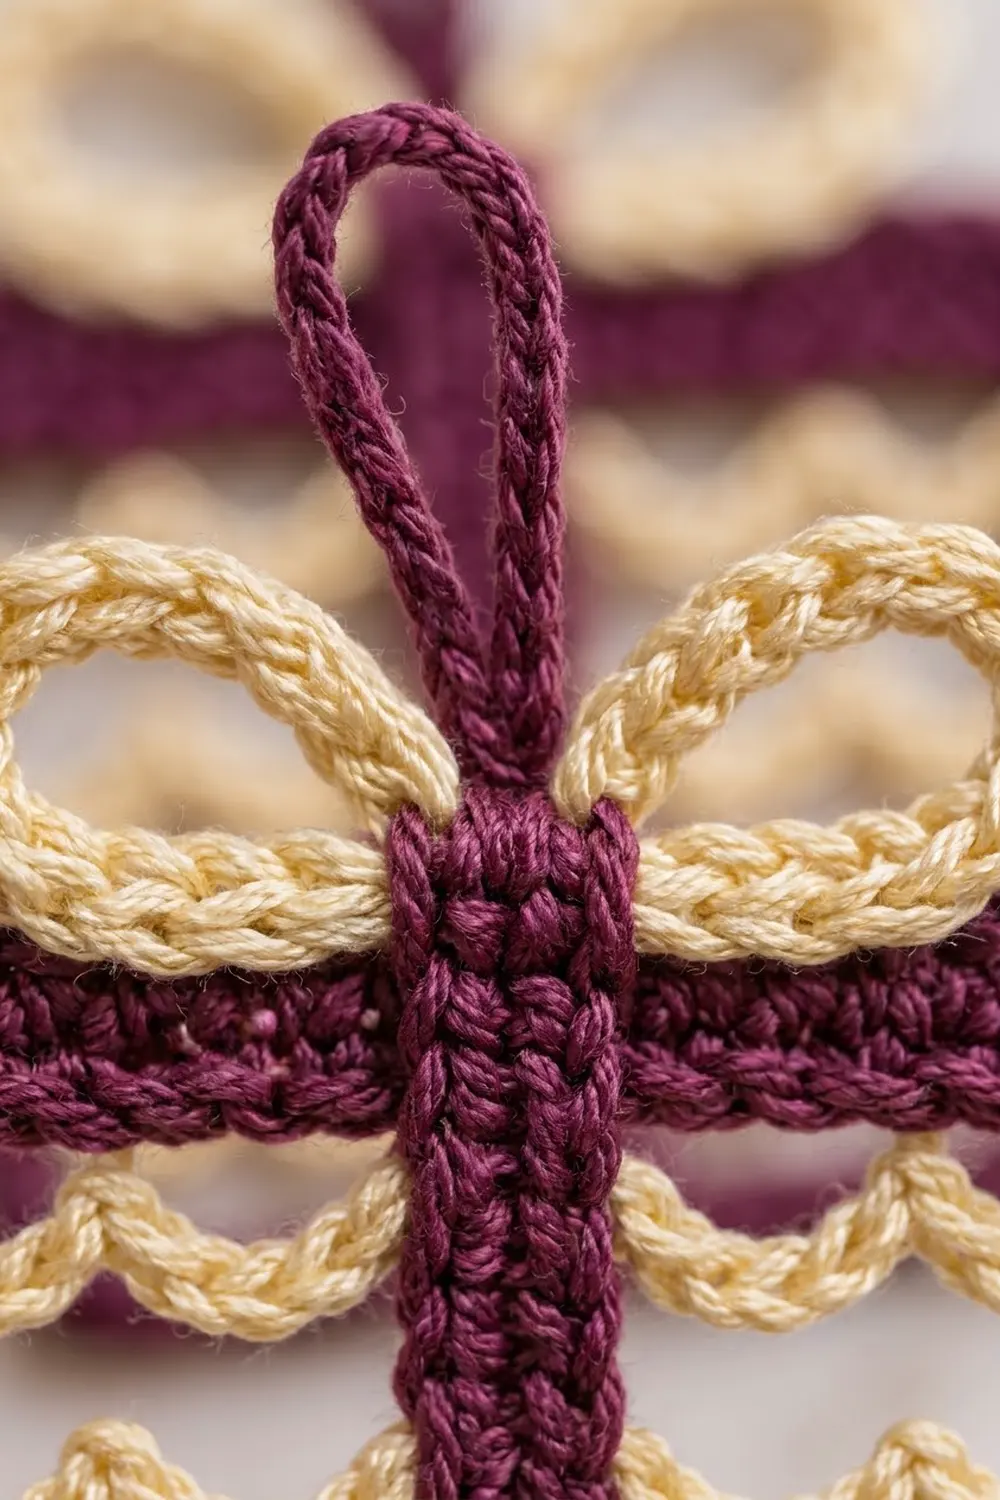
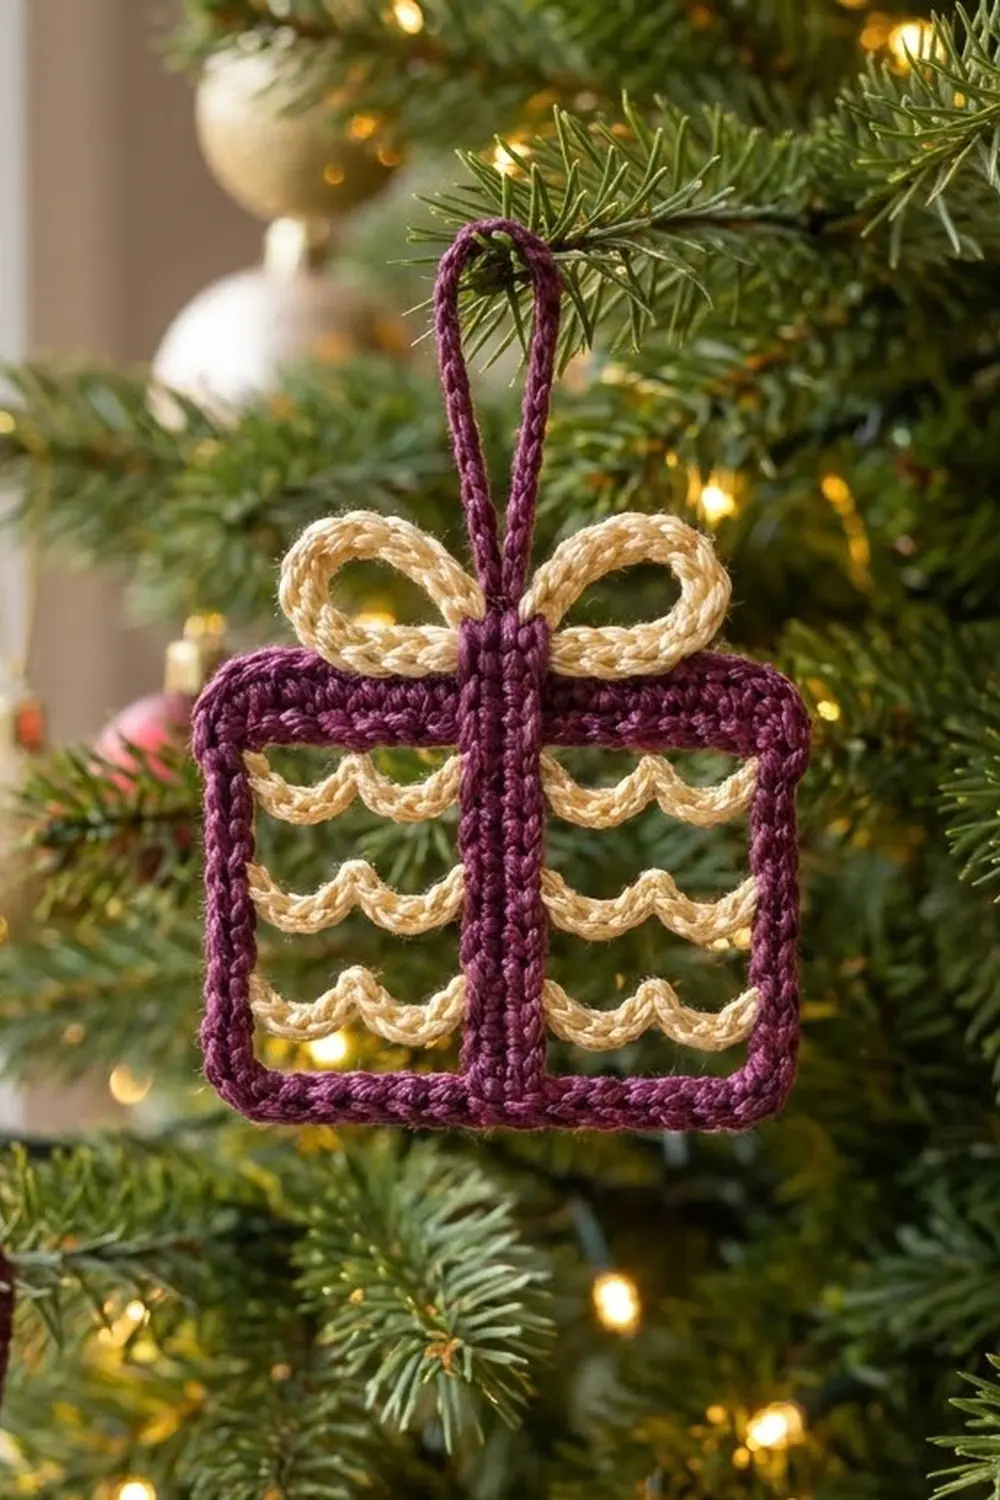
This little gift box ornament is pure holiday sparkle with no glitter needed. A firm plum frame outlines the box, a plum ribbon runs down the center, and soft cream wave cords swing across each side like ribbon curls. A cream bow and a sturdy plum hanging loop finish it off.
The colors are deep plum and warm cream. The look is open and lacy, but the frame is dense enough to hold the shape on a branch. The pattern uses US crochet terms throughout.
The finished box measures about 3.5 in (8.9 cm) wide by 3 in (7.6 cm) tall. With the bow and hanger, it’s about 4.75 in (12.1 cm) tall overall.
To make it, you work a chain ring into a rectangular frame with mitered corners. Next, you work the center ribbon across the opening and add a one-round border. Last, you make six slip-stitch wave cords, one bow cord, a knot tab, and a hanger, then stiffen the ornament so the waves keep their curves.
Finished Size and Construction
- Finished box size: 3.5 in (8.9 cm) wide x 3 in (7.6 cm) tall
- Overall height with bow and hanger: about 4.75 in (12.1 cm)
- Skill level: Easy-Intermediate
- Terminology: US crochet terms
- Yarn weight: Sport weight (#2) mercerized cotton
- Hook: 2.75 mm (C/2)
- Number of pieces: 1 ornament: the frame and ribbon are worked as one piece, plus 6 wave cords, 1 bow cord, 1 knot tab, and a hanger worked from the knot
- Layout: single rectangular box, ribbon centered, 3 waves per half
- Frame size before border: 3.2 in (8.1 cm) x 2.7 in (6.9 cm)
- Border depth: about 0.15 in (0.4 cm) per side, 1 round of sc
Materials
Choose a smooth, mercerized cotton. It gives crisp stitch definition and takes starch well, and both matter here.
- Plum (Color A): 8 g, about 25 m
- Cream (Color B): 5 g, about 15 m
- 2.75 mm (C/2) crochet hook
- Tapestry needle
- 4 locking stitch markers
- Rustproof pins and a foam blocking board
- Fabric stiffener or heavy spray starch
- Scissors
These yarn quantities include a margin of about 30% for your gauge swatch and sewing tails.
Abbreviations (US Terms)
- ch – chain
- sl st – slip stitch
- sc – single crochet
- st(s) – stitch(es)
- Rnd – round
- BB – back bump of a chain
Special technique – slip-stitch cord: Make the stated chain. Then sl st into the BB of the 2nd ch from the hook and into the BB of each ch across. This gives a round, firm cord that looks like a twisted rope.
Gauge and Checkpoints
Main gauge: 6 sc = 1 in (2.5 cm) in sc worked into a foundation chain.
Cord gauge: 16 sl sts of cord = 2 in (5.1 cm).
Make the frame through Rnd 1 first and measure it before you continue.
- Checkpoint 1 (after Rnd 1): about 3.2 in (8.1 cm) x 2.7 in (6.9 cm), measured outside edge to outside edge.
- Checkpoint 2 (after the ribbon): the ribbon lies flat and straight, with no pull at the top or bottom.
- Checkpoint 3 (after the border): 3.5 in (8.9 cm) x 3 in (7.6 cm).
If your frame is too big, go down to a 2.5 mm hook. If it’s too small, go up to a 3.0 mm hook. Don’t change the stitch counts. The counts control the shape, and the hook controls the size.
Frame
With Color A, ch 58. Check that the chain isn’t twisted, then sl st into the first ch to form a ring.
The ring is divided as follows, starting with the first ch:
- 1 corner ch (top left)
- 15 ch along the top
- 1 corner ch (top right)
- 12 ch down the right side
- 1 corner ch (bottom right)
- 15 ch along the bottom
- 1 corner ch (bottom left)
- 12 ch up the left side
Check the total: 4 + 15 + 12 + 15 + 12 = 58.
Rnd 1: Ch 1. Work 3 sc into the top-left corner ch, and place a marker in the center sc of the 3.
- Sc in each of the next 15 ch.
- 3 sc in the corner ch (mark the center sc).
- Sc in each of the next 12 ch.
- 3 sc in the corner ch (mark).
- Sc in each of the next 15 ch.
- 3 sc in the corner ch (mark).
- Sc in each of the last 12 ch.
Sl st into the first sc. (66 sts)
The count is 58 sts worked one into each ch, plus 8 sts added (2 extra at each of the 4 corners), for 66.
Stitches per side, including both corner center sts:
- Top and bottom: 19 each (corner + 1 + 15 + 1 + corner)
- Left and right: 16 each (corner + 1 + 12 + 1 + corner)
- Check: (2 x 19) + (2 x 16) − 4 shared corners = 66
The foundation chain stays on the inside edge as the frame’s opening. Its free loops are the anchor points for the ribbon and the waves. The opening is about 2.5 in wide by 2 in (5.1 cm) tall.
Don’t fasten off. Drop the loop and put it on a marker so you can come back for the border.
Center Ribbon
You work the ribbon into the free loops of the foundation chain on the inside edge.
Find the top center: count the 15 top-side chains and use the 8th, which leaves 7 on each side. Find the 8th of the 15 bottom-side chains the same way.
Row 1: With a new strand of Color A, join with a sl st in the free loop of the top-center ch. Ch 12. Sl st into the free loop of the bottom-center ch. (12 ch)
Row 2: Sl st into the next free loop to the right on the bottom edge. Turn and sc in each of the 12 ch. Sl st into the free loop just to the right of the starting ch at the top. (12 sc)
Row 3: Turn. Sc in each of the 12 sc, then sl st into the bottom-center free loop. (12 sc) Fasten off and weave in the ends.
The ribbon is 3 strands wide, about 0.35 in (0.9 cm). It’s 12 sts tall, which matches the 12 side chains of the frame, so the wave anchors on the ribbon line up exactly with the anchors on the frame sides.
Using the ribbon to split the 15 top chains, each open half is about 1.1 in (2.8 cm) wide.
Wave Cords (Make 6)
With Color B, leave a 4 in (10.2 cm) starting tail.
Cord: Ch 16, then work the slip-stitch cord. (15 sl sts) Fasten off, leaving a 4 in (10.2 cm) ending tail.
Each cord is about 1.9 in (4.8 cm) long.
Shaping: Divide the cord into 3 sections of 5 sl sts each. Each section becomes one U-shaped scallop. The points where the sections meet become the two small peaks.
Placing the waves: On each frame side, count the 12 side chains from the top, not counting corners. The waves anchor at chains 2, 6, and 10. On the ribbon, count the 12 sc of Row 3 from the top and use the same numbers: 2, 6, and 10.
Gaps from the anchors:
- Top wave to the frame top: 1 st (about 0.2 in / 0.5 cm)
- Between waves: 4 sts (about 0.7 in)
- Bottom wave to the frame bottom: 2 sts
The 2-st gap at the bottom leaves room for the bottom wave’s scallops to dip.
Attaching: Use the tapestry needle and a cord tail.
- Sew the tail through the anchor point twice with small stitches.
- Hide the tail inside the cord.
- Repeat at the other end.
The cord is about 1.9 in (4.8 cm) long but spans only 1.1 in (2.8 cm). The extra 0.8 in (2.0 cm) of slack is what forms the three scallops. Each scallop dips about 0.2 in (0.5 cm).
Attach 3 cords in the left half (left frame side to the left edge of the ribbon) and 3 in the right half (right edge of the ribbon to the right frame side).
Bow Cord
With Color B, ch 33 and work the slip-stitch cord. (32 sl sts) Fasten off and leave 6 in (15.2 cm) tails.
The cord is about 4 in (10.2 cm) long.
Shape the bow:
- Overlap the two ends at the center by 2 sts.
- Twist the cord at its midpoint to make a figure 8.
- Bring the midpoint to the center as well.
- With a tail, sew through all layers at the center.
You now have two rounded loops, each about 1 in (2.5 cm) wide. The bow is about 2 in (5.1 cm) across.
Knot Tab and Hanger
Knot tab: With Color A, leave an 8 in (20.3 cm) tail and ch 4.
Row 1: Sc in the 2nd ch from the hook and in the next 2 ch. (3 sc)
Rows 2–6: Ch 1, turn, sc in each sc. (3 sc)
Don’t fasten off. The tab is about 0.5 in (1.3 cm) wide and 0.8 in (2.0 cm) long.
Hanger: Ch 16, then sl st back into the last sc of Row 6. Ch 1. Work 20 sc over the ch-16 loop, then sl st into the same sc. Fasten off and leave a 6 in (15.2 cm) tail.
The 20 sc pack tightly onto 16 ch, which makes a thick, sturdy loop about 1 in (2.5 cm) tall.
Set the bow and the tab aside until the border is done.
Border
Border gauge: same as the main gauge, 6 sc = 1 in (2.5 cm).
Put the dropped Color A loop from the frame back on the hook.
Rnd 2 (border): Ch 1. Work into the outer sc of Rnd 1:
- 3 sc into the marked top-left corner sc.
- Sc in each of the next 17 sts.
- 3 sc into the marked corner sc.
- Sc in each of the next 14 sts.
- 3 sc into the marked corner sc.
- Sc in each of the next 17 sts.
- 3 sc into the marked corner sc.
- Sc in each of the last 14 sts.
Sl st into the first sc. (74 sts)
The count is 66 sts worked one into each existing st, plus 8 sts added (2 at each corner), for 74.
Per side, including both corner center sts:
- Top and bottom: 21 each (corner + 1 + 17 + 1 + corner)
- Left and right: 18 each (corner + 1 + 14 + 1 + corner)
- Check: (2 x 21) + (2 x 18) − 4 = 74
Why the math works: Each round outward adds 1 st of length to each end of a side. Adding 2 sts at every corner covers that growth exactly. That keeps the corners at 90 degrees and lets the frame lie flat without ruffling or cupping.
At 6 sc per inch, 21 sts = 3.5 in (8.9 cm) and 18 sts = 3 in (7.6 cm). That matches the finished size.
Fasten off and weave in the ends.
Attach the bow:
- Center the bow on top of the frame, directly above the ribbon.
- Wrap the knot tab around the bow’s center and the top border so that Row 1 and Row 6 meet behind the frame, with the hanger pointing up.
- Use the 8 in (20.3 cm) tail to sew the tab edges together through the frame.
- Use the hanger tail to tack the bow loops to the top border at 2 points on each side.
Final Blocking
- Wet the ornament in a mixture of fabric stiffener and water, mixed according to the bottle’s directions.
- Gently squeeze out the extra liquid, and blot the ornament in a towel.
- Pin the frame to the board, square, at 3.5 in (8.9 cm) x 3 in (7.6 cm). Put one pin at each corner, then one at the center of each side.
- Pin the ribbon straight and centered.
- Shape each wave: place a pin at each of the 2 peaks, then press each scallop into an even U that dips about 0.2 in (0.5 cm).
- Stuff the bow loops with small rolls of plastic wrap so they dry round.
- Lay the hanger flat in a teardrop shape.
- Let the ornament dry completely, usually 12–24 hours, before you unpin it.
Final Quality-Control Checklist
- Frame is 3.5 in (8.9 cm) x 3 in (7.6 cm) with square corners.
- Rnd 1 has 66 sts and the border has 74 sts.
- Ribbon is centered on top chain 8 and bottom chain 8, and lies flat.
- Six waves, 3 per half, anchored at side chains 2, 6, and 10.
- Each wave has 3 even scallops.
- Bow loops match in size and are centered over the ribbon.
- Hanger is firm and sewn securely through the frame.
- All tails are hidden inside cords or the frame.
Troubleshooting
- Frame cups or ruffles: Recount the corners. Each must have exactly 3 sc into the center st.
- Ribbon bows or puckers: The Row 1 chain was too tight or too loose. Redo it with exactly 12 ch, matching your frame tension.
- Waves hang flat with no scallops: The anchors are too far apart. Check that you used the ribbon edge, not the ribbon center.
- Waves droop after drying: Use a stronger stiffener mix and block again.
- Bow loops are uneven: Unpick the center stitches, re-center the figure 8 by counting 8 sts on each side of the overlap, and sew again.
- Hanger stretches: Add 2 more sc around the loop for a firmer cord.
Care
Dust gently, or spot-clean with a damp cloth. Don’t soak it, because water softens the stiffener. If it loses its shape, re-stiffen it and block again.
Final Notes
The measurement chain is short and reliable:
- 6 sc per inch means Rnd 1 measures 3.2 in (8.1 cm) x 2.7 in (6.9 cm).
- The 1-round border brings it to 3.5 in (8.9 cm) x 3 in (7.6 cm).
- The 12-st ribbon matches the 12 side chains, so the waves line up.
- The 1.9 in (4.8 cm) cords form scallops across 1.1 in (2.8 cm) openings.
Check your gauge at Rnd 1, and every later piece will fall into place. Make one for every branch, or tuck one onto a wrapped present as a keepsake tag.
Happy crocheting!