

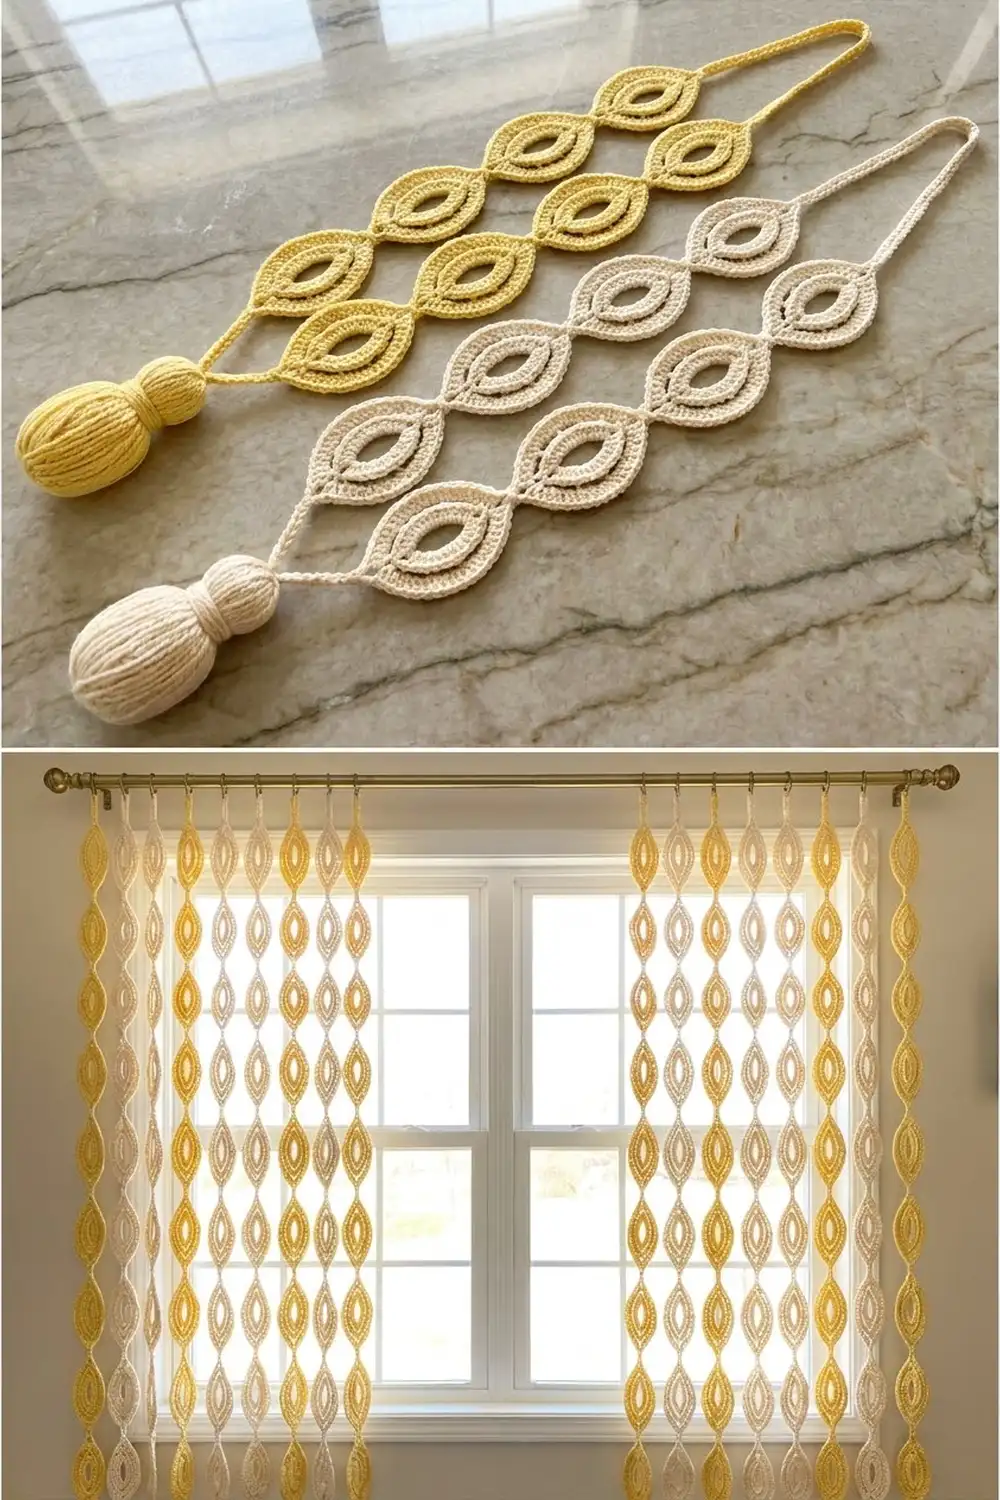
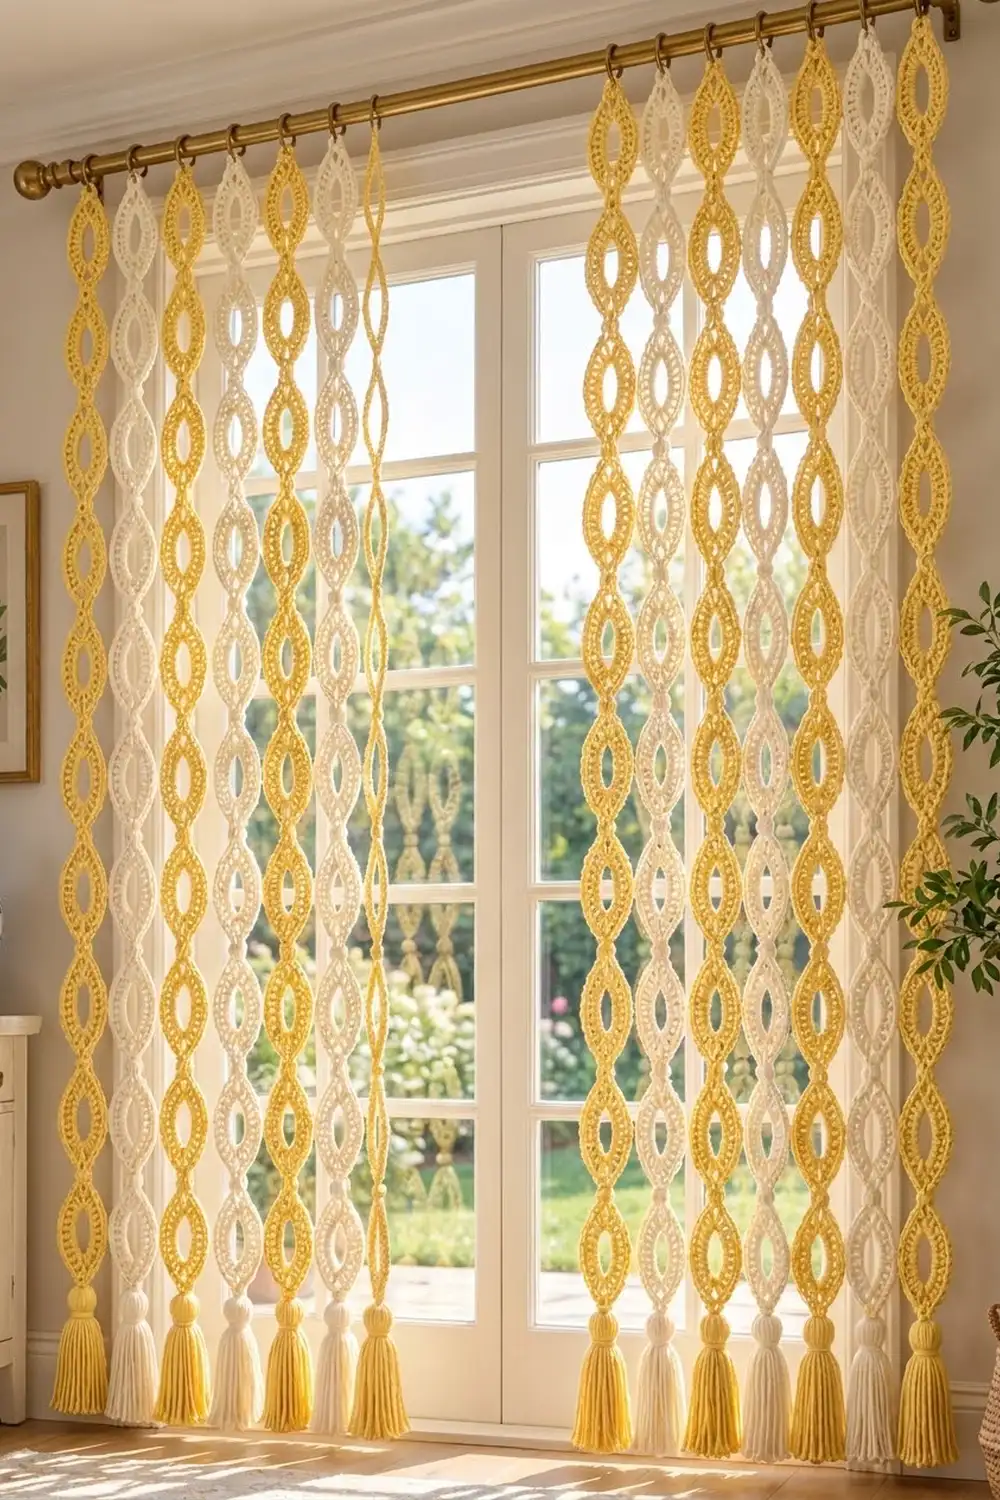
The Sunlit Links Strand Curtain is a light, airy hanging panel made of ten vertical strands. Each strand is a chain of open, almond-shaped motifs linked point to point. A loop at the top hangs the strand from the rod, and a round-headed tassel finishes the bottom. On a curtain rod, the strands filter sunlight without blocking the view.
The strands alternate butter yellow and soft cream. Each motif looks lacy. It has a tight single crochet ring around an oval opening, a round of tall double crochet stitches that fan outward, and a neat single crochet edge with a small point at each end.
This pattern uses US crochet terms. One finished panel measures about 24.25 in (61.6 cm) wide and 43 in (109.2 cm) long, from the top of the rod to the tips of the tassels. Each motif measures 3.5 in (8.9 cm) long and 1.75 in (4.4 cm) wide.
The construction is simple. You crochet the first motif in three rounds. Every motif after that joins to the one above it during its final round. A chain loop goes over the rod, and a tassel finishes the bottom point. The room photo shows two matching panels framing a window, so make the pattern twice if you want the same pair.
Finished Size and Construction
- Finished panel size: 24.25 in (61.6 cm) wide x 43 in (109.2 cm) long
- Skill level: Easy to intermediate
- Terminology: US crochet terms
- Yarn weight: Worsted (#4), cotton or cotton blend
- Hook: 4.5 mm (US 7)
- Number of pieces: 100 motifs (10 strands of 10 motifs) and 10 tassels
- Layout: 10 strands hung side by side, 2.5 in (6.4 cm) apart center to center, alternating yellow and cream
- Piece size (one motif): 3.5 in (8.9 cm) long x 1.75 in (4.4 cm) wide
- Size before border (after Rnd 2): 3 in (7.6 cm) long x 1.25 in (3.2 cm) wide
- Border depth: 0.25 in (0.6 cm) on every edge
Materials
Choose a smooth cotton in worsted weight, either mercerized or matte, with about 170 m per 100 g. Cotton holds the almond shape and doesn’t stretch much under its own weight. It also gives the crisp stitch definition shown in the photo. Avoid fuzzy yarns, because they hide the open centers.
- Color A, butter yellow: 320 g (about 545 m)
- Color B, cream: 320 g (about 545 m)
Each color covers 50 motifs, 5 hanging loops, and 5 tassels. These amounts include a margin of about 20% for gauge differences and tassel trimming.
Tools:
- 4.5 mm (US 7) crochet hook
- Tapestry needle
- Scissors
- Stiff cardboard, 5.5 in (14.0 cm) tall, for the tassels
- 10 wooden beads, 0.75 in (1.9 cm), for the tassel heads (optional)
- Stitch markers
- Measuring tape
- Rust-proof pins and a blocking board
Abbreviations (US Terms)
- ch – chain
- sl st – slip stitch
- sc – single crochet
- dc – double crochet
- sp – space
- st(s) – stitch(es)
- rnd – round
Special stitch – Point join: Ch 1. Insert the hook from front to back into the bottom ch-2 point of the motif above, then sl st. Ch 1. This takes the place of the ch 2 at the top point of the new motif and links the two tips.
Gauge and Checkpoints
Base gauge: 16 sc = 4 in (10.2 cm), worked in rows.
Make one complete motif before you start the strands. The motif is your real gauge swatch, so measure it flat and unstretched.
- After Rnd 1: 2 in (5.1 cm) long x 0.75 in (1.9 cm) wide, with an opening about 1.5 in (3.8 cm) long
- After Rnd 2: 3 in (7.6 cm) long x 1.25 in (3.2 cm) wide
- After Rnd 3: 3.5 in (8.9 cm) long x 1.75 in (4.4 cm) wide
If your motif is too big: Go down to a 4 mm (US G-6) hook. Small errors add up. A motif that is 0.25 in (0.6 cm) too long makes each strand 2.5 in (6.4 cm) too long.
If your motif is too small: Go up to a 5 mm (US H-8) hook.
If only the length is off: Check Rnd 2. Tight dc stitches near the tips pull the points in, so loosen them slightly.
Motif Pattern
The motif starts as a chain ring and then flattens into an almond. The same two stitches act as the tips in every round.
Rnd 1: Ch 16 and sl st in the first ch to form a ring. Ch 1, then work 24 sc into the ring. Sl st in the first sc to join. (24 sc)
Flatten the ring into an oval. Place a marker in sc 1 (top tip) and sc 13 (bottom tip). Each side now has 11 sc between the tips.
Rnd 2: Ch 3 (counts as dc), then (ch 2, dc) in the same st as the join. This makes the top tip. Dc in each of the next 11 sts. Work (dc, ch 2, dc) in the marked sc 13 to make the bottom tip. Dc in each of the next 11 sts. Sl st in the top of the beginning ch-3 to join. (26 dc and 2 ch-2 sps)
The count is 2 dc at each tip plus 11 dc on each side: 2 + 11 + 2 + 11 = 26. The dc stitches fan out from the ring and create the radiating texture.
Rnd 3 (edging): See the Border section below. On the first motif of each strand, work Rnd 3 with a regular ch-2 at both tips. On every later motif, use the point join at the top tip.
Fasten off after Rnd 3 and weave the ends into the Rnd 1 ring, where they are least visible from both sides.
Make All Pieces
Each strand uses one color from top to bottom.
- Color A (yellow): 5 strands x 10 motifs = 50 motifs, plus 5 tassels
- Color B (cream): 5 strands x 10 motifs = 50 motifs, plus 5 tassels
Panel layout (strands left to right, rows top to bottom):
Strand:   1  2  3  4  5  6  7  8  9  10
Loop:     A  B  A  B  A  B  A  B  A  B
M1-M10:   A  B  A  B  A  B  A  B  A  B
Tassel:   A  B  A  B  A  B  A  B  A  B
Finish one whole strand at a time, including its loop and tassel. That way, you can check each strand’s length right away. Tie a scrap of yarn to each finished strand with its number so the order stays correct when you hang them.
Joining
You join the motifs as you go, tip to tip, during Rnd 3 of each new motif.
Stitch-to-stitch logic: The bottom tip of the motif above has a ch-2 point. The top tip of the new motif would normally have its own ch-2 point. The point join replaces that ch 2 with ch 1, sl st into the upper ch-2 sp, and ch 1. The two ch-1s match the 2 chains they replace, so the new motif keeps its exact shape and stitch count.
How to work it: Finish Rnds 1 and 2 of the new motif. Start Rnd 3 at the top tip as written, and in the top ch-2 sp work (sc, point join, sc). Then finish the round normally. Before you sl st, make sure the right sides of both motifs face you.
Tension: Keep the sl st snug but not tight. A tight join puckers the tips, and a loose one lets the motifs twist on the strand.
Hanging loop: When the first motif is complete, join the strand color to its top ch-2 sp. Ch 24 and sl st into the same ch-2 sp, then fasten off. The loop is about 6 in (15.2 cm) around. It fits a rod up to 1.5 in (3.8 cm) thick and drops 3 in (7.6 cm).
Strand size checkpoint: After 10 motifs, the linked section should measure 35 in (88.9 cm) from the top tip to the bottom tip (10 x 3.5 in). If it is longer than 36 in (91.4 cm), the joins are loose.
Border
The border is Rnd 3, a sc edging with a point at each end. It adds 0.25 in (0.6 cm) to every edge.
Border gauge: 4 sc per inch (1.6 sc per cm) along the outer edge.
Rnd 3: Sl st into the top ch-2 sp. Ch 1, then work (sc, ch 2, sc) in the same sp. Sc in each of the next 13 dc. Work (sc, ch 2, sc) in the bottom ch-2 sp. Sc in each of the next 13 dc. Sl st in the first sc to join. (30 sc and 2 ch-2 points)
Count per side: Each side gets 13 sc worked into its dc: the 11 side dc plus 1 tip dc at each end. Add the 2 tip sc, one in each ch-2 sp, for 15 sc per side. Two sides make 30 sc.
As a conversion round, that is 26 sc worked one per existing dc plus 4 extra sc in the tip spaces, for 30 sc and 2 ch-2 points.
Why the math works: Each curved side is about 3.75 in (9.5 cm) long. At 4 sc per inch, 15 sc fills that edge without ruffling or cupping. The extra sc at each tip covers the sharp turn, and the ch-2 keeps the point crisp instead of rounding it off.
Tassels (one per strand):
- Wrap the yarn 30 times around the 5.5 in (14.0 cm) card.
- Slide a 12 in (30.5 cm) tie strand under the wraps at the top, knot it tightly, and slide the bundle off the card.
- Push the bead, or a small ball of scrap yarn, into the bundle just under the top fold.
- Wrap a separate strand tightly 8-10 times around the bundle, 1 in (2.5 cm) below the top, to form the round head. Knot it and bury the ends inside the tassel.
- Cut the bottom loops and trim the tassel to 5 in (12.7 cm) total, including the head.
- Use the top tie strand to sew the tassel to the bottom ch-2 point of motif 10.
Final Blocking
- Lay each strand flat on a blocking board, right side up.
- Mist it with water until damp, not soaked.
- Pin each motif at both tips so it measures 3.5 in (8.9 cm) long.
- Ease the sides out to 1.75 in (4.4 cm) wide and pin the middle of each side.
- Open each center with a finger so the oval is even.
- Lightly steam the tassel skirts and comb them straight with your fingers.
- Let everything dry completely before you unpin, usually 12-24 hours.
- Hang the strands in order, 2.5 in (6.4 cm) apart, for a 24.25 in (61.6 cm) panel.
Final Quality-Control Checklist
- Every motif has 24 sc in Rnd 1, 26 dc in Rnd 2, and 30 sc in Rnd 3
- Each side of every motif has 15 sc
- Both tips are pointed, not rounded
- Every strand has exactly 10 motifs
- The linked section is 35 in (88.9 cm) on each strand
- All hanging loops drop 3 in (7.6 cm)
- All 10 tassels are 5 in (12.7 cm) long with round heads
- The strands alternate yellow and cream, starting with yellow on the left
- Every strand is 43 in (109.2 cm) long in total
- All ends are woven in securely
Troubleshooting
The motif looks round instead of almond-shaped: The tips are not directly across from each other. Check that the bottom tip is in sc 13 of Rnd 1.
The center opening closes up: The Rnd 1 sc are crowded. Make sure the ring is a full 16 ch and the 24 sc are spaced evenly around it.
The edges ruffle: The edging is too loose or has extra stitches. Recount to 15 sc per side.
The edges cup: The edging is too tight. Use a hook 0.5 mm larger for Rnd 3 only.
The strands are different lengths: Compare the motif sizes first, then the joins. Block the long strand more firmly, or remake one motif.
The strands twist on the rod: Block them again, then let them hang for a few minutes with the tassels gently weighted.
The tassel heads look flat: Add a bead or more scrap yarn inside the head.
Care
Hand wash in cool water with mild soap. Roll each strand in a towel to remove water, then dry it flat and re-pin the tips if needed. Avoid long periods of harsh, direct sun so the yellow doesn’t fade.
Final Notes
The whole panel depends on one chain of measurements. Rnd 1 sets a 24-stitch ring. Rnd 2 builds 26 dc into a 3 in (7.6 cm) almond. Rnd 3 adds 15 sc per side and brings the motif to 3.5 in (8.9 cm) long. Ten linked motifs make 35 in (88.9 cm). Add the 3 in (7.6 cm) loop and the 5 in (12.7 cm) tassel, and each strand hangs 43 in (109.2 cm). Ten strands spaced 2.5 in (6.4 cm) apart make a 24.25 in (61.6 cm) panel.
Check your first motif carefully, and the rest of the curtain will follow.
Happy crocheting!