

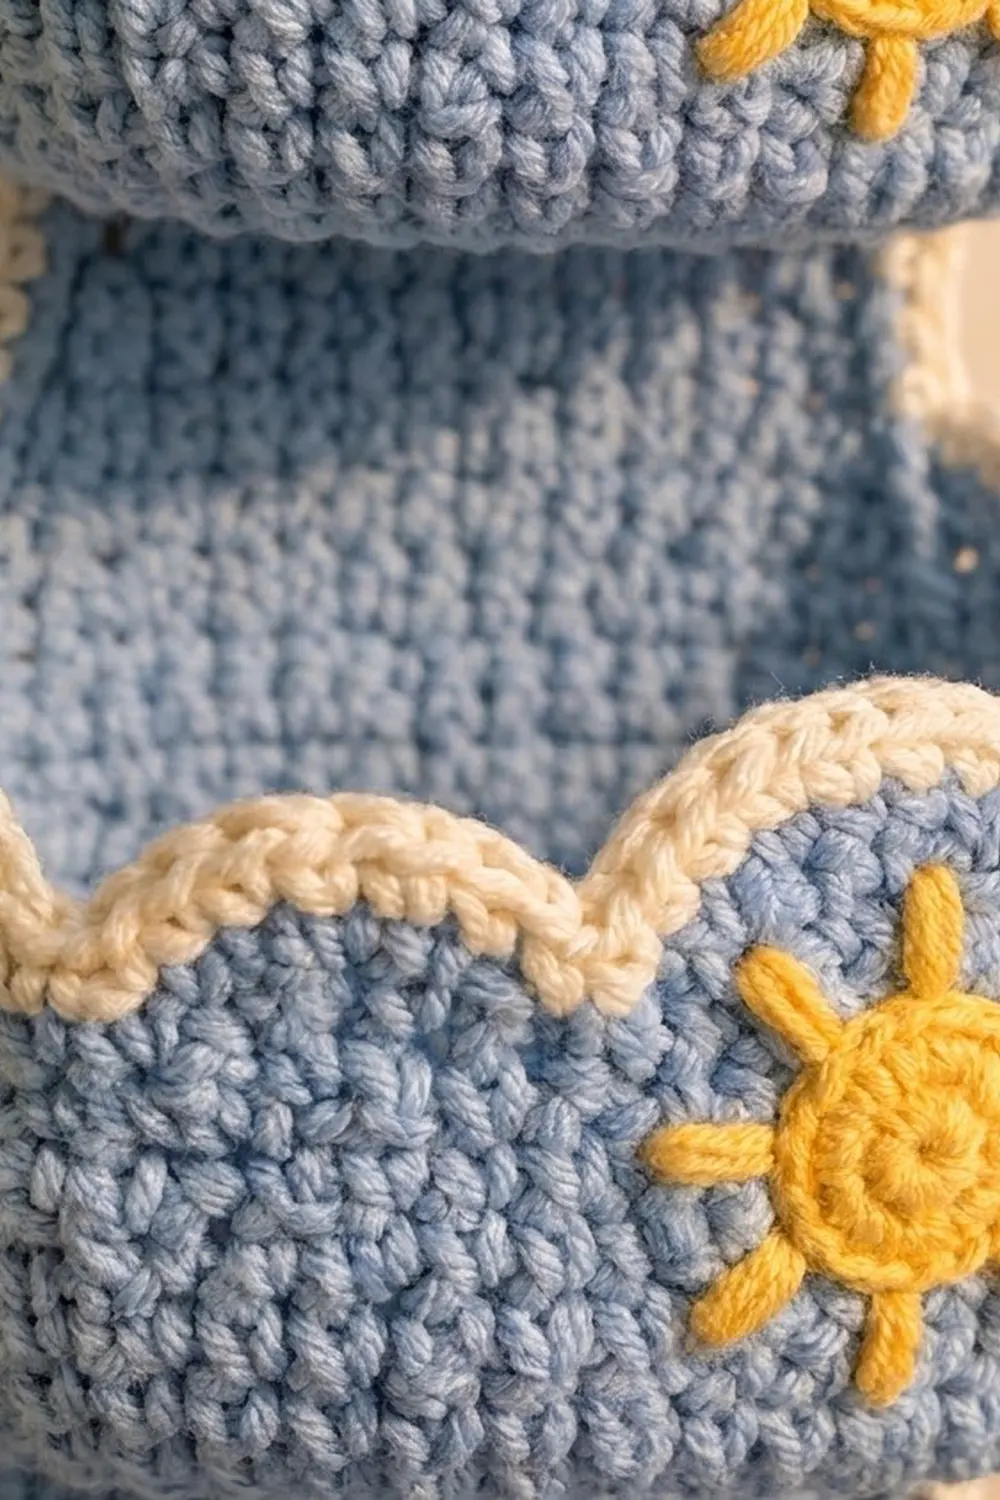
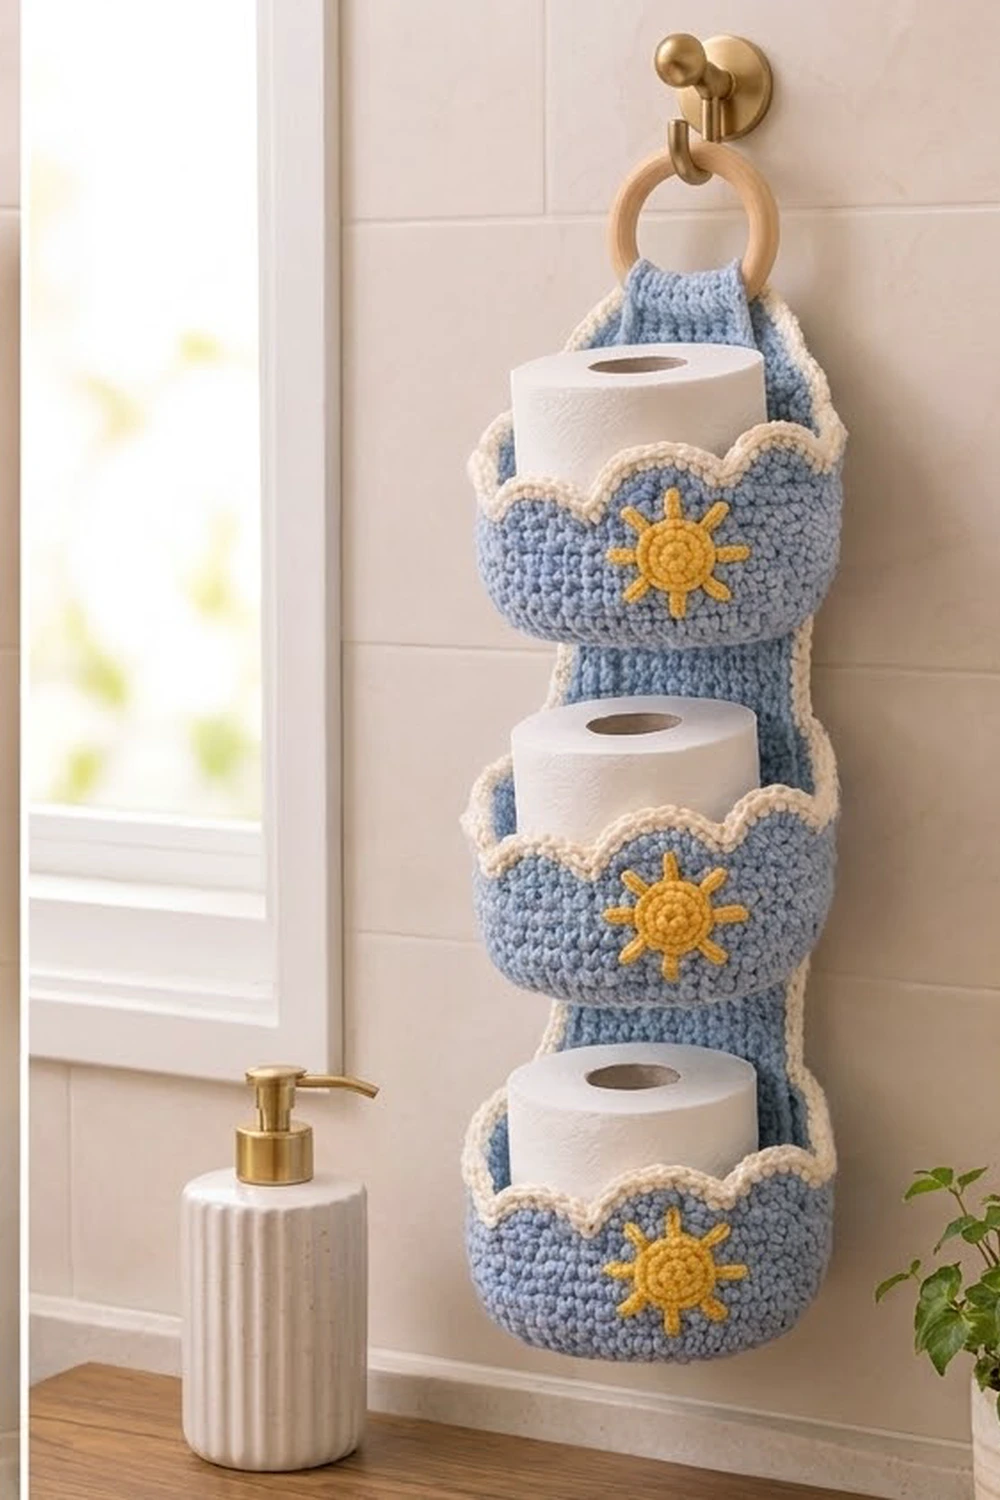
This hanging toilet paper holder keeps three spare rolls tidy and in easy reach. Three soft blue pockets are stacked down a long back panel. Each pocket has a scalloped cloud top outlined in cream and a small yellow sun on the front.
The palette is light blue, cream, and sunny yellow. It’s calm and cheerful and works well in a bright bathroom. Dense single crochet gives the pockets enough body to stand open without stiffening.
The pattern uses US crochet terms. The bordered back panel measures 6.5 x 18.5 in (16.5 x 47.0 cm). With the tab and a 3 in (7.6 cm) wooden ring, the holder hangs about 22.5 in (57.2 cm) long.
Here’s how it’s built. You crochet a flat back panel in rows. Each pocket is an oval basket worked in joined rounds and finished with a blue scallop round and a cream rim. Separately, you make three suns and a hanging tab. Then you sew everything together and add a cream border around the panel.
Finished Size and Construction
- Finished size: panel 6.5 x 18.5 in (16.5 x 47.0 cm); total hanging length about 22.5 in (57.2 cm)
- Skill level: Easy+ (simple stitches, careful sewing)
- Terminology: US
- Yarn weight: worsted (#4)
- Hook: 5.0 mm (H-8)
- Number of pieces: 8 (1 panel, 1 tab, 3 pockets, 3 suns)
- Layout: 1 column of 3 pockets on one panel
- Pocket size: about 6 in (15.2 cm) wide at the back, 4 in (10.2 cm) tall at the scallop peaks
- Panel size before border: 6 x 18 in (15.2 x 45.7 cm)
- Border depth: 1 round, 0.25 in (0.6 cm)
Materials
Pick a smooth worsted-weight cotton or cotton blend. Cotton holds its shape and copes well with bathroom humidity. Acrylic also works, but the pockets will be a little softer.
- Light blue: 250 g, about 450 m (492 yd)
- Cream: 30 g, about 54 m (59 yd)
- Yellow: 10 g, about 18 m (20 yd)
All quantities include a margin of roughly 10-15% for swatching and seams.
Tools:
– 5.0 mm (H-8) crochet hook
– 3 in (7.6 cm) wooden ring
– Tapestry needle
– 4-6 stitch markers
– Rigid ruler or tape measure
– Pins and a blocking surface
Abbreviations (US Terms)
- ch – chain
- sl st – slip stitch
- sc – single crochet
- hdc – half double crochet
- dc – double crochet
- inc – 2 sc in the same stitch
- sc2tog – single crochet 2 together
- BLO – back loop only
- st(s) – stitch(es)
Special stitch – Scallop repeat (worked over 8 sts): sl st in next st, sc in next st, hdc in next st, 2 dc in next st, 2 dc in next st, hdc in next st, sc in next st, sl st in next st. This uses 8 sts and makes 10.
Gauge and Checkpoints
Gauge: 16 sc x 18 rows = 4 x 4 in (10.2 x 10.2 cm) in blue with the 5.0 mm hook. That works out to 4 sts and 4.5 rows per inch.
Start by making one pocket. It is the most gauge-sensitive piece, and it will tell you quickly whether a paper roll fits.
Checkpoints:
– Pocket base after Rnd 10: about 6 x 4.5 in (15.2 x 11.4 cm), lying flat
– Pocket wall (Rnds 11-24): 3.1 in (7.9 cm) tall
– Panel after Row 81: 6 x 18 in (15.2 x 45.7 cm)
– Panel after border: 6.5 x 18.5 in (16.5 x 47.0 cm)
If your pieces come out too big, go down 0.5 mm. If they come out too small, go up 0.5 mm. Don’t add or remove stitches, because the joining is worked stitch-to-stitch.
Back Panel (Blue)
Ch 25.
Row 1: Sc in 2nd ch from hook and in each ch across. (24 sts)
Rows 2-81: Ch 1, turn. Sc in each st across. (24 sts)
Fasten off. Check that the panel measures 6 x 18 in (15.2 x 45.7 cm).
Pocket (Make 3, Blue and Cream)
The rounds are joined with a sl st to the first st. The ch 1 at the start of a round never counts as a stitch.
Oval Base
Ch 9.
Rnd 1: Sc in 2nd ch from hook, sc in next 6 ch, 3 sc in last ch. Rotate and work along the opposite side of the chain: sc in next 6 ch, 2 sc in last ch (the same ch as the first sc). Join. (18 sts)
Rnd 2: Ch 1, inc in first st, sc in next 6, inc in each of next 3, sc in next 6, inc in each of last 2. Join. (24 sts)
Rnds 3-10: Ch 1, [inc, sc in next X sts] once, sc in next 6, [inc, sc in next X sts] 3 times, sc in next 6, [inc, sc in next X sts] twice. Join.
X equals the round number minus 2:
- Rnd 3: X = 1 (30 sts)
- Rnd 4: X = 2 (36 sts)
- Rnd 5: X = 3 (42 sts)
- Rnd 6: X = 4 (48 sts)
- Rnd 7: X = 5 (54 sts)
- Rnd 8: X = 6 (60 sts)
- Rnd 9: X = 7 (66 sts)
- Rnd 10: X = 8 (72 sts)
Every round adds 6 sts, 3 at each curved end. The 6-st straight sides stay the same.
Walls
Rnd 11: Ch 1, sc in BLO of each st around. Join. (72 sts) This makes a crisp fold between the base and the wall.
Rnds 12-24: Ch 1, sc in each st around. Join. (72 sts)
The wall, Rnds 11-24, is 14 rounds tall, which is 3.1 in (7.9 cm).
Scallop Top
Rnd 25 (blue, conversion round): Ch 1, work the Scallop repeat 9 times. Join to the first sl st. Count: 72 sts worked 1-per-st + 18 sts added (2 in each repeat) = 90 sts. Fasten off.
Each scallop is 2 in (5.1 cm) wide and rises about 0.5 in (1.3 cm) above the wall.
Cream Rim
Rnd 26 (cream, trim round): Join cream in the first sc of any repeat. Ch 1, *sc in same st and next 7 sts (sc, hdc, 4 dc, hdc, sc), sc2tog over the next 2 sl sts; for each following repeat, start the 8 sc in the next sc. Repeat from * 9 times in total. Join. Count: 72 sts worked 1-per-st + 9 sc2tog over the 18 sl sts = 81 sts.
The sc2tog pulls each valley in, so the rim follows the cloud shape. Fasten off and weave in the ends.
Sun Appliqué (Make 3, Yellow)
Rnd 1: Make a magic ring, ch 1, 8 sc in the ring. Join. (8 sts)
Rnd 2: Ch 1, 2 sc in BLO of each st around. Join. (16 sts) The unused front loops show as a ring around the center.
Rnd 3 (rays): *Sl st in next st, ch 3, sl st in 2nd ch from hook, sc in next ch, sl st in next st. Repeat from * 7 more times. (8 rays, using all 16 sts)
Fasten off and leave a 12 in (30.5 cm) tail. The finished sun measures about 2 in (5.1 cm) across the ray tips.
Hanging Tab (Blue)
Ch 9.
Row 1: Sc in 2nd ch from hook and in each ch across. (8 sts)
Rows 2-22: Ch 1, turn, sc in each st across. (8 sts)
The finished tab is 2 x 4.9 in (5.1 x 12.4 cm). Fasten off and leave a long tail.
Make All Pieces
- Blue: 1 panel, 1 tab, 3 pockets (Rnds 1-25)
- Cream: 3 pocket rims (Rnd 26), plus the panel border
- Yellow: 3 suns
Layout, front view (rows counted from the bottom of the panel):
        ( O )        wooden ring
         |T|         tab
+--------------------+
|                    |  rows 77-81
| ~~~~ POCKET 3 ~~~~ |  walls on rows 59-72
|                    |
| ~~~~ POCKET 2 ~~~~ |  walls on rows 32-45
|                    |
| ~~~~ POCKET 1 ~~~~ |  walls on rows 5-18
|                    |  rows 1-4
+--------------------+
Joining
Suns first: Center a sun on the front right of each pocket, about 1.25 in (3.2 cm) from the right side and 1 in (2.5 cm) above the base fold. Whipstitch around the edge of Rnd 2, then tack each ray tip down with one small stitch.
Mark each pocket’s back: Lay the pocket flat with the long sides of the base at front and back. Pick the 3 scallops that sit most squarely on the back long side; the 24 wall sts under them form the back. Place a marker at each end of that 24-st span. Turn the pocket so its sun sits on the right as you face it.
Base seam (stitch-to-stitch): Line the 24 back BLO ridge sts from Rnd 11 up with the 24 sts of the target panel row. Whipstitch them together one-to-one. Pocket 1 goes on Row 5, Pocket 2 on Row 32, and Pocket 3 on Row 59.
Side seams (row-to-row): At each marker, whipstitch the 14 wall rounds to 14 panel rows along the panel’s edge column. Pocket 1 runs up rows 5-18, Pocket 2 up rows 32-45, and Pocket 3 up rows 59-72. The panel and the walls share the same row gauge, so the match is one-to-one. Tack the 3 back scallops lightly to the panel at their valleys.
The front 48 sts curve forward and form the pocket. Keep the whipstitch snug, but don’t pull it tight. Neither seam should pucker the panel.
Tab: Sew one short end of the tab across the center 8 sts (sts 9-16) on the front of the panel, 1 in (2.5 cm) below the top edge. Thread the tab through the ring. Sew the other end at the same spot on the back of the panel.
Size checkpoint: The panel should still measure 6 x 18 in (15.2 x 45.7 cm) and lie flat between the pockets.
Border (Cream)
Border gauge: The border uses the same 4 sc per inch. One round adds 0.25 in (0.6 cm) on every edge.
Rnd 1: Join cream in the top right corner st. Lift the tab out of the way as you pass under it.
- Top edge: 3 sc in the corner st, sc in the next 22 sts, 3 sc in the last st. (28 sc including both corners)
- Left side: 72 sc evenly along the row ends, 8 sc for every 9 rows. (72 sc between the corners)
- Bottom edge: 3 sc in the first foundation ch, sc in the next 22 ch, 3 sc in the last ch. (28 sc including both corners)
- Right side: 72 sc along the row ends as before. (72 sc)
Join to the first sc. Total: 28 + 72 + 28 + 72 = 200 sts. Fasten off and weave in the ends.
Why the math works: The short edges keep the panel’s original 24 sts: 22 plain sc plus the 2 corner sts. Each corner st takes 3 sc so the corner turns flat, and those corners are counted only once, in the 28. On the long sides, 81 rows at 4.5 rows per inch is 18 in, and 72 sc at 4 sts per inch is also 18 in. The border therefore lies flat, and the panel finishes at 6.5 x 18.5 in (16.5 x 47.0 cm).
Final Blocking
- Spritz the whole holder with water until it is damp but not soaked.
- Lay it face-up and pin the panel to 6.5 x 18.5 in (16.5 x 47.0 cm).
- Put a paper roll, or a rolled-up hand towel, in each pocket to shape the curve.
- Pin each scallop peak upward to open the cloud shape.
- Flatten each sun with your fingers and spread the rays evenly.
- Leave it to dry completely, then remove the pins and hang it from the ring.
Final Quality-Control Checklist
- Panel measures 6.5 x 18.5 in (16.5 x 47.0 cm)
- Border has 200 sts, with flat corners
- Each pocket has 9 scallops: 3 at the back, 6 curving across the front
- Each cream rim has 81 sts with tight valleys
- Pocket base seams sit on rows 5, 32, and 59
- All three suns sit at the same height and the same distance from the right side
- Tab is secured on both the front and back of the panel
- All ends are woven in
Troubleshooting
- Pocket base ruffles: Your tension is loose. Go down a hook size, or stagger the increases slightly on each round.
- Base cups up before Rnd 11: Your tension is too tight. Go up a hook size.
- A roll won’t fit: Check the Rnd 10 count of 72 and the base size of 6 x 4.5 in (15.2 x 11.4 cm).
- Scallops look flat: Pull the sc2tog in the cream valleys a little firmer.
- Panel border waves: Use 7 sc per 9 rows instead of 8 on the long sides.
- Panel border pulls in: Add 1 extra sc every 18 rows.
- Holder tilts on the hook: Recenter the tab over sts 9-16.
Care
Hand wash in cool water and lay flat to dry, reshaping each pocket around a roll. Avoid the dryer, which can shrink cotton and flatten the scallops.
Final Notes
Every measurement in this pattern links back to the gauge. At 16 sc x 18 rows per 4 in (10.2 cm), the 24 x 81 panel measures 6 x 18 in (15.2 x 45.7 cm). The 72-st pockets stitch on one-to-one: 24 back sts across a panel row and 14 wall rounds up 14 panel rows. The 200-st border then brings the panel to 6.5 x 18.5 in (16.5 x 47.0 cm). Check each stage as you go and the holder will come together easily.
Happy crocheting!