
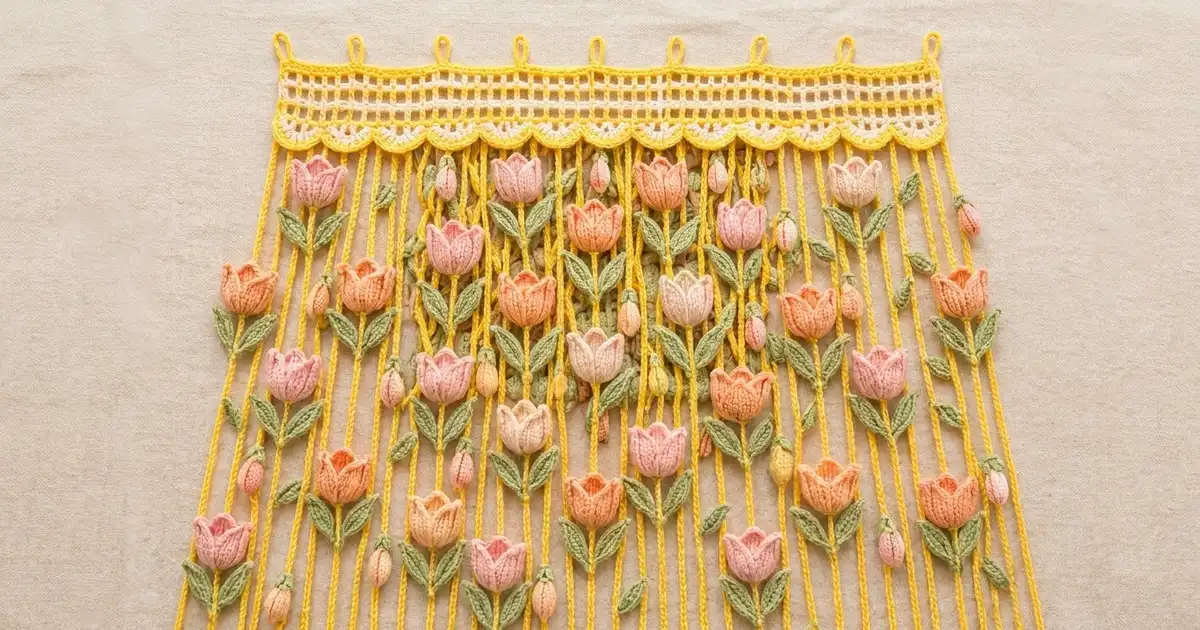
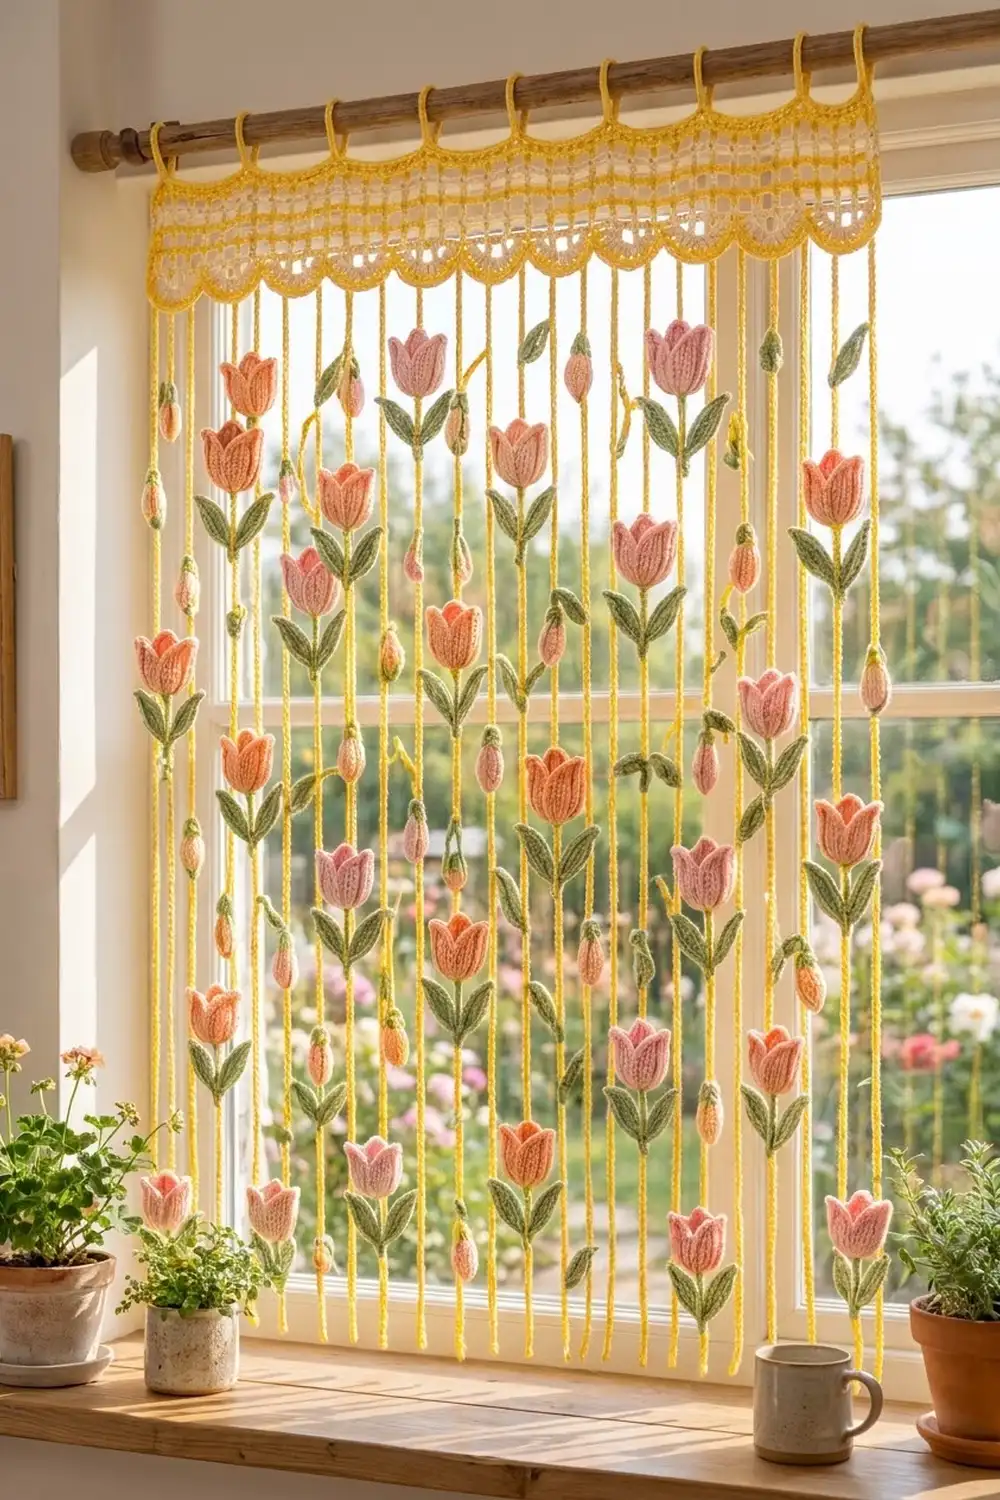
This curtain brings a spring garden to any window. A sunny yellow header with cream filet mesh and soft scallops holds dozens of yellow chain strands. Tulips in pink, peach and pale blush grow along the strands, with sage-green leaves and small ribbed buds.
The look is cottage-style and light. Light still comes through the strands, so the curtain works as a valance, a doorway divider or a wall hanging. The tulip petals are ribbed, which gives them real depth.
The pattern uses US crochet terms. The finished curtain is 36.25 in (92.1 cm) wide and 45.25 in (114.9 cm) long, measured from the top edge to the ends of the strands. The hanging loops add another 1.5 in (3.8 cm) above that.
You crochet the header flat in rows and make the motifs separately. Then you chain the strands directly off the scallop edge and sew the motifs on. Last, you work the top edge with its hanging loops.
Finished Size and Construction
- Finished size: 36.25 in (92.1 cm) x 45.25 in (114.9 cm), plus 1.5 in (3.8 cm) loops
- Skill level: Intermediate. The stitches are simple, but there is a lot of finishing.
- Terminology: US
- Yarn weight: Worsted (#4) cotton
- Hook: 5.0 mm (H-8)
- Number of pieces: 1 header, 49 strands, 48 tulips (144 petals), 48 buds, 96 leaves, 96 stems, 48 caps
- Layout: 49 strands in one row. 25 plain strands alternate with 24 decorated strands.
- Piece sizes: tulip head 2.25 x 2 in (5.7 x 5.1 cm); leaf 2.25 x 1 in (5.7 x 2.5 cm); bud 1.25 x 0.75 in (3.2 x 1.9 cm)
- Size before border: header 36.25 x 3 in (92.1 x 7.6 cm)
- Border depth: 0.25 in (0.6 cm) top edge, plus 1.5 in (3.8 cm) loops
Materials
Use smooth worsted-weight cotton or a cotton blend, about 85 m per 50 g. Cotton hangs straight, keeps the ribs crisp and holds up well in sunlight.
- Bright yellow: 400 g (680 m), for the header edges, strands and loops
- Cream: 50 g (85 m), for the mesh and scallops
- Pink: 150 g (255 m), for the tulips and buds
- Peach: 150 g (255 m), for the tulips and buds
- Pale blush: 50 g (85 m), for the accent tulips
- Sage green: 225 g (383 m), for the leaves, stems and caps
Tools: 5.0 mm hook, tapestry needle, stitch markers, measuring tape, rust-proof pins, a blocking mat, a spray bottle and scissors.
These quantities include a margin of about 15–20% for gauge differences and sewing tails.
Abbreviations (US Terms)
- ch – chain
- sl st – slip stitch
- sc – single crochet
- hdc – half double crochet
- dc – double crochet
- sk – skip
- sp – space
- st(s) – stitch(es)
- BLO – back loop only
- RS – right side
Special stitch: back-bump sl st. Insert the hook into the bump on the back of the chain and make a sl st. Working all the way back along a chain this way turns it into a firm, rounded cord.
Gauge and Checkpoints
- Sc gauge: 16 sc and 18 rows = 4 in (10.2 cm)
- Mesh gauge: 8 mesh squares and 8 rows = 4 in (10.2 cm), so each square is 0.5 in (1.3 cm)
- Chain gauge: 4 ch = 1 in (2.5 cm)
Make one tulip as a test piece before you start the header. Each petal should measure 1.75 x 1.25 in (4.4 x 3.2 cm), and the assembled head 2.25 x 2 in (5.7 x 5.1 cm).
Checkpoints:
– After Row 1, the header is 36.25 in (92.1 cm) wide.
– After Row 5, the header is 2 in (5.1 cm) tall.
– After Row 7, it is 3 in (7.6 cm) tall at the scallop points.
– Each strand is 42 in (106.7 cm).
If your work is too big, go down a hook size. If it is too small, go up a hook size.
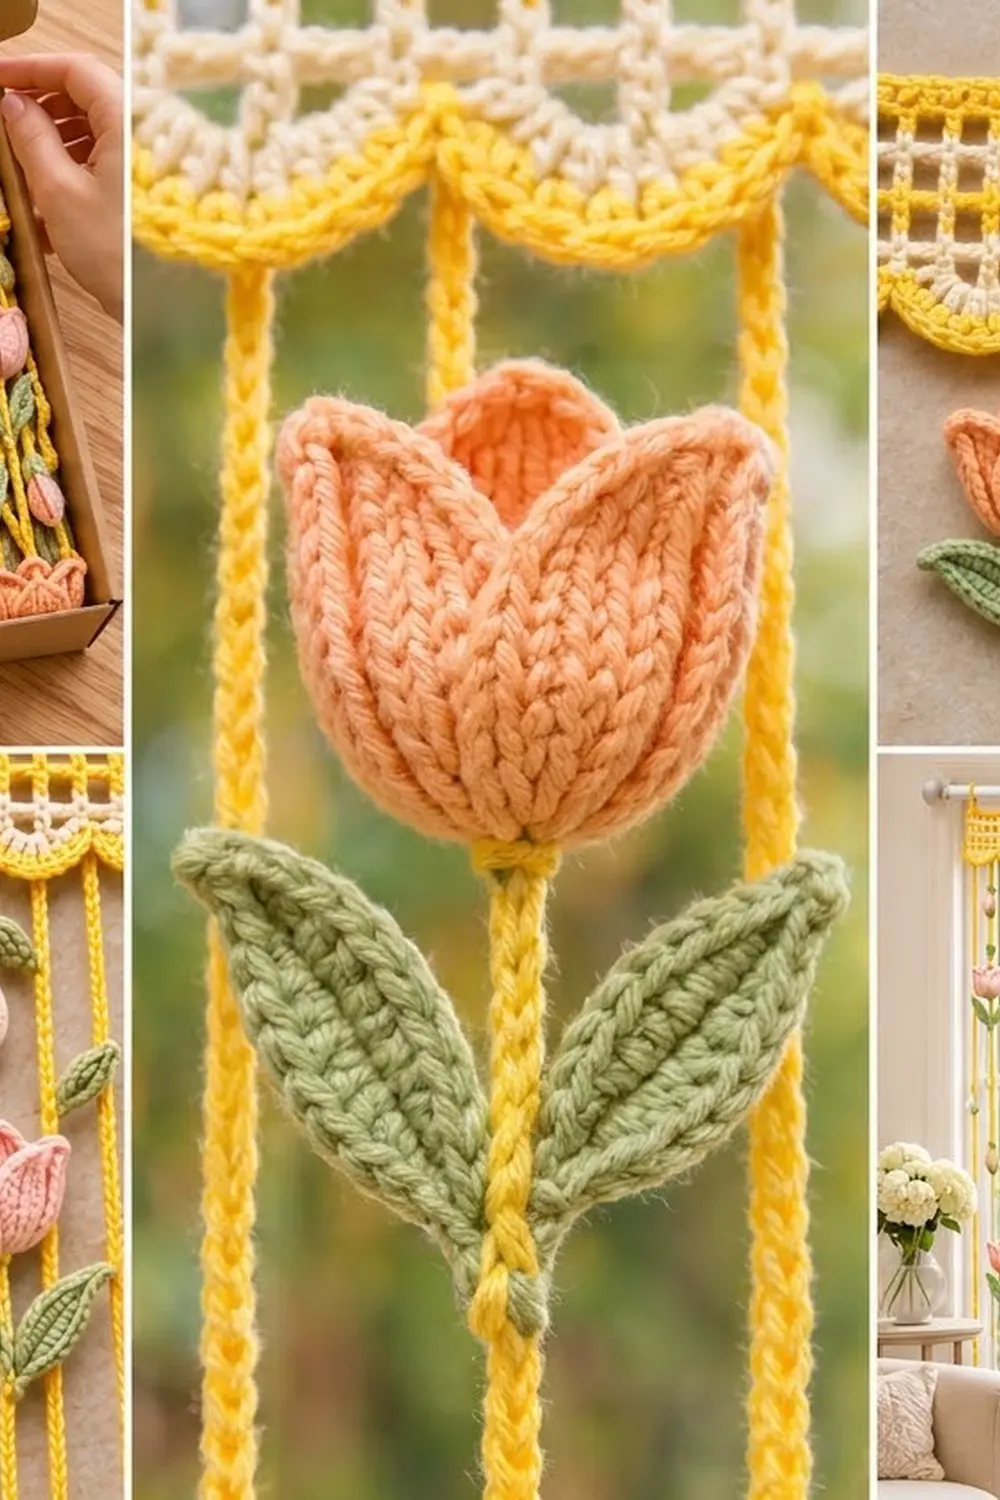
Header
Change color on the last yarn-over of the previous row.
Foundation: With yellow, ch 146.
Row 1 (yellow): Sc in 2nd ch from hook and in each ch across. Change to cream. (145 sc)
Row 2 (cream): Ch 4 (counts as dc + ch 1), turn, sk next st, dc in next st. Ch 1, sk next st, dc in next st; repeat from * to end. (73 dc, 72 ch-1 sps = 72 mesh squares)
Rows 3–4 (cream): Ch 4, turn, dc in next dc. Ch 1, dc in next dc; repeat from * across, working the last dc in the 3rd ch of the turning ch. (73 dc, 72 ch-1 sps) After Row 4, change to yellow.
Row 5 (yellow): Ch 1, turn. Sc in each dc and each ch-1 sp across. Change to cream. (73 + 72 = 145 sc)
Checkpoint: 36.25 x 2 in (92.1 x 5.1 cm).
Row 6 (cream, scallops): Ch 1, turn, sc in first st. Sk 2 sts, 7 dc in next st, sk 2 sts, sc in next st; repeat from * 24 times. Each repeat uses 6 sts, so 1 + (24 x 6) = 145 sts are used. Change to yellow. (24 scallops: 168 dc + 25 sc = 193 sts)
Row 7 (yellow, scallop outline, trim row): Ch 1, turn, sc in first sc. Sc in next 3 dc, 3 sc in next dc, sc in next 3 dc, sc in next sc; repeat from * 24 times. Fasten off. (193 sts worked 1 per st + 48 extra sc at the scallop tips = 241 sc)
Each scallop tip now has a center sc, the middle stitch of its 3-sc group. There are also 25 “valley” sc between and beside the scallops, counting the two end sc. These 49 sc are the strand anchors.
Tulip Petal (make 144)
The rows run along the length of the petal, and working in BLO creates the vertical ribs. Sl sts keep the base narrow, and the hdc section widens the petal near the tip.
Foundation: Ch 8.
Row 1 (RS): Sl st in 2nd ch from hook, sc in next ch, hdc in next 4 ch, sc in last ch. (7 sts)
Row 2: Ch 1, turn. Working in BLO: sc in first st, hdc in next 4 sts, sc in next st, sl st in last st. (7 sts)
Row 3: Ch 1, turn. Working in BLO: sl st, sc, hdc in next 4 sts, sc. (7 sts)
Row 4: Repeat Row 2. (7 sts) Fasten off, leaving an 8 in (20.3 cm) tail.
Pinch the tip corner so it forms a soft point.
Tulip assembly: Use three petals of the same color for each tulip.
- Lay two petals side by side in a narrow V, with the bases overlapping and the tips angled slightly apart.
- Place the third petal on top in the center, with its base lined up with the others.
- Whipstitch all three bases together.
- Tack each side edge of the center petal to the petal behind it so the head cups.
Bud (make 48)
Foundation: With pink or peach, ch 6.
Row 1: Sc in 2nd ch from hook, hdc in next 2 ch, sc in next ch, sl st in last ch. (5 sts)
Row 2: Ch 1, turn. Working in BLO: sl st, sc, hdc in next 2 sts, sc. (5 sts)
Row 3: Ch 1, turn. Working in BLO: sc, hdc in next 2 sts, sc, sl st. (5 sts)
Rows 4–6: Work Row 2, then Row 3, then Row 2 once more. (5 sts each)
Fold the piece so Row 6 meets the foundation chain and whipstitch them together to make a tube. Gather the narrow sl st end closed to form the tip, then gather the wider end closed. The bud is now a ribbed teardrop 1.25 x 0.75 in (3.2 x 1.9 cm).
Cap (make 48, green): Ch 10. Starting in 2nd ch from hook: sl st, sc, hdc; repeat from * 2 more times. (9 sts, 3 points) Wrap the cap around the wide end of the bud with the points facing the tip, and sew it in place.
Leaf (make 96, green)
Foundation: Ch 9.
Round 1:
1. Sc in 2nd ch from hook, hdc in next ch, dc in next 3 ch, hdc in next ch, sc in next ch, 3 sc in last ch.
2. Rotate the piece and work in the free loops on the other side of the chain: sc, hdc, dc in next 3, hdc, sc.
3. For the tip: ch 2, sl st in 2nd ch from hook, then sl st in the first sc.
(7 + 3 + 7 = 17 sts + tip)
Vein: With green, work surface sl sts along the center line from the base to the tip. Fasten off, leaving an 8 in (20.3 cm) tail.
Stems (green)
- Tulip stem (make 48): Ch 7. Work a back-bump sl st in the 2nd ch from hook and in each ch across. (6 sl sts, 1.5 in / 3.8 cm)
- Bud stem (make 48): Ch 5. Work a back-bump sl st in the 2nd ch from hook and in each ch across. (4 sl sts, 1 in / 2.5 cm)
Make All Pieces
| Piece | Color | Quantity |
|---|---|---|
| Tulips (3 petals each) | Pink | 20 |
| Tulips | Peach | 20 |
| Tulips | Pale blush | 8 |
| Buds | Pink | 24 |
| Buds | Peach | 24 |
| Leaves, caps, stems | Sage | 96 leaves, 48 caps, 96 stems |
Layout (front view, left to right):
V A V B V A V B V ... V A V B V
V = plain valley strand (25)
A = decorated strand, type A (12)
B = decorated strand, type B (12)

Distance from header   Type A    Type B
4 in (10.2 cm)           -        bud
7 in (17.8 cm)         tulip       -
13 in (33.0 cm)          -       tulip
18 in (45.7 cm)         bud        -
24 in (61.0 cm)          -        bud
29 in (73.7 cm)        tulip       -
35 in (88.9 cm)          -       tulip
38 in (96.5 cm)         bud        -
Each decorated strand carries 2 tulips and 2 buds, so the 24 decorated strands hold 48 of each. Spread the colors so that tulips of the same color never sit side by side.
Joining
Strands:
1. Hold the header with the RS facing you and the scallops pointing down.
2. With yellow, sl st into the first valley sc.
3. Ch 169, then work a back-bump sl st in the 2nd ch from hook and in each ch back up. (168 sl sts)
4. Sl st into the same valley sc and fasten off.
Make one strand in every valley sc (25) and one in every scallop-tip center sc (24), for 49 strands in total. Each strand attaches to exactly one existing sc, so no stitches are added to the header.
Tension: Chain loosely and evenly at 4 ch per 1 in (2.5 cm). Keep the sl sts as loose as the chains so the strands don’t shorten or twist.
Size checkpoint: Hang the header. Every strand should measure 42 in (106.7 cm). Fix any that don’t before you sew on the motifs.
Motifs: On each decorated strand, measure from the header and mark the positions from the layout table.
- Tulips: Sew the tulip stem along the strand so the head sits at the marked point. Sew a pair of leaves to the bottom of the stem, angled upward in a V.
- Buds: Sew the bud stem to the strand at the mark, then sew the capped bud to the top of the stem.
Use matching yarn and small stitches through the center of the strand.
Border
The border runs along the top edge and holds the hanging loops. Work it at the sc gauge of 4 sts per 1 in (2.5 cm).
Row 8 (yellow, top edge): With the RS facing and the foundation chain at the top, join yellow at the right corner. Ch 1, then sc in each free loop of the foundation chain across. (145 sc)
Row 9 (loops): Ch 1, turn. Sc in the first st, ch 12, sl st in the sc just made. Sc in next 11 sts, sc in next st, ch 12, sl st in the sc just made; repeat from * 12 times. Fasten off. (145 sc + 13 loops)
Why the math works: The mesh needs an odd stitch count (72 x 2 + 1), so the header has 145 sts across. Row 8 matches the Row 1 count exactly, which keeps the top edge from ruffling. The loops sit on sts 1, 13, 25 and so on up to 145, because 1 + (12 x 12) = 145. That gives 13 loops spaced 3 in (7.6 cm) apart, with one at each end. Each ch-12 loop hangs 1.5 in (3.8 cm) and fits a rod up to 0.75 in (1.9 cm) across.
Final Blocking
- Wet the header only and gently squeeze out the extra water.
- Pin the header to 36.25 x 3.25 in (92.1 x 8.3 cm), with the mesh squares straight.
- Pin each scallop tip so all the curves match.
- Spray the tulips and leaves lightly. Shape the petals into cups and flatten the leaves.
- Let everything dry completely.
- Hang the curtain from a rod for 24 hours so the strands straighten under their own weight.
Final Quality-Control Checklist
- The header measures 36.25 in (92.1 cm) wide and lies flat.
- All 72 mesh squares are open and even.
- There are 24 matching scallops, each outlined in yellow.
- All 49 strands measure 42 in (106.7 cm).
- The 13 loops are evenly spaced.
- All 48 tulips, 48 buds and 96 leaves are sewn on firmly at the marked heights.
- All ends are woven in at least 1 in (2.5 cm).
Troubleshooting
- Top edge ruffles: Row 8 has too many sts. Rework it with exactly 145 sc.
- Mesh leans to one side: Make sure each turning ch-4 replaces both the dc and the ch-1.
- Strands twist: The sl sts are too tight. Remake those strands with looser sl sts.
- Petals have no ribs: You worked through both loops. Work Rows 2–4 in BLO only.
- Strands differ in length: Measure them while the curtain is hanging and adjust the chain count.
Care
Hand wash in cool water, roll in a towel and hang to dry. Do not tumble dry, because the strands may tangle.
Final Notes
Each measurement builds on the one before it. At 4 sts per inch, the 145-st header is 36.25 in (92.1 cm) wide. Its 24 scallops and 25 valleys anchor 49 strands of 42 in (106.7 cm) each. The 0.25 in (0.6 cm) top edge brings the header to 3.25 in (8.3 cm), and the curtain to 45.25 in (114.9 cm) long. Check each stage and the tulips will hang straight and even.
Happy crocheting!