

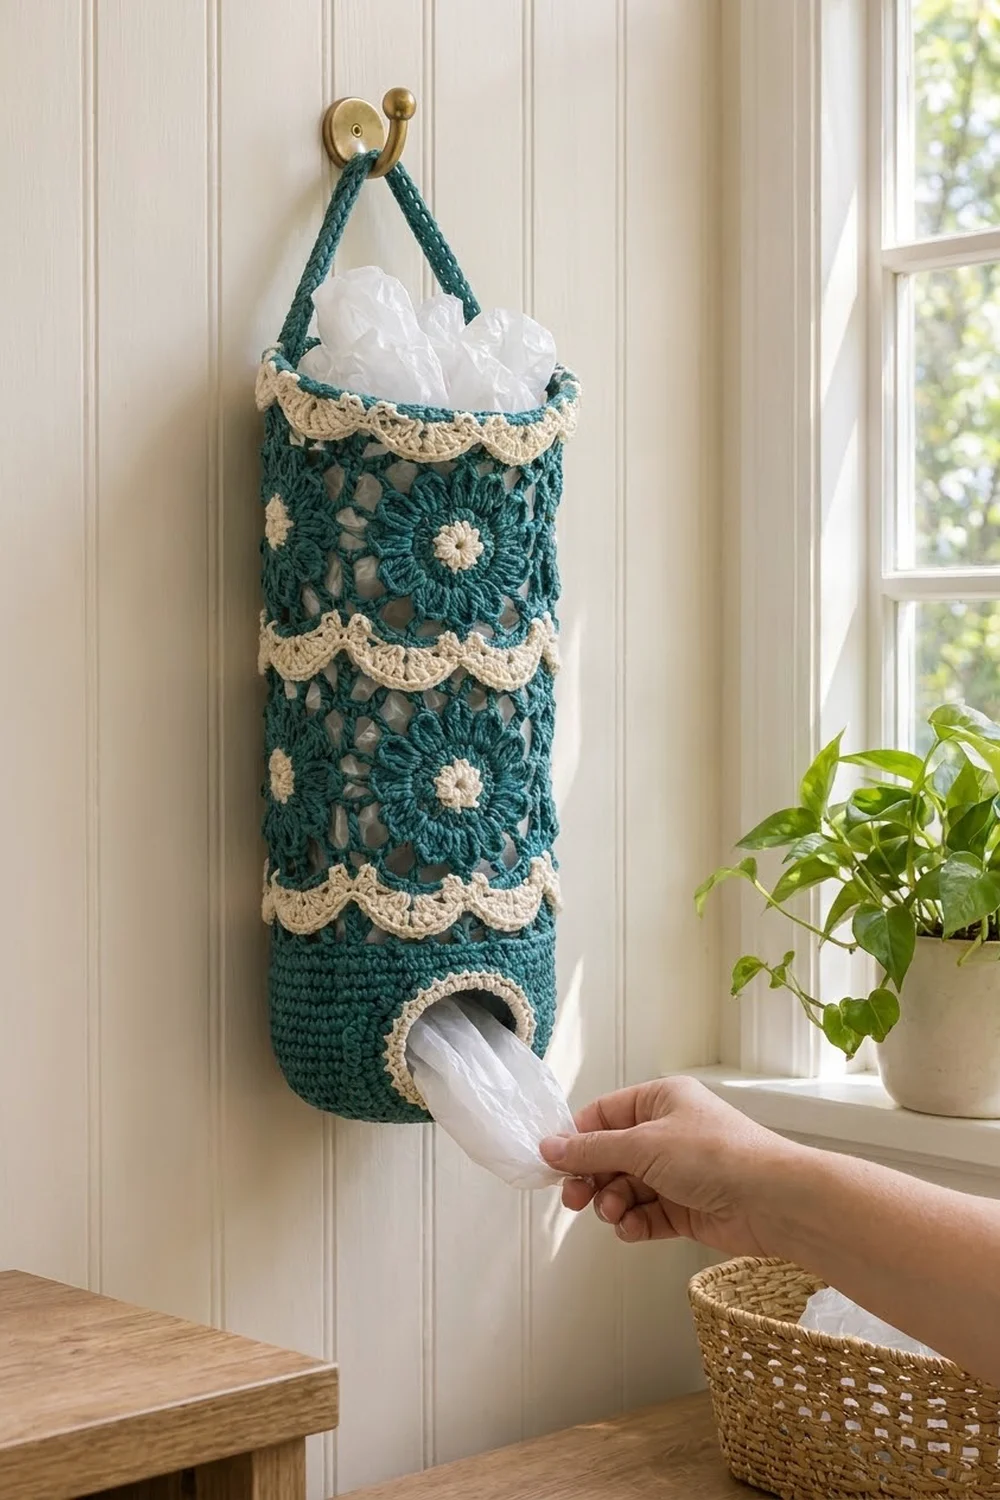
This hanging bag holder turns a kitchen chore into something pretty. It is a slim teal tube with a lacy mesh body, two layered flower appliqués down the front, and soft cream picot scallops that circle it like ribbons. You stuff bags in at the top and pull them out through a neat round opening near the bottom.
The palette is just two colors: deep teal for the body, flowers, and strap, and warm cream for the scallops, flower centers, and opening trim. The look is cottage-style and works well in a kitchen, pantry, or laundry room.
The pattern uses US crochet terms. The finished holder is about 17 in (43.2 cm) tall, not counting the strap, and about 4.75 in (12.1 cm) in diameter, or 15 in (38.1 cm) around.
Here’s how it’s built. You crochet a flat circle base, then turn it into a solid single-crochet wall with a gap for the opening. Above that comes a chain-loop mesh, a firm rim, and a cream scallop edging. Last, you make the flowers, centers, scallop bands, and strap, and sew them on.
Finished Size and Construction
- Finished size: 17 in (43.2 cm) tall × 4.75 in (12.1 cm) diameter
- Circumference: 15 in (38.1 cm)
- Skill level: Intermediate
- Terminology: US
- Yarn weight: Worsted (#4) cotton
- Hook: 5.0 mm (H-8)
- Number of pieces: 1 tube, plus 7 small sewn-on parts (2 flowers, 2 centers, 2 scallop bands, 1 strap)
- Layout: One vertical cylinder, with the flowers and opening lined up on the front
- Tube size before border: 16.5 in (41.9 cm) tall
- Border depth: 0.5 in (1.3 cm), cream scallop edging at the top rim
Materials
Yarn: Use a smooth worsted-weight cotton or cotton blend. Cotton holds its shape when the holder is packed and is easy to wash. Avoid very soft acrylics, because they let the mesh stretch out of shape.
- Teal (main color): about 160 g / 248 m
- Cream (contrast color): about 40 g / 62 m
These amounts include roughly a 15% margin for your gauge swatch and small tension differences.
Tools:
– 5.0 mm (H-8) crochet hook
– Tapestry needle
– 4 locking stitch markers
– Scissors
– Rustproof pins
– A rolled towel or bottle about 4.75 in (12.1 cm) across, for blocking
– Optional: 2 small pearl beads for the flower centers
Abbreviations (US Terms)
- ch – chain
- sl st – slip stitch
- sc – single crochet
- hdc – half double crochet
- dc – double crochet
- sc2tog – single crochet 2 together
- BLO – back loop only
- sk – skip
- sp(s) – space(s)
- st(s) – stitch(es)
Special stitch – Scallop: (5 dc) all worked in the same stitch.
Special stitch – Petal-picot: in the same stitch, work (sc, ch 2). It forms the lacy outer edge of each scallop.
Gauge and Checkpoints
Gauge: 16 sc × 18 rounds = 4 in (10.2 cm) in sc worked in joined rounds. Mesh: 3 rounds = 2 in (5.1 cm) in height.
Crochet the base first and treat it as your gauge test. It is a full piece of the pattern, so nothing is wasted.
Checkpoints:
– After Base Rnd 10, the circle should measure 4.75 in (12.1 cm) across.
– After Wall Rnd 18, the solid section should be 4 in (10.2 cm) tall.
– After Mesh Rnd 18, the mesh should add 12 in (30.5 cm).
– Before the border, the tube should be 16.5 in (41.9 cm) tall.
Too big? Go down half a hook size (4.5 mm) and start over. Too small? Go up to 5.5 mm (I-9). If only the mesh is too short, add one mesh round. Don’t try to fix it by stretching during blocking.
Base
Work in joined rounds. The ch 1 at the start of a round does not count as a stitch. Join each round with a sl st to the first sc.
With teal:
- Rnd 1: Magic ring, ch 1, 6 sc in ring, join. (6 sts)
- Rnd 2: 2 sc in each st. (12 sts)
- Rnd 3: Sc in next st, 2 sc in next st; repeat 6 times. (18 sts)
- Rnd 4: Sc in next 2 sts, 2 sc in next st; repeat 6 times. (24 sts)
- Rnd 5: Sc in next 3, 2 sc in next; repeat 6 times. (30 sts)
- Rnd 6: Sc in next 4, 2 sc in next; repeat 6 times. (36 sts)
- Rnd 7: Sc in next 5, 2 sc in next; repeat 6 times. (42 sts)
- Rnd 8: Sc in next 6, 2 sc in next; repeat 6 times. (48 sts)
- Rnd 9: Sc in next 7, 2 sc in next; repeat 6 times. (54 sts)
- Rnd 10: Sc in next 8, 2 sc in next; repeat 6 times. (60 sts)
Checkpoint: 4.75 in (12.1 cm) across, lying flat.
Solid Wall with Opening
- Wall Rnd 1: Ch 1, sc in the BLO of each st, join. (60 sts) This makes a crisp fold between the base and the wall.
- Wall Rnds 2–3: Ch 1, sc in each st, join. (60 sts)
Opening (worked in rows):
- Row 4: Ch 1, sc in next 48 sts, turn. Leave the last 12 sts unworked. (48 sts)
- Rows 5–15: Ch 1, sc in each st across, turn. (48 sts)
You have now worked 12 rows. Row 15 ends at the edge of the opening. Ch 12, then sl st into the first sc of Row 15 on the other side of the gap.
- Wall Rnd 16: Ch 1, turn, sc in each of the 48 sc, then sc in each of the 12 ch, join. (48 + 12 = 60 sts)
- Wall Rnds 17–18: Ch 1, sc in each st, join. (60 sts)
The opening is 12 sts wide, about 3 in (7.6 cm), and 12 rows tall, about 2.75 in (7.0 cm). Place a marker at the middle of the opening. This marks the front line.
Checkpoint: The solid wall is 4 in (10.2 cm) tall.
Mesh Body
- Mesh Rnd 1: Ch 1, sc in first st, ch 5, sk 3 sts, sc in next st; repeat 14 times. Then ch 2, sk 3, dc in the first sc. The ch 2 plus dc counts as the final loop and leaves you at its center. (15 loops)
- Mesh Rnds 2–18: Ch 1, sc around the post of the joining dc, ch 5, sc in next ch-5 sp; repeat 14 times. Then ch 2, dc in the first sc. (15 loops)
Math check: 60 sts ÷ 4 sts per repeat = 15 loops.
Checkpoint: The mesh is 12 in (30.5 cm) tall when gently stretched lengthwise.
Rim
- Rim Rnd 1 (conversion): Ch 1, 4 sc around the joining dc post, then 4 sc in each of the next 14 ch-5 sps, join. (15 loops × 4 sc = 60 sts)
- Rim Rnd 2: Ch 1, sc in each st, join. (60 sts) Fasten off teal.
Checkpoint: The tube is now 16.5 in (41.9 cm) tall and 15 in (38.1 cm) around.
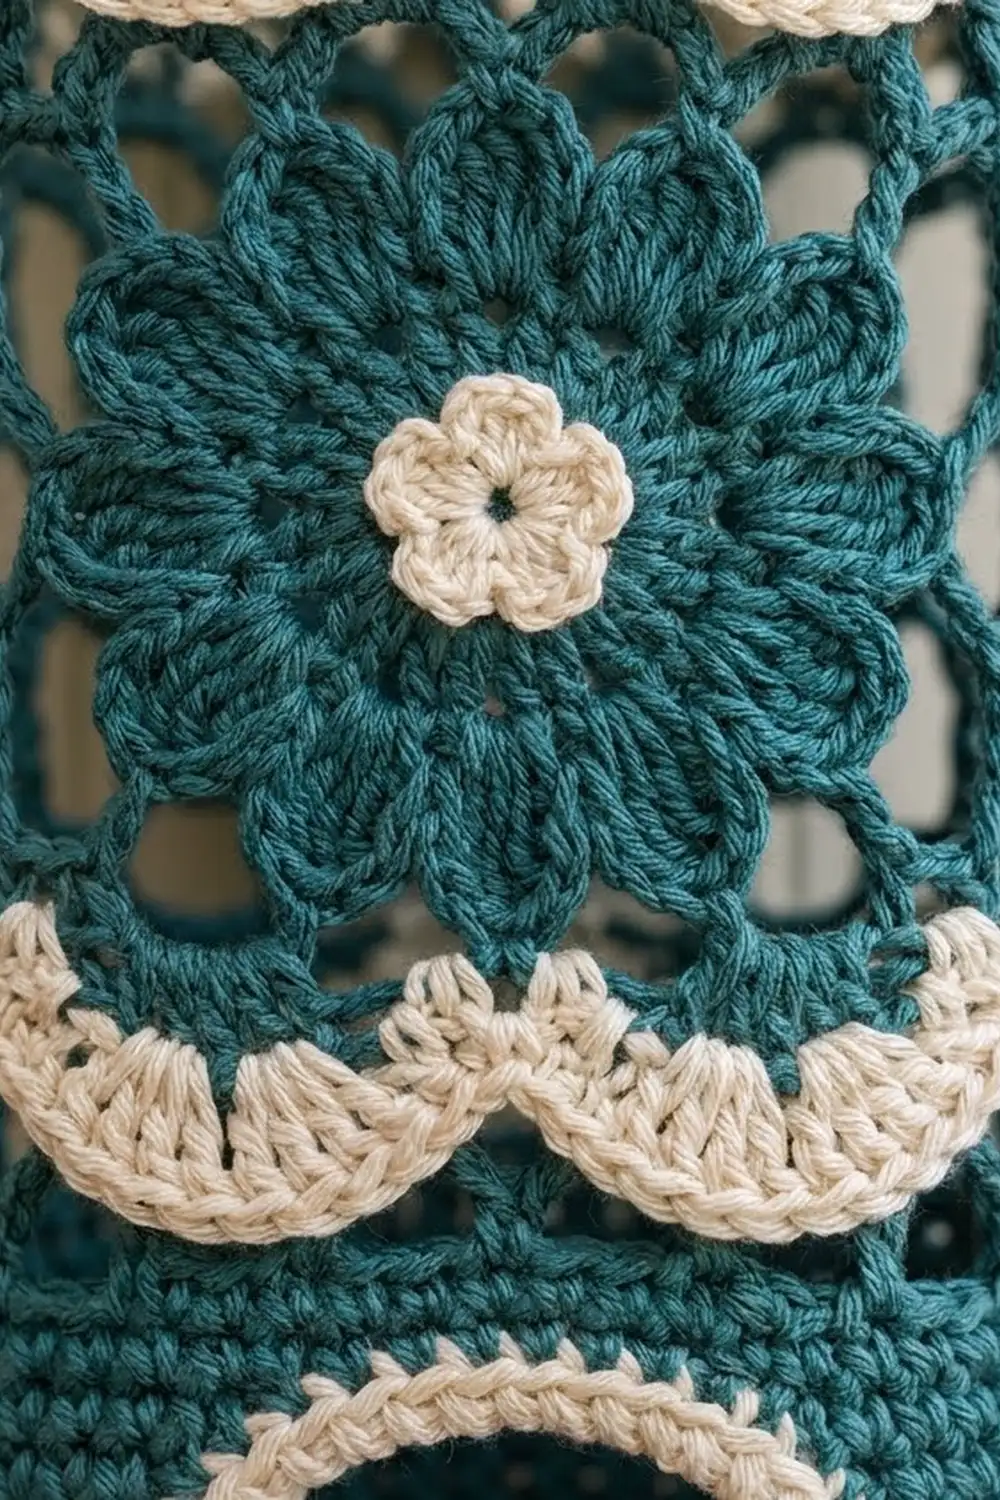
Flowers (make 2, teal)
- Rnd 1: Magic ring, ch 3 (counts as dc), 15 dc in ring, join to the top of the ch-3. (16 sts)
- Rnd 2: Ch 1, sc in same st, ch 3, sk 1, sc in next, ch 3, sk 1; repeat 7 times, join. (8 sc, 8 ch-3 sps)
- Rnd 3: In each ch-3 sp, work (sc, hdc, 3 dc, hdc, sc), join. (8 petals, 56 sts)
- Rnd 4: Working behind the petals, sl st around the post of the next Rnd 2 sc. Ch 5, sc around the post of the next Rnd 2 sc; repeat 8 times, ending at the first post. (8 ch-5 sps)
- Rnd 5: In each ch-5 sp, work (sc, hdc, 5 dc, hdc, sc), join. (8 petals, 72 sts)
Fasten off and leave a 12 in (30.5 cm) tail. Each flower should be 3 in (7.6 cm) across, with two layers of petals.
Flower Centers (make 2, cream)
- Rnd 1: Magic ring, ch 1, 5 sc in ring, join. (5 sts)
- Rnd 2: In each sc, work (sl st, ch 2, 2 dc, ch 2, sl st). (5 petals)
Each center should be about 1.25 in (3.2 cm) across. Sew one to the middle of each teal flower. If you like, add a pearl bead at the very center.
Scallop Bands (make 2, cream)
- Rnd 1: Ch 60, join into a ring without twisting it. Ch 1, sc in each ch, join. (60 sts)
- Rnd 2: Ch 1, sc in next st, sk 2, 5 dc in next st (scallop), sk 2; repeat 10 times, join. (10 sc + 50 dc = 60 sts, 10 scallops)
- Rnd 3: Sl st in the sc, (sc, ch 2) in each of the next 4 dc, sc in the 5th dc; repeat 10 times, join. (10 sl sts, 50 sc, 40 ch-2 sps)
Each band is 15 in (38.1 cm) around and about 0.75 in (1.9 cm) deep, so it slides snugly over the tube.
Strap (teal)
- Row 1: Ch 5, sc in 2nd ch from hook and in each remaining ch, turn. (4 sts)
- Rows 2–45: Ch 1, sc in each st, turn. (4 sts)
The strap is about 10 in (25.4 cm) long and 1 in (2.5 cm) wide.
Assembly
- Slide the bands over the tube with the scallops pointing down. Pin the foundation edge of the lower band at the top of Mesh Rnd 3, 2 in (5.1 cm) above the solid wall. Pin the upper band at the top of Mesh Rnd 9, 6 in (15.2 cm) above the solid wall. Whipstitch each foundation edge to the mesh loops all the way around.
- Center the flowers on the front line. Place the lower flower’s center 3.75 in (9.5 cm) above the solid wall and the upper flower’s center 9 in (22.9 cm) above it. Sew around the edge of each Rnd 4 loop so the outer petals lie flat.
- Sew each end of the strap inside the rim at opposite sides, 30 sts apart. Overlap 0.75 in (1.9 cm) at each end and stitch through both Rim Rnds.
Border
Border gauge: The edging is worked into the 60 sc of Rim Rnd 2 at 16 sc = 4 in (10.2 cm). One scallop repeat uses 6 sts.
Top Rim Edging (cream):
– Rnd 1: Join cream in any sc of Rim Rnd 2. Ch 1, sc in next st, sk 2, 5 dc in next st, sk 2; repeat 10 times, join. (10 sc + 50 dc = 60 sts, 10 scallops)
– Rnd 2: Sl st in the sc, (sc, ch 2) in each of the next 4 dc, sc in the 5th dc; repeat 10 times, join. (10 sl sts, 50 sc, 40 ch-2 sps) Fasten off.
This edging is the same as Rnds 2–3 of the bands, so the three cream trims match. These scallops point up.
Why the math works: 60 ÷ 6 = 10 full scallops with no leftover stitches. Each scallop uses 6 sts and puts 6 sts back, so the rim keeps its 15 in (38.1 cm) circumference and doesn’t ruffle or pull in.
Opening Edging (cream):
– Rnd 1: Join cream at one bottom corner of the opening. Sc in each of the 12 skipped sts of Wall Rnd 3, 1 sc in each of the 12 row ends, sc in the back bar of each of the 12 ch, then 1 sc in each of the 12 row ends on the other side, join. (12 + 12 + 12 + 12 = 48 sts)
– Rnd 2: Ch 1, sc2tog across the corner, sc in next 10 sts; repeat 4 times, join. (4 sc2tog + 40 sc = 44 sts)
The four corner decreases round off the rectangle. The finished opening is about 2.25 in (5.7 cm) across.
Final Blocking
- Weave in all ends along stitches of the same color.
- Soak the holder in cool water for 10 minutes, then press the water out in a towel. Don’t wring it.
- Slide the holder over a rolled towel or bottle about 4.75 in (12.1 cm) across.
- Ease the tube to 17 in (43.2 cm) tall and pin the base flat.
- Pin the scallop points evenly, and open each flower petal with your fingers.
- Shape the opening round with a fingertip.
- Let it dry completely before you remove the form.
Final Quality-Control Checklist
- The base is flat and 4.75 in (12.1 cm) across.
- The solid wall is 4 in (10.2 cm) tall with no gaps at the chain join.
- Every mesh round has 15 loops.
- The rim and top edging each have 60 sts and 10 scallops.
- The bands sit level with their scallops pointing down.
- The flowers are centered on the front line, directly above the opening.
- The strap ends are secure and opposite each other.
- The total height is 17 in (43.2 cm).
Troubleshooting
- Base cups or ruffles: Your gauge is off. Change hook size rather than the increases.
- Gap at the chain join above the opening: Sew it closed with a teal tail.
- Mesh loops slant: This is normal in joined mesh. Blocking straightens most of it.
- Edging flares: Your dc are too loose. Drop half a hook size for the cream rounds only.
- Flowers cup: Press them with steam before you sew them on.
- Opening too tight: Skip Opening Edging Rnd 2 and work a sl st round instead.
Care
Hand wash or machine wash cold on a gentle cycle in a mesh bag. Reshape it over a rolled towel and air dry.
Final Notes
Your measurement chain runs like this: a 4.75 in (12.1 cm) base, a 4 in (10.2 cm) solid wall, 12 in (30.5 cm) of mesh, and a 0.5 in (1.3 cm) rim. That gives 16.5 in (41.9 cm) before the border. The 0.5 in (1.3 cm) border brings it to 17 in (43.2 cm), all at a steady 15 in (38.1 cm) around. Check each stage as you go and the trims will fit without any fudging.
Happy crocheting!