

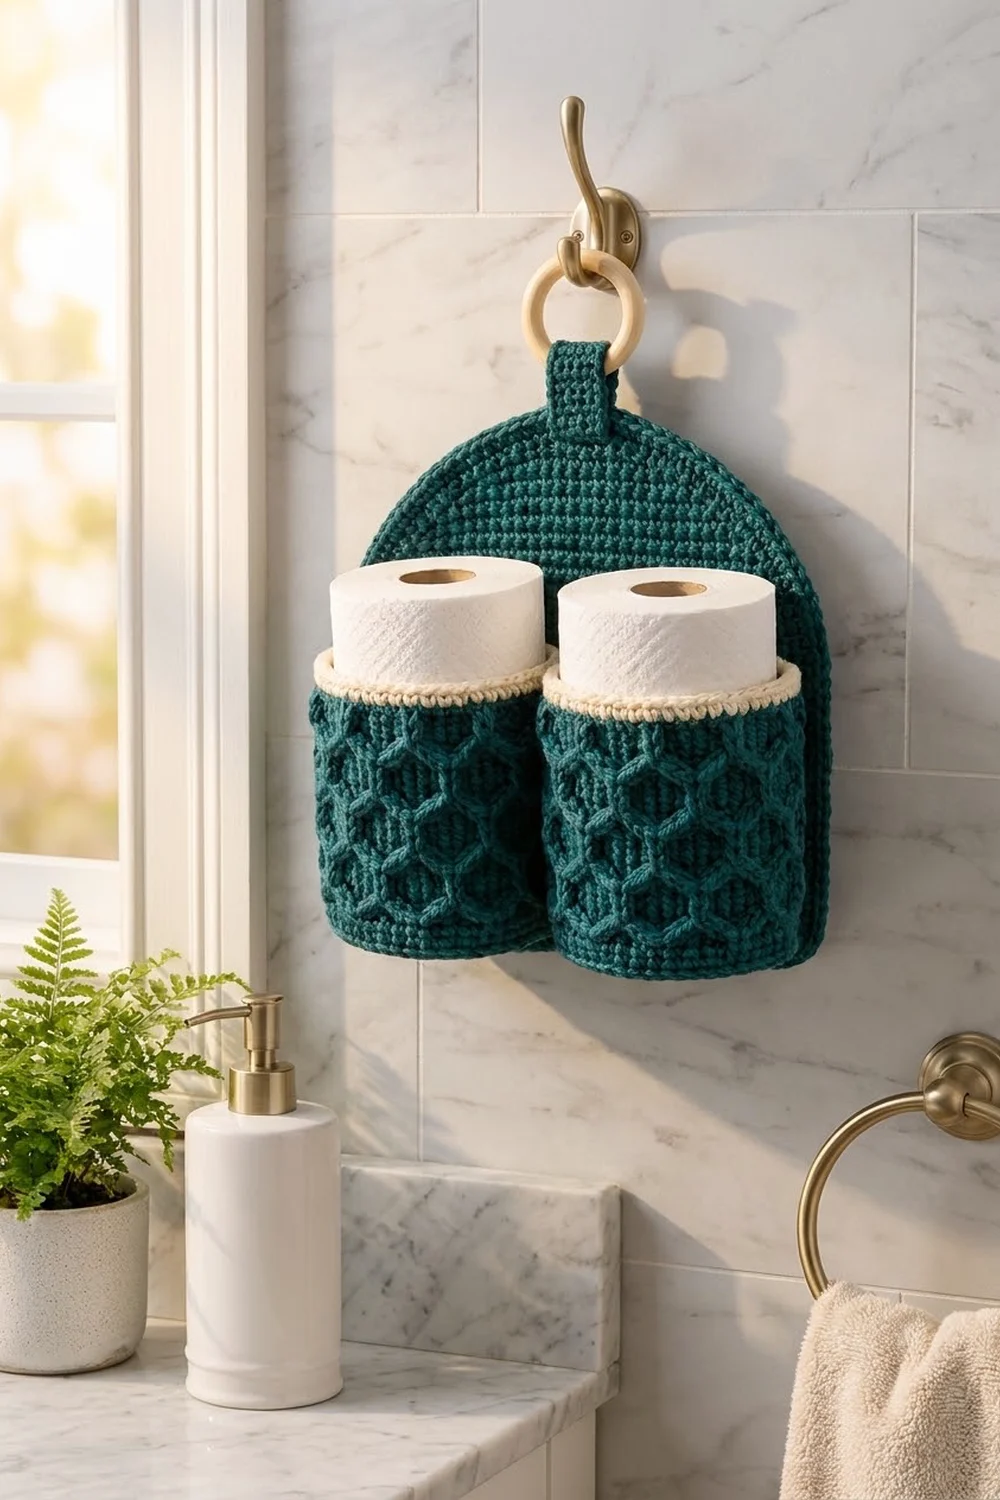
This wall-hanging holder keeps two spare rolls neat and within reach. Two round cups with a raised honeycomb texture sit side by side on an arched back panel. A short tab loops through a natural wooden ring so the holder hangs from a towel hook or knob.
The colors are deep teal with a crisp cream rim on each cup. The look is calm and modern: a smooth single crochet back panel, bold honeycomb cells on the cups and one light accent line at the top edge of each cup.
The pattern uses US crochet terms. The back panel measures 10.5 in (26.7 cm) wide and 8 in (20.3 cm) tall. Each cup is 5.25 in (13.3 cm) across and 4 in (10.2 cm) tall, so a standard roll about 4.5 in (11.4 cm) wide drops in easily.
Each cup starts as a flat round base. The wall is then worked up in joined rounds, with front post trebles forming the honeycomb, and finished with a cream rim. The back panel is worked flat in rows from the bottom up, with decreases shaping the arch, and then edged. The tab is a small strip. Everything is sewn together at the end.
Finished Size and Construction
- Finished size: 10.5 in (26.7 cm) wide x 8 in (20.3 cm) tall (back panel); about 10.5 in (26.7 cm) tall including the tab and ring
- Skill level: Intermediate
- Terminology: US
- Yarn weight: Worsted (medium #4)
- Hook: 5.0 mm (H-8)
- Number of pieces: 4 crocheted pieces (2 cups, 1 back panel, 1 tab) plus 1 wooden ring
- Layout: two cups side by side across the lower panel; tab and ring centered at the top
- Cup size: 5.25 in (13.3 cm) diameter x 4 in (10.2 cm) tall
- Back panel before border: 10 in (25.4 cm) wide x 7.5 in (19.1 cm) tall
- Border depth: 0.25 in (0.6 cm) on each panel edge; cream cup rim 0.5 in (1.3 cm)
Materials
Choose a smooth cotton or cotton-blend worsted yarn. Cotton holds the cup shape and shows the honeycomb ridges clearly.
- Color A, teal: 180 g, about 329.2 m (360 yd)
- Color B, cream: 20 g, about 36.6 m (40 yd)
- 5.0 mm (H-8) crochet hook
- 1 wooden ring, 2 in (5.1 cm) outer diameter
- Tapestry needle
- 4 locking stitch markers
- Scissors and a tape measure
- Rust-proof pins and a blocking mat
The yarn amounts include a margin of about 20% for a gauge swatch and for differences in tension.
Abbreviations (US Terms)
- ch – chain
- sl st – slip stitch
- sc – single crochet
- sc2tog – single crochet 2 together
- BLO – back loop only
- rev sc – reverse single crochet (crab stitch)
- FPtr – front post treble crochet
- st(s) – stitch(es)
- rnd(s) – round(s)
Special stitch – FPtr (honeycomb post): Yarn over twice. Insert the hook from front to back to front around the post of the stitch 2 rounds below, as given in the instructions. Yarn over and pull up a loop, then [yarn over, pull through 2 loops] 3 times. Skip the stitch of the current round behind the FPtr. Each FPtr replaces one sc, so stitch counts never change.
Gauge and Checkpoints
Gauge: 16 sc and 18 rows/rnds = 4 in (10.2 cm). The honeycomb rounds keep the same stitch gauge because each FPtr replaces one sc.
Make one cup first. It is the best gauge test, because the cup has to hold a roll and the panel width is matched to the two cups.
- Base checkpoint: after Rnd 6 (36 sts), the circle measures about 2.7 in (6.9 cm) across.
- Finished base: after Rnd 11 (66 sts), the base is 5.25 in (13.3 cm) across and lies flat.
- Wall checkpoint: after wall Rnd 16, the teal wall is 3.5 in (8.9 cm) tall.
- Finished cup: 4 in (10.2 cm) tall including the rim.
- Panel checkpoint: after Row 14, the panel is 10 in (25.4 cm) wide and 3.1 in (7.9 cm) tall.
If your base is too big, go down half a hook size. If it is too small or the roll fits tightly, go up half a size. If the base ruffles, your stitches are looser than your rounds. Tighten slightly, or use a 4.5 mm hook for the base only.
Cup (Make 2)
Work in joined rounds with the right side facing. The ch 1 at the start of each round does not count as a stitch. Join each round with a sl st to the first st. Keep the round joins in one vertical line, because this line becomes the back of the cup.
Base
With Color A:
Rnd 1: Magic ring, 6 sc in ring, join. (6 sts)
Rnd 2: Ch 1, 2 sc in each st, join. (12 sts)
Rnd 3: Ch 1, *sc 1, 2 sc in next st; repeat from * around, join. (18 sts)
Rnd 4: Ch 1, *sc 2, 2 sc in next st; repeat from * around, join. (24 sts)
Rnd 5: Ch 1, *sc 3, 2 sc in next st; repeat from * around, join. (30 sts)
Rnd 6: Ch 1, *sc 4, 2 sc in next st; repeat from * around, join. (36 sts)
Rnds 7–11: Keep adding 6 sts per round, with one more sc between increases each round. Rnd 7 has 42 sts, Rnd 8 has 48, Rnd 9 has 54, Rnd 10 has 60 and Rnd 11 has 66.
The base is now a flat circle 5.25 in (13.3 cm) across.
Wall
Continue with Color A. The 66 sts divide into 11 repeats of 6 sts. Each repeat has two ridge lines that move together and then apart.
Rnd 1: Ch 1, sc BLO in each st, join. (66 sts) The unused front loops make a crisp fold so the wall stands up.
Rnd 2: Ch 1, sc in each st, join. (66 sts)
Rnd 3 (Post Rnd A): Ch 1, *FPtr around next st of Rnd 1, sc 4, FPtr around next st of Rnd 1; repeat from * around, join. (66 sts: 44 sc + 22 FPtr)
Rnd 4 and all even rnds through Rnd 14: Ch 1, sc in each st, join. (66 sts)
From Rnd 5 onward, work each FPtr around the nearest FPtr two rounds below that continues the same ridge line. That FPtr is either directly below or one stitch to the side.
Rnd 5 (Post Rnd B): Ch 1, *sc 1, FPtr, sc 2, FPtr, sc 1; repeat from * around, join. (66 sts) The two lines move one stitch toward each other.
Rnd 7 (Post Rnd C): Ch 1, *sc 2, FPtr 2, sc 2; repeat from * around, join. (66 sts) The lines meet.
Rnd 9: Repeat Post Rnd C. (66 sts) The two lines run up together as one vertical bar.
Rnd 11: Repeat Post Rnd B. (66 sts) The lines move apart.
Rnd 13: Repeat Post Rnd A. (66 sts) Each line now meets the line of the next repeat.
Rnd 15: Repeat Post Rnd A. (66 sts) This completes the vertical bar between repeats and closes the last cells.
Rnd 16: Ch 1, sc in each st, join. (66 sts) Change to Color B on the last yarn over of the join, then fasten off Color A.
Because the lines meet at alternating points, they form offset hexagon cells, about 2.5 rows of cells tall. Work the cream rim now (see Border), before joining.
Back Panel
With Color A, work flat in rows. The ch 1 at the start of each row does not count as a stitch. Turn at the end of every row.
Foundation: Ch 41.
Row 1: Sc in 2nd ch from hook and in each ch across, turn. (40 sts)
Rows 2–17: Ch 1, sc in each st across, turn. (40 sts)
The panel is 10 in (25.4 cm) wide. Shaping begins on Row 18.
Decrease row: Ch 1, sc2tog, sc across to last 2 sts, sc2tog, turn. (2 sts fewer)
Plain row: Ch 1, sc in each st across, turn. (same count)
Shape the arch in this order:
- Row 18: decrease (38 sts)
- Rows 19–20: plain (38 sts)
- Row 21: decrease (36 sts)
- Row 22: plain (36 sts)
- Row 23: decrease (34 sts)
- Row 24: plain (34 sts)
- Row 25: decrease (32 sts)
- Row 26: decrease (30 sts)
- Row 27: plain (30 sts)
- Rows 28–34: decrease every row (28, 26, 24, 22, 20, 18, 16 sts)
There are 12 decrease rows, which remove 24 sts: 40 − 24 = 16 sts across the top. The panel has 34 rows and is 7.5 in (19.1 cm) tall. Don’t fasten off. Go straight on to the panel edging in the Border section.
Tab
With Color A, ch 6.
Row 1: Sc in 2nd ch from hook and in each ch across, turn. (5 sts)
Rows 2–18: Ch 1, sc in each st, turn. (5 sts)
The tab measures 1.25 in (3.2 cm) wide x 4 in (10.2 cm) long. Fasten off, leaving a 12 in (30.5 cm) tail.
Make All Pieces
- Color A, teal: 2 cups (base plus wall Rnds 1–16), 1 back panel with edging, 1 tab
- Color B, cream: 2 cup rims
Layout, front view:
            [ ring ]
            [ tab  ]
     +----------------------+
     |  arched back panel   |
     |  +--------++-------+ |
     |  | cup 1  || cup 2 | |
     |  +--------++-------+ |
     +----------------------+
Joining
Sew with whipstitch, using a long Color A tail and the tapestry needle. Finish the panel edging and both cup rims first.
Placement: Panel Rows 1–18 are 4 in (10.2 cm) tall, the same height as the 18 wall rounds of each cup. Each cup round lines up with one panel row.
Mark the cups: On each cup, mark a back strip 6 stitch columns wide, centered on the line of round joins.
Mark the panel: Count the 40 stitches of Row 1 from right to left. Mark columns 8 and 13 for the right cup and columns 28 and 33 for the left cup. Each pair is centered on its half of the panel.
Sew: Pin a cup so its base edge rests on the panel’s foundation row, just above the edging. Sew the first column of the strip to the first marked panel column, matching one wall round to one panel row: wall Rnds 1–18 to panel Rows 1–18. Repeat for the second column. Each seam is 18 stitches long, and there are 4 seams in total.
Base: Tack the 6 base stitches of the back strip to the foundation loops between the marked columns.
Cup to cup: Where the two cups touch, tack them together with 3 stitches spread across wall Rnds 4–14.
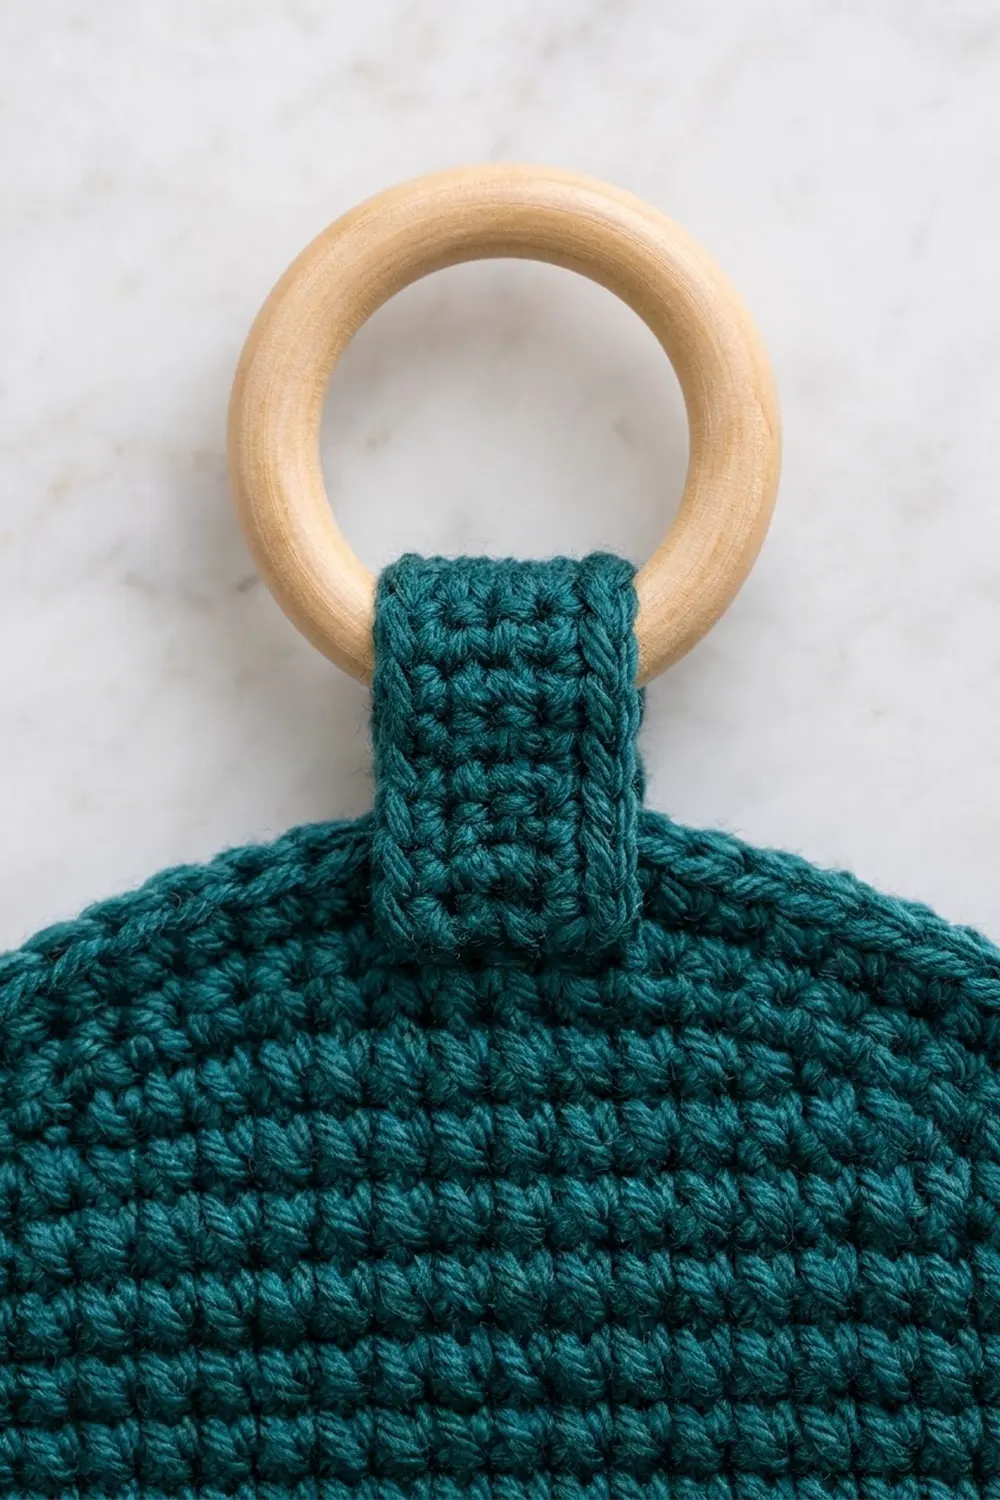
Tab: Fold the tab through the ring so the two ends meet. Center it on the top of the panel so it overlaps the front by 1.25 in (3.2 cm), then sew both layers down around all edges.
Keep your sewing tension snug but not tight. If you pull too hard, the panel will dimple and the honeycomb will flatten.
Size checkpoint: The two cups together span 10.5 in (26.7 cm), the same width as the bordered panel.
Border
The border uses the main gauge: 16 sc = 4 in (10.2 cm).
Back Panel Edging
With the right side facing, keep going from the last panel row with Color A. Work 1 round:
- First side (down): For Rows 34 to 25, work 1 sc in each row end, but work 2 sc in the row ends of Rows 34, 32, 30, 28 and 26 (15 sc). Then work 1 sc in each row end of Rows 24 to 1 (24 sc). Side total: 39 sc.
- Bottom: 3 sc in the first foundation loop, 1 sc in each of the next 38 loops, 3 sc in the last loop. Bottom total: 44 sc = 40 (1 per loop) + 4 extra (2 at each corner).
- Second side (up): Mirror the first side: 24 sc for Rows 1–24, then 15 sc for Rows 25–34. Side total: 39 sc.
- Top: 1 sc in each of the 16 sts of Row 34. Top total: 16 sc.
Join with a sl st to the first sc. Total: 39 + 44 + 39 + 16 = 138 sc. Fasten off.
Why the math works: On the straight lower sides, one sc per row end matches the gauge of 16 sts and 18 rows per 4 in closely. On the arch, the edge steps in about one stitch per row, so it is longer than its row count. The 5 extra sc on each side cover that extra length and keep the curve from cupping. The 2 extra sc at each bottom corner let the edging turn the corner and lie flat. The panel grows to 10.5 in (26.7 cm) x 8 in (20.3 cm).
Cup Rim
With Color B:
Rnd 17: Ch 1, sc in each st, join. (66 sts)
Rnd 18: Ch 1, rev sc in each st, join. (66 sts) Fasten off and weave in the ends.
Why the math works: Both rim rounds have 66 sts, one in each stitch, so the rim matches the wall circumference exactly and won’t flare or pull in. The rev sc rolls into a firm, rounded cream edge.
Final Blocking
- Weave in all ends before blocking.
- Spray the back panel with water until it is damp but not soaked.
- Pin the panel to 10.5 in (26.7 cm) wide x 8 in (20.3 cm) tall, smoothing the arch into an even curve.
- Put a towel-wrapped roll in each cup so it dries as a true cylinder 5.25 in (13.3 cm) across.
- Lightly mist the cups and press the honeycomb ridges into place with your fingers.
- Let all the pieces dry completely, then join them as described above.
Final Quality-Control Checklist
- Each base lies flat and measures 5.25 in (13.3 cm) across.
- Every round of each cup wall has 66 sts.
- The honeycomb cells are even all the way around, and no ridge skips a stitch.
- The cup round joins are at the back, hidden by the seams.
- The cream rims are smooth and don’t flare.
- The panel arch is symmetrical, with 16 sts across the top.
- The panel edging has 138 sc and lies flat.
- The cups sit level, with their bottoms lined up with the lower edge of the panel.
- The tab is centered and secure around the ring.
Troubleshooting
Honeycomb lines wander. A FPtr went around the wrong post. Count each 6-stitch repeat and check the post positions before you join the round.
Wall flares outward. The FPtr stitches are too loose. Pull up a shorter loop, or go down half a hook size for the post rounds.
Base curls upward. There are too few stitches for your tension. Go up half a hook size for the base.
Arch looks pointed. Check that Rows 19–20, 22, 24 and 27 are plain rows. Block the curve firmly.
Cups droop forward. Add a third seam down the center of each back strip, or use a firmer cotton.
Panel edge ripples. There are too many edging stitches on the arch. On each side, work 1 sc instead of 2 in one of the doubled row ends.
Care
Hand wash in cool water with a mild soap. Lay flat to dry, reshaping each cup over a roll, and do not tumble dry.
Final Notes
All the measurements in this pattern follow from your gauge. At 16 sc and 18 rows per 4 in (10.2 cm), the 66-stitch base is 5.25 in (13.3 cm) across, and 18 wall rounds make a cup 4 in (10.2 cm) tall. Two cups span 10.5 in (26.7 cm). That matches the 40-stitch panel, which is 10 in (25.4 cm) wide plus 0.25 in (0.6 cm) of edging on each side. The panel’s first 18 rows line up with each cup’s 18 rounds, so every seam joins one round to one row. Check each of these measurements as you go, and the holder will hang straight and hold its rolls neatly.
Happy crocheting!