

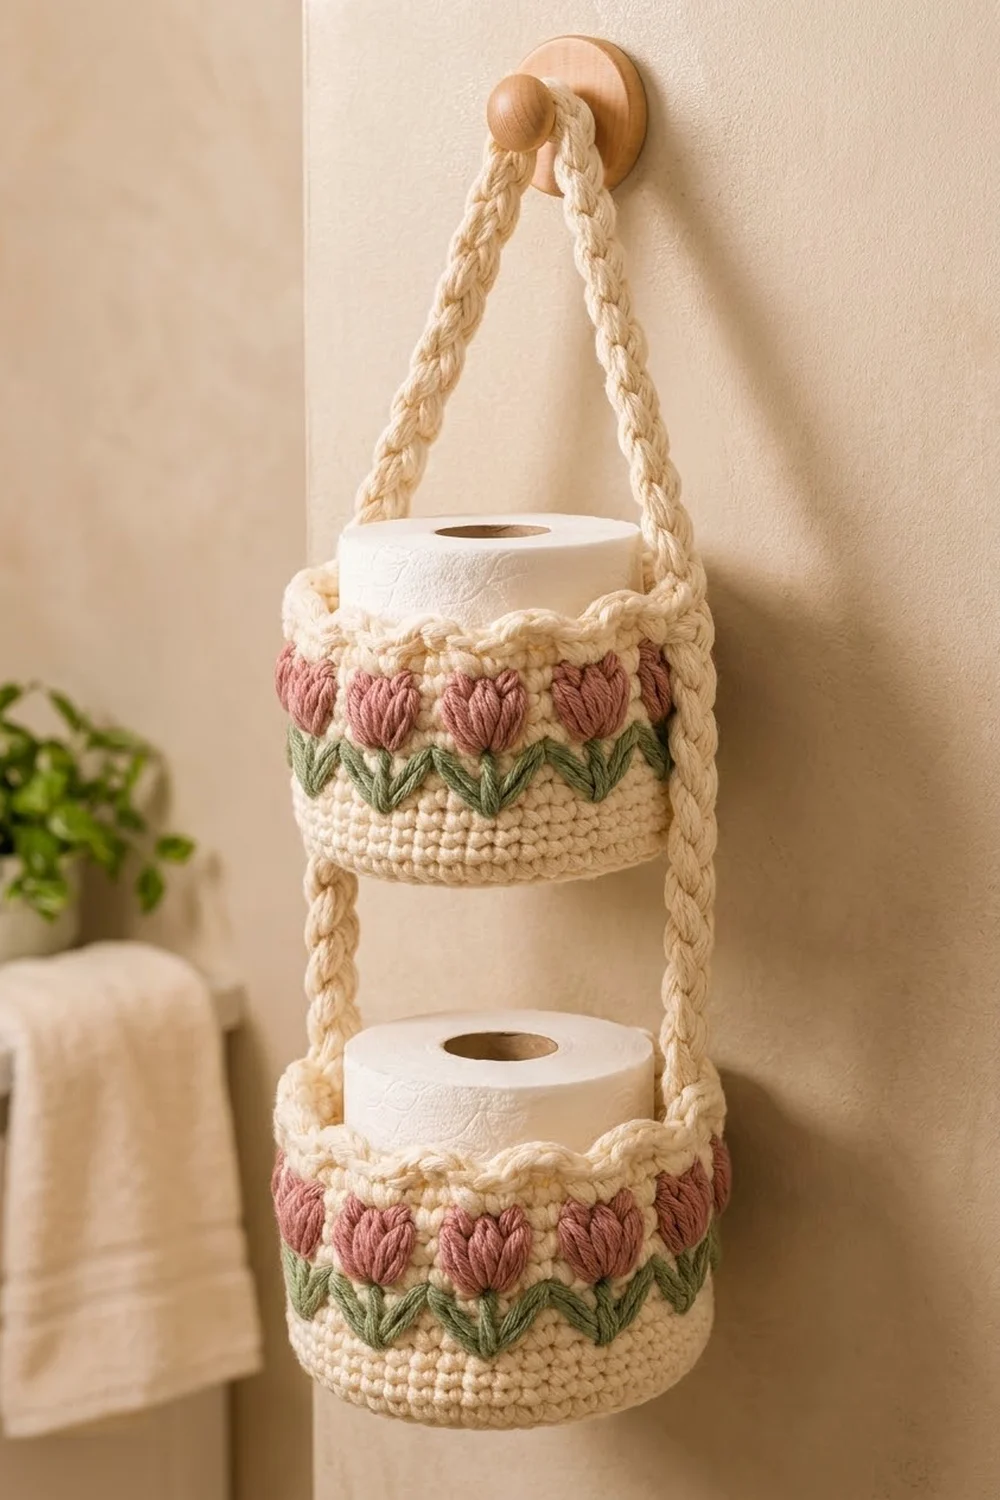
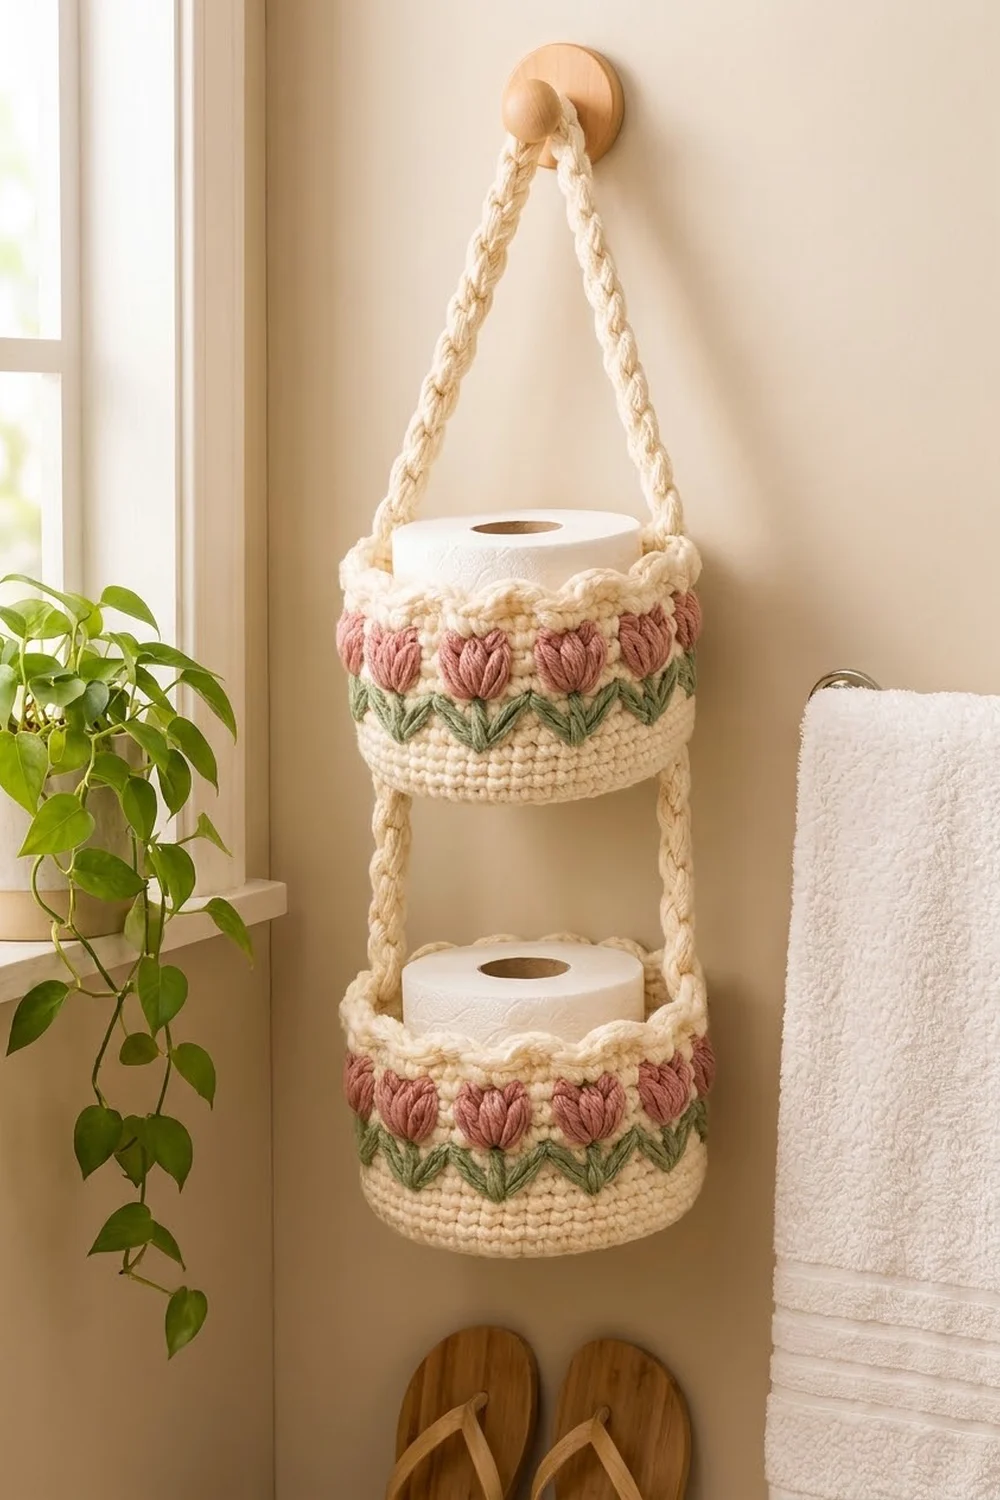
The Tulip Cottage holder is a two-tier hanging basket set that stores a spare toilet roll in each basket. Each round cream basket has a band of plump dusty-rose tulips on sage-green stems and is finished with a soft scalloped rim. Two chunky braided straps hold the baskets one above the other and meet in a point that hangs from a simple wall peg or hook.
The palette is cream, dusty rose and sage green, in a cottage style that suits a bathroom. The yarn is bulky, so the baskets are firm, quick to make and strong enough to hold a full roll.
This pattern uses US crochet terms. Each basket is about 7 in (17.8 cm) across and 4.25 in (10.8 cm) tall, including the rim. When hung, the whole holder is about 20.5 in (52.1 cm) tall.
How it’s made: you work two identical baskets from the bottom up in joined rounds. Each one starts with a flat single crochet base, then a back-loop turning ridge, straight walls with a tapestry-crochet tulip band, and a scalloped border. Next you crochet six cords and braid them into two straps. Finally you sew the straps up opposite sides of both baskets and join them at the top.
Finished Size and Construction
- Finished basket size: 7 in (17.8 cm) outer diameter × 4.25 in (10.8 cm) tall
- Hanging height: about 20.5 in (52.1 cm)
- Skill level: Intermediate (color changes, puff stitch, assembly)
- Terminology: US
- Yarn weight: Bulky (#5)
- Hook: 6 mm (US J-10)
- Number of pieces: 2 baskets + 6 cords (braided into 2 straps)
- Layout: 2 baskets stacked vertically, 3.5 in (8.9 cm) apart
- Base diameter: 6.75 in (17.1 cm)
- Wall height before border: 3.5 in (8.9 cm)
- Border depth: 0.75 in (1.9 cm)
- Finished strap length: 22 in (55.9 cm) each
Materials
Yarn: Use a bulky cotton or cotton-blend yarn that has good stitch definition and little stretch, at about 110 m per 100 g. Acrylic will work, but the baskets will be softer. If you use acrylic, crochet tightly.
- Cream (main color, MC): 300 g / 330 m
- Dusty Rose (CC1): 30 g / 33 m
- Sage Green (CC2): 40 g / 44 m
These amounts include a margin of about 15% for your swatch and for tension differences.
Tools:
– 6 mm (US J-10) crochet hook
– Tapestry needle
– 4 stitch markers
– Scissors and a measuring tape
– Sewing pins or locking markers for assembly
– A toilet roll or a round container about 6.5 in (16.5 cm) wide, for blocking
– A wall hook or wooden peg
Abbreviations (US Terms)
- ch – chain
- sl st – slip stitch
- sc – single crochet
- hdc – half double crochet
- dc – double crochet
- BLO – back loop only
- MR – magic ring
- st(s) – stitch(es)
- sk – skip
- rep – repeat
- C / G / R – cream / green / rose (used in the color sequences)
Special stitch – Tulip Puff (TP): With rose, yo, insert the hook in the stitch, pull up a loop to about 0.75 in (1.9 cm). Repeat from * to * 4 more times, for 5 loops pulled up and 11 loops on the hook. Yo and pull through all 11 loops. Ch 1 to lock the puff, changing back to cream on this ch. The ch-1 does not count as a stitch, and the TP counts as 1 stitch.
Color changes: Work the last yo of the stitch before the change with the new color. Carry the unused color along the top of the previous round and work over it, so that no strands show on the inside.
Gauge and Checkpoints
Gauge: 11 sc × 12 rounds = 4 in (10.2 cm) in sc worked in joined rounds.
Before starting the second basket, make the base of the first one as your test piece. Measure across the circle at these points:
- After Round 3 (18 sts): 2 in (5.1 cm)
- After Round 6 (36 sts): 4 in (10.2 cm)
- After Round 10 (60 sts): 6.75 in (17.1 cm)
- After Round 20 (top of the wall): 3.5 in (8.9 cm) tall from the turning ridge
- After the border: 4.25 in (10.8 cm) total height
If your base is too big, go down to a 5.5 mm hook. If it is too small, go up to a 6.5 mm hook. Don’t add or remove rounds to fix the size: the tulip repeat needs exactly 60 stitches.
If the base curls up like a bowl, your stitches are too tight. Loosen your tension, or work the rounds on a larger hook. If it ruffles, change to a smaller hook.
Basket (Make 2)
Work in joined rounds. Each round starts with ch 1, which does not count as a stitch, and ends with a sl st into the first sc. Joining every round keeps the tulip repeats lined up vertically.
Base
With cream:
Round 1: Work 6 sc in the MR and join. (6 sts)
Round 2: 2 sc in each st around. (12 sts)
Round 3: Sc in next st, 2 sc in next st; rep around. (18 sts)
Round 4: Sc in next 2 sts, 2 sc in next st; rep around. (24 sts)
Round 5: Sc in next 3 sts, 2 sc in next st; rep around. (30 sts)
Round 6: Sc in next 4 sts, 2 sc in next st; rep around. (36 sts)
Round 7: Sc in next 5 sts, 2 sc in next st; rep around. (42 sts)
Round 8: Sc in next 6 sts, 2 sc in next st; rep around. (48 sts)
Round 9: Sc in next 7 sts, 2 sc in next st; rep around. (54 sts)
Round 10: Sc in next 8 sts, 2 sc in next st; rep around. (60 sts)
Checkpoint: The base is flat and 6.75 in (17.1 cm) across.
Walls
Round 11 (turning ridge): Sc in BLO of each st around. (60 sts)
The unused front loops leave a neat ridge around the bottom edge, and the work starts turning upward.
Rounds 12–13: Sc in each st around. (60 sts)
Tulip Band
From here on, work each round as a 5-stitch repeat, 12 times around (12 × 5 = 60). Join green at the start of Round 14 and carry it through Round 16.
Round 14 (stems): C, C, G, C, C; rep 11 more times. (60 sc: 48 C, 12 G)
Round 15 (leaf base): C, G, G, G, C; rep 11 more times. (60 sc: 24 C, 36 G)
Round 16 (leaf tips): G, C, G, C, G; rep 11 more times. (60 sc: 24 C, 36 G)
The leaves move outward from positions 2 and 4 to positions 1 and 5. This forms a V around each stem. Leaf tips 5 and 1 of neighboring repeats sit side by side, which gives the connected zigzag. At the end of Round 16, cut green and weave in the end.
Round 17 (tulips): Join rose and carry it. Ch 1, then hdc in next 2 sts with cream, TP in next st, hdc in next 2 sts with cream; rep 11 more times. (60 sts: 48 hdc + 12 TP)
Each TP sits directly above a green stem. Push each puff toward the outside of the basket with your finger as you work. Cut rose at the end of the round.
Rounds 18–20: With cream, sc in each st around. (60 sts)
Checkpoint: The wall is 3.5 in (8.9 cm) tall from the turning ridge, and the outer diameter is about 7 in (17.8 cm), or 21.75 in (55.2 cm) around. You should see 12 tulips evenly spaced around the wall.
Make All Pieces
Baskets: Make 2. Each basket uses about 115 m of cream, 13 m of rose (12 tulips) and 18 m of green (12 leaf motifs).
Cords: Make 6, all in cream.
Ch 70. Sc in the back bump of the 2nd ch from the hook and in each ch across. (69 sc)
Each cord should be about 25 in (63.5 cm) long. Leave 8 in (20.3 cm) tails at both ends.
Braids: Hold 3 cords together and sew them together firmly at one end. Braid them evenly and firmly to the other end, then sew that end together. Make 2 braids.
Braiding shortens the cords by about 12%, so each braid should finish at about 22 in (55.9 cm) long and 0.75 in (1.9 cm) wide. Trim or add a few braid crossings so that both straps are exactly the same length.
Layout:
            /\          apex: 1 in (2.5 cm) overlap
           /  \         free strap: 10.5 in (26.7 cm) per side
          |    |
     [ BASKET A ]       strap sewn 3.5 in (8.9 cm) per side
          |    |        gap: 3.5 in (8.9 cm)
     [ BASKET B ]       strap sewn 3.5 in (8.9 cm) per side
Strap length per side: 3.5 + 3.5 + 3.5 + 10.5 + 1 = 22 in (55.9 cm).
Joining
Placement: Each basket has 12 repeats. Place a marker at the boundary between repeat 12 and repeat 1, and a second marker at the boundary between repeat 6 and repeat 7. These two points are exactly 30 stitches apart, so they sit directly opposite each other. At each marker, the strap covers the two touching green leaf tips.
Bottom basket (B): Pin the end of a strap over one marker on the outside of the wall. Line it up with the turning ridge (Round 11) and run it straight up to Round 20. Do the same with the second strap at the other marker.
Gap: Measure 3.5 in (8.9 cm) of free strap above the top of Round 20 on each side.
Top basket (A): Pin the straps over Basket A’s markers, from its Round 11 up to Round 20, the same way as for Basket B.
Sewing: With cream and a tapestry needle, whipstitch both edges of the braid to the wall. Sew through one leg of each wall stitch, about every 0.25 in (0.6 cm). Take an extra securing stitch into the front loops of Round 10 at the bottom of each basket. This is where the weight is carried.
On each basket, slide the strap behind the scalloped border so the scallops sit on top of the strap.
Tension: Sew firmly, but don’t pull so tight that the wall puckers. The braid should lie flat, and the wall should stay round.
Apex: Bring the two free ends together above Basket A. Overlap them by 1 in (2.5 cm) and sew through all layers twice.
Size checkpoint: Hang the holder before you weave in the ends. Both baskets should sit level, the gap should be 3.5 in (8.9 cm) on both sides, and the total height should be about 20.5 in (52.1 cm).
Border
Work the border on each basket before assembly, straight after Round 20.
Border gauge: One scallop, measured flat, is 1.8 in (4.6 cm) wide and 0.75 in (1.9 cm) deep, including Border Round 1.
Border Round 1: With cream, sc in each st around. (60 sts)
Border Round 2 (scallops): Sc in next st, sk 1 st, 5 dc in next st, sk 1 st, sc in next st; rep 11 more times.
Each repeat uses 5 base stitches: 1 sc, 1 skipped st, 1 shell st, 1 skipped st and 1 sc. Across the round that is 12 × 5 = 60 stitches, with 24 of them skipped. The round produces 12 × (2 sc + 5 dc) = 84 sts and 12 scallops.
Border Round 3 (firming round): Loosely sl st in each st around. (84 sl sts) Fasten off.
Why the math works: The scallop repeat is 5 stitches, the same as the tulip repeat. Each 5-dc shell falls on position 3, directly above a tulip, and the pair of sc between scallops sits above the touching leaf tips. That is also where the straps go, so they sit neatly between scallops.
Final Blocking
- Weave in all ends on the inside, following the same color.
- Slip each basket over a toilet roll or round container 6.5 in (16.5 cm) wide.
- Mist the basket with water until it is damp, not soaked.
- Press the base flat and push each tulip outward with your fingertips.
- Pinch each scallop into an even curve.
- Lay the braids straight, mist them and smooth them to 22 in (55.9 cm).
- Let everything dry completely before assembly, usually 12–24 hours.
Final Quality-Control Checklist
- [ ] Each base measures 6.75 in (17.1 cm) and lies flat
- [ ] Each wall is 3.5 in (8.9 cm) tall from the ridge
- [ ] 12 tulips per basket, each centered over a stem
- [ ] 12 scallops per basket, each centered over a tulip
- [ ] Both braids are 22 in (55.9 cm) long
- [ ] The straps are 30 stitches apart on both baskets
- [ ] The gap between baskets is 3.5 in (8.9 cm) on both sides
- [ ] Both baskets hang level with no puckering
- [ ] No carried yarn shows on the inside
Troubleshooting
The tulips slant to one side. Joined rounds should stop this from happening. Check that you join with a sl st into the first sc and start each round in the same stitch.
The puffs sink inward. Pull the loops up to an even height, and push each puff outward right after you make it.
The green or rose shows through the cream. Carry the unused yarn more loosely, and tuck it fully inside the stitches you work over it.
The base cups or ruffles. Re-check your gauge at Round 6 and change hook size.
The baskets tilt. The straps aren’t level. Re-measure the gap on both sides and sew again.
The braid twists. Before braiding, block each cord straight and make sure all three cords are the same length.
Care
Spot clean with mild soap. If you must wash it, hand wash in cool water, then reshape it and dry flat on a round form.
Final Notes
The measurements build on each other. With a gauge of 11 sc per 4 in (10.2 cm), the base finishes at 60 stitches and 6.75 in (17.1 cm) across. The walls are 3.5 in (8.9 cm) tall, with 12 tulip repeats of 5 stitches. Twelve matching scallops bring each basket to 4.25 in (10.8 cm). Cords 25 in (63.5 cm) long braid into straps of 22 in (55.9 cm), which give a 3.5 in (8.9 cm) gap between the baskets and a total hanging height of about 20.5 in (52.1 cm). Check each measurement as you reach it, and the finished holder will hang straight.
Happy crocheting!