
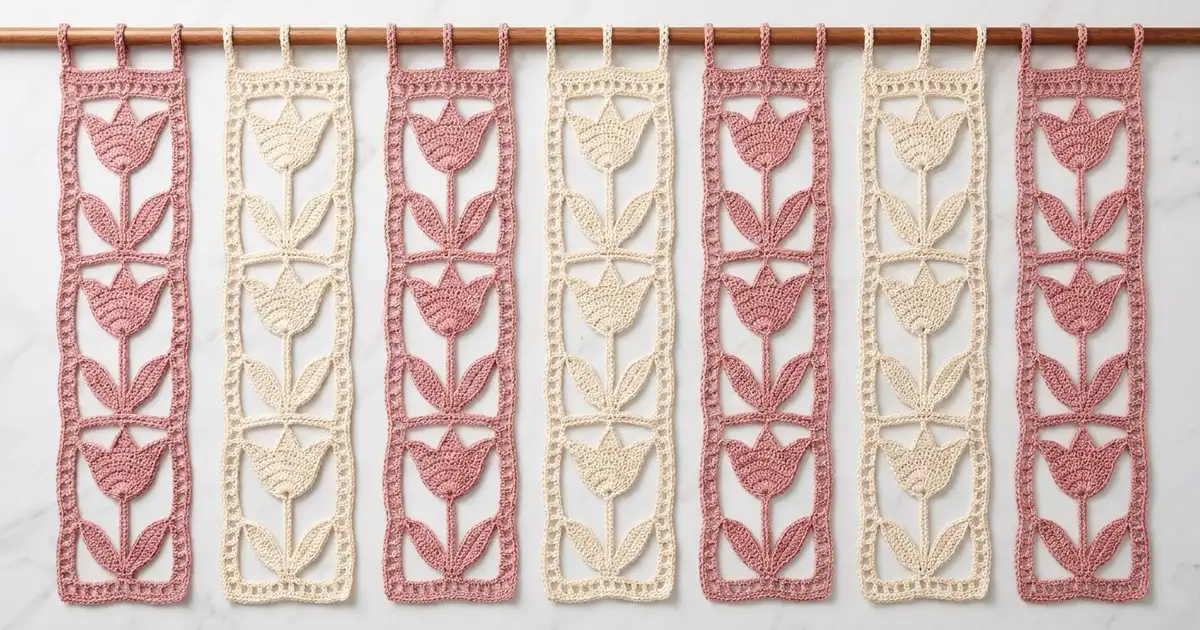
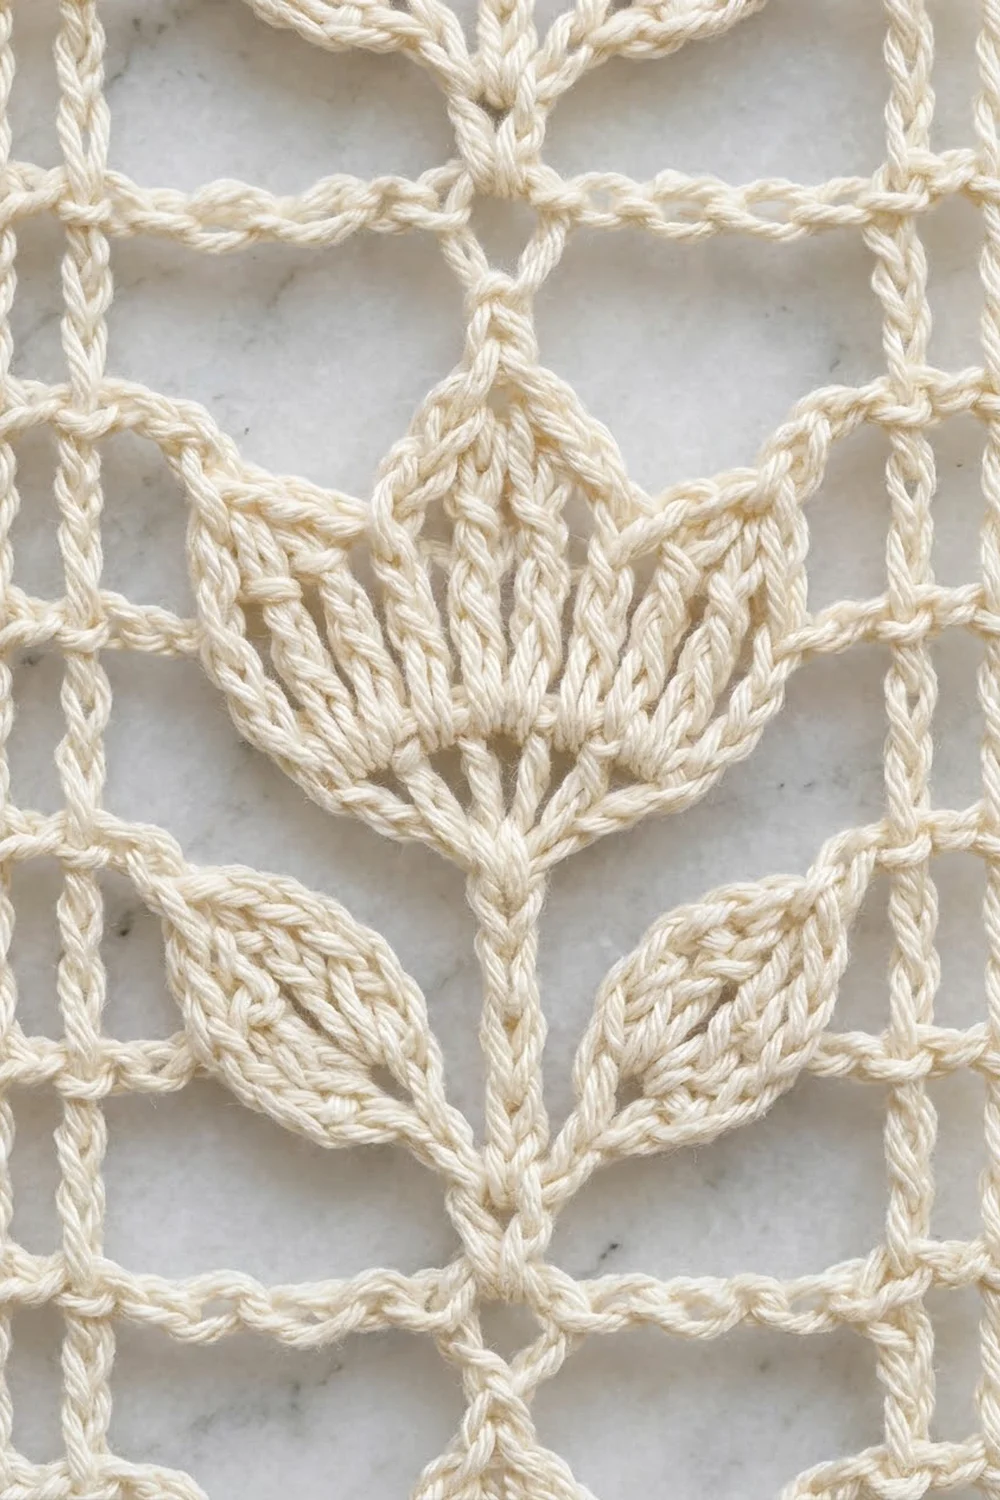
This Tulip Ladder Door Curtain is made of seven tall, airy strips. Each strip has a column of crocheted tulips framed by open ladder edges. Light passes through the mesh, and each tulip stands out as a small solid shape with a pointed three-petal cup, a straight stem and two angled leaves.
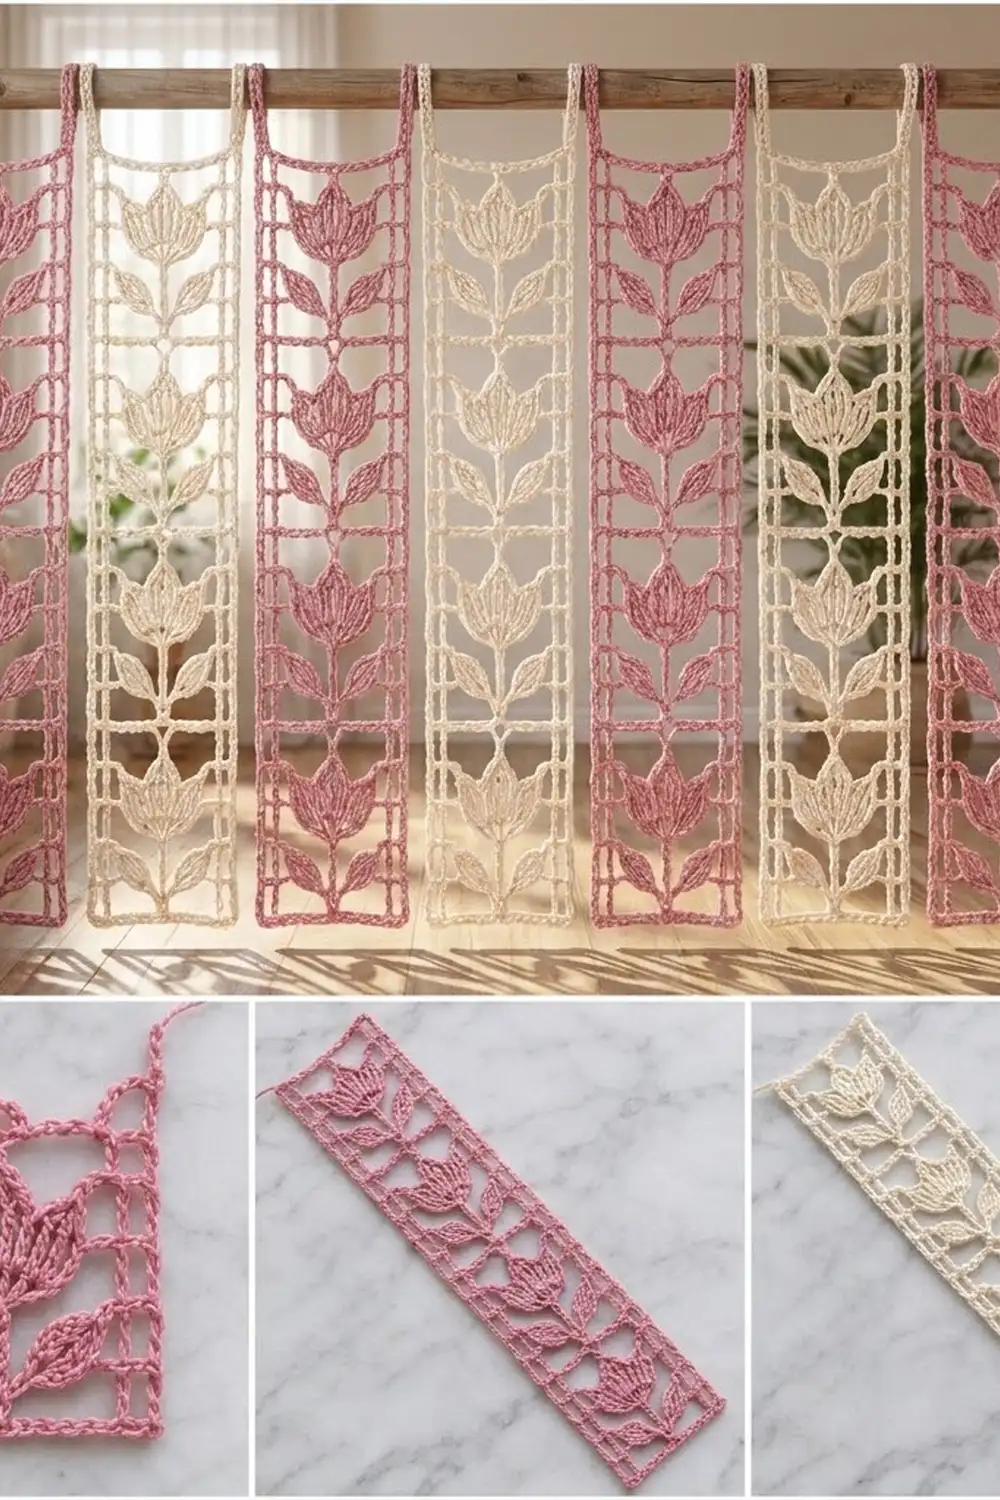
The sample alternates four dusty pink strips with three cream strips, which gives a soft, striped look that suits cottage, nursery and Scandinavian-style rooms. The strips are not joined to each other. Each one hangs from the rod by its own loops, so you can walk through the curtain and push individual strips aside.
The pattern uses US crochet terms. Each finished strip measures 5.75 in (14.6 cm) wide and 78 in (198.1 cm) long, plus 1.5 in (3.8 cm) hanging loops.
Each strip is worked flat in rows from the bottom up. The tulip motif repeats every 8 rows, and the stitch count stays at 21 on every row. A single round of single crochet finishes the edges, and three chain loops at the top slide onto the rod.
Finished Size and Construction
- Finished strip size: 5.75 in × 78 in (14.6 cm × 198.1 cm), plus 1.5 in (3.8 cm) loops
- Skill level: Intermediate
- Terminology: US crochet terms
- Yarn weight: Worsted (#4)
- Hook: US H-8 (5 mm)
- Number of pieces: 7 strips (4 pink, 3 cream)
- Layout: 7 strips side by side, unjoined, hung from one rod
- Piece size before border: 5.25 in × 77.5 in (13.3 cm × 196.9 cm)
- Border depth: 0.25 in (0.6 cm) on every edge
- Tulips per strip: 19
- Total hanging width: 44.75 in (113.7 cm), including 0.75 in (1.9 cm) gaps
Materials
Yarn: Use a smooth worsted-weight cotton or cotton-acrylic blend of about 200 yd (183 m) per 100 g. Smooth yarn shows the tulip shapes clearly and stretches less over a long drop than pure acrylic. Avoid fuzzy or splitty yarns, because the open mesh needs crisp stitches.
- Dusty pink: 450 g, about 900 yd (823 m), for 4 strips
- Cream: 350 g, about 700 yd (640 m), for 3 strips
These quantities include a margin of roughly 10–15% for swatching and tension differences. One strip uses about 203 yd (186 m).
Tools:
– US H-8 (5 mm) crochet hook
– Locking stitch markers
– Tapestry needle
– Scissors
– Measuring tape
– Blocking mats and rust-proof pins
– Spray bottle
– Curtain rod at least 46 in (116.8 cm) long, up to 1 in (2.5 cm) in diameter
Abbreviations (US Terms)
- ch – chain
- sk – skip
- sl st – slip stitch
- sc – single crochet
- dc – double crochet
- tr – treble crochet
- st(s) – stitch(es)
- RS – right side
- rnd – round
Stitch placement rule: Every row has 21 positions. Each position is either a stitch (dc or tr) or one chain. Work each new stitch into the matching position directly below it, whether that position is a stitch or a chain. Where the instructions say “ch X, sk X,” you skip that many positions below. This keeps the count at exactly 21 on every row.
Edge sequence: Work these 5 positions at each end of every row from Row 2 to Row 154.
– Left edge: Ch 3 (counts as dc), ch 1, sk next st, dc in next st, ch 1, sk next st, dc in next st.
– Right edge: Dc in next st, ch 1, sk next st, dc in next st, ch 1, sk next st, dc in top of turning ch.
Each edge sequence makes two open squares, which form the ladder down each side.
Gauge and Checkpoints
Gauge: 16 dc and 8 rows = 4 in (10.2 cm) in plain double crochet. One dc row measures 0.5 in (1.3 cm).
Use your first strip as the test piece instead of a separate swatch. Check these measurements as you go:
- After Row 1: The width should be 5.25 in (13.3 cm).
- After Row 9 (first tulip): The height should be 4.5 in (11.4 cm).
- After Row 81 (10 tulips): The height should be 40.5 in (102.9 cm).
- After Row 155: The strip should measure 5.25 in × 77.5 in (13.3 cm × 196.9 cm).
- After the border: The strip should measure 5.75 in × 78 in (14.6 cm × 198.1 cm).
Lay the strip flat without stretching it when you measure.
If the strip is too big (more than 0.25 in / 0.6 cm wider than target, or tulips taller than 4 in / 10.2 cm), go down one hook size and start again.
If it is too small, go up one hook size.
If only the height is off, you can adjust the length by adding or removing whole tulip repeats. Each repeat adds or removes 4 in (10.2 cm). Do not change the width, because the border math depends on the 21-stitch base.
Strip Pattern
Make 7 strips, following the color layout below. Each row begins with ch 3, which counts as the first dc. The design is symmetrical, so RS and WS rows read the same way.
In the center instructions below, “c1” to “c11” are the 11 center positions between the two edge sequences.
Foundation: Ch 23.
Row 1 (solid base): Dc in 4th ch from hook (the skipped 3 ch count as the first dc), then dc in each remaining ch across. Turn. (21 dc)
Tulip Repeat (Rows 2–9)
Row 2 (bar row): Work the left edge. Ch 11, sk next 11 sts. Work the right edge. Turn. (21 positions: 6 dc, 15 ch)
The ch-11 makes the horizontal bar that separates the tulips.
Row 3 (leaf base): Work the left edge.
– Ch 2, sk 2 (c1–c2).
– Dc in next 7 ch of the bar (c3–c9). The center dc of these 7 is the stem, and the 3 dc on each side are the leaf bases.
– Ch 2, sk 2 (c10–c11).
Work the right edge. Turn. (21 positions: 13 dc, 8 ch)
Row 4 (leaves widen outward): Work the left edge.
– Ch 1, sk 1.
– Dc in next 3 sts (c2–c4).
– Ch 1, sk 1.
– Dc in next st (the stem, c6).
– Ch 1, sk 1.
– Dc in next 3 sts (c8–c10).
– Ch 1, sk 1.
Work the right edge. Turn. (21 positions: 13 dc, 8 ch)
Each leaf has shifted one position outward, which makes the upward slant.
Row 5 (leaf tips): Work the left edge.
– Ch 1, sk 1.
– Dc in next st (leaf tip, c2).
– Ch 3, sk 3.
– Dc in next st (stem, c6).
– Ch 3, sk 3.
– Dc in next st (leaf tip, c10).
– Ch 1, sk 1.
Work the right edge. Turn. (21 positions: 9 dc, 12 ch)
Row 6 (calyx): Work the left edge.
– Ch 4, sk 4.
– Dc in next 3 sts (c5–c7). These sit on the stem and the chains on either side of it.
– Ch 4, sk 4.
Work the right edge. Turn. (21 positions: 9 dc, 12 ch)
Row 7 (cup widens): Work the left edge.
– Ch 2, sk 2.
– Dc in next 7 positions (c3–c9).
– Ch 2, sk 2.
Work the right edge. Turn. (21 positions: 13 dc, 8 ch)
Row 8 (full cup): Work the left edge.
– Ch 1, sk 1.
– Dc in next 9 positions (c2–c10).
– Ch 1, sk 1.
Work the right edge. Turn. (21 positions: 15 dc, 6 ch)
Row 9 (petals): Work the left edge.
– Ch 1, sk 1.
– Tr in next st (c2), then dc in next st (c3). This is the left petal.
– Ch 1, sk 1.
– Dc in next st (c5), tr in next st (c6), dc in next st (c7). This is the center petal.
– Ch 1, sk 1.
– Dc in next st (c9), then tr in next st (c10). This is the right petal.
– Ch 1, sk 1.
Work the right edge. Turn. (21 positions: 12 dc, 3 tr, 6 ch)
The tr stitches rise above the dc to form the three pointed petal tips.
Rows 10–153: Repeat Rows 2–9 eighteen more times, for 19 tulips in total.
Checkpoint: The strip should measure 76.5 in (194.3 cm) tall here (153 rows × 0.5 in).
Top Finish
Row 154 (bar row): Repeat Row 2. (21 positions)
Row 155 (solid top): Ch 3 (counts as dc). Dc in each st and each ch across, ending in the top of the turning ch. (21 dc) Do not fasten off.
Before the border, the strip measures 5.25 in × 77.5 in (13.3 cm × 196.9 cm).
Make All Pieces
Make 7 strips: 4 in dusty pink and 3 in cream.
Layout as seen from the room side, left to right:
| P | C | P | C | P | C | P |
P = pink, C = cream. Each cell is one 5.75 in × 78 in (14.6 cm × 198.1 cm) strip.
Work the border and loops on each strip in its own color. Weave in all tails along the solid dc posts, not across the open mesh, so they stay hidden.
Joining: None — Hanging the Strips
This design is not joined. Each strip hangs on its own so the curtain moves freely and lets people walk through, as in the sample.
Spacing: Leave a 0.75 in (1.9 cm) gap between neighboring strips on the rod. The total width is:
- 7 strips × 5.75 in = 40.25 in (102.2 cm)
- plus 6 gaps × 0.75 in = 4.5 in (11.4 cm)
- total 44.75 in (113.7 cm)
Tension advice: Each strip should hang straight under its own weight. If a strip twists, check that its three loops are the same length.
Size checkpoint: Once all 7 strips are on the rod, the hanging width should be 44.75 in (113.7 cm). Each strip’s lower edge should sit 78 in (198.1 cm) below the base of its loops.
Border
Each strip gets one round of sc in its own color, followed by three hanging loops.
Border gauge: 4 sc per inch (2.5 cm) along every edge.
Rnd 1: Continue from the last st of Row 155 without turning.
– Top edge: 3 sc in the last st (corner), sc in next 19 sts, 3 sc in the last st (corner). (25 sc)
– First long side: Work 2 sc into the side of each row end down the long side. (155 rows × 2 = 310 sc)
– Bottom edge: Working into the underside of the foundation ch, 3 sc in the first st, sc in next 19, 3 sc in the last st. (25 sc)
– Second long side: 2 sc into each row end. (310 sc)
Sl st to the first sc. (670 sc total)
Side counts: In this border, the 3-sc corner groups count toward the short edges. So the short edges have 25 sc each including their corners, and the long sides have 310 sc each with no corner stitches.
Why the math works:
– The top edge is 21 stitches at 4 per inch, which is 5.25 in (13.3 cm). One sc per stitch matches this exactly.
– The sides are 155 rows at 0.5 in each, which is 77.5 in (196.9 cm). At 4 sc per inch that is 310 sc, which is exactly 2 sc per dc row end.
– Because both directions use the same 4-per-inch rate, the edges stay flat. The 3-sc corners turn cleanly without cupping.
– The border adds 0.25 in (0.6 cm) on each edge, which brings the strip to 5.75 in × 78 in (14.6 cm × 198.1 cm).
Hanging Loops
Join yarn in the center sc of the top-right corner group. This is st 1 of the 25 top-edge sc.
- Ch 12, sl st in the same sc to make the first loop.
- Sl st in each of the next 12 sc, ending in st 13 (the center sc).
- Ch 12, sl st in the same sc.
- Sl st in each of the next 12 sc, ending in st 25 (the center sc of the left corner group).
- Ch 12, sl st in the same sc. Fasten off.
Each loop stands about 1.5 in (3.8 cm) tall. It fits a rod up to 1 in (2.5 cm) in diameter.
Final Blocking
- Soak each strip in cool water for 15 minutes, then press out the water in a towel. Do not wring.
- Lay the strip on blocking mats. Because the strip is long, block it in two or three sections, sliding it along as each section dries.
- Pin the width to 5.75 in (14.6 cm) every 6 in (15.2 cm) along the length.
- Pin the length to 78 in (198.1 cm) without overstretching. The strip will relax further once it hangs.
- Pin every horizontal ch-11 bar straight, and square up the edge ladder openings.
- Gently shape each tulip: open the petal tips to points, and angle the leaves upward.
- Let each section dry completely before unpinning.
- Hang all strips for 24 hours, then measure again. If a strip has grown more than 1 in (2.5 cm), see Troubleshooting.
Final Quality-Control Checklist
- [ ] Every row has 21 positions, and every strip has 155 rows.
- [ ] Each strip has 19 tulips, each with three petals, a stem and two leaves.
- [ ] Both ladder edges have two columns of open squares from Row 2 to Row 154.
- [ ] The border has 670 sc: 25 on each short edge and 310 on each long side.
- [ ] Each strip measures 5.75 in × 78 in (14.6 cm × 198.1 cm).
- [ ] All three loops on each strip are 1.5 in (3.8 cm) tall.
- [ ] The colors run P, C, P, C, P, C, P.
- [ ] All tails are woven into solid posts.
Troubleshooting
The strip narrows or widens. You have probably worked into a chain space instead of the chain itself, or missed the turning chain. Count 21 positions on every row.
The tulips lean to one side. The center positions have drifted. Place a marker on the stem dc (c6) in Rows 3–5 to keep it centered.
The petals look flat. Make sure c2, c6 and c10 in Row 9 are true tr stitches with two wraps.
The border ruffles. Work 2 sc into each row end, never 3. Count 310 sc on each long side.
The border pulls in. Loosen your tension, or go up one hook size for the border round only.
The strips grow longer after hanging. Pull out the border and loops, remove the last full tulip repeat, rework Rows 154–155 and redo the border. This shortens the strip by 4 in (10.2 cm).
The strips twist. The loops are uneven. Redo them with exactly 12 chains each.
Care
Hand wash in cool water with mild detergent, then lay flat and reshape to 5.75 in × 78 in (14.6 cm × 198.1 cm) to dry. Do not tumble dry, because the long strips can stretch and tangle.
Final Notes
The measurements build on each other in this order:
- A gauge of 16 dc to 4 in (10.2 cm) gives a 21-stitch base of 5.25 in (13.3 cm).
- Each dc row measures 0.5 in (1.3 cm), and each tulip repeat measures 4 in (10.2 cm).
- 155 rows give a strip of 77.5 in (196.9 cm).
- A sc border at 4 sc per inch brings the strip to 5.75 in × 78 in (14.6 cm × 198.1 cm).
- Seven strips with six 0.75 in (1.9 cm) gaps hang 44.75 in (113.7 cm) wide.
If you keep your gauge, you will get a clean, even curtain of pink and cream tulips.
Happy crocheting!