

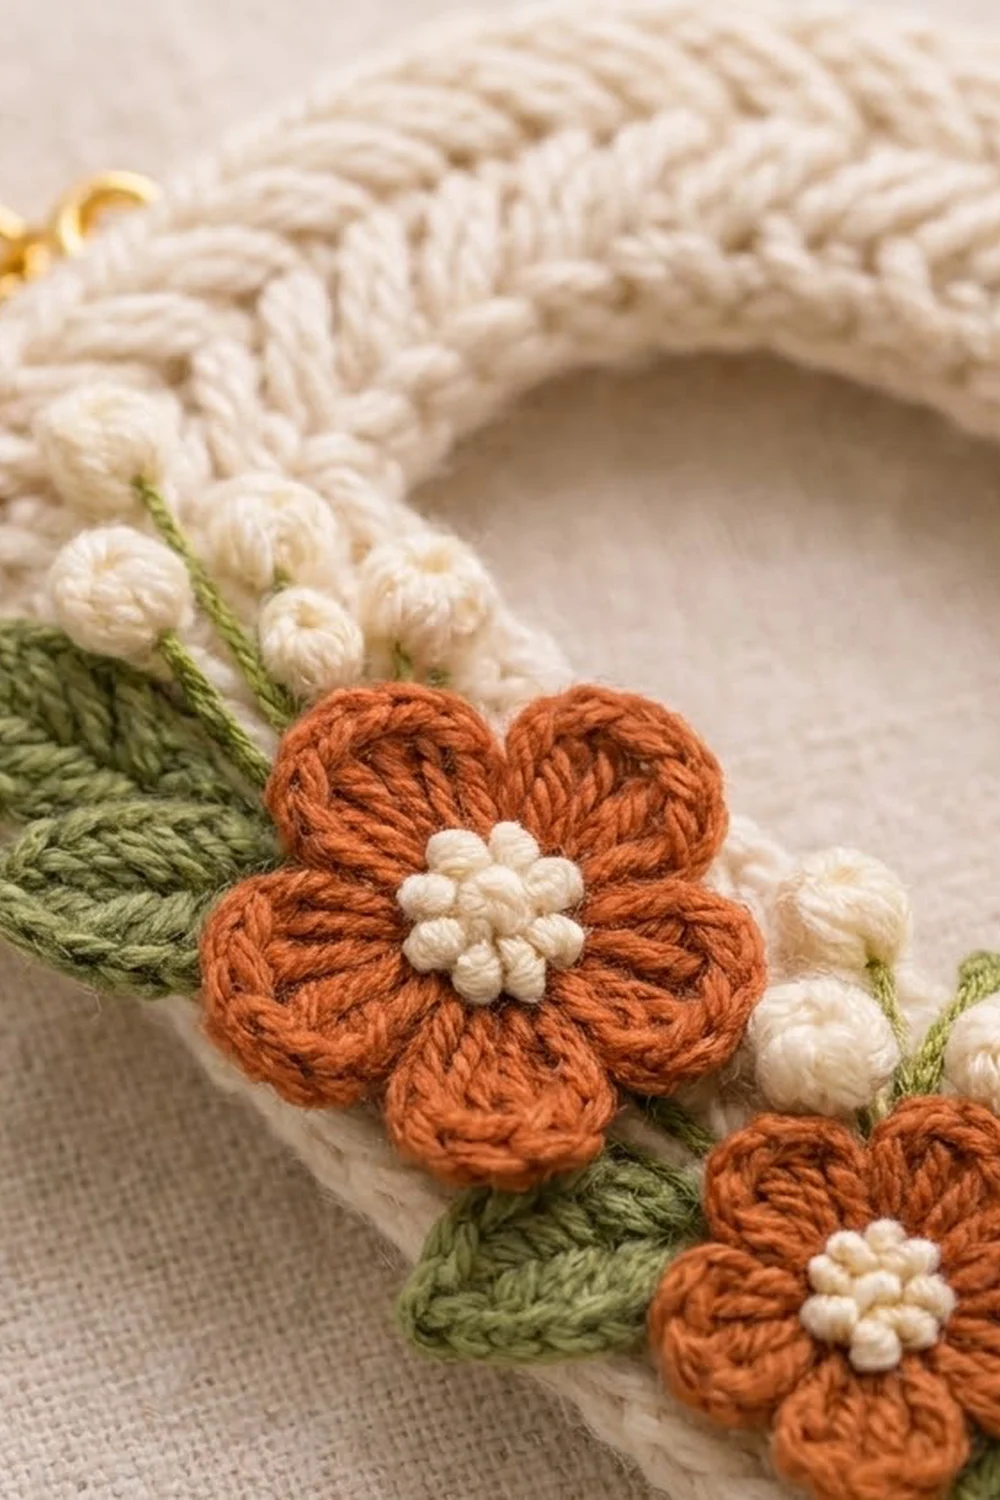
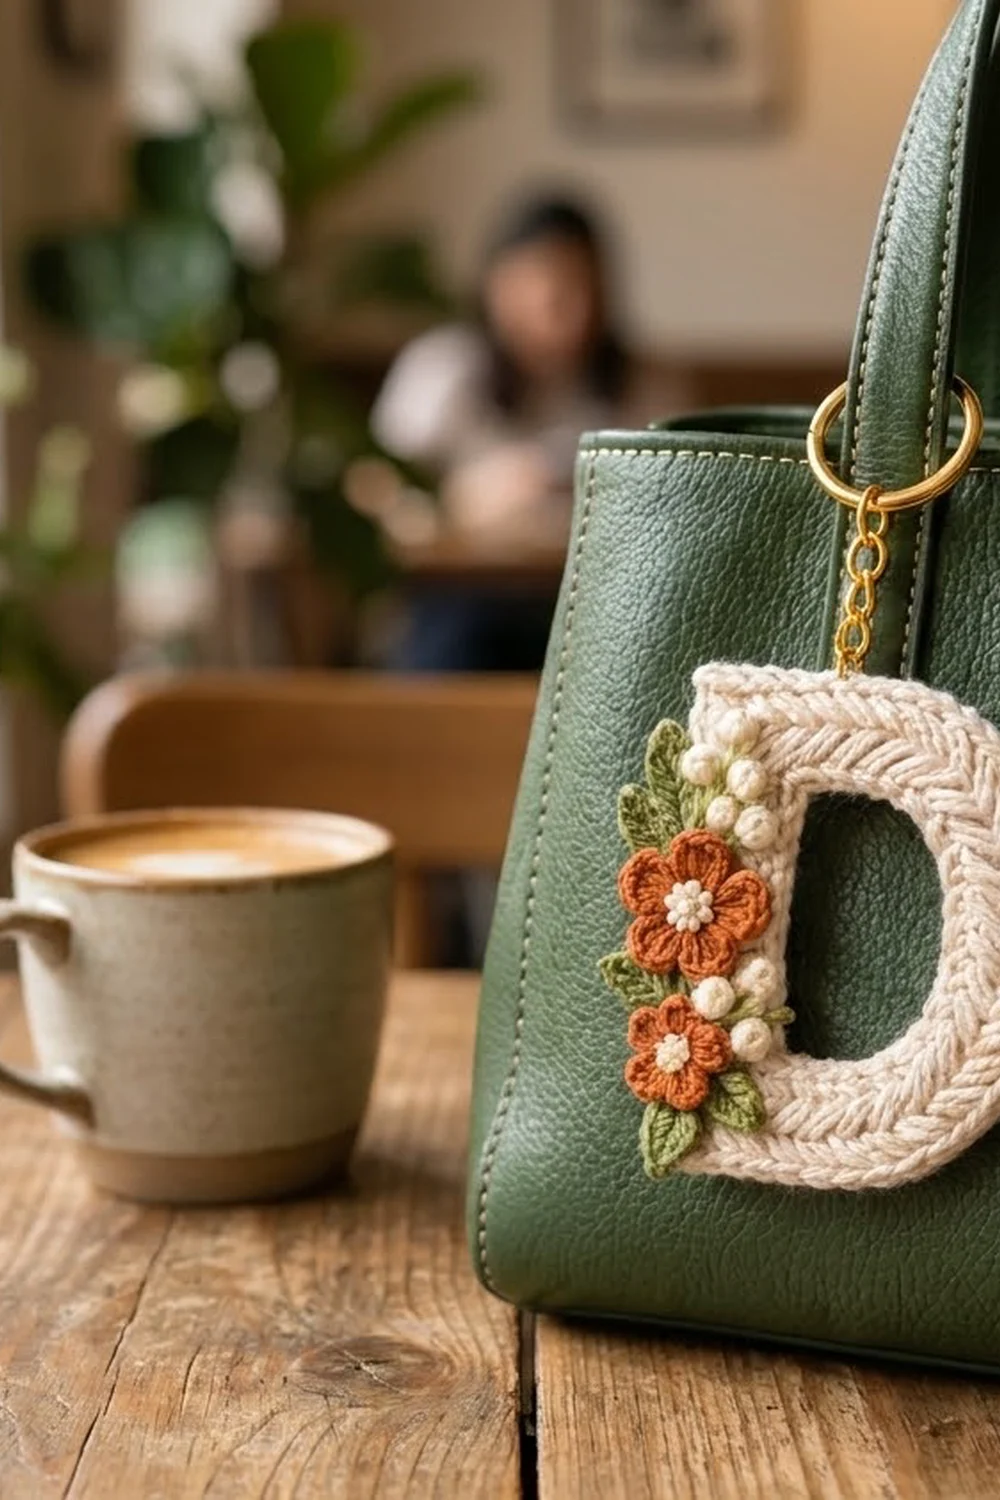
This little letter D keychain is soft, neat and easy to personalize. The letter is worked in cream cotton in a knit-look stitch, so rows of V-shaped ridges follow the outline and look a bit like a braid. A cluster of rust-orange flowers, sage leaves and tiny cream berries sits over the straight stem of the letter.
The colors are warm and earthy: cream for the letter, berries and flower centers, rust for the petals, and sage green for the leaves and berry stems. A gold split ring on a short chain finishes the top-left corner, ready to clip onto a bag, a set of keys or a zipper pull.
The pattern uses US crochet terms. The finished keychain measures about 3.5 in (8.9 cm) tall and 3 in (7.6 cm) wide, not counting the hardware.
The letter is one piece. You crochet it in joined rounds outward from a chain ring that forms the D-shaped opening. You add corner increases at the stem and spaced increases around the bowl, then finish with one round of border. After that, you make the flowers, leaves and berries separately and sew them onto the stem.
Finished Size and Construction
- Finished size: 3.5 in (8.9 cm) tall × 3 in (7.6 cm) wide
- Skill level: Advanced beginner
- Terminology: US crochet terms
- Yarn weight: DK (#3 light) cotton or cotton blend
- Hook: 3.5 mm (E-4)
- Number of pieces: 1 letter, plus small sewn-on appliqués (2 flowers, 4 leaves, 7 berries)
- Layout: one letter, with the appliqués stacked along the front of the stem
- Letter stroke width: about 0.75 in (1.9 cm) before the border, about 1 in (2.5 cm) after
- Size before border: 3 in (7.6 cm) tall × 2.5 in (6.4 cm) wide
- Border depth: 0.25 in (0.6 cm), outer edge only
Materials
Use a smooth, mercerized or soft-twist DK cotton. Cotton keeps the V ridges crisp and holds its shape on a keychain that gets handled every day. Avoid fuzzy yarns, because they blur the knit-look texture.
- Cream (letter, berries, flower centers): 10 g / 23 m
- Rust orange (petals): 4 g / 9 m
- Sage green (leaves, berry stems): 3 g / 7 m
All quantities include a safety margin of about 30% for swatching and tails.
Tools:
– 3.5 mm (E-4) crochet hook
– Tapestry needle with a sharp point, for sewing the appliqués and embroidering
– 2 locking stitch markers
– Gold split ring, 1 in (2.5 cm), with a 1.5 in (3.8 cm) length of gold chain
– 2 gold jump rings, 6 mm, and 2 pairs of flat-nose pliers
– Blocking mat, rust-proof pins and a spray bottle
– Scissors and a ruler
Abbreviations (US Terms)
- ch – chain
- sl st – slip stitch
- sc – single crochet
- hdc – half double crochet
- dc – double crochet
- st(s) – stitch(es)
- rnd(s) – round(s)
- RS / WS – right side / wrong side
- 3L – third loop
Special stitch – Camel hdc (hdc in 3L): Every hdc has a horizontal bar on the WS, just below its top two loops. Work the new hdc under that bar only. This pushes the top two loops of the previous round to the front, where they show as a row of V’s on the RS. That row of V’s is the knit-look ridge.
3L sc: Work a sc under the same horizontal bar.
Gauge and Checkpoints
Gauge: 18 hdc and 16 rnds = 4 in (10.2 cm) in camel hdc. That works out to 4.5 sts per inch (2.54 cm), and each hdc round is 0.25 in (0.6 cm) tall.
The letter is small, so it works as its own gauge swatch. Make the whole letter first and measure it before you start the appliqués.
Checkpoints:
– After Rnd 1: The inner stem edge (the straight side of the opening) measures about 1.5 in (3.8 cm).
– After Rnd 3: The letter measures 3 in (7.6 cm) tall along the stem and 2.5 in (6.4 cm) wide. The outer stem side has 14 sts, counting both corner sts.
– After the border: The letter measures 3.5 in (8.9 cm) × 3 in (7.6 cm).
If your letter is too big: Go down to a 3.25 mm (D-3) hook, or tighten the loop on your hook before you yarn over.
If your letter is too small: Go up to a 3.75 mm (F-5) hook.
If it cups or ruffles: Check your counts first, then adjust your tension. Don’t change the number of increases.
Pattern: The Letter D
You work the letter in joined rounds with the RS facing and do not turn.
Each round starts at corner A (top-left corner of the opening), goes down the stem to corner B (bottom-left), and then goes around the curved bowl back to corner A. Keep the 6 stem sts in a straight line every round. They are never increased.
Foundation: With cream, leave an 8 in (20.3 cm) tail and ch 22. Sl st into the first ch to form a ring, making sure the chain isn’t twisted.
Rnd 1:
1. Ch 2 (does not count as a st).
2. Work 3 hdc in the first ch. This is corner A.
3. Hdc in each of the next 6 ch. This is the stem.
4. Work 3 hdc in the next ch. This is corner B.
5. For the curve, hdc in the next 2 ch, then [2 hdc in next ch, hdc in next 3 ch] 3 times (14 ch worked, 17 sts made).
6. Sl st to the first hdc.
Count: 29 sts (corner A 3, stem 6, corner B 3, curve 17).
Place a marker in the middle hdc of each corner group, and move the markers up every round.
Rnd 2: This round is regular hdc, worked through both loops.
1. Ch 2.
2. Corner A: hdc in the next st, 3 hdc in the marked st, hdc in the next st (5 sts).
3. Hdc in each of the 6 stem sts.
4. Corner B: hdc in the next st, 3 hdc in the marked st, hdc in the next st (5 sts).
5. Curve: hdc in next 2, [2 hdc in next, hdc in next 3] 3 times, 2 hdc in next, hdc in next 2 (17 sts worked, 21 sts made).
6. Sl st to the first hdc.
Count: 37 sts (5 + 6 + 5 + 21).
Rnd 3: Work every st as a camel hdc (in 3L). This brings the first row of V ridges to the front.
1. Ch 2.
2. Corner A: hdc in next 2, 3 hdc in the marked st, hdc in next 2 (7 sts).
3. Hdc in each of the 6 stem sts.
4. Corner B: same as corner A (7 sts).
5. Curve: hdc in next 2, [2 hdc in next, hdc in next 4] 3 times, 2 hdc in next, hdc in next 3 (21 sts worked, 25 sts made).
6. Sl st to the first hdc.
Count: 45 sts (7 + 6 + 7 + 25).
Side check: The stem side has 14 sts, counting both corner sts. The curved side has 33 sts, counting both corner sts. Together that is 14 + 33 − 2 shared corners = 45. ✓
Measure the letter now. It should be 3 in (7.6 cm) × 2.5 in (6.4 cm). If it is, don’t fasten off; go straight on to the border.
Border
Border gauge: One rnd of 3L sc measures 0.25 in (0.6 cm) deep, at the same 4.5 sts per inch (2.54 cm).
The border goes around the outer edge only. The inner edge of the opening is already finished by the foundation chain.
Rnd 4: Work every st as a 3L sc. This brings the second row of V ridges to the front and rounds off the edge.
1. Ch 1 (does not count as a st).
2. Corner A: sc in next 3, 3 sc in the marked st, sc in next 3 (9 sts).
3. Sc in each of the 6 stem sts.
4. Corner B: sc in next 3, 3 sc in the marked st, sc in next 3 (9 sts).
5. Curve: sc in next 3, [2 sc in next, sc in next 5] 3 times, sc in next 4 (25 sts worked, 28 sts made).
6. Sl st to the first sc.
Count: 52 sts (9 + 6 + 9 + 28).
Fasten off, leaving a 12 in (30.5 cm) tail for attaching the hardware.
Count per side:
– Stem side: 14 sts worked 1 per existing st, + 2 sts added (1 extra from each corner) = 16 sts, counting both corners.
– Curved side: 33 sts worked 1 per existing st, + 2 sts added at the corners + 3 sts added by the curve increases = 38 sts, counting both corners.
– Total: 16 + 38 − 2 shared corners = 52. ✓
Why the math works: Each 3-st corner turns 90° and adds 1 st to each side it touches. The straight stem has no increases, so it stays flat and true.
The bowl has to grow faster than the corners, because it turns a full 180°. Each 0.25 in (0.6 cm) round lengthens the curve by about π × 0.25 in = 0.8 in (2.0 cm), which is roughly 3.5 sts at 4.5 sts per inch. That is why the hdc rounds add 4 sts around the curve.
The border needs only 3 curve increases. That keeps the edge slightly firm, so it rolls toward the front instead of rippling.
At the end, 16 stem sts ÷ 4.5 sts per inch = 3.56 in. That matches the 3.5 in (8.9 cm) finished height.
Appliqués
Large Flower (make 1)
- With cream, make a magic ring. Ch 1, work 5 sc in the ring, pull the ring closed and sl st to the first sc (5 sts). Fasten off.
- Join rust in any sc. Rnd 2: Ch 1, 2 sc in each st, sl st to the first sc (10 sts).
- Rnd 3: [(hdc, dc, dc, hdc) in next st, sl st in next st] 5 times. This makes 5 petals.
- Fasten off, leaving a 10 in (25.4 cm) tail.
The flower is about 1.1 in (2.8 cm) across.
Small Flower (make 1)
- Work the cream center the same way as the large flower (5 sts).
- Join rust in any sc. Rnd 2: [(sc, hdc, dc, hdc, sc) in next st] 5 times, sl st to the first sc. This makes 5 petals.
- Fasten off, leaving a 10 in (25.4 cm) tail.
The flower is about 0.8 in (2.0 cm) across.
Flower centers: With cream, stitch 3 tiny French knots over each center. Wrap the yarn around the needle twice for each knot. These give the beaded look.
Leaf (make 4)
- With sage, ch 7.
- Starting in the 2nd ch from the hook: sc, hdc, dc, dc, hdc, then work 3 sc in the last ch to turn the tip.
- Working along the other side of the chain: hdc, dc, dc, hdc, sc.
- Sl st to the first sc and fasten off.
Each leaf is about 0.9 in (2.3 cm) long, with a pointed tip.
Berry (make 7)
- With cream, make a magic ring and work 5 sc in it.
- Pull the ring very tight. Thread the tail through all 5 sts and gather them into a ball.
Each berry is about 0.2 in (0.5 cm) across.
Arrange and Sew
Lay the letter RS up with the stem on your left. Work from the top of the stem down:
- Top: 2 leaves, angled up and out.
- Upper middle: the large flower, overlapping the outer stem edge by about 0.125 in (0.3 cm).
- Lower middle: the small flower, about 0.5 in (1.3 cm) below the large flower.
- Bottom: 2 leaves, one tucked behind the small flower and one at the base of the stem.
Pin everything in place.
Sew the leaves first, using small whipstitches around their bases. Then sew the flowers, stitching through the inner round of each flower so the petals stay free.
With sage, backstitch three short berry stems, each 0.5 in (1.3 cm) long:
– one above the large flower,
– one to the right of it,
– one beside the small flower.
Sew 2 or 3 berries along each stem, 7 berries in total. Weave in all ends on the WS.
Hardware
Using the cream tail, whipstitch one jump ring firmly through the corner A border sts. Use a second jump ring to link the chain to the first jump ring, then thread the split ring onto the other end of the chain. Close every ring fully with the pliers so the yarn can’t slip out.
Final Blocking
- Lightly mist the letter until it is damp, not soaking.
- Pin it RS up on the mat, at 3.5 in (8.9 cm) × 3 in (7.6 cm).
- Square both stem corners, and keep the stem edge straight with a ruler.
- Ease the bowl into a smooth, even curve.
- Gently shape the flower petals and leaf tips with your fingers.
- Let it dry completely, at least 4 hours, before you unpin it.
Final Quality-Control Checklist
- Finished size is 3.5 in (8.9 cm) × 3 in (7.6 cm).
- Final counts are correct: Rnd 1 has 29 sts, Rnd 2 has 37, Rnd 3 has 45 and the border has 52.
- The stem edge is straight and both left corners are square.
- The bowl curves smoothly, with no points or ripples.
- Two even rows of V ridges show on the RS.
- The flowers, leaves and berries are secure and don’t flop.
- The jump rings are fully closed and the hardware feels sturdy.
- All ends are woven in on the WS.
Troubleshooting
- The bowl cups: You’ve lost a curve increase. Count the curve sts after each rnd.
- The bowl ruffles: Your tension is loose on the increases. Go down a hook size for the curve only.
- The corners are rounded: Make sure the 3 sts go into the marked middle st, not into the st beside it.
- The V ridges don’t show: You worked into the back loop instead of the third loop. The 3L bar sits below both top loops.
- The letter twists: The foundation chain was twisted when you joined it. Restart from the chain.
- The flowers droop: Add a few stitches through the center ring, all the way into the letter.
Care
Hand wash in cool water with a mild soap and press out the water in a towel. Reshape the letter and let it dry flat. Keep the metal parts dry so they don’t tarnish.
Final Notes
The measurements build on each other:
– 22 foundation chains give a stem opening of about 1.5 in (3.8 cm).
– Three rounds bring the letter to 3 in (7.6 cm) × 2.5 in (6.4 cm), with 14 sts on the stem side.
– One border round of 0.25 in (0.6 cm) brings it to 16 stem sts and a finished size of 3.5 in (8.9 cm) × 3 in (7.6 cm).
Check each stage before moving on and the shape will stay true. Once you know the method, it’s easy to swap the flower colors to suit your bag or your recipient.
Happy crocheting!