

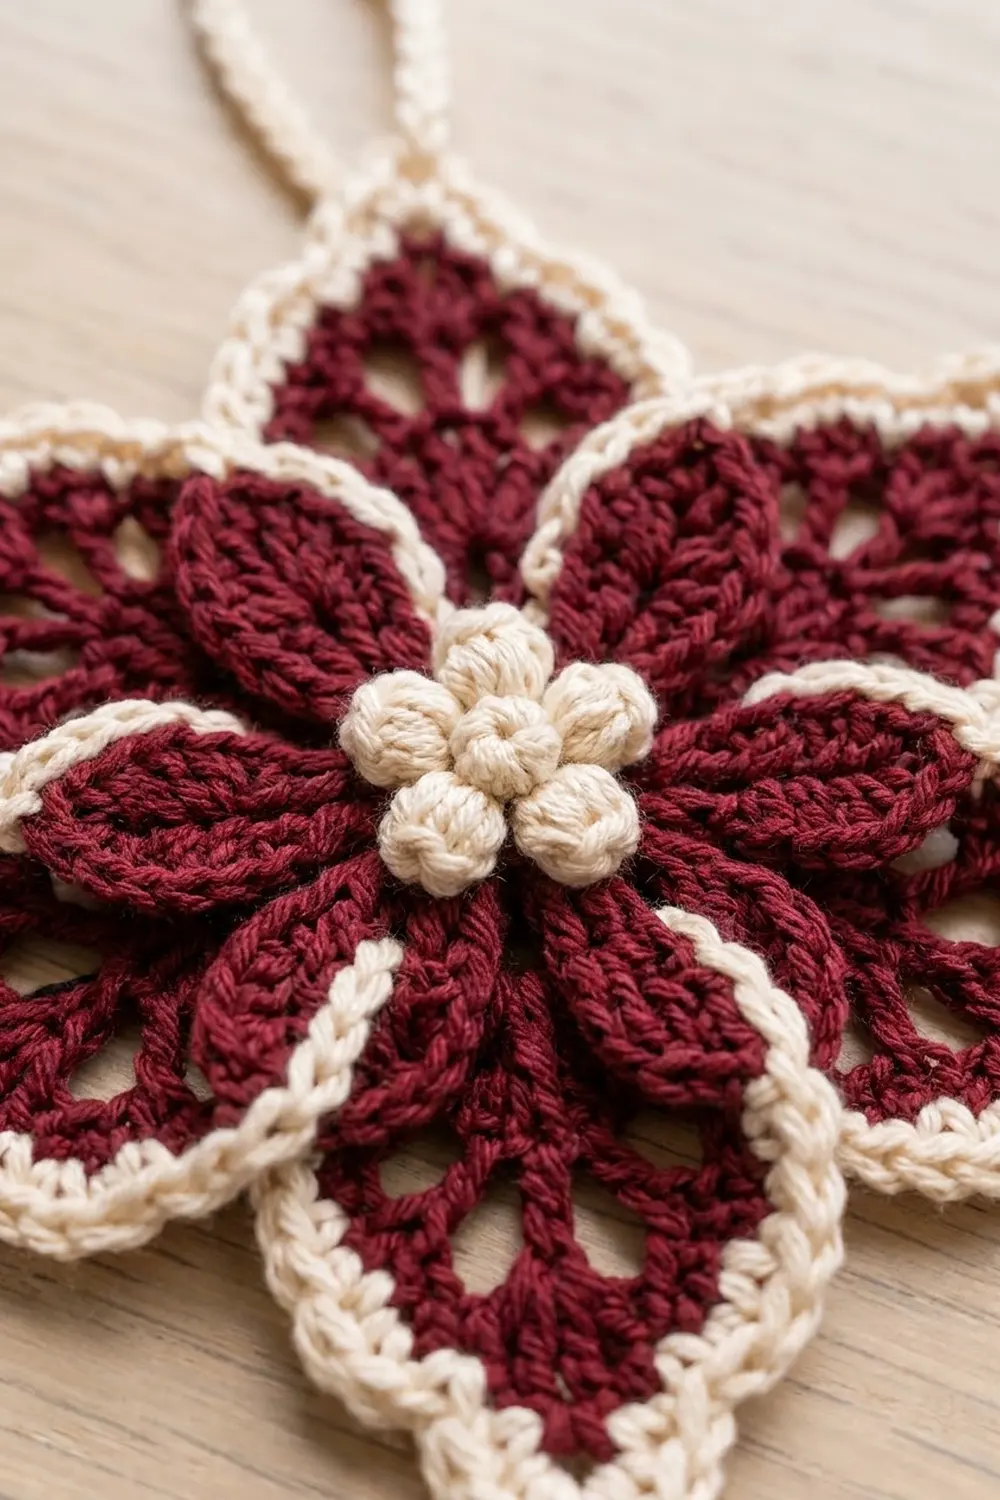
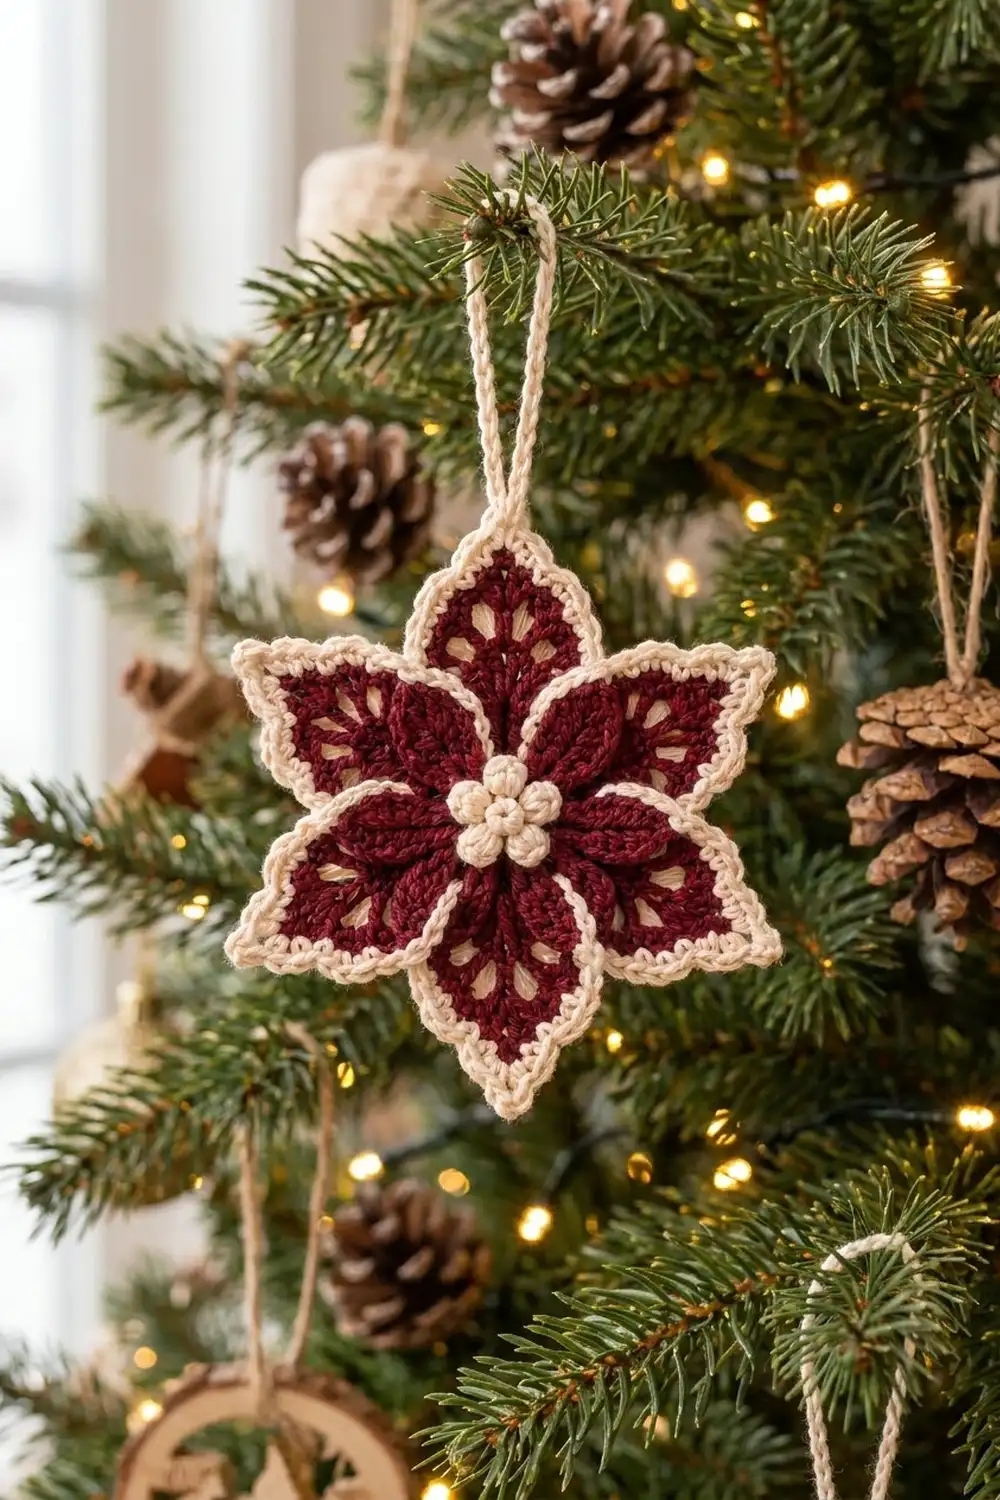
This poinsettia star ornament has deep burgundy petals outlined in cream. It looks traditional, and it hangs well on a tree, on a gift package, or in a window.
The design has three layers. Six lacy outer petals form the star, six solid inner petals sit on top, and a cluster of cream bobbles fills the center. The cream border and hanging loop match the bobble center, so the ornament reads as a single design.
The ornament measures 5.25 in (13.3 cm) from tip to tip. The pattern uses US crochet terms.
You will crochet the six outer petals one at a time and give each one a cream border. Next you make the inner flower, which has a center disc built into it, and then the bobble center. Last, you sew the outer petals to the back of the disc, sew the bobbles on top, and add the loop.
Finished Size and Construction
- Finished size: 5.25 in (13.3 cm) tip to tip
- Skill level: Intermediate
- Terminology: US crochet terms
- Yarn weight: Sport (2), mercerized cotton
- Hook: 3.25 mm (US D/3)
- Number of pieces: 9 (6 outer petals, 1 inner flower with center disc, 1 bobble ring, 1 center bobble)
- Layout: 6 outer petals in a ring, one every 60 degrees, with the inner flower and bobble center layered on top
- Outer petal size (bordered): 2.25 in (5.7 cm) long × 2 in (5.1 cm) wide
- Outer petal size before border: 2 in (5.1 cm) long × 1.5 in (3.8 cm) wide
- Border depth: 0.25 in (0.6 cm), 2 rounds of sc
Materials
Mercerized cotton works best because it gives crisp stitches, open windows, and sharp points. A soft acrylic will also work, but the petals will look rounder and less defined.
- Color A, burgundy: 10 g, about 30 m
- Color B, cream: 6 g, about 18 m
These quantities make one ornament and already include a margin for tails and gauge swatching.
Tools:
- 3.25 mm (US D/3) crochet hook
- Tapestry needle
- Scissors
- Stitch marker
- Blocking mat and rust-proof pins
- Spray bottle with water
- Ruler or tape measure
Abbreviations (US Terms)
- ch – chain
- sl st – slip stitch
- sc – single crochet
- hdc – half double crochet
- dc – double crochet
- tr – treble crochet
- st(s) – stitch(es)
- sp – space
- FLO – front loop only
- rnd – round
- yo – yarn over
3-dc bobble: [Yo, insert hook in st, yo, pull up a loop, yo, draw through 2 loops] 3 times, yo, draw through all 4 loops on hook.
5-dc bobble: Work as the 3-dc bobble, but repeat the bracketed steps 5 times and finish by drawing through all 6 loops.
Gauge and Checkpoints
Gauge: 22 sc × 24 rows = 4 in (10.2 cm) in sport cotton with a 3.25 mm hook. Because ornament gauge does not need to be exact, the checkpoints below are more useful than a swatch.
Make one complete outer petal before you make the others, and check it at each stage:
- After Row 1: the fan is 0.5 in (1.3 cm) tall.
- After Row 3: the lace section is 1.25 in (3.2 cm) tall.
- After Row 5: the petal is 2 in (5.1 cm) from base to tip and 1.5 in (3.8 cm) at its widest.
- After the border: the petal is 2.25 in (5.7 cm) long and 2 in (5.1 cm) wide.
If the petal is more than 0.25 in (0.6 cm) too big, go down to a 2.75 mm (US C/2) hook. If it is that much too small, go up to a 3.5 mm (US E/4) hook. Use the same hook for every piece.
Outer Petal (make 6)
Work in rows from the base point out to the tip. Use Color A.
Row 1: Ch 4, 4 dc in 4th ch from hook. The skipped ch count as the first dc. Turn. (5 dc)
Row 2: Ch 4 (counts as dc and ch 1), dc in next dc, [ch 1, dc in next dc] 2 times, ch 1, dc in top of turning ch. Turn. (5 dc, 4 ch-1 sps)
Row 3: Ch 5 (counts as dc and ch 2), dc in next dc, [ch 2, dc in next dc] 2 times, ch 2, dc in 3rd ch of turning ch. Turn. (5 dc, 4 ch-2 sps)
These ch-2 spaces sit over the ch-1 spaces of Row 2 and form the tall windows that fan out from the base.
Row 4: Ch 3 (counts as dc), [3 dc in next ch-2 sp, dc in next dc] 4 times. The last dc goes in the 3rd ch of the turning ch. Turn. (17 dc: 5 worked into existing dc + 12 worked into spaces)
This solid row closes the top of the windows.
Row 5 (tip): Ch 1, sc in first st, hdc in next 2 sts, dc in next 5 sts, (dc, ch 2, dc) in next st (the 9th, center st), dc in next 5 sts, hdc in next 2 sts, sc in last st. (18 sts: 17 worked 1 per st + 1 extra dc at the center, plus the ch-2 tip)
This gives 9 sts on each side of the tip. Fasten off and weave in the Color A ends.
Before adding the border, the petal measures 2 in (5.1 cm) long × 1.5 in (3.8 cm) wide.
Inner Flower with Center Disc (make 1)
Use Color A and work in joined rounds without turning.
Rnd 1: Make a magic ring, ch 1, 9 sc in ring, sl st to first sc. (9 sc)
Rnd 2: Ch 1, 2 sc in each sc around, sl st to first sc. (18 sc)
Checkpoint: The disc is 0.75 in (1.9 cm) across.
Rnd 3 (FLO): Ch 1, sc in FLO of first st, ch 6, skip 2 sts, [sc in FLO of next st, ch 6, skip 2 sts] 5 times, sl st to first sc. (6 sc, 6 ch-6 sps)
The 18 back loops of Rnd 2 stay free on the back of the disc. You will join the outer petals to these loops later.
Rnd 4 (petals): Sl st into first ch-6 sp. In each ch-6 sp work (sc, hdc, 2 dc, tr, ch 2, tr, 2 dc, hdc, sc), then sl st in next sc. Repeat around and join to the first sc. (6 petals, each 10 sts + ch-2 tip; 60 sts total)
Checkpoint: The inner flower is 2.75 in (7.0 cm) across from tip to tip.
Fasten off and leave a 12 in (30.5 cm) tail. The trebles give each inner petal its ribbed center and pointed tip.
Bobble Center (make 1 ring + 1 center bobble)
Bobble ring, Color B:
Rnd 1: Make a magic ring, ch 1, 6 sc in ring, sl st to first sc. (6 sc)
Rnd 2: Ch 2 (does not count as a st), [3-dc bobble in next sc, ch 1] 6 times, sl st to top of first bobble. (6 bobbles, 6 ch-1 sps)
Fasten off and leave a 10 in (25.4 cm) tail.
Center bobble, Color B: Make a magic ring, ch 2, 5-dc bobble in ring, ch 1 to close. Pull the ring tight and fasten off, leaving an 8 in (20.3 cm) tail.
Checkpoint: With the center bobble sitting in the middle of the ring, the cluster measures 1 in (2.5 cm) across.
Make All Pieces
| Piece | Quantity | Color |
|---|---|---|
| Outer petal | 6 | A, with B border |
| Inner flower with center disc | 1 | A |
| Bobble ring | 1 | B |
| Center bobble | 1 | B |
Layout seen from the front. P = outer petal, and the center is the inner flower with the bobbles on top:
          P1 (loop)
     P6           P2
          [center]
     P5           P3
            P4
Each inner petal sits between two outer petals, so the windows of the outer petals stay visible.
Border (each outer petal)
Border gauge: Work 2 sc per dc row-end and 3 sc per row-end of the taller ch-5 turning row. Along stitch edges, work 1 sc per st.
Round 1: With the right side facing, join Color B in the tip ch-2 sp. Ch 1 and work (sc, ch 2, sc) in the same sp. Then work down the first side:
- 1 sc in each of the next 9 sts of Row 5
- 2 sc in the Row 4 row-end
- 3 sc in the Row 3 row-end
- 2 sc in the Row 2 row-end
- 2 sc in the Row 1 row-end
Work 3 sc in the base point (the foundation ch). Then work up the second side to match: 9 sc in the row-ends, followed by 1 sc in each of the 9 sts of Row 5. Sl st to the first sc.
Count: 41 sc (2 at the tip + 18 on each long edge + 3 at the base) and the ch-2 tip.
Round 2: Sl st into the tip ch-2 sp, ch 1, (sc, ch 2, sc) in the sp. Work 1 sc in each of the 41 sc around and sl st to the first sc.
Count: 43 sc (41 worked 1 per st + 2 new tip sc) and the ch-2 tip. The base still has 3 sc. Fasten off.
Why the math works: A sport-weight dc is about twice as tall as a sc, so 2 sc per row-end keeps the edges flat. The ch-5 turning row is taller, so it gets 3 sc. The extra sc and ch-2 at the tip sharpen the point. The base is never increased, so it stays narrow enough to fit its 3 joining sts.
Hanging loop (P1 only): Join Color B in the tip ch-2 sp of one petal, ch 24, and sl st in the same sp. The chain is about 3 in (7.6 cm) long and makes a 1.5 in (3.8 cm) loop. Fasten off.
Joining
Method: Whipstitch with the Color A tail through matching stitches.
Petals to disc: Turn the inner flower face down. Rnd 2 has 18 free back loops, enough for 3 per petal (6 × 3 = 18). Place the 3 base sts of Border Round 2 of each petal against 3 back loops. Whipstitch one stitch to one loop, going clockwise from P1 to P6. Work the joins one after another so that the next petal starts at the very next back loop.
Side tacks: Neighboring petals touch about 5 sts up from the base. Tack each pair together at that point with one Color B stitch through both border sts. This makes 6 tacks.
Tension: Snug each whipstitch firmly enough that it disappears into the stitches, but do not cinch it. Pulling too hard cups the disc and makes the petals lift.
Bobbles: Center the bobble ring on the inner flower and sew through Rnd 1 of the ring into Rnd 1 of the disc. Then sew the center bobble into the hole of the ring.
Size checkpoint: The ornament measures 5.25 in (13.3 cm) from tip to tip, which is 0.75 in (1.9 cm) of disc plus 2 × 2.25 in (5.7 cm) of petals.
Final Blocking
- Weave in all ends and secure them through the back of the disc.
- Pin the ornament face up on the mat.
- Measure 5.25 in (13.3 cm) across each pair of opposite tips.
- Pin every tip and open each window with a pin.
- Mist until damp, but not soaked.
- Shape each inner petal by hand so it lies flat and points between two outer petals.
- Let it dry completely, at least 6 hours, before you unpin it.
- For extra stiffness, mist with fabric starch and dry it again.
Final Quality-Control Checklist
- Six outer petals, each 2.25 in (5.7 cm) long
- 43 sc plus a ch-2 tip on Border Round 2 of each petal
- Six inner petals, each sitting between two outer petals
- All 18 back loops of the disc used for joining
- Six side tacks, none of them visible from the front
- Bobble center firmly attached and sitting upright
- Hanging loop on the top petal, about 1.5 in (3.8 cm) long
- Ornament 5.25 in (13.3 cm) tip to tip
- No loose ends on the front
Troubleshooting
Petal curls or cups: Row 1 is too tight. Loosen your tension, or chain 5 instead of 4 at the start.
Windows close up: The ch-2s in Row 3 are too tight. Chain a little looser.
Border ruffles: You may have worked 3 sc into a dc row-end. Use 3 only for Row 3.
Border pulls in: Make sure every row-end gets at least 2 sc.
Tip is blunt: Check that both rounds have (sc, ch 2, sc) at the tip.
Petals overlap at the disc: One petal took more than 3 loops. Recount the loops so each petal has exactly 3.
Inner petals flop: Re-block them, or starch lightly.
Care
Hand wash in cool water, press out the water in a towel, and reshape flat to dry. Store flat or hanging, away from direct sunlight.
Final Notes
The size of the ornament depends on a chain of measurements. Each petal is 2 in (5.1 cm) before the border and 2.25 in (5.7 cm) with its 0.25 in (0.6 cm) border. The disc is 0.75 in (1.9 cm), and the finished star is 5.25 in (13.3 cm). Check each link as you go and the finished ornament will come out the right size.
Happy crocheting!