

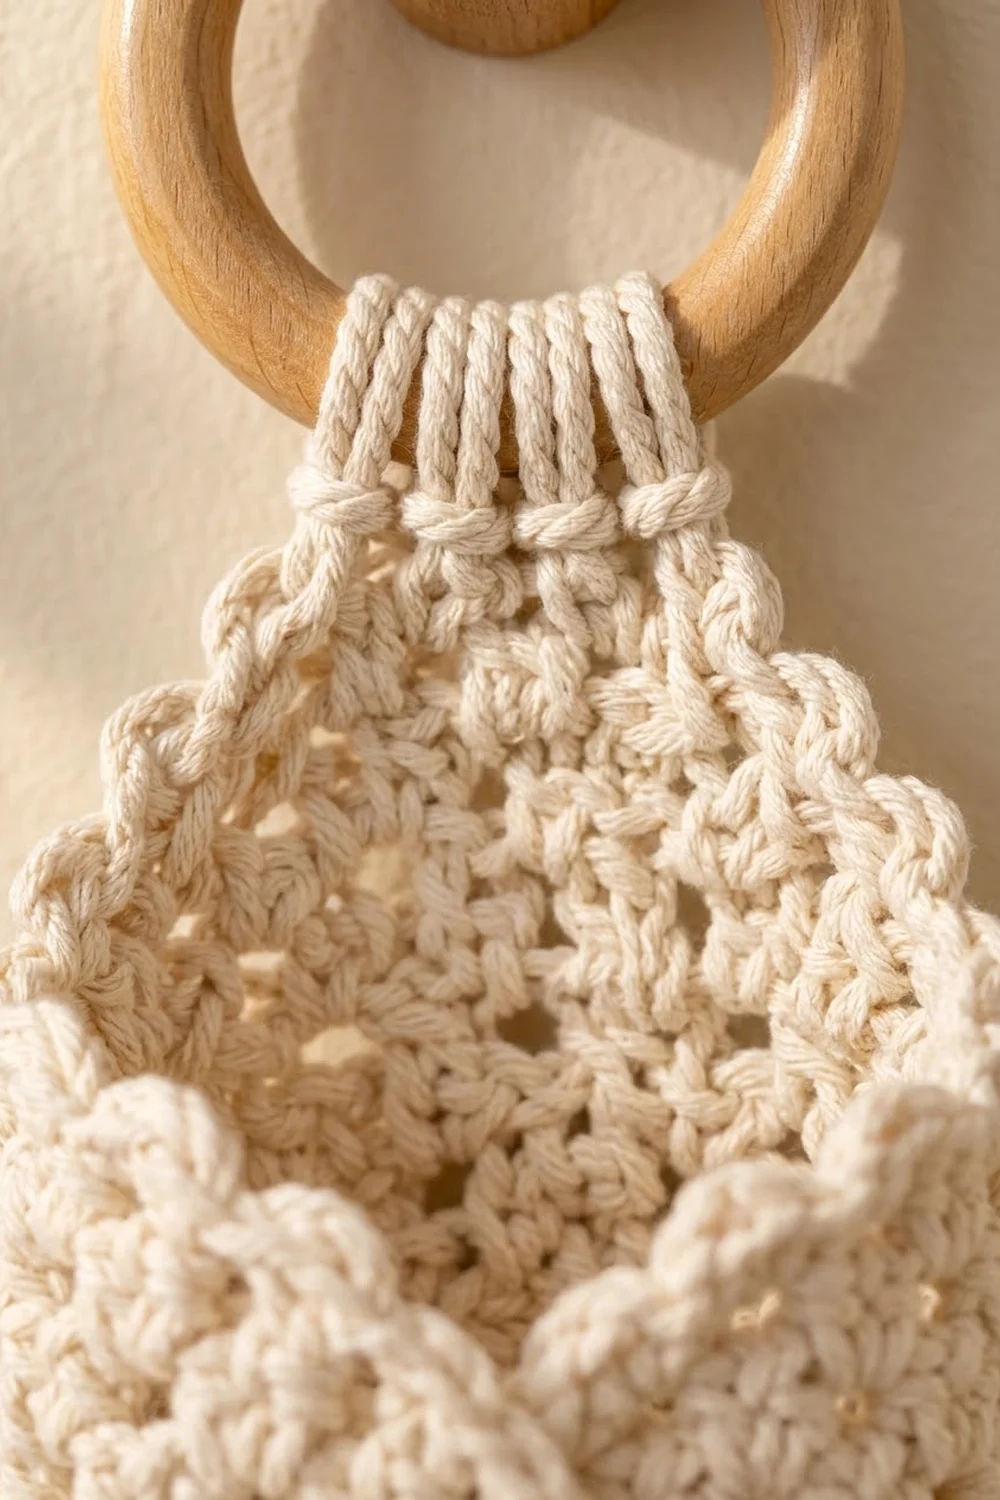
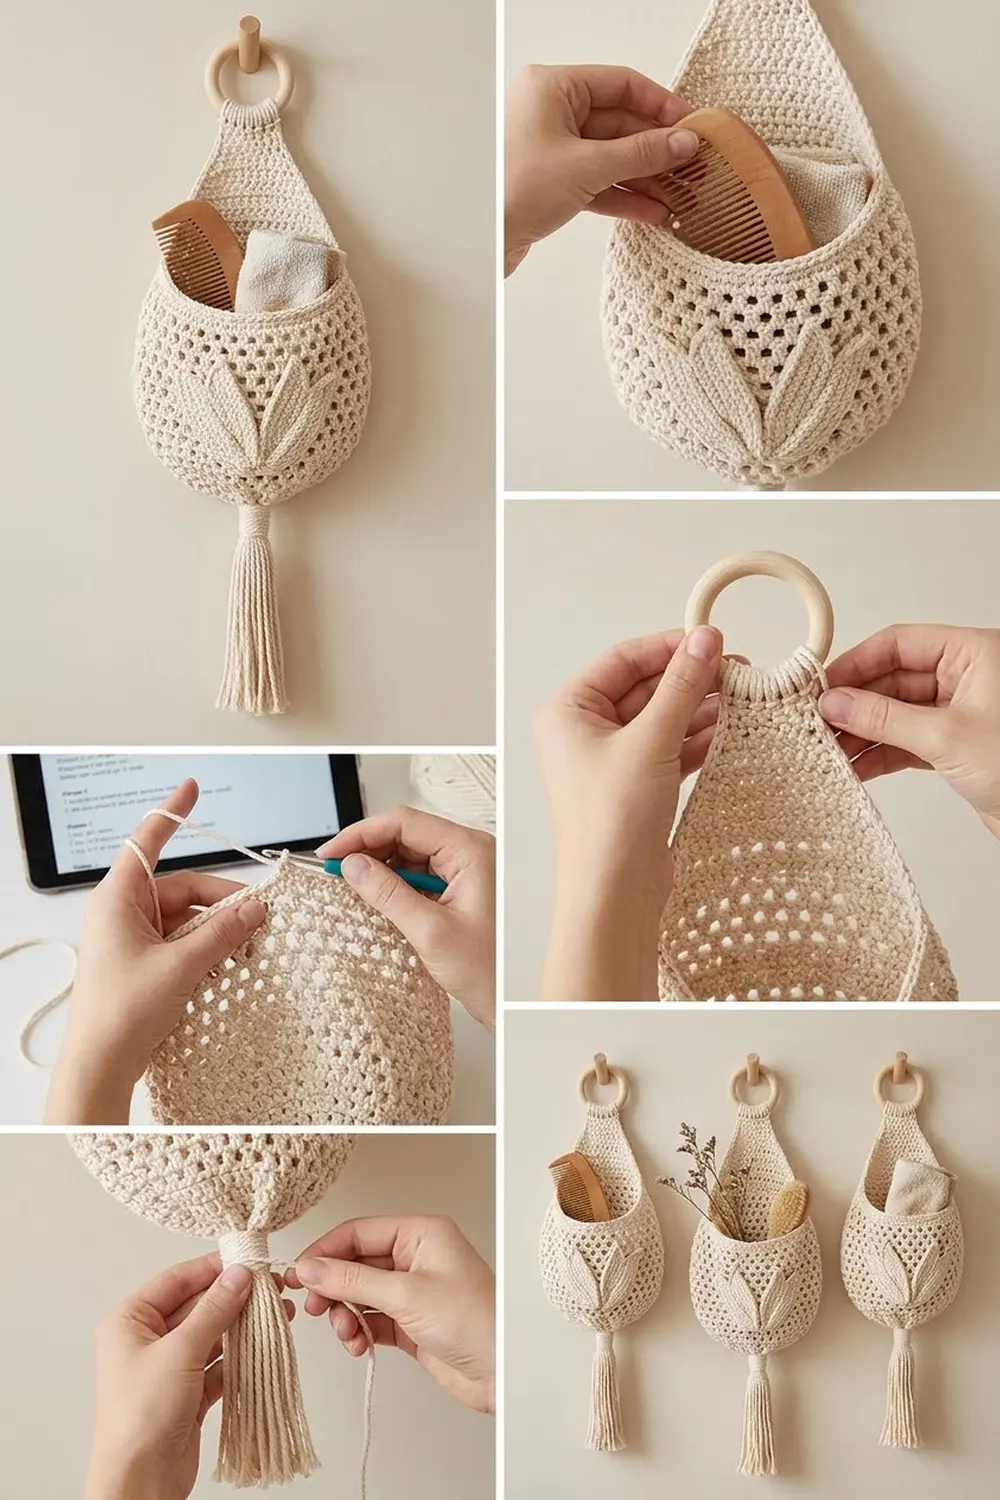
The Tulip Bloom Hanging Wall Pocket is a soft, sculptural storage pouch for a bathroom, entryway or plant corner. The teardrop-shaped body is worked in an airy half double crochet mesh. Two leaf-shaped petals cross over the front like the closed petals of a tulip, and a natural wooden ring at the top and a long cord tassel at the bottom finish the boho look.
The piece uses one color: natural cream cotton cord. The cord gives clear stitch definition, holds its shape well and suits the calm, neutral palette that goes with wood and greenery.
This pattern uses US crochet terms. The finished pocket is about 6.4 in (16.3 cm) wide and 8 in (20.3 cm) tall. Hanging length from the top of the ring to the tip of the tassel is about 22 in (55.9 cm).
Construction is simple. You crochet the body in the round from the bottom point up, then work a tapered back panel in rows that ends in a tab. The tab wraps around the ring. You make two petals separately, sew them onto the front, add a scalloped edge to the opening, and finish with the tassel.
Finished Size and Construction
- Finished pocket size: 6.4 in (16.3 cm) wide x 8 in (20.3 cm) tall
- Total hanging length: about 22 in (55.9 cm), ring and tassel included
- Skill level: Easy-intermediate
- Terminology: US crochet terms
- Yarn weight: 3 mm cotton cord (bulky, #5)
- Hook: 6 mm (US J-10)
- Number of pieces: 1 body plus 2 sewn-on petals, finished as one single pocket
- Layout: single hanging piece, not part of a larger assembly
- Body size before border: 6.4 in (16.3 cm) x 8 in (20.3 cm), with a back panel 5 in (12.7 cm) tall
- Petal size: 6 in (15.2 cm) x 3.75 in (9.5 cm)
- Border depth: about 0.5 in (1.3 cm)
Materials
Yarn: Use a soft 3 mm cotton cord, either single-twist or braided. Braided cord gives crisper holes. Single-twist cord gives a fluffier tassel. Cotton blends work too, but avoid slippery synthetics because they make the pocket sag.
- Cream: about 280 g / 85 m. This covers the body (about 45 m), both petals (about 16 m), the tassel (about 5.5 m) and the wrapping bands (about 1.5 m).
These quantities include a margin of about 20 percent. Cord thickness varies from brand to brand, so check the meters on your label rather than the grams.
Tools:
- 6 mm (US J-10) crochet hook
- Wooden ring, 3 in (7.6 cm) outer diameter
- Large-eye blunt tapestry needle
- 4 locking stitch markers
- Sharp scissors
- Tape measure
- Pins and a spray bottle for blocking
Abbreviations (US Terms)
- ch: chain
- sl st: slip stitch
- sc: single crochet
- hdc: half double crochet
- dc: double crochet
- hdc2tog: half double crochet 2 together
- sk: skip
- sp: space
- st(s): stitch(es)
- Rnd: round
Special stitches:
- Mesh pattern: (hdc, ch 1, sk 1) worked around. On the following round, work the hdc into each ch-1 sp so the holes sit offset. Each hdc and each ch-1 counts as 1 stitch.
- Scallop: (sl st in next st, 3 hdc in next st). Each scallop uses 2 stitches.
Gauge and Checkpoints
Gauge: 10 sts and 8 rnds = 4 in (10.2 cm) in hdc or mesh pattern. That works out to 2.5 sts and 2 rnds per inch.
Make one petal first. It is quick and it tests your gauge. After the petal’s Rnd 3 it should measure about 5.5 in (14.0 cm) long and 3.25 in (8.3 cm) wide.
Checkpoints:
- Body after Rnd 6: a cone 3 in (7.6 cm) tall that flattens to 6.4 in (16.3 cm) wide, with a circumference of 12.8 in (32.5 cm)
- Body after Rnd 16: 8 in (20.3 cm) tall, still 6.4 in (16.3 cm) wide
- Back panel after Row 10: 5 in (12.7 cm) tall, tapering from 6.4 in (16.3 cm) to 2.4 in (6.1 cm)
- Petal after border round: 6 in (15.2 cm) x 3.75 in (9.5 cm)
If your piece is too big, go down to a 5.5 mm hook. If it is too small, go up to a 6.5 mm hook. Don’t change the stitch counts, because the petals, border and back panel all depend on the 32-stitch round.
Body
Join every round with a sl st to the first stitch. The ch 1 at the start of each round does not count as a stitch. Leave a 6 in (15.2 cm) tail on the magic ring.
Rnd 1: Magic ring, ch 1, 8 hdc in ring, pull the ring tight. (8)
Rnd 2: Ch 1, 2 hdc in each st around. (16)
Rnd 3: Ch 1, hdc in each st around. (16)
Rnd 4: Ch 1, hdc in next st, 2 hdc in next st 8 times. (24)
Rnd 5: Ch 1, hdc in each st around. (24)
Rnd 6: Ch 1, hdc in next 2 sts, 2 hdc in next st 8 times. (32)
The rounds without increases make the pointed, pod-like bottom instead of a flat base. Check the cone against the checkpoint now.
Rnd 7 (mesh set-up): Ch 3 (counts as hdc + ch 1), sk next st, hdc in next st, ch 1, sk next st 15 times, sl st to 2nd ch of beginning ch-3. (16 hdc + 16 ch-1 = 32 sts)
Rnd 8: Sl st into first ch-1 sp, ch 3 (counts as hdc + ch 1), hdc in next ch-1 sp, ch 1 15 times, sl st to 2nd ch of beginning ch-3. (32 sts)
Rnds 9–16: Repeat Rnd 8. (32 sts each round)
The body now measures 8 in (20.3 cm) tall. Lay it flat with the round join at the right-hand fold. Stitches 1–16 are the front and stitches 17–32 are the back. Place markers in st 17 and st 32. Fasten off.
Back Panel and Hanging Tab
Turn at the end of each row. The ch 1 does not count as a stitch.
Row 1: Join the cord in marked st 17. Ch 1, hdc in each st and ch-1 sp from st 17 to st 32. (16)
Row 2: Ch 1, hdc2tog, hdc in next 12 sts, hdc2tog. (14)
Row 3: Ch 1, hdc in each st across. (14)
Row 4: Ch 1, hdc2tog, hdc in next 10 sts, hdc2tog. (12)
Row 5: Ch 1, hdc in each st across. (12)
Row 6: Ch 1, hdc2tog, hdc in next 8 sts, hdc2tog. (10)
Row 7: Ch 1, hdc in each st across. (10)
Row 8: Ch 1, hdc2tog, hdc in next 6 sts, hdc2tog. (8)
Row 9: Ch 1, hdc in each st across. (8)
Row 10: Ch 1, hdc2tog, hdc in next 4 sts, hdc2tog. (6)
The panel is now 5 in (12.7 cm) tall and 2.4 in (6.1 cm) wide at the top.
Rows 11–15 (tab): Ch 1, hdc in each st across. (6 each row)
The tab is 2.5 in (6.4 cm) long. Fasten off, leaving a 12 in (30.5 cm) tail. Don’t attach the ring until after the border.
Petals (make 2)
Foundation: Ch 11.
Rnd 1: Working into the back bumps, sc in 2nd ch from hook, hdc in next ch, dc in next 6 ch, hdc in next ch, (sc, ch 2, sc) in last ch for the tip. Rotate and work along the opposite side of the foundation: hdc in next ch, dc in next 6 ch, hdc in next ch, sc in the same ch as the first sc. Sl st to first sc. (20 sts + tip ch-2 sp)
Count check: 1 base sc + 8 sts on side one + 2 tip sc + 8 sts on side two + 1 base sc = 20.
Rnd 2: Ch 1, 2 hdc in first sc, hdc in next 9 sts, (2 hdc, ch 2, 2 hdc) in tip sp, hdc in next 9 sts, 2 hdc in last sc. Sl st to first hdc. (26 sts + tip sp)
Count check: 2 + 9 + 4 + 9 + 2 = 26.
Rnd 3: Ch 1, 2 hdc in each of next 2 sts, hdc in next 11 sts, (2 hdc, ch 2, 2 hdc) in tip sp, hdc in next 11 sts, 2 hdc in each of last 2 sts. Sl st to first hdc. (34 sts + tip sp)
Count check: 4 + 11 + 4 + 11 + 4 = 34, or 17 per side from base to tip. The added stitches at the base round it off, and the tip stays pointed.
Rnd 4 (scallop edge): Sl st in first st, 3 hdc in next st, sl st in next st 8 times. That covers 17 sts. Work (hdc, ch 2, hdc) in the tip sp. Then sl st in next st, 3 hdc in next st 8 times and sl st in the last st, which covers 17 sts. Join.
You now have 16 scallops plus a pointed tip, and the petal measures 6 in (15.2 cm) x 3.75 in (9.5 cm). Fasten off with a 20 in (50.8 cm) sewing tail.
Attaching the Petals
- Flatten the body with the front facing you.
- Pin the base of the left petal at the front center over Rnd 6, about 3 in (7.6 cm) up from the bottom point. Tilt the petal so its tip lands at the left fold, level with Rnd 16 or up to 0.3 in (0.8 cm) above it.
- Pin the right petal the same way on the right side, overlapping the left petal by about 1 in (2.5 cm) at the base.
- Whipstitch each petal’s lower outer edge and base to the body, about 3 in (7.6 cm) up each side. Leave the inner upper edges free so they form the V-shaped tulip opening.
Border
Border gauge: 2 sc per inch along row-ends and 2.5 sts per inch along the rim. Working 1 sc per row-end pulls the back panel’s side edges in very slightly, which helps the panel curve to meet the front.
Row 1 (sc trim): Work 1 sc per row-end or stitch: 10 sc down the right back-panel edge, 16 sc across front stitches 1–16 (1 per hdc and 1 per ch-1 sp), then 10 sc up the left back-panel edge, ending at Row 10. That gives 10 + 16 + 10 = 36 sc. Where the panel meets the front rim, don’t add a corner stitch; the turn is a soft curve. Turn.
Row 2 (scallops): Sl st in first st, 3 hdc in next st, sl st in next st 17 times, sl st in last st. Fasten off.
Why the math works: The scallop uses 2 stitches per repeat. 1 + (17 x 2) + 1 = 36, so the row starts and ends with a flat sl st and has 17 even scallops: 5 on each panel edge, plus 7 across the front rim, counting the 2 scallops that sit where the panel meets the rim.
Ring, Wrap and Tassel
Ring:
- Fold the tab from front to back over the wooden ring.
- Sew Row 15 to the back of Row 10 using the tail.
- Cut 24 in (61.0 cm) of cord and wrap it tightly 6 times around the tab just below the ring. Thread the end under the wraps and trim.
Tassel:
- Cut 12 strands, each 18 in (45.7 cm) long.
- Hold them as a bundle and center the bundle under the bottom point.
- Use the magic-ring tail to tie the middle of the bundle firmly to Rnd 1, passing the tail through the ring center 3 times.
- Fold all 24 ends downward.
- Cut 36 in (91.4 cm) of cord and wrap it tightly 8 times around the bundle, 1 in (2.5 cm) below the bottom point. Hide the end under the wraps.
- Comb the strands apart and trim the tassel to 8 in (20.3 cm) below the wrap.
Final Blocking
- Lightly mist the whole piece with water.
- Stuff the pocket with a rolled towel so it fills out to 6.4 in (16.3 cm) wide.
- Pin the free petal edges so they curl outward slightly.
- Pin the back panel flat and smooth the scallops with your fingers.
- Dampen the tassel and hang a light clip at its tip to straighten the strands.
- Let everything dry completely for 24 hours before removing the towel.
Final Quality-Control Checklist
- Rnd 6 and every round from Rnd 7 to Rnd 16 have 32 stitches.
- The pocket is 6.4 in (16.3 cm) wide and 8 in (20.3 cm) tall.
- The back panel tapers evenly from 16 to 6 stitches over 10 rows.
- Each petal has 34 stitches before the scallop round and 16 scallops plus the tip.
- The petals overlap by about 1 in (2.5 cm) at the base, and the tips reach the rim.
- The border has 36 sc and 17 scallops.
- The ring, tab wrap and tassel wrap are tight and the ends are hidden.
- The tassel measures 8 in (20.3 cm) and is trimmed evenly.
Troubleshooting
- The pocket flares open: Your gauge is loose. Redo Rnds 7–16 with a hook one size smaller.
- The bottom is flat, not pointed: You added increases on Rnds 3 or 5. Those rounds have no increases.
- The holes don’t stagger: On the even mesh rounds, work into the ch-1 spaces, not into the hdc stitches.
- The petal tip is blunt: Make sure the ch-2 tip space appears in every round.
- The back panel droops forward: Tighten the wrap below the ring, or add a second line of sewing on the tab.
- The scallops ruffle: Work the hdc stitches more firmly, or use a 5.5 mm hook for the border only.
Care
Hand wash in cool water with mild soap, press the water out in a towel, and lay the pocket flat or hang it to dry. Comb the tassel straight while it is damp.
Final Notes
Each stage depends on the one before it:
- The 32-stitch round gives the pocket its 6.4 in (16.3 cm) width.
- Sixteen rounds give its 8 in (20.3 cm) height.
- The 16 back stitches taper to a 6-stitch tab 5 in (12.7 cm) up.
- The 34-stitch petals fit neatly across the front.
- The 36-stitch border divides into exactly 17 scallops.
Check each measurement as you go and the pocket will finish true to size.
Happy crocheting!