

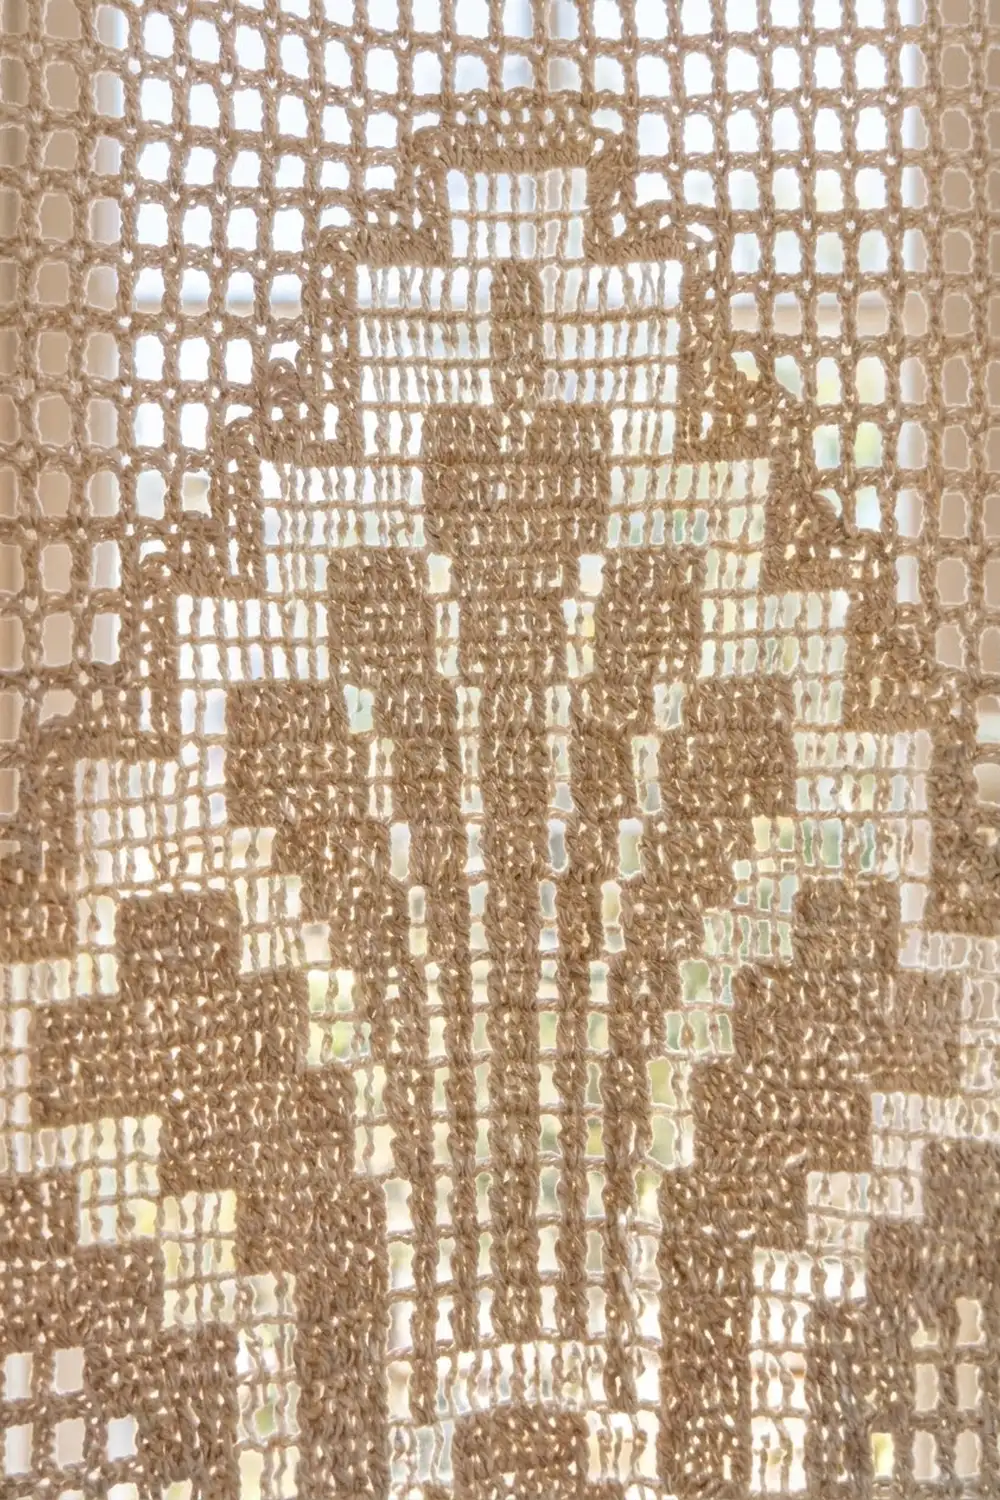
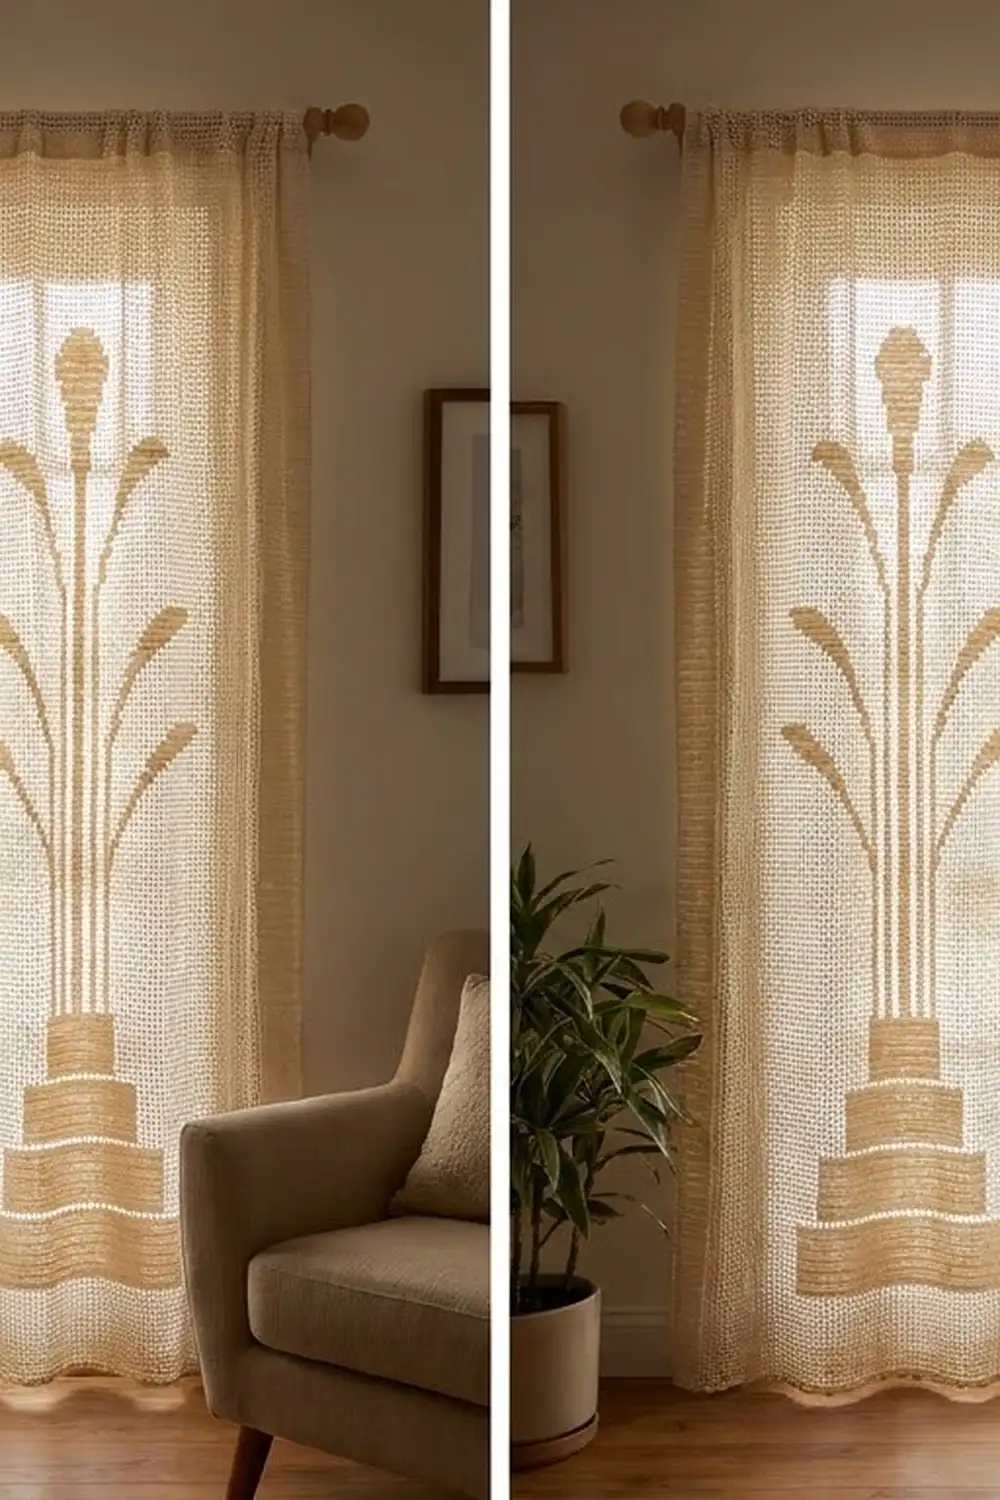
The Deco Fountain Curtain Panel is a floor-length filet crochet curtain with a repeating Art Deco motif. Each motif has a stepped pyramid base, a tall center stem with a tiered bud, and slim side stems that fan outward in stair steps. In window light, the solid blocks look like a soft cream silhouette against the open mesh.
The panel uses one color, a natural cream/ecru cotton, so the pattern comes from light and shadow rather than color changes. The style is calm and architectural, and it suits both modern and vintage rooms.
This pattern uses US crochet terms. One finished panel measures 30 in (76.2 cm) wide and hangs 84.5 in (214.6 cm) long from the top of the rod pocket to the picot hem. For a pair, make two separate panels.
Each panel is worked bottom-up in rows as one piece. You start with a solid foundation band, work the fountain motif five times, add a plain mesh section, then finish with a solid band that folds back to form the rod pocket. One round of single crochet edges the panel, and a picot row finishes the hem.
Finished Size and Construction
- Finished size (hanging): 30 in x 84.5 in (76.2 cm x 214.6 cm)
- Flat size with border, before folding the rod pocket: 30 in x 86.75 in (76.2 cm x 220.3 cm)
- Size before border: 29.5 in x 86 in (74.9 cm x 218.4 cm)
- Skill level: Intermediate (simple stitches, careful counting)
- Terminology: US
- Yarn weight: DK (#3) cotton
- Hook: 3.5 mm (E-4)
- Number of pieces: 1 per panel; make 2 for a pair (the panels hang side by side and are not joined)
- Layout: 59 squares wide x 172 rows tall
- Motif size: 31 squares x 30 rows = 15.5 in x 15 in (39.4 cm x 38.1 cm)
- Border depth: 0.25 in (0.6 cm) on the sides and top; 0.5 in (1.3 cm) at the hem, including the picots
Materials
Yarn: Use a smooth DK cotton or cotton blend in natural/ecru. Mercerized cotton gives crisp blocks and drapes well. Avoid fuzzy yarn because it blurs the motif.
- Natural/ecru: 500 g (about 1,150 m) per panel, or 1,000 g (about 2,300 m) for a pair
These amounts include a margin of about 10% for swatching and border work. Buy all the yarn from one dye lot.
Tools:
– 3.5 mm (E-4) crochet hook
– Tapestry needle
– Stitch markers (at least 4)
– Measuring tape
– Rust-proof pins and blocking mats or a clean floor area
– Spray bottle
– Curtain rod, up to 1 in (2.5 cm) in diameter
Abbreviations (US Terms)
- ch – chain
- sl st – slip stitch
- sc – single crochet
- dc – double crochet
- sk – skip
- sp – space
- st(s) – stitch(es)
- tch – turning chain
- B – block
- M – mesh
Special stitches
- Square: Every square is 3 stitches wide, plus the dc it shares with the next square. A row of 59 squares has 178 stitches: 3 x 59 + 1.
- Mesh (M): ch 2, then dc in the next dc. When the square below is a block, skip its 2 center dc.
- Block (B): When the square below is a block, work dc in each of the next 3 dc. When the square below is a mesh, work 2 dc in the ch-2 sp, then dc in the next dc.
- First square (always B): ch 3 (counts as dc), dc in the next 3 dc.
- Last square (always B): dc in the next 2 dc, dc in the top of the tch.
- Picot: ch 3, sl st in the 3rd ch from the hook.
Gauge and Checkpoints
Gauge: 10 squares and 10 rows = 5 in (12.7 cm) in filet mesh, so 1 square = 0.5 in (1.3 cm) wide and tall.
Make a swatch first: ch 39, then work 12 rows of 12 squares: 1B, 10M, 1B. Wash it, dry it flat, and measure the center 10 squares.
Checkpoints (unblocked, lightly flattened):
– After Row 4: 29.5 in (74.9 cm) wide, 2 in (5.1 cm) tall
– After Row 34 (first motif): 17 in (43.2 cm) tall
– After Row 154 (fifth motif): 77 in (195.6 cm) tall
– After Row 164: 82 in (208.3 cm) tall
– After Row 172: 86 in (218.4 cm) tall
If your swatch is too big, go down 0.25 to 0.5 mm in hook size. If it’s too small, go up. Also check row height: if your dc rows are taller than they are wide, pull the loop down snugly before each yarn-over. A difference of only 0.05 in (0.1 cm) per row adds up to more than 8 in (20.3 cm) over 172 rows, so check the length at every checkpoint.
Panel Instructions
Every row has 178 stitches (59 squares). Turn at the end of every row. The motif is symmetrical, so you read each row the same way on both right-side and wrong-side rows.
Foundation: ch 180.
Row 1: dc in the 4th ch from the hook and in each ch across. Turn. (178 sts: 59B)
Rows 2–4: 1B, 57M, 1B. (178 sts)
Motif Rows
Motif rows sit inside the panel row like this:
1B, 13M, [motif row], 13M, 1B
Each motif row has 31 squares, so every panel row is 1 + 13 + 31 + 13 + 1 = 59 squares (178 sts).
- Motif Row 1: 31M
- Motif Row 2: 5M, 21B, 5M
- Motif Row 3: 7M, 17B, 7M
- Motif Row 4: 9M, 13B, 9M
- Motif Row 5: 8M, 1B, 2M, 9B, 2M, 1B, 8M
- Motif Rows 6–8: 8M, 1B, 2M, 1B, 2M, 3B, 2M, 1B, 2M, 1B, 8M
- Motif Rows 9–10: 7M, 1B, 3M, 1B, 2M, 3B, 2M, 1B, 3M, 1B, 7M
- Motif Rows 11–12: 7M, 1B, 2M, 1B, 3M, 3B, 3M, 1B, 2M, 1B, 7M
- Motif Rows 13–15: 6M, 1B, 3M, 1B, 3M, 3B, 3M, 1B, 3M, 1B, 6M
- Motif Row 16: 6M, 1B, 2M, 1B, 4M, 3B, 4M, 1B, 2M, 1B, 6M
- Motif Rows 17–19: 5M, 1B, 3M, 1B, 4M, 3B, 4M, 1B, 3M, 1B, 5M
- Motif Row 20: 4M, 2B, 3M, 1B, 4M, 3B, 4M, 1B, 3M, 2B, 4M
- Motif Row 21: 9M, 1B, 4M, 3B, 4M, 1B, 9M
- Motif Row 22: 8M, 2B, 4M, 3B, 4M, 2B, 8M
- Motif Rows 23–24: 14M, 3B, 14M
- Motif Rows 25–26: 13M, 5B, 13M
- Motif Rows 27–28: 14M, 3B, 14M
- Motif Row 29: 15M, 1B, 15M
- Motif Row 30: 31M
How the shapes form: Motif Rows 2–5 build the stepped pyramid, which narrows by 2 squares on each side per row. The 3B center stem rises from Row 6 through Row 24, widens to 5B in Rows 25–26, then steps back to 3B and 1B to form the bud. The inner stems move outward one square every few rows and end in a 2B tip on Row 22. The outer stems start on Row 5 and end in a 2B tip on Row 20.
Panel Rows 5–154: Work Motif Rows 1–30 five times. The repeats fall on Rows 5–34, 35–64, 65–94, 95–124, and 125–154. Motif Rows 1 and 30 add two plain mesh rows between repeats. Place a marker at the start of each repeat. (178 sts per row)
Rows 155–164: 1B, 57M, 1B. (178 sts)
Rod Pocket Band
Row 165: 1B, then work 57 blocks over the mesh (2 dc in the ch-2 sp, dc in the next dc), 1B. (178 sts: 59B)
Rows 166–172: 59B, working dc in each dc across. (178 sts) Do not fasten off.
The band is 8 rows, or 4 in (10.2 cm) deep. It folds in half later to make a 2 in (5.1 cm) pocket.
Border
Border gauge: Along the top and bottom edges, work 1 sc in each stitch, which matches the panel’s 178 sts. Along the sides, work 2 sc in the end of each dc row; one dc row is 0.5 in (1.3 cm) tall and two sc fill that height without ruffling.
Round 1 (RS): Continue from the end of Row 172.
- Top edge: 3 sc in the first st (corner), sc in each of the next 176 sts, 3 sc in the last st (corner).
- First side: 2 sc in the end of each row, working down Rows 172 to 1. (344 sc)
- Bottom edge: Work into the free loops of the foundation chain. 3 sc in the first ch (corner), sc in each of the next 176 ch, 3 sc in the last ch (corner).
- Second side: 2 sc in the end of each row, working up Rows 1 to 172. (344 sc)
- Sl st to the first sc. (Total: 176 + 176 + 344 + 344 + 4 corners x 3 = 1,052 sc)
Why the math works: Each top or bottom edge has 176 sc plus the 2 corner stitches it was worked into, which equals the 178-stitch row count, with no corners counted twice. Each side has 344 sc, exactly 2 per row for 172 rows.
Round 2 (hem only): Sl st along to the center sc of the bottom-right corner. Sc in that center sc, then [picot, sc in each of the next 3 sc] 59 times. This ends in the center sc of the other bottom corner. Fasten off. (178 sc + 59 picots)
The bottom edge has 178 stitches including both corner centers. After the first sc, 177 remain, which divides by 3 into 59 groups. That gives one picot per filet square, so the scallops line up with the grid.
Weave in all ends through solid blocks, where they hide best.
Final Blocking
- Soak the panel in cool water with a little wool or cotton wash for 15 minutes.
- Press out the water without wringing, then roll the panel in towels.
- Lay it flat on mats or a clean sheet with the rod pocket unfolded.
- Pin the corners first to 30 in x 86.75 in (76.2 cm x 220.3 cm).
- Pin along each edge every 4 in (10.2 cm), lining up the side block columns so they’re straight.
- Use pins to square up the center stem of each motif so it runs perfectly vertical.
- Let the panel dry completely.
- Fold Rows 169–172 to the wrong side along the top of Row 168. Whipstitch the top border edge to the wrong side along Row 164, leaving both ends of the pocket open for the rod.
Final Quality-Control Checklist
- Every row has 178 sts, and both side edges are a solid one-block column.
- The motif is centered, with 13 mesh squares on each side.
- All five motif repeats line up vertically.
- The flat size is 30 in x 86.75 in (76.2 cm x 220.3 cm).
- The hanging length from the pocket fold to the hem is 84.5 in (214.6 cm).
- The border has 1,052 sc and the hem has 59 picots, one per square.
- The rod pocket slides easily over a 1 in (2.5 cm) rod.
- No ends show through the mesh.
Troubleshooting
The panel narrows or widens as you go: Count the squares in each row. A missed tch or an extra dc at the edge is the usual cause.
The motif shifts off center: Check the 13M side fields in the last row you worked. Rip back to the last correct marker.
Blocks look gappy: When working a block over a mesh, work the 2 dc into the ch-2 space, not into the chains.
The panel is too long: Cotton can drop slightly when it hangs. Leave out one or more of Rows 155–164 (each row removes 0.5 in / 1.3 cm).
The side border ruffles: Use 2 sc per row end, never 3, and keep your tension even.
The hem flares: Work Round 2 a little tighter, or use a hook 0.5 mm smaller.
Care
Hand wash in cool water or machine wash on a gentle cycle in a large mesh bag, then reshape and dry flat. Iron on low heat through a cloth if needed.
Final Notes
Everything in this panel comes from one gauge: 1 square = 0.5 in (1.3 cm). There are 59 squares in 178 stitches, which makes 29.5 in (74.9 cm) of width, and the border brings it to 30 in (76.2 cm). There are 172 rows in 86 in (218.4 cm) of length. The border adds 0.75 in (1.9 cm), and folding the pocket takes away 2.25 in (5.7 cm), so the panel hangs 84.5 in (214.6 cm) long. Check your gauge, count each row, and confirm the length at every checkpoint. For a pair, make a second panel to the same measurements.
Happy crocheting!