

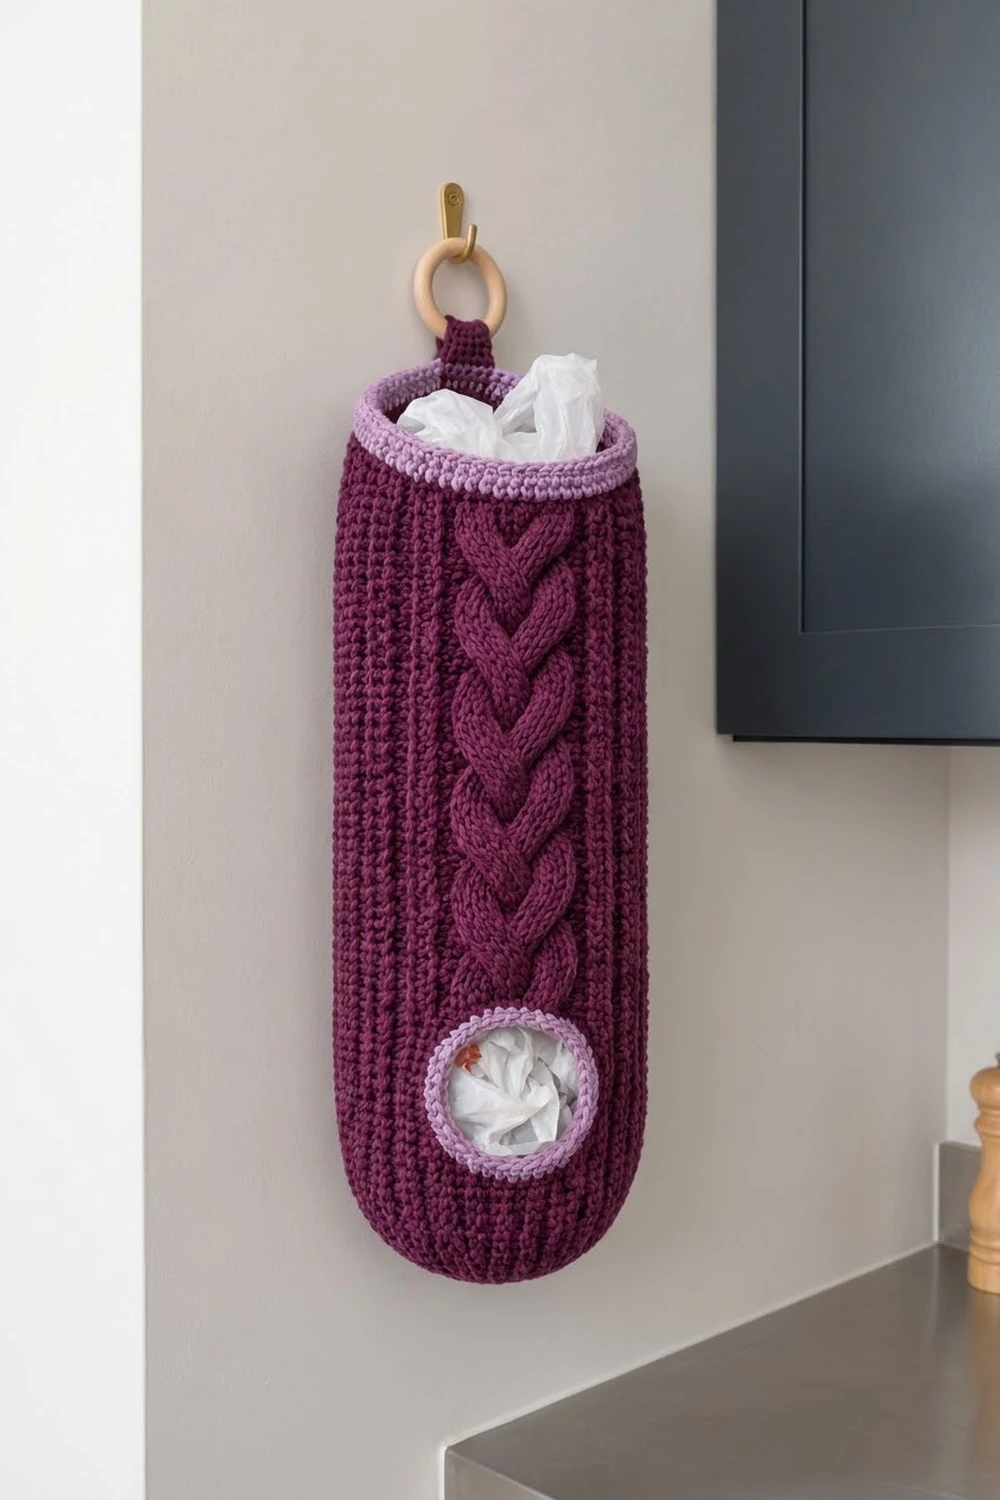
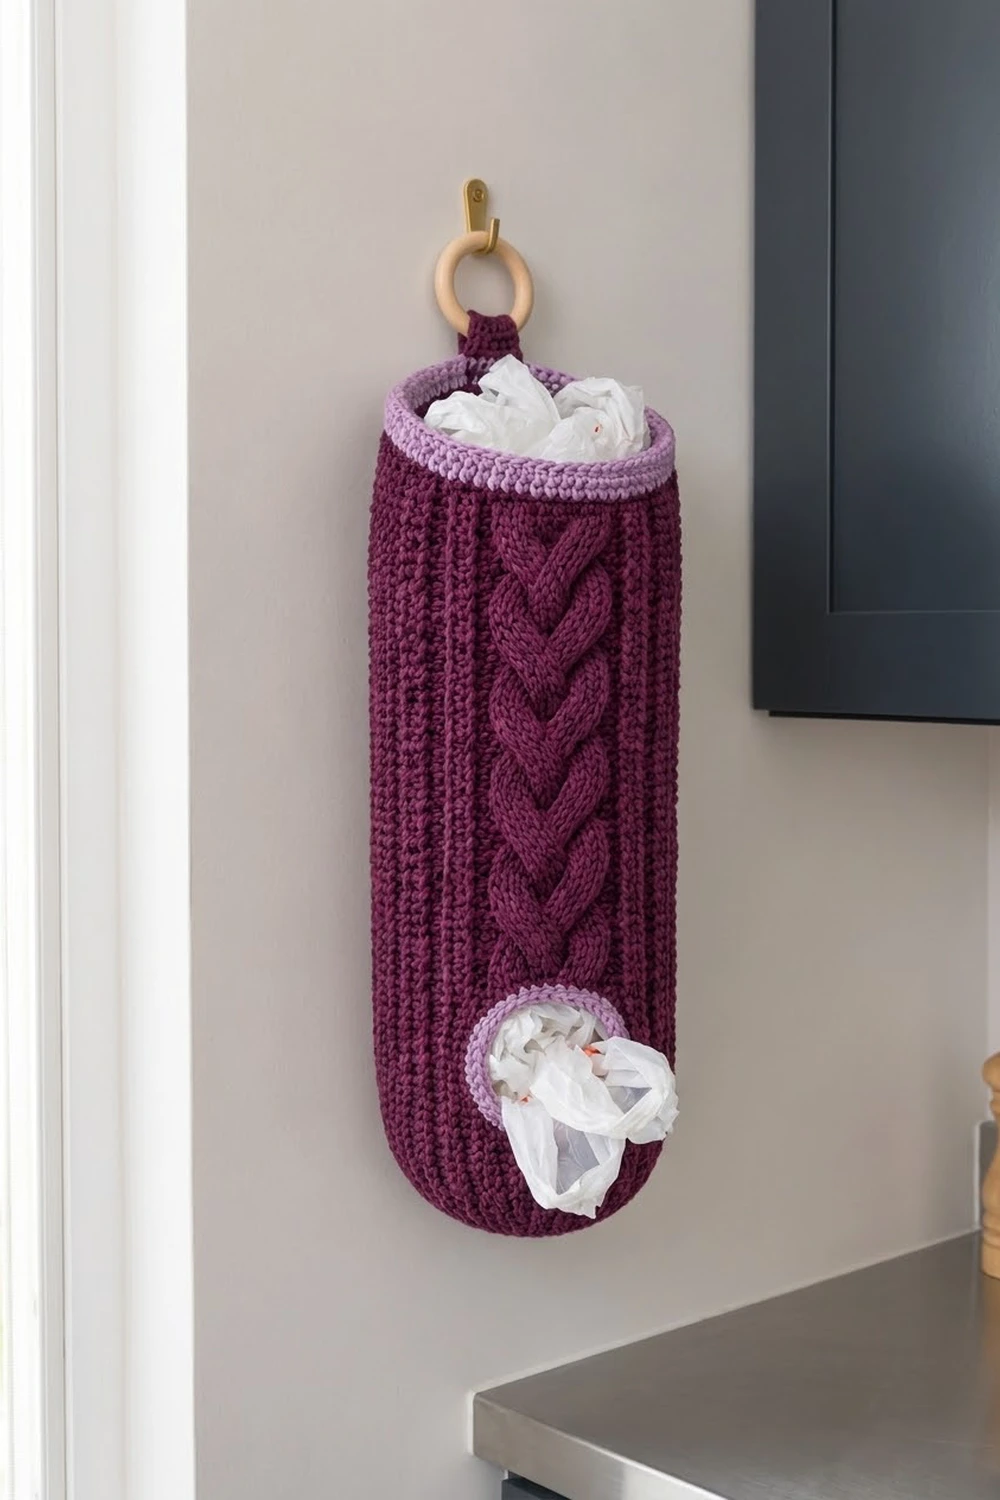
This grocery bag holder is a tall, slim tube in deep plum with a raised three-strand braid running up the front. Vertical ribbing gives it a knit-like texture, and lilac trim around the top and the dispensing hole keeps it from looking too dark. You push bags in at the top and pull them out one at a time through the round hole near the bottom.
Two colors are used: plum for the body and the hanging tab, and lilac for the trim. It’s a classic cable style that sits nicely in a modern kitchen, especially hung on a wooden ring from a simple hook.
The pattern uses US crochet terms. The finished holder is 6 in (15.2 cm) wide laid flat and 16.75 in (42.5 cm) long. The tab adds 2 in (5.1 cm), for a total hanging length of 18.75 in (47.6 cm).
You work it bottom up in joined rounds as one piece. First a cupped circular base, then a ribbed body with the hole built in, then the braid cable, then a lilac rim. Trim the hole and add the tab at the end. No seams and no assembly.
Finished Size and Construction
- Finished size: 6 in (15.2 cm) wide flat × 16.75 in (42.5 cm) long; 18.75 in (47.6 cm) including the tab
- Skill level: Intermediate (post stitches and cable crosses)
- Terminology: US
- Yarn weight: Worsted (#4)
- Hook: 4.5 mm (US 7)
- Number of pieces: 1
- Layout: Single tube, worked in the round from the bottom up
- Piece size: 12 in (30.5 cm) around, 6 in (15.2 cm) flat
- Size before border: 6 in (15.2 cm) × 16 in (40.6 cm)
- Border depth: 0.75 in (1.9 cm)
Materials
Yarn: Use a smooth worsted weight acrylic or cotton-acrylic blend. Post stitches and cables show up best in a tightly plied yarn that doesn’t split. Avoid fuzzy or highly textured yarns, which hide the braid. The amounts below assume about 190 m per 100 g.
- Plum (Color A): 200 g, about 380 m (415 yd)
- Lilac (Color B): 30 g, about 57 m (62 yd)
The quantities include a margin of about 15%, because cable and post-stitch fabric uses more yarn than plain stitches.
Tools:
– 4.5 mm (US 7) crochet hook
– Locking stitch markers (at least 3)
– Tapestry needle
– Scissors
– Measuring tape
– Optional: a 2 in (5.1 cm) wooden ring for hanging
Abbreviations (US Terms)
- ch – chain
- sl st – slip stitch
- sc – single crochet
- dc – double crochet
- sc2tog – single crochet 2 together
- FPdc – front post double crochet
- BPdc – back post double crochet
- FPtr – front post treble crochet
- st(s) – stitch(es)
- rnd(s) – round(s)
Special stitches
- Right Cross (RC), worked over the 6 braid sts: Skip the next 2 sts. FPtr around each of the next 2 sts. Then, working in front of the 2 FPtr you just made, FPtr around each of the 2 skipped sts. FPdc around each of the next 2 sts. The right strand crosses over the middle strand.
- Left Cross (LC), worked over the 6 braid sts: FPdc around each of the next 2 sts. Skip the next 2 sts. FPtr around each of the next 2 sts. Then, working behind the 2 FPtr you just made, FPtr around each of the 2 skipped sts. The left strand crosses over the middle strand.
- Plain braid (PB), worked over 6 sts: FPdc around each of the next 6 sts.
Round start: Ch 2 at the beginning of every round. It does not count as a stitch. Join every round with a sl st to the top of the first stitch, and do not turn. The join sits at the center back.
Gauge and Checkpoints
Gauge: In the body pattern, 16 sts and 8 rnds = 4 in (10.2 cm). That means 4 sts per inch and 0.5 in (1.3 cm) per round.
This is a single-piece item, so the first rounds of the holder are your gauge test. Work the base and Rnds 6–10, then stop and measure before you start the cable.
Checkpoints:
- After Rnd 5: The base measures about 3.75 in (9.5 cm) across and has started to cup.
- After Rnd 10: The tube measures 12 in (30.5 cm) around and 6 in (15.2 cm) laid flat. It is about 3.5 in (8.9 cm) tall from the bottom of the base.
- After Rnd 22: Total height is about 9.5 in (24.1 cm).
- After Rnd 35: Total height is 16 in (40.6 cm).
- After the border: Total height is 16.75 in (42.5 cm).
If the tube is too wide, for example 6.5 in (16.5 cm) flat, go down to a 4 mm hook and restart. If it is too narrow, go up to a 5 mm hook. Don’t change the stitch count, because the cable panel and the ribbing are both built around 48 stitches. Height doesn’t need to match exactly: add or remove plain rounds just before the border.
Base
Use plum (Color A).
Rnd 1: Make a magic ring. Ch 2, then work 12 dc into the ring. Join. (12 sts)
Rnd 2: Ch 2, then 2 dc in each st around. Join. (24 sts)
Rnd 3: Ch 2, then 2 dc in the next st, dc in the next st. Repeat from * around. Join. (36 sts)
Rnd 4: Ch 2, then 2 dc in the next st, dc in each of the next 5 sts. Repeat from * around. Join. (42 sts)
Rnd 5: Ch 2, then 2 dc in the next st, dc in each of the next 6 sts. Repeat from * around. Join. (48 sts)
Rnds 4 and 5 add only 6 stitches each, so the base starts to curve upward. This gives the rounded bottom. Place a marker in st 1 so you can find the center back.
Stitch map for the body: Number the 48 sts from the join.
– Sts 1–18: Rib A
– Sts 19–30: center front panel
– Sts 31–48: Rib B
The panel is centered on the front, because the midpoint of sts 19–30 sits exactly opposite the join.
Lower Body and Dispensing Hole
All post stitches are worked around the stitches of the previous round.
- Rib A (18 sts): BPdc, FPdc 9 times.
- Rib B (18 sts): FPdc, BPdc 9 times.
- Plain panel (12 sts): BPdc 3, FPdc 6, BPdc 3.
With this layout, an FPdc rib sits on each side of the panel, so the cable channel looks the same on both sides.
Rnds 6–7: Ch 2. Work Rib A, the plain panel, then Rib B. Join. (48 sts)
Rnd 8 (hole round): Ch 2. Work Rib A. Ch 12 loosely and skip sts 19–30. Work Rib B. Join. (36 sts + 12 ch = 48)
Rnd 9: Ch 2. Work Rib A. Dc in each of the 12 ch. Work Rib B. Join. (48 sts)
Rnd 10: Ch 2. Work Rib A, the plain panel (around the 12 dc from Rnd 9), then Rib B. Join. (48 sts)
Stop here and check gauge (Checkpoint 2). The opening is now a slit 3 in (7.6 cm) wide. The lilac trim will round it out later.
Cable Body
From here on, the panel becomes BPdc 3, braid 6, BPdc 3. Only the middle 6 sts change from round to round.
Rnd 11: Ch 2. Rib A, BPdc 3, RC, BPdc 3, Rib B. Join. (48 sts)
Rnd 12: Ch 2. Rib A, BPdc 3, PB, BPdc 3, Rib B. Join. (48 sts)
Rnd 13: Ch 2. Rib A, BPdc 3, LC, BPdc 3, Rib B. Join. (48 sts)
Rnd 14: Repeat Rnd 12. (48 sts)
Rnds 15–34: Repeat Rnds 11–14 five more times. That makes 6 braid repeats in total. (48 sts in every round)
Rnd 35: Repeat Rnd 12. (48 sts)
Each cross uses 6 stitches and produces 6 stitches, so every round stays at 48. Count the stitches after each cross round for the first few repeats. A missed skipped stitch is the most common mistake here.
The body now has 30 rounds (Rnds 6–35). At 0.5 in (1.3 cm) per round, that’s 15 in (38.1 cm). Add about 1 in (2.5 cm) for the cupped base and you get 16 in (40.6 cm), which matches Checkpoint 4. Fasten off plum.
Border
There are two lilac trims: the top rim and the hole edging.
Border gauge: 16 sc and 16 rnds = 4 in (10.2 cm), worked into this edge. That’s 4 sc per inch around and 0.25 in (0.6 cm) per round.
Top Rim
Join lilac (Color B) at the center back, in st 1.
Rnd 36: Ch 1, then sc in each st around. Join. (48 sc: 24 across the front half, 24 across the back half)
Rnds 37–38: Ch 1, then sc in each st around. Join. (48 sc in each round)
Fasten off.
Why the math works: The body has 48 stitches at 4 per inch, which is 12 in (30.5 cm) around. The rim also has 48 sc at 4 per inch, so it’s the same 12 in. The rim neither flares nor pulls in. Laid flat, the tube shows 24 sts per side, or 6 in (15.2 cm). Three rounds at 0.25 in (0.6 cm) each make the 0.75 in (1.9 cm) border, so the total height is 16 in + 0.75 in = 16.75 in (42.5 cm).
Hole Edging
Join lilac at the bottom right corner of the slit.
Rnd 1: Ch 1. Work 12 sc along the bottom edge, one into each of sts 19–30 from Rnd 7. Work 2 sc up the left side, around the post of the edge st. Work 12 sc along the top edge, into the underside of the 12 ch. Work 2 sc down the right side. Join. (12 + 2 + 12 + 2 = 28 sc)
Rnd 2: Ch 1. Sc in each of the next 5 sts, sc2tog. Repeat from * 4 times. Join. (28 sts worked into: 20 sc + 4 sc2tog = 24 sts)
The four decreases pull in the corners and round the slit into a circle about 1.75 in (4.4 cm) across. It stretches to about 2.25 in (5.7 cm) as bags pass through. Fasten off.
Hanging Tab
Join plum on Rnd 38 at st 47.
Row 1: Ch 1, then sc in sts 47, 48, 1 and 2. (4 sc)
Rows 2–16: Ch 1, turn, then sc in each st across. (4 sc in each row)
The tab is about 0.9 in (2.3 cm) wide and 4 in (10.2 cm) long. If you’re using a ring, thread the tab through it. Fold the tab down to the inside of the back and sew the last row to the base of Rnd 36. This makes a loop that stands 2 in (5.1 cm) above the rim. Weave in all ends.
Final Blocking
- Lightly spray the holder with water until it’s damp but not soaked.
- Stuff it loosely with plastic bags or a rolled towel so it holds a round tube shape.
- Lay it flat and pat it to 6 in (15.2 cm) wide and 16.75 in (42.5 cm) long.
- Pinch the braid gently so each cross stands up, and straighten the panel so it runs vertically.
- Push a finger into the hole and shape the lilac edging into a circle.
- Let it dry completely. If you’re using acrylic, a few seconds of steam held above the fabric (never pressed) will relax the stitches.
Final Quality-Control Checklist
- 48 sts in every body round, and 48 sc in each rim round.
- The braid is centered directly above the hole.
- Each braid repeat alternates a right cross and a left cross, with a plain round between.
- One FPdc rib sits on each side of the 3-stitch BPdc channel.
- The hole edging has 24 sts and lies round, not pointed.
- The rim lies flat with no ruffle and no pull-in.
- The tab is centered at the back, directly opposite the braid.
- All ends are woven in, and no ends show through the hole.
Troubleshooting
The tube twists into a spiral. You’re probably joining into the ch 2 instead of the first stitch. Always join to the top of the first real stitch.
The braid looks flat. Your FPtr stitches are too short. Pull up a full loop before each yarn over.
The braid leans to one side. You repeated the same cross twice in a row. Rounds should go RC, plain, LC, plain.
The stitch count drifts to 47 or 49. Check that every cross ends with exactly 6 stitches, and that the ch 2 isn’t being counted as a stitch.
The hole is too small. Work the hole round as ch 14 over 14 skipped sts, and work 14 dc into those chains in Rnd 9. Keep the panel centered.
The rim ruffles. Use a 4 mm hook for the lilac rounds only.
The tube is shorter than planned. Add plain rounds (Rnd 12) before the border. Each round adds 0.5 in (1.3 cm).
Care
Machine wash cold on a gentle cycle in a mesh bag, then lay flat to dry and reshape the hole while it’s damp. Don’t tumble dry, because the heat can stretch post-stitch fabric.
Final Notes
Here’s how the measurements add up:
– Base: 48 sts, about 3.75 in (9.5 cm) across.
– Body: 12 in (30.5 cm) around and 6 in (15.2 cm) flat.
– Height: 30 body rounds at 0.5 in (1.3 cm) each, plus the cupped base, gives 16 in (40.6 cm).
– Rim: 48 sc keeps the same width and adds 0.75 in (1.9 cm), for 16.75 in (42.5 cm).
– Tab: adds 2 in (5.1 cm), for a total hanging length of 18.75 in (47.6 cm).
Check gauge at Rnd 10, count every cross round, and the braid will come out centered and even.
Happy crocheting!