

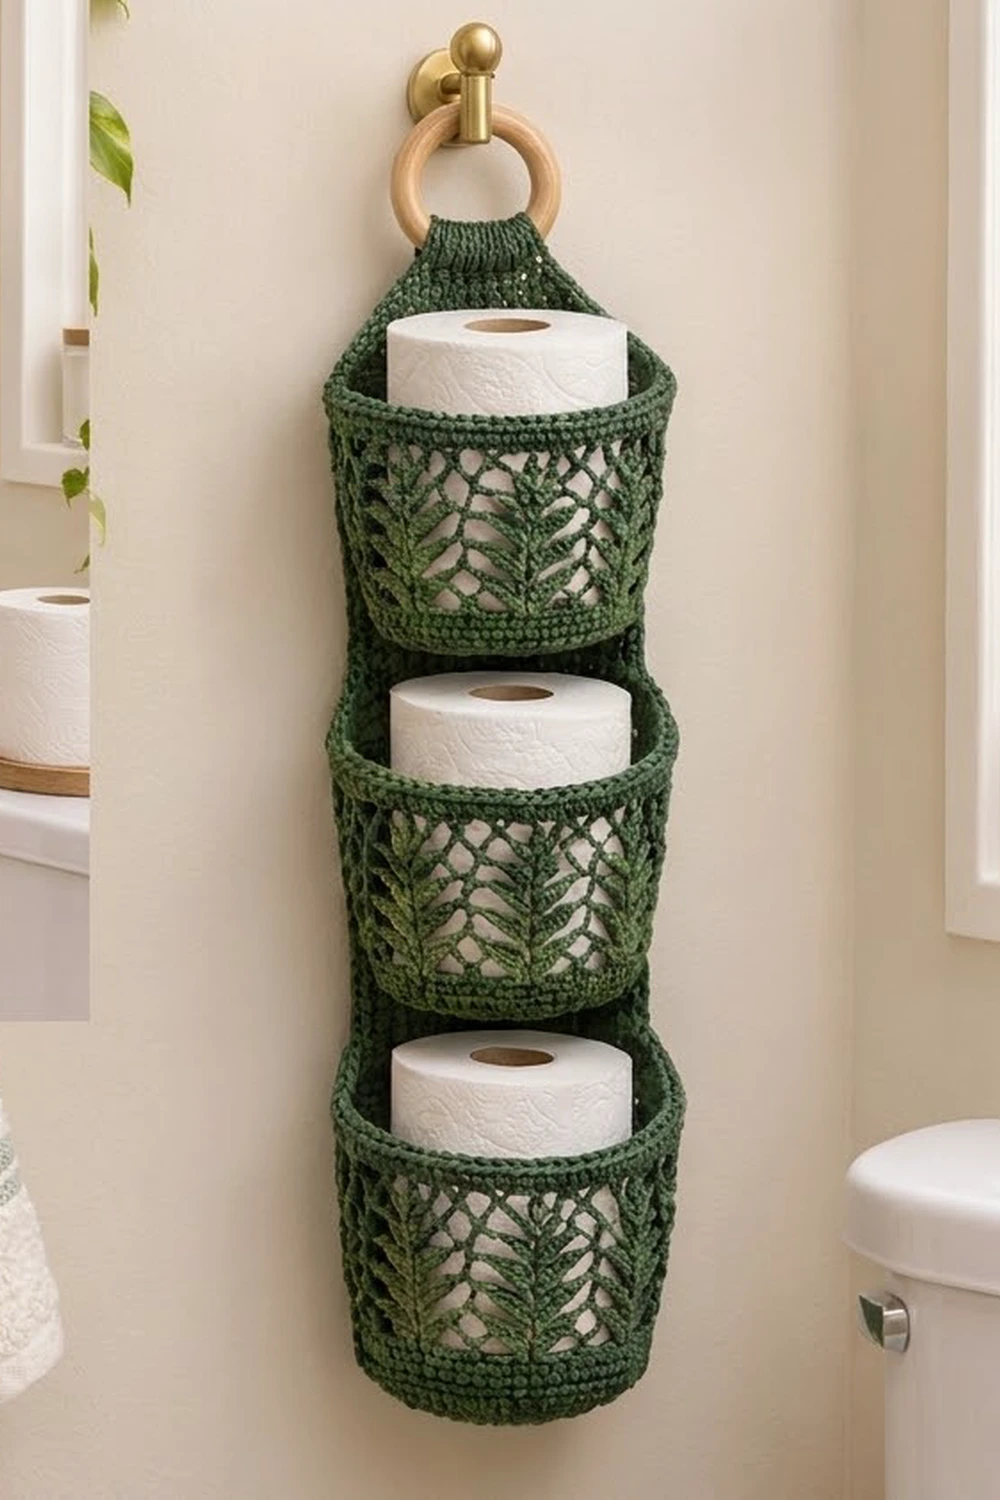
The Fern Ladder holder is a three-pocket hanging organizer for spare toilet rolls. Three oval baskets stack down a slim back panel, and the panel narrows into a tab that wraps around a wooden ring. It hangs from any hook, towel bar or door hanger.
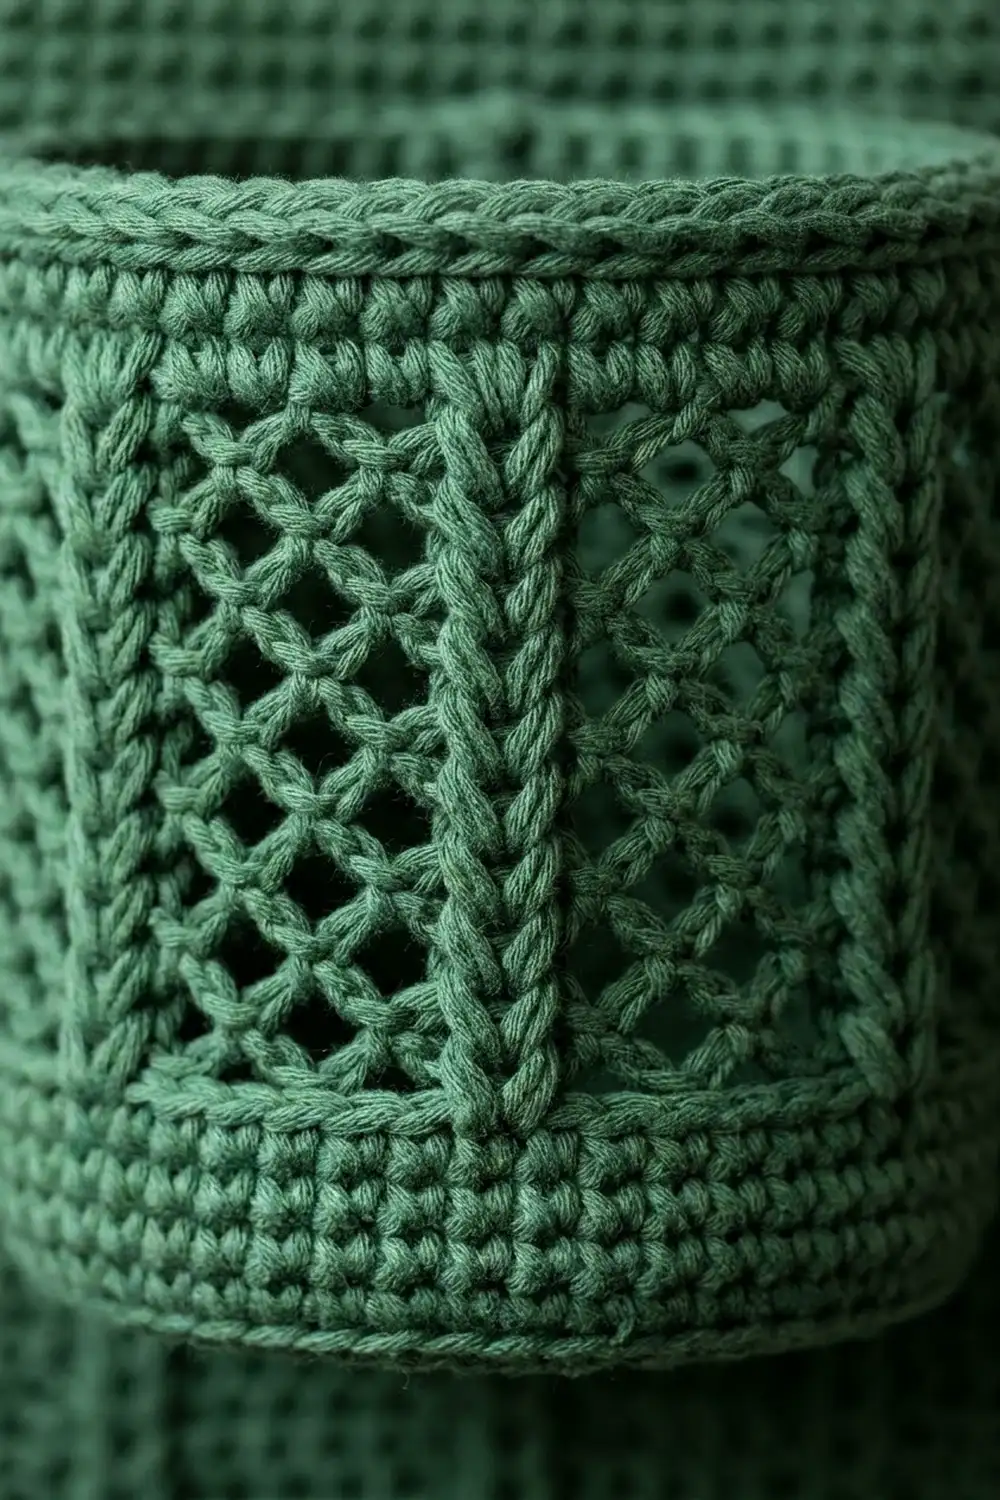
Each pocket starts with a firm single-crochet base, then a lacy middle band, then a solid rim with a twisted crab-stitch edge. In the lace band, columns of stacked V-shells look like fern fronds, and a diamond chain net fills the spaces between them. The sample uses one deep forest green, which suits a botanical, spa-style bathroom.
The pattern uses US crochet terms. The finished organizer hangs about 25 in (63.5 cm) long, measured from the top of the ring. Each pocket is about 6.75 in (17.1 cm) wide, 5.5 in (14.0 cm) deep and 5.5 in (14.0 cm) tall.
You will work three pockets in joined rounds and one back panel in rows. Then you sew the pockets to the panel, work a border around the panel, and fold the tab around the ring.
Finished Size and Construction
- Finished size: 5.5 in (14.0 cm) wide panel; about 25 in (63.5 cm) hanging length including the ring
- Skill level: Intermediate
- Terminology: US
- Yarn weight: Worsted (#4) cotton
- Hook: 4.5 mm (US 7)
- Number of pieces: 4 (3 pockets + 1 back panel), plus a purchased ring
- Layout: 1 column of 3 pockets, spaced 6 in (15.2 cm) apart, measured rim to rim
- Pocket size: 6.75 in (17.1 cm) wide × 5.5 in (14.0 cm) deep × 5.5 in (14.0 cm) tall
- Panel size before border: 5 in (12.7 cm) × 24 in (61.0 cm)
- Border depth: 0.25 in (0.6 cm) per edge
Materials
Use a smooth, firm worsted-weight cotton or cotton blend. Cotton keeps the baskets crisp and stands up to bathroom humidity. Avoid fuzzy or very stretchy yarns, because they blur the fern texture and let the pockets sag.
- Forest Green: 300 g (about 570 m / 623 yd)
Tools:
– 4.5 mm (US 7) crochet hook
– 1 wooden ring, 2.75 in (7.0 cm) diameter
– Tapestry needle
– 8 locking stitch markers
– Scissors
– Measuring tape
– Blocking mat and pins
The yarn quantity includes a margin of about 15 percent for your gauge swatch and tension differences.
Abbreviations (US Terms)
- ch – chain
- sl st – slip stitch
- sc – single crochet
- dc – double crochet
- inc – 2 sc in the same stitch
- sc2tog – single crochet 2 together
- BLO – back loop only
- sk – skip
- sp – space
- st(s) – stitch(es)
- rev sc – reverse single crochet (crab stitch)
Special stitch: Fern Shell (FS). Work (2 dc, ch 1, 2 dc) into the stitch or space named. When an FS starts a round, ch 3 counts as the first dc.
Gauge and Checkpoints
Gauge: 16 sc × 18 rounds = 4 in (10.2 cm). Mesh gauge: 4 mesh rounds = 2 in (5.1 cm).
Make one complete pocket before you start the others. It is your real gauge swatch.
- After Rnd 12 (base): 5.5 in (14.0 cm) × 6.75 in (17.1 cm); 80 sts
- After Rnd 16: the solid wall measures 0.9 in (2.3 cm) tall
- After Rnd 23: the mesh band measures 3.5 in (8.9 cm) tall
- Finished pocket: 5.5 in (14.0 cm) tall; a standard roll, about 4.5 in (11.4 cm) across, slides in easily
- Panel after Row 81: 18 in (45.7 cm) long, 5 in (12.7 cm) wide
If your base is too big: go down one hook size. If it is too small: go up one hook size. If only the mesh band comes out too tall, tighten your chains rather than changing hooks.
Pocket (Make 3)
Oval Base
Rnd 1: Ch 7. Sc in 2nd ch from hook, sc in next 4 ch, 3 sc in last ch. Turn the work and continue along the opposite side of the chain: sc in next 4 ch, 2 sc in last ch (the same ch as the first sc). Join with sl st to the first sc. (14 sts)
Rnds 2–12: Ch 1. Work the formula below, where n is the round number, then join with sl st to the first sc.
[sc (n − 2), inc] once, sc 4, [sc (n − 2), inc] 3 times, sc 4, [sc (n − 2), inc] twice.
On Rnd 2, (n − 2) is zero, so you simply work inc. Each round adds 6 sts, 3 at each curved end:
- Rnd 2: 20 sts
- Rnd 3: 26 sts
- Rnd 4: 32 sts
- Rnd 5: 38 sts
- Rnd 6: 44 sts
- Rnd 7: 50 sts
- Rnd 8: 56 sts
- Rnd 9: 62 sts
- Rnd 10: 68 sts
- Rnd 11: 74 sts
- Rnd 12: 80 sts
Check the base now. It should measure 5.5 in (14.0 cm) × 6.75 in (17.1 cm), and its edge should be about 20 in (50.8 cm) around.
Lower Wall
Rnd 13: Ch 1, sc BLO in each st around, join. (80 sts) This round makes a crisp ridge where the base turns up into the wall.
Rnds 14–16: Ch 1, sc in each st around, join. (80 sts)
Fern Mesh
Each fern repeat uses 10 sts, and the round holds 8 repeats (8 × 10 = 80).
Rnd 17 (setup Round A): Ch 3 (counts as dc). Work (dc, ch 1, 2 dc) in the same st as the join; this is the first FS. Ch 3, sk 4 sts, sc in next st, ch 3, sk 4 sts*, FS in next st. Repeat from * 6 more times, then repeat from * to ** once more. Join with sl st to the top of the beginning ch-3.
(Count: 8 FS, 8 sc, 16 ch-3 sps.)
Rnd 18 (Round B): Sl st in next dc and in the ch-1 sp. Work (ch 3, dc, ch 1, 2 dc) in the same sp. Ch 2, sc in next ch-3 sp, ch 3, sc in next ch-3 sp, ch 2, FS in the ch-1 sp of the next FS. Repeat around, ending at *. Join.
(Count: 8 FS, 16 sc, 8 ch-3 sps, 16 ch-2 sps.)
Rnd 19 (Round A): Sl st in next dc and in the ch-1 sp. Work (ch 3, dc, ch 1, 2 dc) in the same sp. Ch 3, sk the ch-2 sp, sc in the next ch-3 sp, ch 3, sk the next ch-2 sp, FS in the next FS ch-1 sp. Repeat around, ending at *. Join.
(Count: 8 FS, 8 sc, 16 ch-3 sps.)
Rnds 20 and 22: Work as Rnd 18.
Rnds 21 and 23: Work as Rnd 19.
The stacked FS form 8 fern columns, each with 7 chevrons. The sc points that move back and forth between them make the diamond net. The mesh band should measure 3.5 in (8.9 cm) tall.
Rim
Rnd 24 (conversion): Ch 1. *Sc in each of the next 2 dc, sc in the ch-1 sp, sc in each of the next 2 dc, 2 sc in the next ch-3 sp, sc in the sc, 2 sc in the next ch-3 sp. Repeat from * around. Join. The beginning ch-3 counts as the first dc.
(Count: 40 sc worked 1 per existing st [32 dc + 8 sc] + 40 sc worked into spaces [8 ch-1 sps + 32 in ch-3 sps] = 80 sts.)
Rnds 25–27: Ch 1, sc in each st around, join. (80 sts)
Rnd 28: Ch 1, rev sc in each st around, join. (80 sts) Fasten off and weave in the ends.
Back Panel (Make 1)
Row 1: Ch 21. Sc in the 2nd ch from hook and in each ch across. (20 sts)
Rows 2–81: Ch 1, turn, sc in each st across. (20 sts) The panel now measures 18 in (45.7 cm).
Row 82: Ch 1, turn, sc2tog, sc 16, sc2tog. (18 sts)
Row 83: Ch 1, turn, sc in each st across. (18 sts)
Rows 84–91: Repeat Rows 82–83 four more times. You will have 16, 16, 14, 14, 12, 12, 10 and 10 sts. (Row 91: 10 sts)
Rows 92–108: Ch 1, turn, sc in each st across. (10 sts)
Fasten off. The panel measures 5 in (12.7 cm) wide and 24 in (61.0 cm) long. The taper is 2.2 in (5.6 cm) long and the tab is 3.8 in (9.7 cm) long.
Make All Pieces
All four pieces are Forest Green:
- Pockets: 3 × about 60 g (114 m) = 180 g
- Panel with border: about 75 g (143 m)
Layout, top to bottom:
          [ ring ]
          [ tab: Rows 92–108 ]
          [ taper: Rows 82–91 ]
[ Pocket 1 – rim at Row 81, base at Row 57 ]
[ Pocket 2 – rim at Row 54, base at Row 30 ]
[ Pocket 3 – rim at Row 27, base at Row 3  ]
Joining
Method: Whipstitch with a 24 in (61.0 cm) tail of Forest Green, sewing stitch to stitch.
- Mark the back of each pocket. Flatten the pocket so one straight side of the oval base faces you. Mark the 20 rim sts of Rnd 27 that are centered on that side; this is exactly one quarter of the 80 sts. Then mark the 20 Rnd 13 ridge sts directly below them.
- Sew the rim. Lay the panel right side up. Place Pocket 1 so its marked side lies against the panel. Whipstitch rim sts 1–20 one to one onto panel Row 81, sts 1–20. Both sides have 20 sts, so the seam lies flat without gathers.
- Sew the base. Whipstitch the 20 marked Rnd 13 ridge sts one to one onto panel Row 57, sts 1–20.
- Tack the sides. Tack the pocket wall to panel column 1 and column 20 at each of the 7 mesh rounds.
- Repeat for the other pockets. Sew Pocket 2 from Row 54 down to Row 30, and Pocket 3 from Row 27 down to Row 3.
Tension: Pull each stitch just snug. If you pull too tight, the panel puckers. If you leave it loose, the full pockets tip forward.
Checkpoint: The rims should sit 6 in (15.2 cm) apart, and the gap between a pocket’s base and the rim below should be about 0.7 in (1.8 cm). The panel still measures 24 in (61.0 cm).
Border
The border goes around the back panel only. It runs behind the pocket edges, which are attached at columns 1 and 20.
Border gauge: 4 sc per 1 in (2.5 cm), the same as the panel’s stitch gauge.
Rnd 1 (sc): Join yarn in the first foundation st at the bottom right corner. Ch 1 and work around the panel as follows:
- Bottom edge: 3 sc in the first st, sc 18, 3 sc in the last st (24 sts).
- Side 1: Work 94 sc evenly along the row ends of Rows 2–107. Skip 1 row end out of every 9, for 12 skips in total.
- Top edge (tab): 3 sc in the first st of Row 108, sc 8, 3 sc in the last st (14 sts).
- Side 2: 94 sc along Rows 107–2, as on Side 1.
Join. (226 sts: 24 + 94 + 14 + 94)
Rnd 2: Ch 1, rev sc in each st around, join. (226 sts) Fasten off.
Why the math works: 106 row ends at 4.5 rows per inch measure about 23.6 in (59.9 cm). 94 sc at 4 sc per inch measure 23.5 in (59.7 cm), so the edge neither ruffles nor pulls in. The bottom and top edges keep one sc per existing stitch (18 + 8), and each corner has its own 3-sc group, so no corner is counted twice. The border adds 0.25 in (0.6 cm) on every edge, so the panel finishes at 5.5 in (14.0 cm) × 24.5 in (62.2 cm).
Attach the ring: Pass the tab through the wooden ring from front to back. Fold it down so Row 108 sits on top of Row 96 on the wrong side, and whipstitch it in place across all 14 border sts.
Final Blocking
- Mist the whole organizer lightly until it is damp but not soaked.
- Lay it flat on a blocking mat with the right side up.
- Pin the panel to 5.5 in (14.0 cm) × 24.5 in (62.2 cm).
- Stuff each pocket with a toilet roll wrapped in a plastic bag so the walls dry round.
- Gently open the diamond net with your fingertips and straighten each fern column so it runs vertically.
- Let it dry completely, usually 24 hours, before hanging.
Final Quality-Control Checklist
- Each base measures 5.5 in (14.0 cm) × 6.75 in (17.1 cm) and lies flat.
- Each pocket has 8 fern columns, each with 7 chevrons.
- All rims have 80 sts and lie smooth.
- The rims are spaced 6 in (15.2 cm) apart.
- The panel border has 226 sts and its corners are square.
- The ring is sewn securely and the tab does not twist.
- All ends are woven in and none show through the mesh.
Troubleshooting
- The base cups upward: you may have skipped an increase. Recount the round; it should be a multiple of 6 plus 8.
- The base ruffles: your tension is loose. Go down a hook size.
- The fern columns lean to one side: you worked an FS into a st instead of the ch-1 sp. Every FS from Rnd 18 on goes in the ch-1 sp.
- The rim flares: you worked extra sts in Rnd 24. Each repeat should give exactly 10 sc.
- The pockets droop forward: add more side tacks along columns 1 and 20.
- The panel edge waves: skip one more row end per side on Border Rnd 1.
Care
Hand wash in cool water, press out the water in a towel, and dry flat with a roll inside each pocket. Do not tumble dry.
Final Notes
The measurement chain is simple to follow. Gauge of 16 sc = 4 in (10.2 cm) gives an 80-st base that is 20 in (50.8 cm) around. That base gives pockets 6.75 in (17.1 cm) wide, which sit on a 5 in (12.7 cm) panel. The panel is 24 in (61.0 cm) long before the border and 24.5 in (62.2 cm) after it. Check each stage and the finished holder will fit standard rolls neatly.
Happy crocheting!