

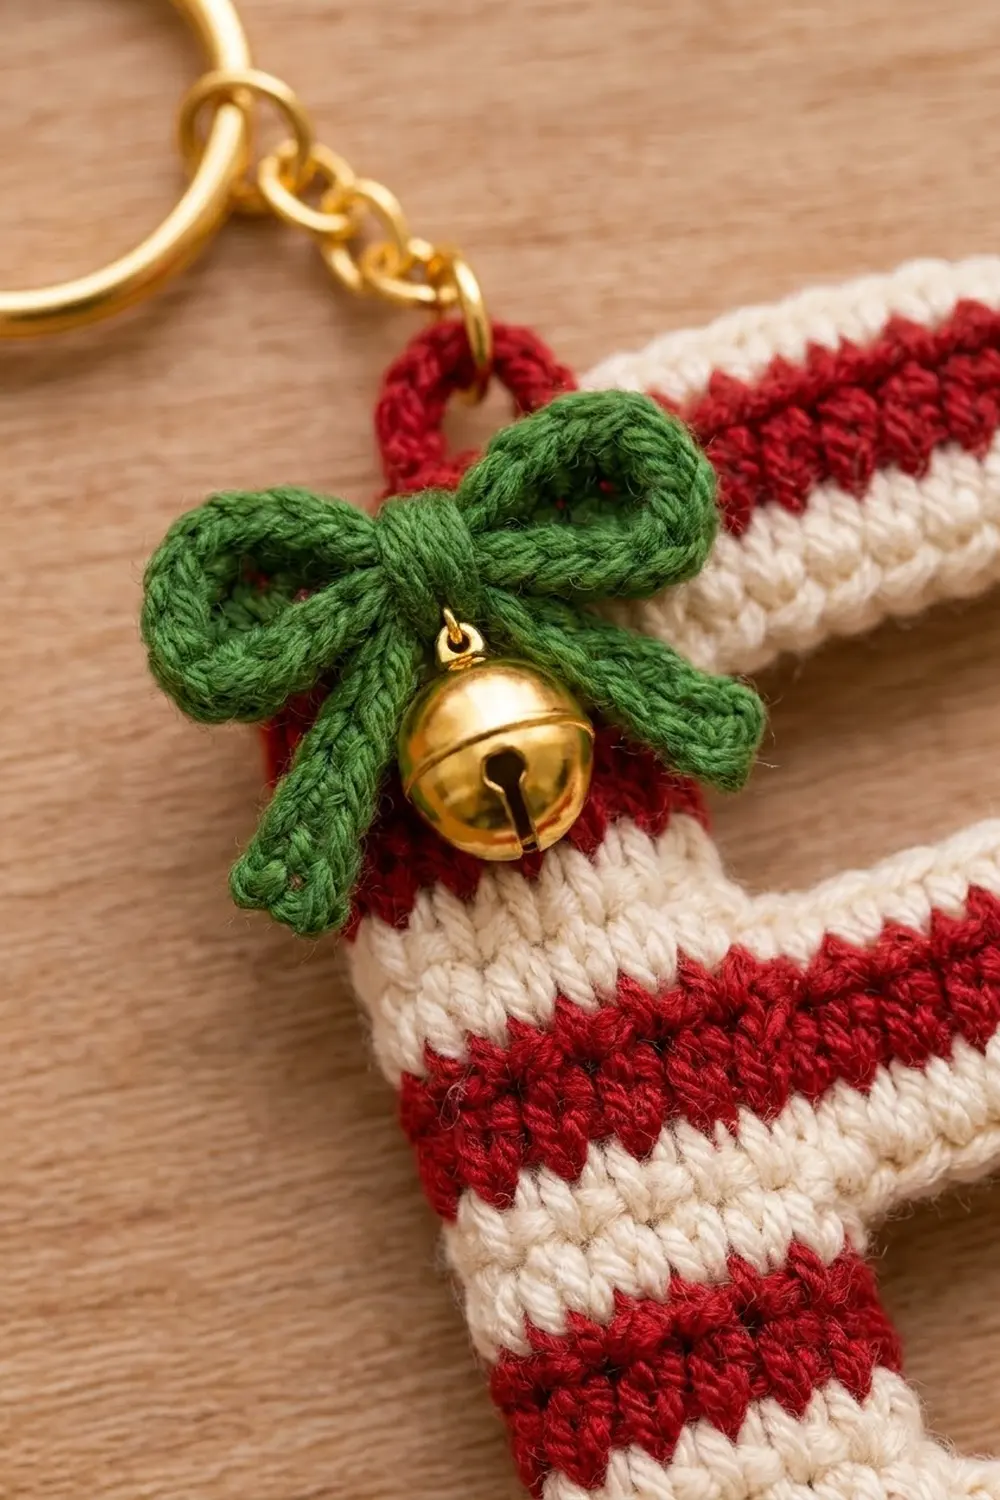
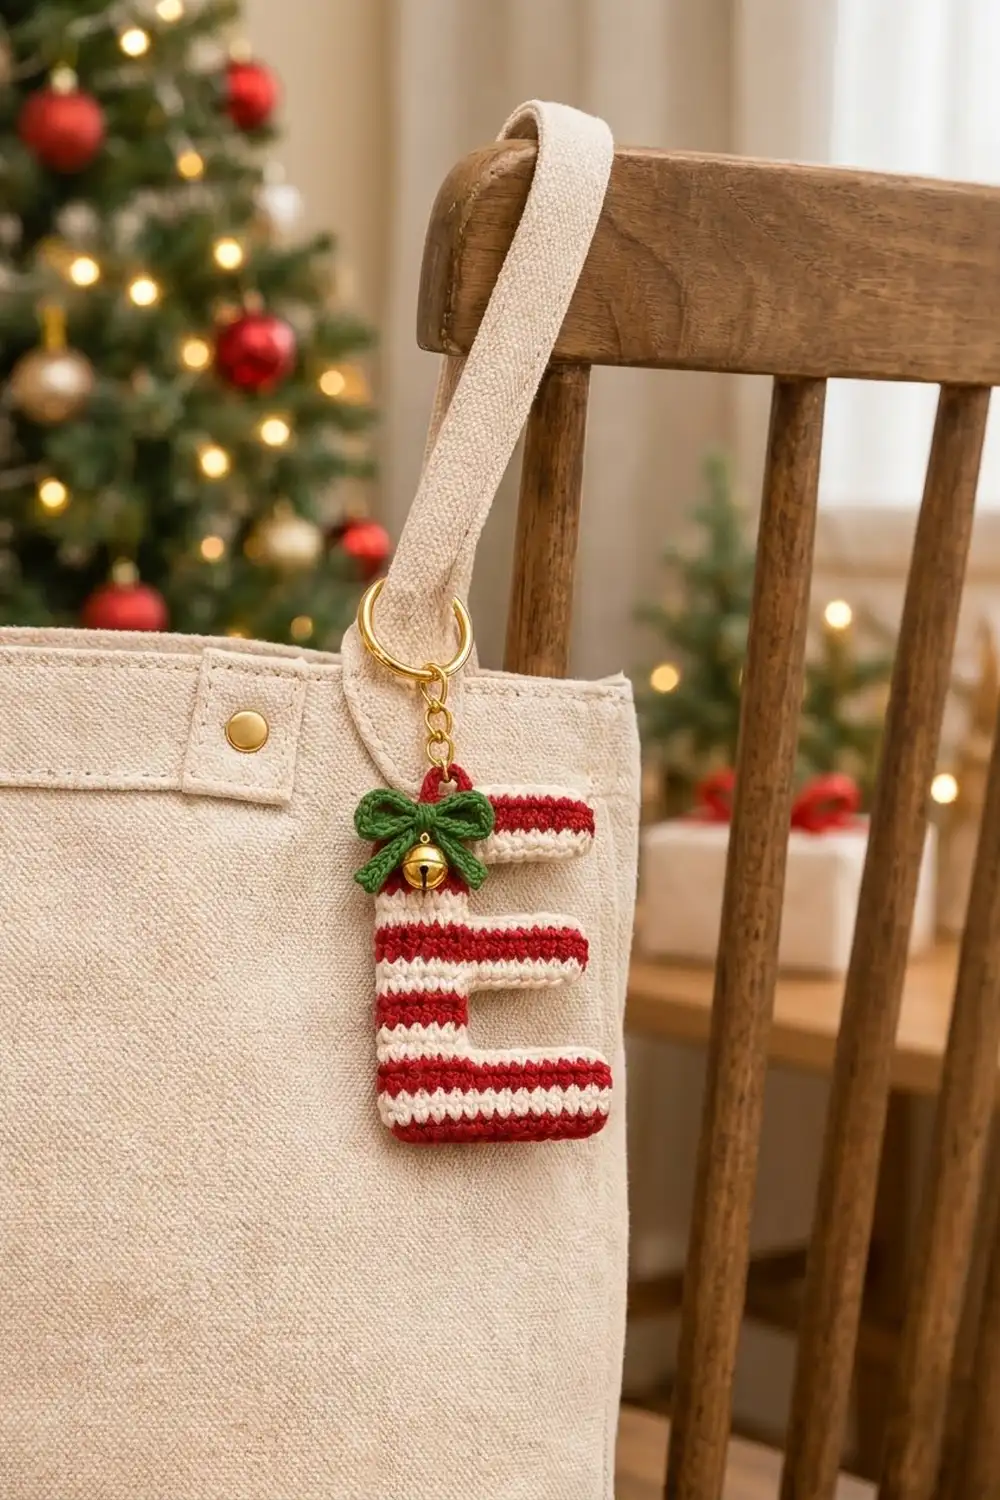
This little letter E is a quick holiday make with a lot of charm. Red and cream stripes run across the letter like a candy cane. A soft cream edge outlines every corner, and a tiny green bow with a gold jingle bell sits at the top. Clip it to a tote bag, a backpack, or a set of keys, or tuck it into a stocking as a personalized gift.
You work the letter flat in single crochet rows, from the bottom bar up to the top bar. The arms grow out of the spine from a simple chain, so you don’t sew any letter parts together. One round of cream edging then smooths all twelve corners into one clean outline.
The pattern uses US crochet terms. The finished charm measures about 3.25 in (8.3 cm) wide and 4.75 in (12.1 cm) tall, not counting the hanging loop and keyring.
The construction has four steps:
1. Crochet the striped letter in 25 rows.
2. Add one round of cream edging.
3. Crochet a small hdc strip and shape it into a bow.
4. Attach the bow, bell, loop, and keyring.
Finished Size and Construction
- Finished size: 3.25 in (8.3 cm) wide x 4.75 in (12.1 cm) tall
- Skill level: Easy / advanced beginner
- Terminology: US crochet terms
- Yarn weight: DK (light worsted, #3)
- Hook: 3.5 mm (E-4)
- Number of pieces: 1 letter, plus 1 small bow appliqué
- Layout: one standalone letter, spine on the left
- Letter size before edging: 3 in (7.6 cm) x about 4.5 in (11.4 cm)
- Edging depth: about 0.125 in (0.3 cm) on every side
Materials
Choose a smooth, firm DK cotton or cotton blend. Cotton gives crisp stripes, holds its shape on a keyring, and doesn’t fuzz much. Avoid fluffy or very soft acrylic, which blurs the stripe lines.
- Red (MC): 5 g, about 12 m
- Cream (CC1): 6 g, about 14 m
- Green (CC2): 2 g, about 5 m
These quantities include a comfortable margin for gauge checks and tails.
Tools and notions:
- 3.5 mm (E-4) crochet hook
- Tapestry needle
- 1 gold jingle bell, 10 mm
- 1 gold split keyring, 25 mm, with a short chain and jump ring
- Small pliers for the jump ring
- Scissors, rust-proof pins, and a spray bottle for blocking
- Optional: stitch markers
Abbreviations (US Terms)
- ch: chain
- sl st: slip stitch
- sc: single crochet
- hdc: half double crochet
- st(s): stitch(es)
- RS: right side
- MC / CC: main color / contrast color
Color change: Work the last sc of the row until 2 loops remain on the hook. Drop the old color, yarn over with the new color, and pull through both loops. The new color is now ready for the turning chain.
Row-end: The side edge of one sc row. In the edging, you work 1 sc into each row-end.
Gauge and Checkpoints
Gauge: 20 sc and 22 rows = 4 in (10.2 cm) in single crochet, worked firmly.
That works out to 5 sc and 5.5 rows per inch. The fabric needs to be firm and dense so the charm doesn’t stretch on a keyring.
Test before committing: Work Rows 1–5 (the bottom bar) and measure. These rows are your gauge check and also the start of the real letter.
Checkpoints:
- After Row 5: 3 in (7.6 cm) wide, about 0.9 in (2.3 cm) tall
- Spine (6 sts): 1.2 in (3.0 cm) wide
- Middle arm (13 sts): 2.6 in (6.6 cm) wide
- After Row 15: about 2.7 in (6.9 cm) tall
- After Row 25: about 4.5 in (11.4 cm) tall
- After edging: 3.25 in (8.3 cm) x 4.75 in (12.1 cm)
Too big? Go down to a 3.25 mm hook or crochet more tightly. Too small? Go up to a 3.75 mm hook. Keep the stitch counts the same and change only the hook.
Stripe Sequence
Change color every 2 rows, always at the end of an even row:
- Rows 1–2: red
- Rows 3–4: cream
- Rows 5–6: red
- Rows 7–8: cream
- Rows 9–10: red
- Rows 11–12: cream
- Rows 13–14: red
- Rows 15–16: cream
- Rows 17–18: red
- Rows 19–20: cream
- Rows 21–22: red
- Rows 23–24: cream
- Row 25: red
The red foundation chain adds a little height under Row 1. Once the edging is on, the bottom red stripe and the single red Row 25 look balanced.
Carrying yarn: If the next stripe starts at the same right-hand edge, carry the unused color loosely up that edge. If it starts in a different section, cut the yarn and rejoin it, leaving 4 in (10.2 cm) tails. This happens four times: cream for Row 7, red for Row 13, red for Row 17, and cream for Row 23. The edging hides all carried strands.
Letter E
If you crochet right-handed, the spine sits on the left when Row 1 faces you. Single crochet looks nearly the same on both sides, so left-handers can use whichever side puts the spine on the left as the front.
Bottom Bar
With red, ch 16.
Row 1: Sc in 2nd ch from hook and in each ch across. (15 sc)
Row 2: Ch 1, turn, sc in each st across, changing to cream in the last st. (15 sc)
Rows 3–5: Ch 1, turn, sc in each st across, following the stripe sequence. (15 sc)
Row 5 ends at the left edge. Checkpoint: 3 in (7.6 cm) x 0.9 in (2.3 cm).
Lower Spine
Row 6: Ch 1, turn, sc in the first 6 sts, leave the remaining 9 sts unworked. (6 sc)
Rows 7–9: Ch 1, turn, sc in each st across. (6 sc)
Row 10: Ch 1, turn, sc in each st across, changing to cream in the last st. (6 sc) With cream, ch 8 for the middle arm.
Middle Arm
Row 11: Sc in 2nd ch from hook and in the next 6 ch, then sc in each of the 6 spine sts. (7 + 6 = 13 sc)
Rows 12–15: Ch 1, turn, sc in each st across. (13 sc)
Row 15 ends at the left edge. The middle arm is 2 sts shorter than the top and bottom bars, which gives the classic E shape.
Upper Spine
Row 16: Ch 1, turn, sc in the first 6 sts, leave the remaining 7 sts unworked. (6 sc)
Rows 17–19: Ch 1, turn, sc in each st across. (6 sc)
Row 20: Ch 1, turn, sc in each st across, changing to red in the last st. (6 sc) With red, ch 10 for the top bar.
Top Bar
Row 21: Sc in 2nd ch from hook and in the next 8 ch, then sc in each of the 6 spine sts. (9 + 6 = 15 sc)
Rows 22–25: Ch 1, turn, sc in each st across. (15 sc)
Fasten off red after Row 25. Checkpoint: 3 in (7.6 cm) wide, about 4.5 in (11.4 cm) tall. Each of the five sections (bottom bar, lower spine, middle arm, upper spine, top bar) is 5 rows, or about 0.9 in (2.3 cm).
Weave in the stripe tails along the edges they came from. You can also lay them along the edge and work over them during the edging.
Border (Cream Edging)
Border gauge: Work 1 sc into each stitch, each foundation chain, and each row-end. Work 3 sc into the stitch at each outer corner. Inner corners get no extra stitches.
The letter has 12 corners: 8 outer and 4 inner.
Round 1: With RS facing, join cream with a sl st in the last st of Row 25 (top-left corner). Ch 1, then work:
- Top-left corner: 3 sc in the same st.
- Left side: 1 sc in each row-end down to Row 1. (25 sc)
- Bottom edge: Working into the foundation chain, 3 sc in the first ch, 1 sc in each of the next 13 ch, 3 sc in the last ch. (19 sc)
- Bottom bar right end: 1 sc in each row-end of Rows 1–5. (5 sc)
- Bottom bar top: 3 sc in the outermost unworked st of Row 5, then 1 sc in each of the next 8 unworked sts toward the spine. (11 sc)
- Lower spine, inner edge: 1 sc in each row-end of Rows 6–10. (5 sc)
- Middle arm underside: Working into the 7 chains of the arm, 1 sc in each of the first 6 ch, 3 sc in the last ch at the tip. (9 sc)
- Middle arm tip: 1 sc in each row-end of Rows 11–15. (5 sc)
- Middle arm top: 3 sc in the outermost unworked st of Row 15, then 1 sc in each of the next 6 unworked sts. (9 sc)
- Upper spine, inner edge: 1 sc in each row-end of Rows 16–20. (5 sc)
- Top bar underside: Working into the 9 chains of the top bar, 1 sc in each of the first 8 ch, 3 sc in the last ch at the tip. (11 sc)
- Top bar right end: 1 sc in each row-end of Rows 21–25. (5 sc)
- Top edge: 3 sc in the outermost st of Row 25, then 1 sc in each of the next 13 sts. The 3 sc you made at the start complete this edge. (3 + 13 + 3 = 19 sc)
Join with a sl st to the first sc. Fasten off and weave in.
Round total: 25 + 19 + 5 + 11 + 5 + 9 + 5 + 9 + 5 + 11 + 5 + 19 = 128 sc.
Why the math works: Count the edge units segment by segment: 15 + 5 + 9 + 5 + 7 + 5 + 7 + 5 + 9 + 5 + 15 + 25 = 112. Each of the 8 outer corners adds 2 extra sc, so 112 + 16 = 128. Inner corners keep 1 sc per unit, so they turn neatly without bunching. Along the sides, 1 sc per row-end puts 5.5 sc per inch where 5 would lie flat. That small extra gives the edge its slightly rounded, cushioned roll.
Hanging Loop
With red, join with a sl st in the center sc of the top-left corner group. Ch 10, then sl st in the same sc. Turn, work 14 sc into the ch-10 loop, and sl st in the base. Fasten off and weave in.
The loop is about 0.75 in (1.9 cm) tall.
Bow
With green, leave a 6 in (15.2 cm) tail and ch 32.
Row 1: Hdc in 3rd ch from hook and in each ch across. (30 hdc)
Fasten off, leaving an 8 in (20.3 cm) tail. The strip is about 6 in (15.2 cm) long.
Shaping:
- Lay the strip flat and find its center.
- Fold each end toward the center to form two loops, using about 2 in (5.1 cm) of strip per loop.
- Let the remaining 1 in (2.5 cm) at each end hang down as tails, crossing them slightly below the center.
- Wrap the 8 in (20.3 cm) tail tightly around the center 5–6 times and secure it on the back.
The finished bow is about 1.75 in (4.4 cm) wide and 1 in (2.5 cm) tall.
Final Assembly
- Use the remaining green tail to sew the bow over the top-left corner of the letter, just below the hanging loop. Stitch through the bow center and each loop so it lies flat.
- Sew the 10 mm jingle bell to the bow center, passing through 3–4 times.
- Open the jump ring with pliers and slip it through the red hanging loop. Attach the keyring chain, then close the ring completely.
Final Blocking
- Before adding the bell and keyring, lightly mist the letter until it is damp, not soaked.
- Pin it on a foam board to 3.25 in (8.3 cm) wide and 4.75 in (12.1 cm) tall.
- Pin each outer corner so the bar ends are square.
- Check that the middle arm is level and the spine is straight.
- Let it dry completely, then unpin.
- Fluff the bow loops with your fingers.
Final Quality-Control Checklist
- The letter measures 3.25 in (8.3 cm) x 4.75 in (12.1 cm).
- The bars are 15 sts, the middle arm is 13 sts, and the spine is 6 sts.
- Each section is 5 rows, for 25 rows total.
- Each stripe is 2 rows, and Row 25 is a single red row.
- The edging has 128 sc, with 3 sc at each of the 8 outer corners.
- No carried strands show on the front.
- The hanging loop is firmly attached and the jump ring is fully closed.
- The bell and bow are secure enough for daily use.
Troubleshooting
Letter is wider than 3 in (7.6 cm) before edging: Your tension is loose. Go down one hook size and redo the bottom bar.
Arms slant upward: The arm chain is too tight. Chain loosely, or use a hook one size larger for the chain only.
Edging ruffles on the sides: Skip 1 row-end out of every 10 on the left side. The round total drops by the same number. Keep 3 sc at every corner.
Inner corners pucker: Don’t add stitches at inner corners. One sc per unit is enough.
Stripe edges look jagged: Make every color change on the last yarn over of the row before. Pull carried strands snug but not tight.
Bow droops: Wrap the center more tightly and sew each loop to the letter.
Care
Hand wash in cool water with mild soap and lay flat to dry. Take off the keyring before washing to protect the metal finish.
Final Notes
The measurements build in one short chain. At 5 sc and 5.5 rows per inch, 25 rows make a letter 3 in (7.6 cm) x 4.5 in (11.4 cm). The 128-stitch cream edging adds 0.125 in (0.3 cm) on every side, for a finished charm of 3.25 in (8.3 cm) x 4.75 in (12.1 cm). Check the bottom bar first and the rest of the letter will follow. Try different stripe colors, or use the same method for other block letters to spell out a whole name.
Happy crocheting!