

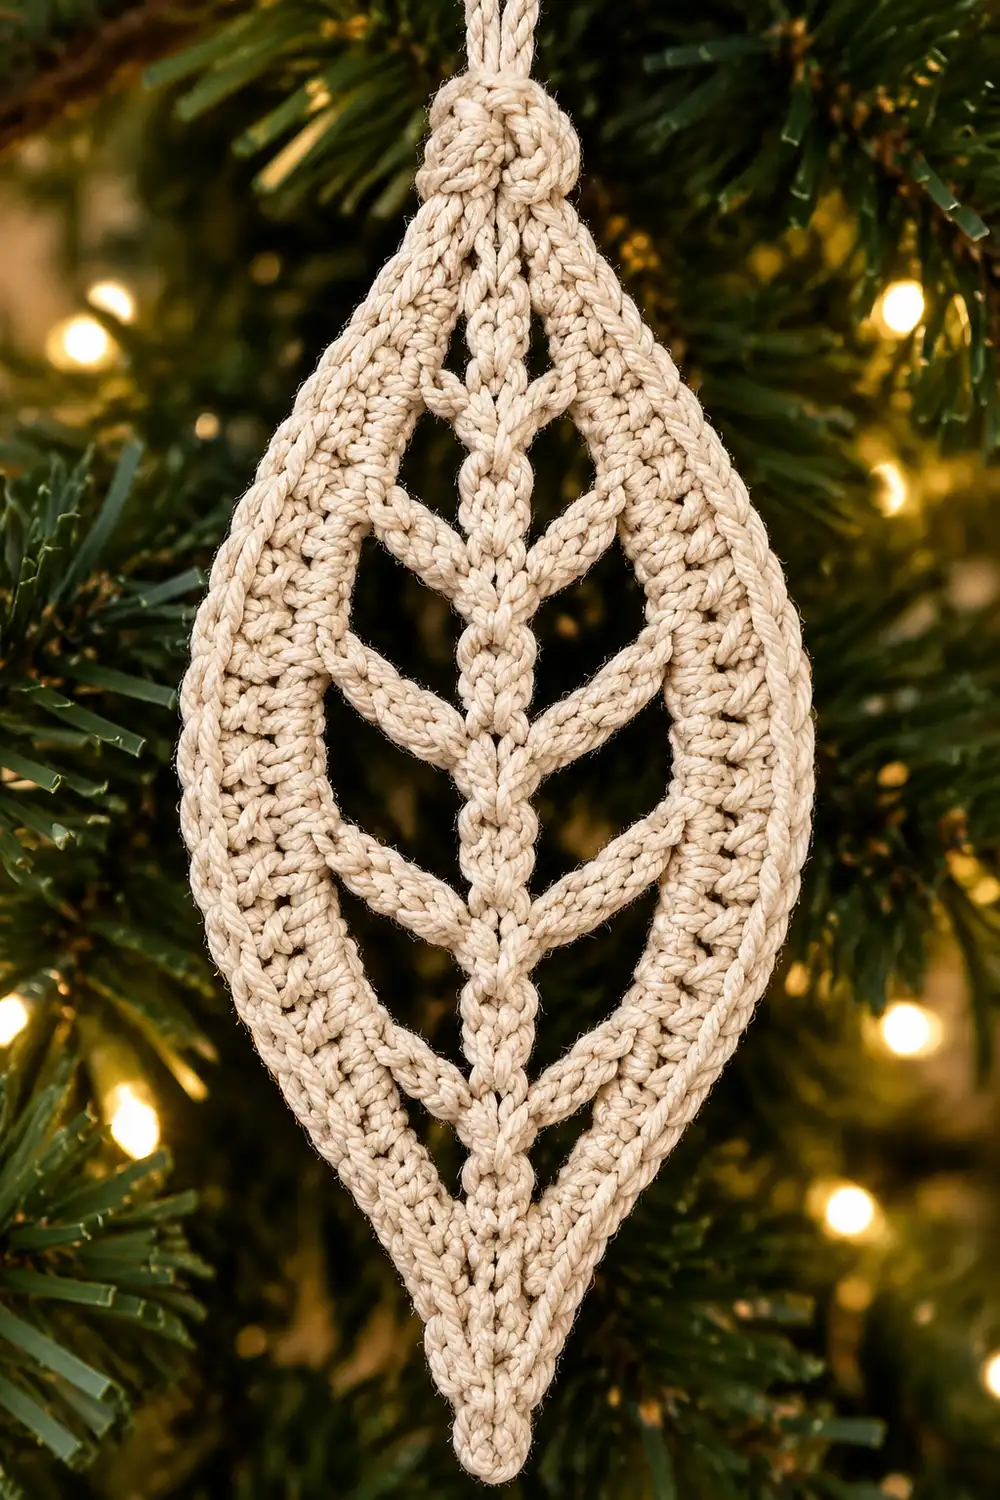
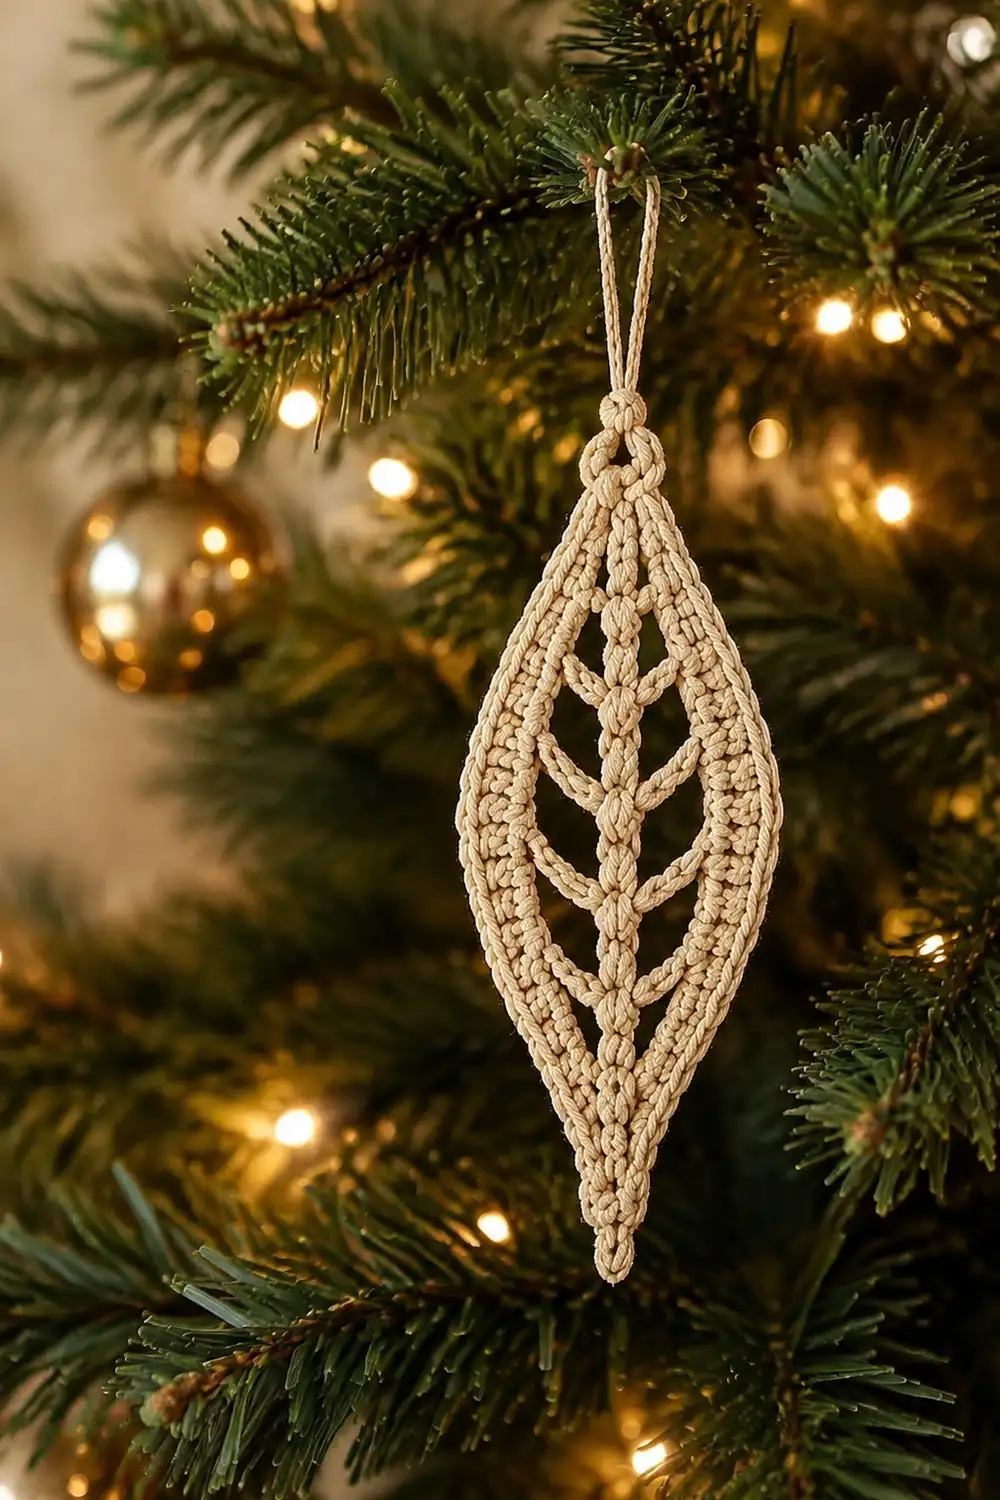
This ornament is a single lacy leaf in soft cream yarn. It has an elongated teardrop shape with a pointed top and bottom. A chain spine runs down the center, and delicate veins branch out from it on both sides, leaving plenty of open space between them.
The style is quiet and classic. One neutral color lets the openwork show against evergreen branches and warm string lights. A smooth single crochet border outlines the silhouette and sharpens both points. A twisted yarn loop at the crown makes it ready to hang.
The pattern uses US crochet terms. The finished ornament measures 4 in (10.2 cm) long and 2 in (5.1 cm) wide, not counting the hanging loop.
You make it in one piece without fastening off between stages. First you crochet the spine. Next you work a round of frame chains, adding veins that anchor into the spine. Then you build a stitch band over the frame chains and finish with a single crochet border. A separate twisted cord becomes the hanger.
Finished Size and Construction
- Finished size: 4 in (10.2 cm) long × 2 in (5.1 cm) wide
- Hanging loop: about 3 in (7.6 cm), added separately
- Skill level: Intermediate (openwork, working into chains)
- Terminology: US crochet terms
- Yarn weight: Sport (#2) mercerized cotton
- Hook: 2.75 mm (US C-2)
- Number of pieces: 1 ornament plus 1 twisted cord
- Layout: A central spine with 4 veins on each side, inside a teardrop frame
- Size before border: 3.7 in (9.4 cm) long × 1.75 in (4.4 cm) wide
- Border depth: 1 round of sc, about 1/8 in (0.3 cm) on every edge
Materials
Yarn advice: Mercerized cotton gives the best stitch definition and holds the sharp points well. A soft acrylic will work, but the veins will relax more, so plan to use stiffener.
- Cream / off-white: about 3 g / 10 m (10.9 yd)
This quantity includes a margin for the gauge check and the 20 in (50.8 cm) strand for the hanging cord.
Tools:
– 2.75 mm (US C-2) crochet hook
– Tapestry needle
– Scissors
– 2 stitch markers
– Blocking mat, rust-proof pins and a spray bottle
– Optional: fabric stiffener or spray starch
Abbreviations (US Terms)
- ch – chain
- sl st – slip stitch
- sc – single crochet
- hdc – half double crochet
- st(s) – stitch(es)
- sp – space
- BB – back bump of a chain
Special stitch – Vein-3 / Vein-4: Ch 3 (or 4). Sl st in the indicated spine st. Then sl st in the BB of each of the 3 (or 4) ch you just made, working back toward the frame. The hook ends at the outer point of the frame, ready to continue.
Veins are not counted as frame stitches. You never work into them in later rounds.
Gauge and Checkpoints
Gauge: 12 sc = 2 in (5.1 cm) with a 2.75 mm hook. This equals 6 sc per 1 in (2.5 cm). Chains and sl sts should match that 6-per-inch rate.
Test one piece first. Your first ornament is your real gauge test. Check it at each stage:
- Spine: 20 sl sts measure 3.3 in (8.4 cm). The acceptable range is 3.1–3.5 in (7.9–8.9 cm).
- After Round 2: 3.7 in (9.4 cm) long × 1.75 in (4.4 cm) wide, lightly patted flat. Acceptable range: 3.6–3.8 in (9.1–9.7 cm) long and 1.6–1.9 in (4.1–4.8 cm) wide.
- After Round 3: 4 in (10.2 cm) × 2 in (5.1 cm). Acceptable range: 3.9–4.1 in (9.9–10.4 cm) long and 1.9–2.1 in (4.8–5.3 cm) wide.
If your piece is too big, go down to a 2.5 mm hook, or tighten your chains. If it is too small, go up to a 3.0 mm hook. Change hooks and restart from the spine. Size errors at the spine carry through every later round.
Part 1: The Spine
Ch 21.
Spine row: Sl st in the BB of the 2nd ch from hook and in the BB of each ch across. You will have 20 sl sts. Do not fasten off.
The hook is now at the bottom tip, which is the slipknot end. The skipped chain at the opposite end is the top tip.
Number the spine sts from the bottom up. St 1 is the last sl st you made, and st 20 is the first. If you like, place markers in sts 4, 8, 12 and 16.
The spine has two edges:
– Side A edge: the top loops of the sl sts
– Side B edge: the unused V loops of the foundation chain on the opposite edge
Working the chain back with sl sts keeps the spine firm and straight. A bare chain would stretch when you block.
Checkpoint: The spine measures 3.3 in (8.4 cm).
Part 2: Round 1 – Frame Chains and Veins
In this round you build the outline of the leaf as chain segments. A vein runs back to the spine between each pair of segments.
Round 1:
- Bottom tip. Ch 1, sc in the last sl st made. This is the bottom tip sc. Place a marker in it.
- Side A (working up the spine, anchoring into the Side A edge):
- Ch 6, then work Vein-3 into spine st 4.
- Ch 4, then work Vein-4 into st 8.
- Ch 4, then work Vein-4 into st 12.
- Ch 4, then work Vein-3 into st 16.
- Ch 6, then sc in the skipped ch at the top of the spine. This is the top tip sc. Place a marker in it.
- Side B (working down, anchoring into the Side B edge):
- Ch 6, then work Vein-3 into st 16.
- Ch 4, then work Vein-4 into st 12.
- Ch 4, then work Vein-4 into st 8.
- Ch 4, then work Vein-3 into st 4.
- Ch 6, then sl st in the bottom tip sc to join.
Count: You now have 2 tip sc and 48 frame ch, which is 24 per side (6 + 4 + 4 + 4 + 6). You also have 8 veins, 4 per side.
Both sides use the same segment lengths in mirror order. That keeps the leaf symmetrical across the spine. The middle veins are longer (4 ch) than the end veins (3 ch). This makes the leaf widest at its center and narrower toward the tips.
Tip: Frame chains are the ones with no sl sts worked along them. Vein chains have a sl st in every ch.
Part 3: Round 2 – Frame Band
This round covers the frame chains with stitches to form the solid outer band. It is a conversion round: you work one stitch into each existing frame stitch, plus a few extra at the tips.
Round 2:
- Ch 1. In the bottom tip sc, work (sc, ch 2, sc).
- Side A: Working into the frame ch only (skip all vein ch), sc in the next 3 ch, hdc in the next 18 ch, and sc in the next 3 ch.
- In the top tip sc, work (sc, ch 2, sc).
- Side B: sc in the next 3 ch, hdc in the next 18 ch, and sc in the next 3 ch.
- Sl st in the first sc to join.
Count: 52 sts plus 2 ch-2 tip sps.
Here is how the count works:
– 50 existing sts (48 frame ch + 2 tip sc) × 1 st each = 50
– Plus 1 extra sc at each tip (2 tips) = 2
– Total = 52 sts
Each side has 26 sts between the two tip spaces: 1 tip sc + 3 sc + 18 hdc + 3 sc + 1 tip sc. Because 2 × 26 = 52, the count checks out.
Using sc near the tips and hdc along the middle keeps the points slim while the band stays fuller at the widest part.
As you work over each vein junction, the stitches enclose it. This locks the veins in place.
Checkpoint: 3.7 in (9.4 cm) × 1.75 in (4.4 cm).
Border
Border gauge: The border uses the same gauge as the frame band, 6 sc per 1 in (2.5 cm). Do not change hooks.
Round 3 (sc border):
- Ch 1, sc in the same st as the join.
- In the bottom tip ch-2 sp, work (sc, ch 2, sc).
- Sc in the next 26 sts.
- In the top tip ch-2 sp, work (sc, ch 2, sc).
- Sc in the next 25 sts.
- Sl st in the first sc to join.
Count: 56 sc plus 2 ch-2 tip sps.
Here is how the count works:
– 52 existing sts × 1 sc each = 52
– Plus 2 sc worked into each of the 2 tip spaces = 4
– Total = 56 sc
Per side: Each side has 28 sc between the tip spaces.
– Side A: 1 + 26 + 1 = 28
– Side B: 1 (after the top tip) + 25 + 1 (first sc of the round) + 1 (sc before the bottom tip space) = 28
Because 2 × 28 = 56, the count checks out.
Why the math works: Adding a band 1/8 in (0.3 cm) deep around a closed outline lengthens it by about 2π × 1/8 in. That is roughly 0.8 in (2.0 cm), or about 5 sts at 6 sc per inch. The 4 extra sc and 2 ch-2 sps at the tips supply exactly that amount. All of the extra is placed at the points, where the curve turns sharply. Along the sides, the edge stays one-to-one, so it lies flat without ruffling or cupping.
Fasten off, leaving a 6 in (15.2 cm) tail. Weave in all ends along the frame band, not through the veins, so they stay invisible.
Checkpoint: 4 in (10.2 cm) × 2 in (5.1 cm).
Hanging Loop (Twisted Cord)
- Cut one 20 in (50.8 cm) strand. Hold one end, or anchor it under a heavy object.
- Twist the strand in one direction until it kinks back on itself.
- Fold it in half and let it twist together. You will have a cord about 8 in (20.3 cm) long.
- Thread both cut ends through the top tip ch-2 sp, from front to back.
- Tie an overhand knot close to the tip. Trim the ends to 1/2 in (1.3 cm) and tuck them behind the knot.
The finished loop hangs about 3 in (7.6 cm) above the crown.
Optional: Wrap a short tail of yarn several times around the cord just above the knot, then secure it with the needle. This gives a neat collar.
Final Blocking
- Mist the ornament until it is evenly damp, or soak it briefly and press out the water in a towel.
- Lay it right side up on the blocking mat.
- Pin the spine straight, with one pin just beyond each end.
- Pin the bottom and top tips into sharp points, through the ch-2 sps.
- Pin the widest point of each side so the total width is 2 in (5.1 cm).
- Ease each vein into a straight line and pin the outer point of each vein. This opens the negative spaces evenly.
- Check that the length is 4 in (10.2 cm). Adjust the tip pins if needed.
- Optional: Brush on fabric stiffener or spray starch while the piece is pinned.
- Let it dry completely before you unpin it. Pin the cord straight beside the ornament if it also needs to dry.
Final Quality-Control Checklist
- [ ] The spine has 20 sl sts and is straight.
- [ ] Each side has 4 veins, anchored at spine sts 4, 8, 12 and 16.
- [ ] Round 2 has 52 sts, 26 per side, plus 2 ch-2 tip sps.
- [ ] Round 3 has 56 sc, 28 per side, plus 2 ch-2 tip sps.
- [ ] Both tips are sharp and centered on the spine.
- [ ] The finished size is 4 in (10.2 cm) × 2 in (5.1 cm), within tolerance.
- [ ] All ends are woven into the frame band.
- [ ] The hanging loop is secure and about 3 in (7.6 cm) long.
Troubleshooting
The spine curves. The foundation chain is tighter than the sl sts. Make the starting chain with a hook one size larger, then switch back.
The veins look loose or twisted. Work the return sl sts firmly into the back bumps only. Let each chain lie flat before you anchor it.
The edge ruffles. You have too many sts or your tension is too loose. Recount Rounds 2 and 3, or go down a hook size.
The edge cups inward. The border is too tight. Relax your tension on Round 3, and check that each tip has its full (sc, ch 2, sc).
The tips look rounded. Make sure you used ch 2 at both tips in Rounds 2 and 3. Pin firmly through the ch-2 sps when blocking.
The ornament is lopsided. Check that each side’s frame chains follow 6-4-4-4-6 in mirror order and that the veins land in the correct spine sts.
The veins sag after hanging. Re-block with stiffener.
Care
Spot clean or hand wash in cool water. Reshape, pin, and dry flat. Store flat in tissue paper so the points stay crisp; stiffened ornaments should be spot cleaned only.
Final Notes
Here is the measurement chain from start to finish:
– Spine: 20 sl sts, 3.3 in (8.4 cm)
– After Round 2: 52 sts, 3.7 in (9.4 cm) × 1.75 in (4.4 cm)
– After Round 3: 56 sc, 4 in (10.2 cm) × 2 in (5.1 cm)
– Hanging loop: about 3 in (7.6 cm)
If each checkpoint matches, the next stage will too.
Optional: Once your first leaf is right, you can make a few more and hang them along a garland. Each one is still worked exactly as written above.
Happy crocheting!