

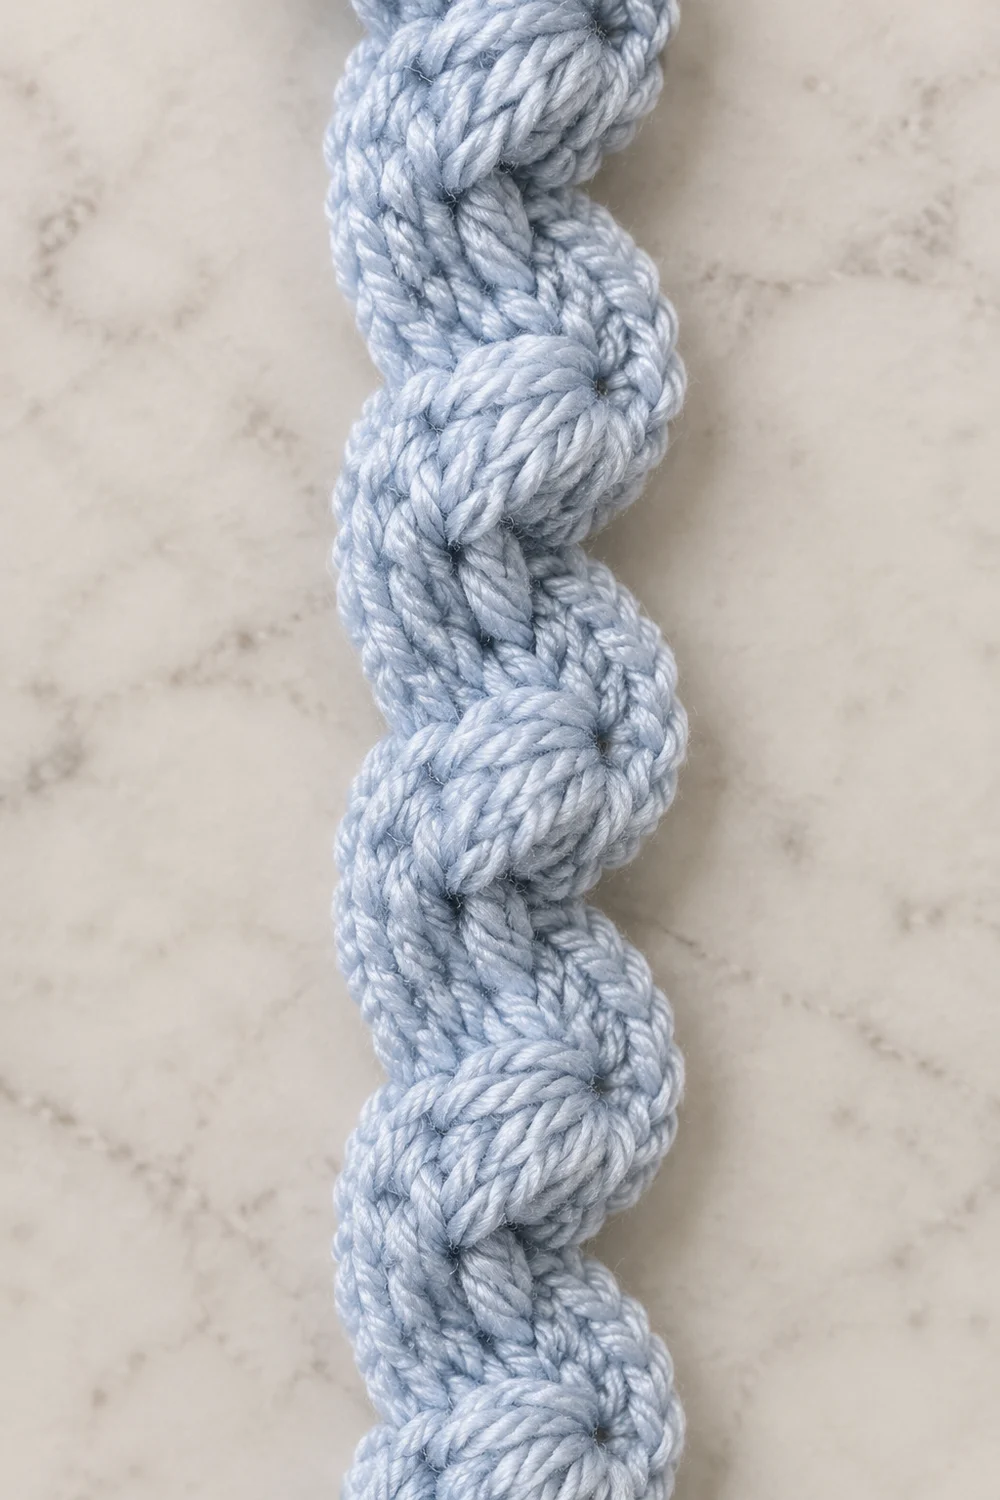
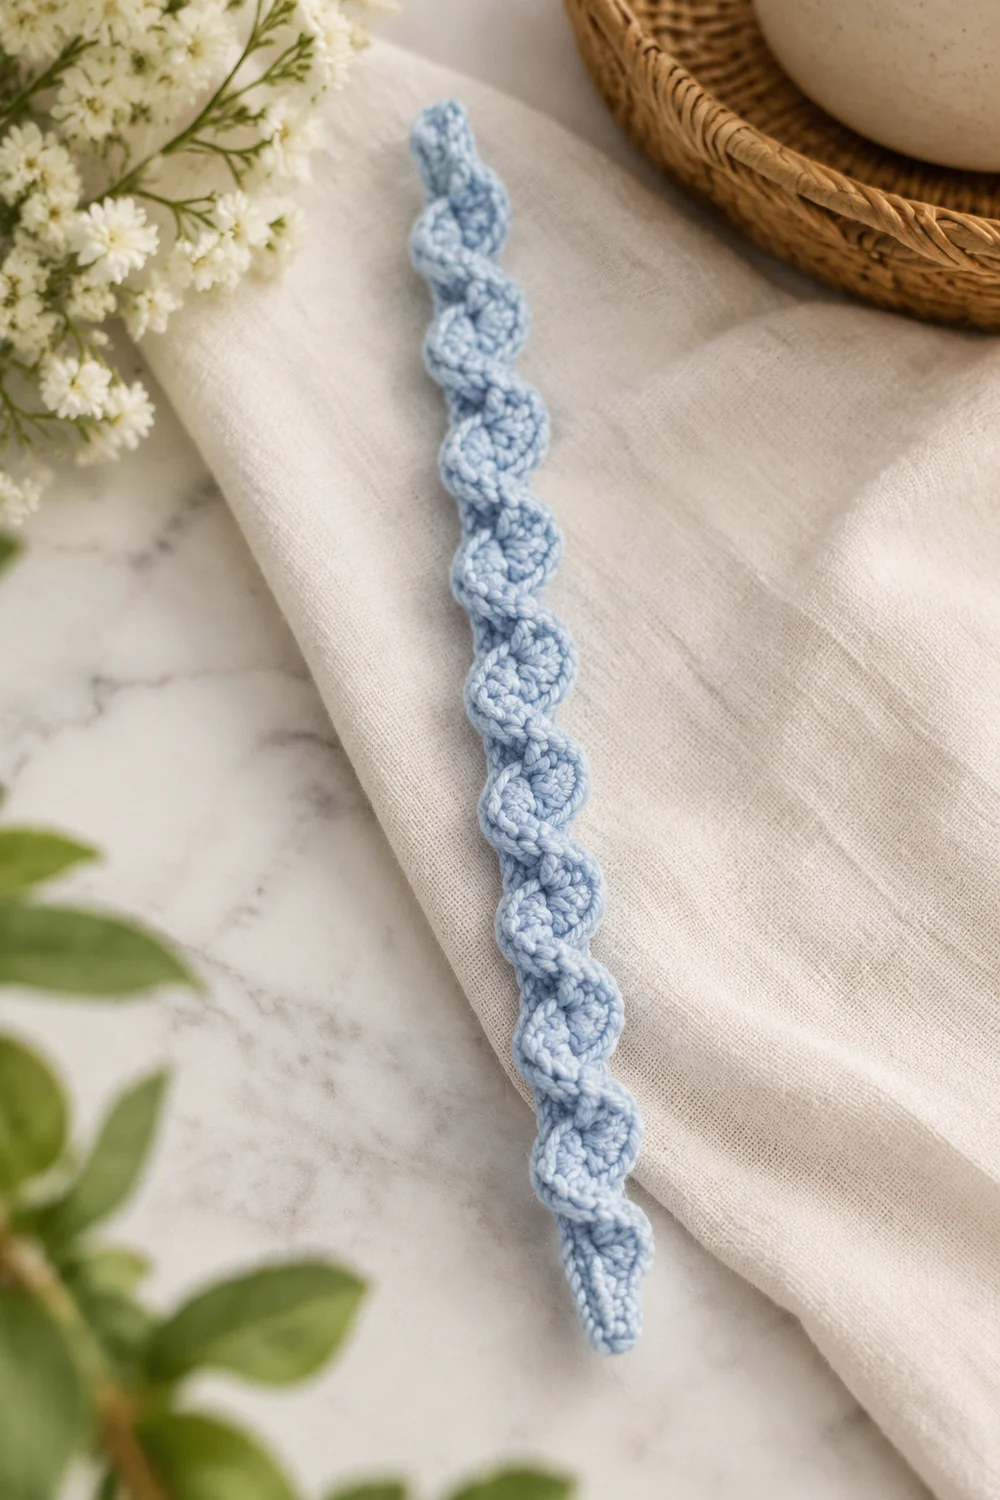
This Frosty Popcorn Trim is a small, single crocheted strip worked in light blue yarn. A column of small popcorn clusters runs down the center of the strip, spaced evenly along its length. The bumps create a dimensional surface, and a smooth, tight edge frames the texture.
The look is soft and wintry. A pale blue or blue-gray yarn shows off the popcorns without hiding them. The surrounding fabric is plain single crochet, so the clusters stand out clearly. The edge is a single crochet round followed by a slip stitch round. Together they keep the strip flat and structured.
This pattern uses US crochet terms. The finished strip measures 1.75 in (4.4 cm) wide by 4.5 in (11.4 cm) long after blocking.
Construction overview: You work the strip flat in short rows of 5 stitches. A popcorn goes in the center stitch of every fourth row, for 4 popcorns in total. Then you work one round of single crochet around all four edges, with 3 sc in each corner. You finish with one round of slip stitches for a crisp outline.
Finished Size and Construction
- Finished size: 1.75 in x 4.5 in (4.4 cm x 11.4 cm)
- Skill level: Easy (advanced beginner)
- Terminology: US crochet terms
- Yarn weight: Worsted (#4)
- Hook: 5.0 mm (H-8)
- Number of pieces: 1
- Layout: Single vertical strip with one centered column of 4 popcorns
- Piece size (body): 5 stitches wide x 17 rows long
- Size before border: 1.25 in x 4 in (3.2 cm x 10.2 cm)
- Border depth: 0.25 in (0.6 cm) on every side (1 round sc + 1 round sl st)
Materials
Yarn: Use a smooth worsted-weight (#4) yarn in light blue or pale blue-gray. A plied acrylic or cotton-acrylic blend gives clear stitch definition, and the popcorns hold their shape well in it. Avoid fuzzy or very splitty yarns. They blur the clusters and make the popcorn closure harder to see.
- Light blue (main color): 15 g, about 28 m
Tools:
- 5.0 mm (H-8) crochet hook
- Tapestry needle
- Scissors
- Ruler or tape measure
- Rust-proof pins and a blocking surface (foam board or folded towel)
- Spray bottle or steam iron (for blocking)
Note: The quantity above includes a comfortable margin. The strip itself uses about 10 g (roughly 19 m). The extra covers your swatch, tails, and any frogging.
Abbreviations (US Terms)
- ch – chain
- sc – single crochet
- dc – double crochet
- sl st – slip stitch
- st(s) – stitch(es)
- RS – right side
- WS – wrong side
- pc – popcorn (see below)
Special stitch – Popcorn (pc): Work 4 dc in the same stitch. Drop the loop from your hook. Insert the hook from front to back into the top of the first dc of the group. Pick up the dropped loop and pull it through. Ch 1 to close. The closing ch 1 does not count as an extra stitch. One popcorn counts as 1 stitch.
Insert the hook from front to back so the popcorn pops toward you, onto the RS. All popcorns in this pattern are worked on RS rows.
Gauge and Checkpoints
The strip is small, so the strip itself serves as your gauge piece. Work Rows 1–8, then measure before continuing.
Body gauge: 4 sc = 1 in (2.5 cm) across. 17 rows = 4 in (10.2 cm) in pattern.
Popcorn rows sit a little taller than plain sc rows, so measure the row gauge over the popcorn pattern, not over plain sc alone.
Checkpoints:
- After Row 2: Width is 1.25 in (3.2 cm).
- After Row 8: Length is about 1.9 in (4.8 cm). Two popcorns are visible, both centered.
- After Row 17: The body measures 1.25 in x 4 in (3.2 cm x 10.2 cm).
- After the border: The strip measures 1.75 in x 4.5 in (4.4 cm x 11.4 cm), before or after light blocking.
If your piece is too big: Go down to a 4.5 mm hook and restart.
If your piece is too small: Go up to a 5.5 mm hook and restart.
A difference of 0.25 in (0.6 cm) in width at Row 2 is worth fixing. Over the full border, it grows to a noticeable change in proportions.
Pattern: Strip Body
Turning ch 1 does not count as a stitch throughout.
Foundation: Ch 6.
Row 1 (RS): Sc in 2nd ch from hook and in each ch across. Turn. (5 sc)
Row 2 (WS): Ch 1, sc in each st across. Turn. (5 sc)
Row 3 (RS – popcorn row): Ch 1, sc in first 2 sts, pc in next st, sc in last 2 sts. Turn. (5 sts: 4 sc + 1 pc)
Row 4 (WS): Ch 1, sc in each st across. Work into the closing ch at the top of the popcorn, and count it as 1 stitch. Turn. (5 sc)
Check that the popcorn sits on the RS, facing away from you as you work this row.
Row 5 (RS): Ch 1, sc in each st across. Turn. (5 sc)
Row 6 (WS): Ch 1, sc in each st across. Turn. (5 sc)
Rows 7–14: Repeat Rows 3–6 twice more. Popcorns now sit on Rows 3, 7, and 11. (5 sts per row)
Row 15 (RS – popcorn row): Work as Row 3. (5 sts: 4 sc + 1 pc)
Row 16 (WS): Work as Row 4. (5 sc)
Row 17 (RS): Ch 1, sc in each st across. Do not turn and do not fasten off. (5 sc)
Body summary: 17 rows of 5 stitches each. Four popcorns sit on Rows 3, 7, 11, and 15, which places them 4 rows apart, about 1 in (2.5 cm). There are 2 plain rows before the first popcorn and 2 plain rows after the last, so the column is centered top to bottom. With 2 sc on each side of every popcorn, it is also centered side to side.
Checkpoint: The body should measure 1.25 in x 4 in (3.2 cm x 10.2 cm).
Border
Border gauge: The border is worked 1 sc per stitch along the short edges and 1 sc per row-end along the long edges.
- Short edges: 5 sc over 1.25 in, which is 4 sc/in. This matches the body.
- Long edges: 17 sc over 4 in, which is 4.25 sc/in. This is slightly denser than the body’s 4 sc/in.
That slight extra density along the long edges is intentional. It firms up the sides, keeps the edge tight and smooth, and prevents rippling.
Per-side counts (corner center stitches included):
- Long side: 17 positions, one per row. The corner centers sit at the row-ends of Row 1 and Row 17.
- Short side: 5 positions, one per stitch or foundation ch. The corner centers are the first and last stitches.
Each corner center stitch is shared by two adjacent sides.
Round 1 (RS) – Single Crochet
Continue from the end of Row 17. Ch 1 and rotate the piece to work down the long edge.
- Sc in the row-end of Rows 16 through 2. (15 sc)
- 3 sc in the base of the first st of Row 1 (bottom corner). (3 sc)
- Working into the remaining loops of the foundation chain, sc in each of the next 3 chs. (3 sc)
- 3 sc in the last foundation ch (bottom corner). (3 sc)
- Working up the other long edge, sc in the row-end of Rows 2 through 16. (15 sc)
- 3 sc in the first st of Row 17 (top corner). (3 sc)
- Sc in each of the next 3 sts of Row 17. (3 sc)
- 3 sc in the last st of Row 17 (top corner). (3 sc)
Join with sl st to the first sc. (48 sc)
Why the math works: This is a conversion round. It places 1 sc into each existing edge position, plus extra stitches at the corners. It is not a growth round continuing the body’s pattern.
- Edge positions: 2 long sides x 17 + 2 short sides x 5 = 44. Subtract the 4 shared corner centers counted twice, which gives 40 positions, each receiving 1 sc.
- Corner extras: Each corner gets 3 sc instead of 1, adding 2 extra sc per corner. That is 4 corners x 2 = 8.
- Total: 40 + 8 = 48 sc.
You can also check it by section: 15 + 3 + 3 + 3 + 15 + 3 + 3 + 3 = 48.
After Round 1, per side between corner groups:
- Long sides: 15 sc each
- Short sides: 3 sc each
- Corners: 4 groups of 3 sc
Round 2 (RS) – Slip Stitch Edge
Ch 1 (does not count). Sl st in each sc around, including each of the 3 corner sc. Join with sl st to the first sl st. (48 sl st)
Fasten off.
This is a 1-to-1 trim round, so it adds no stitches: 48 sc become 48 sl st. Keep your slip stitches snug but not strangling. Too tight and the long edges will pull in and cup. Too loose and the outline looks sloppy. If you tend to slip stitch tightly, go up 0.5 mm for this round only.
Checkpoint: The strip should measure about 1.75 in x 4.5 in (4.4 cm x 11.4 cm). The border adds 0.25 in (0.6 cm) on each side: 1.25 + 0.5 = 1.75 in wide, and 4 + 0.5 = 4.5 in long.
Final Blocking
- Weave in ends. Run each tail through the border stitches on the WS for at least 1 in (2.5 cm). Then reverse direction for a few stitches and trim.
- Dampen. Lightly mist the strip with water until it is evenly damp, not soaked. For acrylic, you can instead hover a steam iron about 0.5 in (1.3 cm) above the fabric. Never press it directly.
- Shape. Lay the strip RS up. Gently ease it to 1.75 in x 4.5 in (4.4 cm x 11.4 cm).
- Pin the edges only. Pin the four corners first, then the midpoint of each long side. Keep pins in the border, not in the body.
- Protect the popcorns. Do not flatten the center column. Pinch each popcorn gently from the sides so it stands up and stays round.
- Dry fully. Leave the strip pinned until completely dry, usually a few hours.
- Re-measure. Unpin and confirm the final size.
Final Quality-Control Checklist
- [ ] The body has 17 rows of 5 stitches each.
- [ ] There are exactly 4 popcorns, on Rows 3, 7, 11, and 15.
- [ ] Every popcorn is centered, with 2 sc on each side.
- [ ] All popcorns pop toward the RS.
- [ ] Round 1 has 48 sc, with 3 sc at each corner.
- [ ] Round 2 has 48 sl st, worked 1 per sc.
- [ ] The long edges are straight, with no rippling or cupping.
- [ ] The corners are square and lie flat.
- [ ] The finished size is 1.75 in x 4.5 in (4.4 cm x 11.4 cm).
- [ ] All ends are woven in securely and invisibly.
Troubleshooting
The popcorns are on the wrong side. You likely inserted the hook from back to front when closing them, or worked them on WS rows. Close every popcorn front to back, and work popcorns on RS (odd-numbered) rows only.
The popcorns look flat or loose. Pull the dropped loop through firmly before the closing ch 1. You can also try a hook 0.5 mm smaller for the 4 dc only.
The strip gets wider after popcorn rows. You may be working an extra sc into the closing ch and the popcorn top separately. Treat the popcorn as exactly 1 stitch on the following row.
The long edges ripple. You worked more than 1 sc per row-end. Each long edge needs exactly 15 sc between the corner groups.
The long edges pull in or cup. Either your border sc are too tight or you skipped row-ends. Recount for 15 sc per long side, and loosen your Round 2 slip stitches.
The corners are rounded instead of square. Make sure all 3 corner sc go into a single corner stitch, not spread across two.
The finished length is under 4.5 in (11.4 cm). Your row gauge is tight. Remake the strip with a hook 0.5 mm larger rather than stretching it during blocking.
Optional: For a longer trim, add extra 4-row repeats (Rows 3–6) before Row 15. Each repeat adds 4 sc to each long side of the border, which adds 8 sc to the Round 1 total.
Care
Hand wash in cool water with mild soap and press out the water in a towel. Reshape the strip and lay it flat to dry, pinching the popcorns back into shape while damp.
Final Notes
Here is the measurement chain from start to finish:
- Foundation and width: A foundation ch of 6 gives 5 sc at 4 sc/in, a width of 1.25 in (3.2 cm).
- Body length: Seventeen rows in pattern give a body length of 4 in (10.2 cm). Four centered popcorns sit about 1 in (2.5 cm) apart.
- Round 1: This border round converts 40 edge positions plus 8 corner extras into 48 sc.
- Round 2: This round trims those 48 sc into 48 slip stitches for a smooth, tight outline.
- Finished size: The border adds 0.25 in (0.6 cm) per side, bringing the strip to 1.75 in x 4.5 in (4.4 cm x 11.4 cm).
If you check your size at Row 2, Row 8, Row 17, and after the border, the finished trim will come out right. Happy crocheting!