

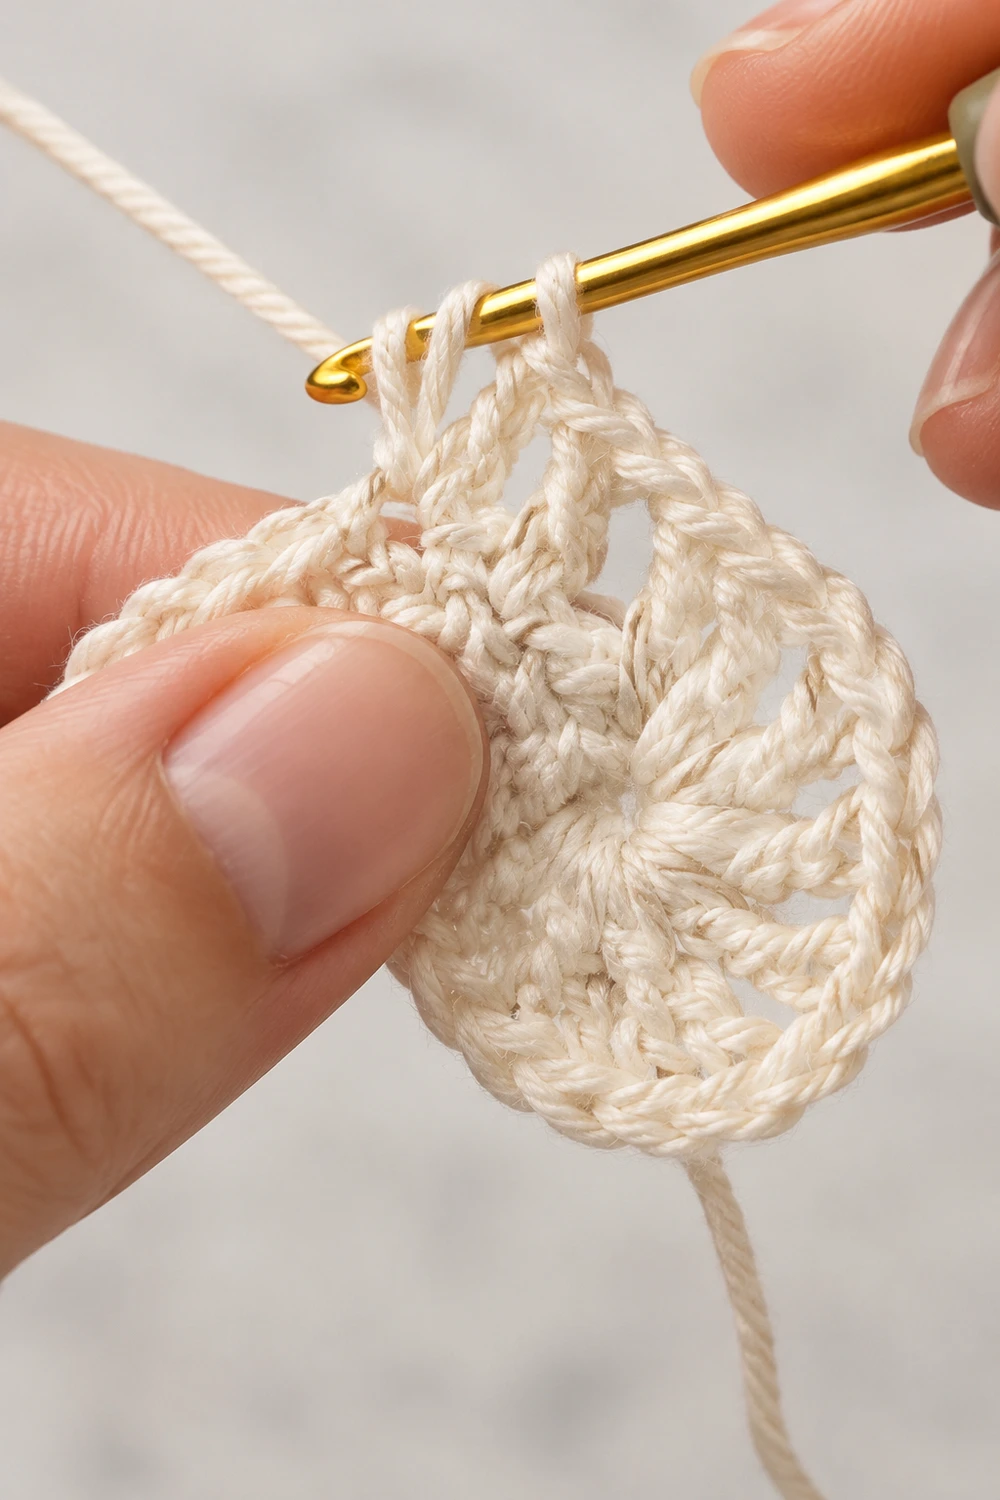
This little motif is a dense, textured teardrop worked in cream cotton. It is small enough to sit on a fingertip, and its surface has a bumpy, nubbly look that comes from tight single crochet rows. The finished shape is a slightly domed pod, rounded at the bottom and tapered to a point at the top.
The color is a single soft cream or off-white. The style is quiet and natural, and plain stitches show the texture best. The piece in the photo is shown mid-construction, with the working yarn still attached and a gold hook in the last loops. This pattern takes you from that first chain to the finished, blocked pod.
All instructions use US crochet terms. The finished motif measures 1.25 in wide x 1.5 in tall (3.2 x 3.8 cm).
Construction is simple. You work flat rows of single crochet from the rounded bottom up to the point. Increases build the curve and decreases shape the tip. Then you add a two-round edging around the whole piece. The firm slip-stitch edge and a quick shaped blocking give the pod its gentle three-dimensional curve.
Finished Size and Construction
- Finished size: 1.25 in wide x 1.5 in tall (3.2 x 3.8 cm)
- Skill level: Easy (confident beginner)
- Terminology: US crochet terms
- Yarn weight: Fine / sport (#2) mercerized or matte cotton
- Hook: 2.5 mm
- Number of pieces: 1
- Layout: Single standalone motif, point at top
- Piece size before border: 1.0 in wide x 1.25 in tall (2.5 x 3.2 cm)
- Border depth: 1/8 in (0.3 cm) on every edge
- Construction: Flat sc rows (10 rows), then 1 round of sc and 1 round of firm slip stitches
Materials
Yarn advice: Choose a smooth, tightly plied cotton in fine/sport weight (#2). Cotton holds the dense texture and keeps a crisp shape after blocking. Avoid fuzzy or very soft acrylic, because it blurs the nubbly surface and won’t hold the pod curve. A light cream shows stitch definition best, as in the photo.
Yarn quantity:
- Cream / off-white: 2 g (about 7 m)
The motif itself uses roughly 3 m. The quantity listed includes a generous margin for the starting tail, the ending tail, and one practice attempt.
Tools:
- 2.5 mm crochet hook (a smooth metal hook, like the gold one shown, glides well through tight cotton)
- 2.25 mm hook (backup, if your gauge runs large)
- Tapestry needle with a small eye
- Small scissors
- 1 removable stitch marker
- Ruler or small measuring tape with inch and cm markings
- Spray bottle with water
- Rounded shaping form, such as the back of a teaspoon bowl or a large marble
Abbreviations (US Terms)
- ch: chain
- sc: single crochet
- sl st: slip stitch
- st(s): stitch(es)
- BLO: back loop only
- RS: right side
- rep: repeat
Special stitches:
- sc2tog (single crochet 2 together): Insert hook in the next st, yarn over, pull up a loop (2 loops on hook). Insert hook in the following st, yarn over, pull up a loop (3 loops on hook). Yarn over and pull through all 3 loops. This turns 2 sts into 1.
- sc3tog (single crochet 3 together): Pull up a loop in each of the next 3 sts (4 loops on hook). Yarn over and pull through all 4 loops. This turns 3 sts into 1.
Note: The ch 1 at the start of each row is a turning chain only. It does not count as a stitch.
Gauge and Checkpoints
Body gauge: 7 sc and 8 rows = 1 in (2.5 cm) in flat sc rows, worked firmly.
The motif is tiny, so the motif itself is your gauge test. Work Rows 1 to 6 first, then measure before you continue.
Checkpoints:
- After Row 3: The piece is 7 sc wide and measures 1.0 in (2.5 cm) across.
- After Row 6: Width is still 1.0 in (2.5 cm). Height is 0.75 in (1.9 cm).
- After Row 10: Height is 1.25 in (3.2 cm) from the foundation chain to the tip.
- After the border: 1.25 in wide x 1.5 in tall (3.2 x 3.8 cm).
If your piece is too big: Pull the rows out and switch to a 2.25 mm hook. Also check that you are not adding a stitch at row ends. Each row should start and end with the exact counts given.
If your piece is too small: Relax your grip slightly, or try a 2.75 mm hook. Keep the stitches dense, though. Gaps between stitches will spoil the nubbly texture.
Small differences of 1/16 in (0.2 cm) are fine. A difference of 1/8 in (0.3 cm) or more will show in the final shape, so adjust before continuing.
Pattern: Teardrop Body
You work in flat rows from the rounded bottom up to the point. Leave a starting tail of about 6 in (15.2 cm).
Row 1: Ch 4. Sc in 2nd ch from hook and in each of the next 2 ch. (3 sc)
Row 2: Ch 1, turn. 2 sc in first st, sc in next st, 2 sc in last st. (5 sc)
Row 3: Ch 1, turn. 2 sc in first st, sc in each of next 3 sts, 2 sc in last st. (7 sc)
Checkpoint: width 1.0 in (2.5 cm).
Rows 1 to 3 form the rounded base. Each increase row adds 2 sts, one at each edge. That is why the bottom curves rather than squaring off.
Row 4: Ch 1, turn. Sc in each st across. (7 sc)
Row 5: Ch 1, turn. Sc in each st across. (7 sc)
Row 6: Ch 1, turn. Sc in each st across. (7 sc)
Checkpoint: width 1.0 in (2.5 cm), height 0.75 in (1.9 cm).
Rows 3 to 6 are the widest band of the teardrop. Placing the widest part in the lower half gives the classic drop or seed-pod silhouette.
Row 7: Ch 1, turn. Sc2tog, sc in each of next 3 sts, sc2tog. (5 sc)
Row 8: Ch 1, turn. Sc in each st across. (5 sc)
Row 9: Ch 1, turn. Sc2tog, sc in next st, sc2tog. (3 sc)
Row 10: Ch 1, turn. Sc3tog. (1 sc)
Checkpoint: height 1.25 in (3.2 cm).
The tapering rows lose 2 sts per decrease row and then close to a single stitch. This creates the pointed top. The plain row between decreases (Row 8) keeps the taper long and elegant instead of blunt.
Texture note: Turning every row means the front and back of the sc alternate on each face. This creates the bumpy, nubbly ridges you see in the photo. Keep your tension consistent so the bumps stay even.
Do not fasten off. The side facing you after Row 10 is the RS. Continue straight into the border.
Border
The border has two rounds. Round 1 tidies the edges and brings the motif to full size. Round 2 is a firm slip-stitch round that draws the edge in slightly so the dense center domes into a pod.
Border gauge: Along the side edges, Round 1 is worked as 1 sc per row end. That gives 8 sc/in along the sides, which is tighter than the body’s 7 sc/in. This is deliberate: each row is 1/8 in (0.3 cm) tall, so 1 sc per row end matches the side length exactly. Along the bottom, the border works 1 sc per foundation ch, at the body gauge of 7 sc/in.
Edge definitions for counting: Here, the “sides” are the row ends of Rows 1 to 9 only. The tip and the bottom are counted separately, so no stitch is counted twice.
Round 1 (sc): Ch 1. Work 3 sc in the top of the sc3tog just made. This is the tip, 3 sc. Place a marker in the center sc of these 3.
Rotate the piece to work down the first side. Sc in the row end of each of Rows 9 through 1 (9 sc).
Rotate to work along the bottom, into the remaining loops on the underside of the foundation chain. Sc in each of the 3 ch (3 sc).
Rotate to work up the second side. Sc in the row end of each of Rows 1 through 9 (9 sc).
Join with a sl st to the first sc of the round.
Counts per section, Round 1:
- Tip: 3 sc
- Side 1: 9 sc
- Bottom: 3 sc
- Side 2: 9 sc
- Total: 3 + 9 + 3 + 9 = 24 sc
Round 1 is a conversion round, not a growth round. It places 1 sc per existing row end or foundation ch (9 + 3 + 9 = 21). It then adds the tip turn, 3 sc worked into a single stitch (21 + 3 = 24).
Checkpoint: 1.25 in wide x 1.5 in tall (3.2 x 3.8 cm).
Round 2 (firm slip-stitch edge): Working in BLO, sl st in each st around. Keep the slip stitches snug, but loose enough to fit the hook through the next loop. (24 sl st)
Join with a sl st to the first sl st. Fasten off, leaving a 6 in (15.2 cm) tail.
Why the math works:
- Sides: Each side has 9 rows, and 9 rows at 8 rows/in = 1.125 in (2.9 cm). Nine sc worked at 8 sc/in also = 1.125 in (2.9 cm). The edge lies flat with no ruffling and no pulling.
- Bottom: The 3 foundation ch are worked 1:1, so the bottom keeps the body gauge.
- Tip: Working 3 sc into one stitch turns the point cleanly without a gap.
- Size: The sc round adds one stitch depth, 1/8 in (0.3 cm), to every edge. Width goes from 1.0 in to 1.25 in (2.5 to 3.2 cm), since two side edges add 1/4 in (0.6 cm). Height goes from 1.25 in to 1.5 in (3.2 to 3.8 cm) through the tip and bottom.
- Pod curve: Round 2 keeps the count at 24. Snug slip stitches are slightly shorter than the sc beneath them, so the edge draws in a little. The dense center then rises into a shallow dome.
Weave in both tails along the back of the edge, through the stitch posts. Trim close.
Final Blocking
Cotton responds well to light spray blocking, and this step sets the pod shape.
- Lay the motif RS down on a clean towel and mist it until damp but not dripping.
- Turn it RS up. Gently stretch it to 1.25 in x 1.5 in (3.2 x 3.8 cm) with your fingers.
- Pinch the tip between your thumb and finger to sharpen the point.
- Press the motif, RS up, over a rounded form, such as the back of a teaspoon bowl or a large marble. Smooth the edges down around the curve.
- Leave it on the form to dry completely, about 1 to 2 hours.
- Lift it off and check the dome. If it is too shallow, mist again and repeat over a smaller, rounder form.
Final Quality-Control Checklist
- [ ] Rows 1 to 10 counts: 3, 5, 7, 7, 7, 7, 5, 5, 3, 1
- [ ] Body before border measures 1.0 in x 1.25 in (2.5 x 3.2 cm)
- [ ] Border Round 1 has 24 sc: 3 tip, 9 per side, 3 bottom
- [ ] Border Round 2 has 24 sl st in BLO
- [ ] Finished size is 1.25 in x 1.5 in (3.2 x 3.8 cm)
- [ ] Tip is pointed, bottom is evenly rounded
- [ ] Texture is dense, with no visible gaps between stitches
- [ ] Center domes gently into a pod shape
- [ ] Tails are woven in and invisible from the RS
Troubleshooting
The bottom looks square. Check Rows 2 and 3. The increases must sit in the very first and very last stitch of each row.
Stitch counts keep growing. You are likely working into the turning ch 1. Skip it, because it is not a stitch.
The sides ruffle after Round 1. You worked more than 1 sc per row end. Rip back and work exactly 9 sc per side.
The edge cups too much or puckers. Your slip stitches are too tight. Redo Round 2 with a slightly looser pull, or use a hook one size larger for that round only.
The piece stays flat instead of doming. Tighten Round 2 slightly and repeat the blocking over a smaller rounded form.
The tip is blunt. Make sure Row 10 is a true sc3tog, not 3 separate stitches. Also check that all 3 tip sc in Round 1 go into that single stitch.
There are holes at the decreases. Pull each loop up snugly before finishing the sc2tog or sc3tog.
The texture looks flat and smooth. Make sure you turn at the end of every row. Working in the round in one direction removes the alternating ridges.
Care
Hand wash in cool water with mild soap and press out the water gently in a towel. Reshape over the rounded form and let it dry flat.
Final Notes
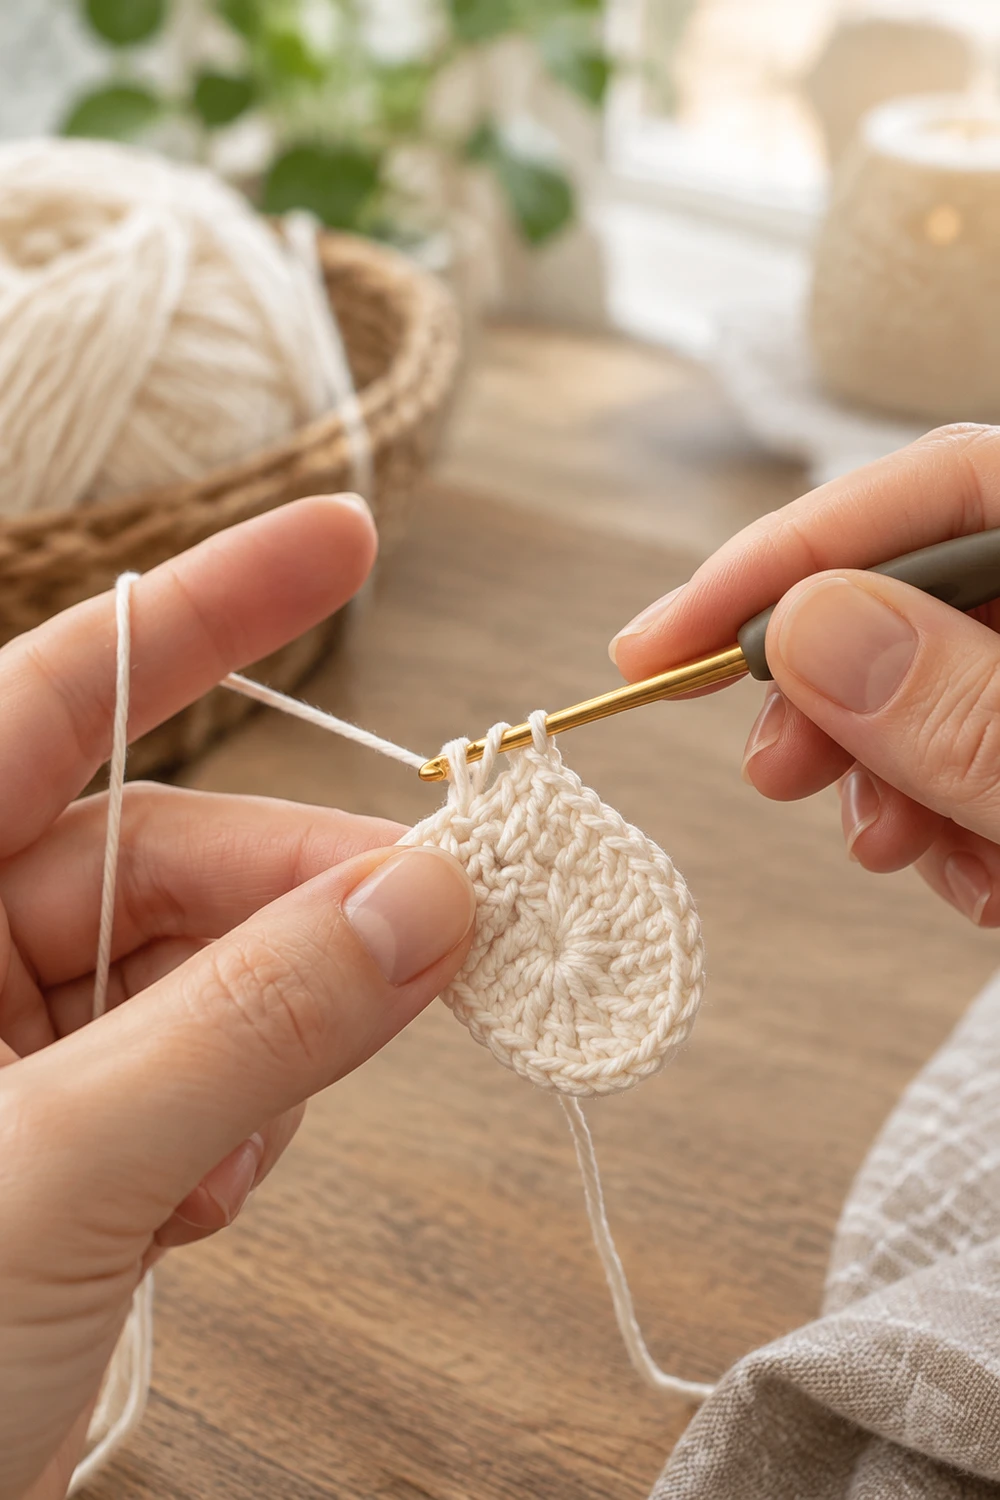
The whole motif follows one simple measurement chain. Body gauge is 7 sc and 8 rows = 1 in (2.5 cm). Seven sc across the widest rows gives 1.0 in (2.5 cm), and 10 rows gives 1.25 in (3.2 cm) of height. The sc border adds 1/8 in (0.3 cm) to every edge, at 1 sc per row end along the sides. That brings the finished teardrop to 1.25 in x 1.5 in (3.2 x 3.8 cm). The firm slip-stitch round and shaped blocking turn that flat teardrop into a small, dense pod.
Optional: If you enjoy the shape, you can make extra pods later using the same pattern. The pattern itself is complete as one single motif.
Happy crocheting!