

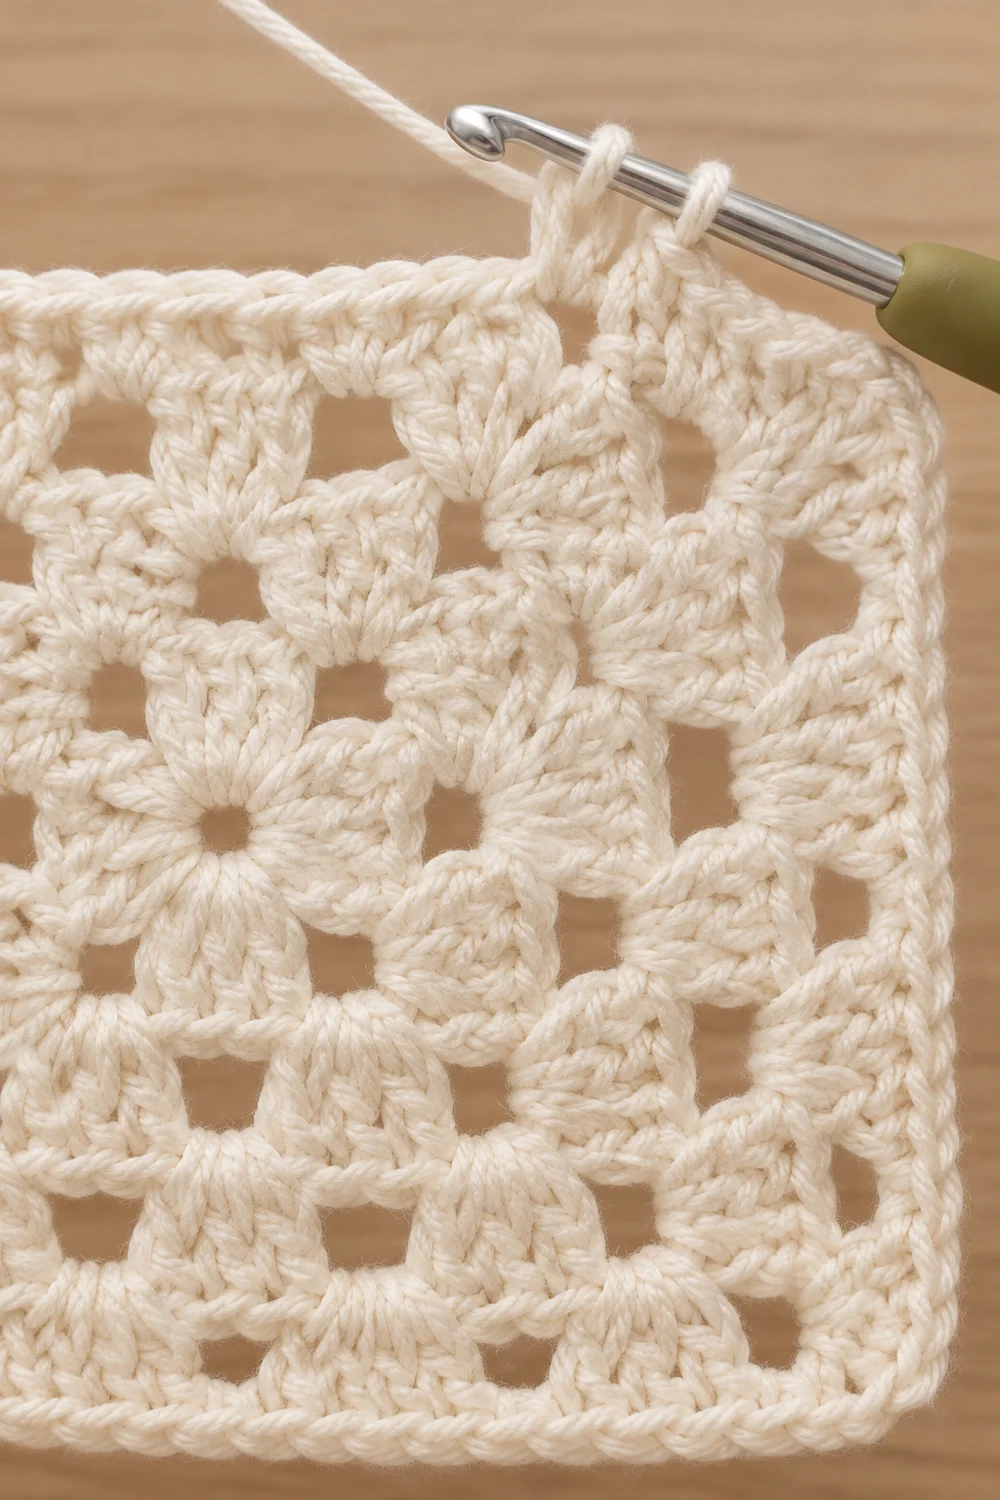
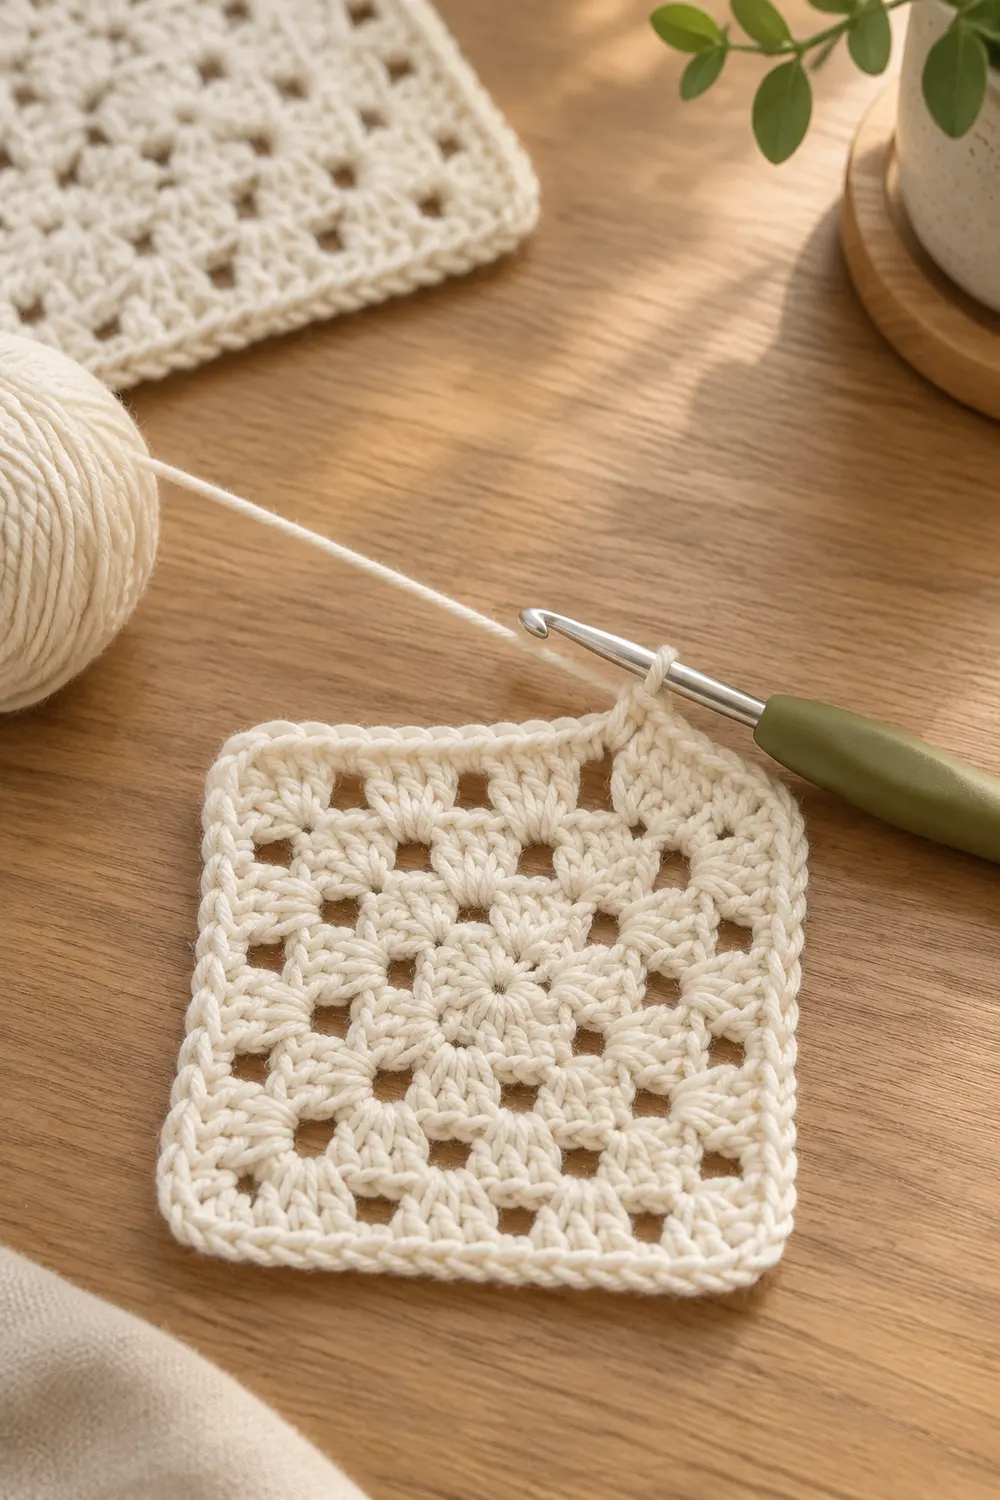
This is a small, airy granny square worked in a single soft cream shade. Clusters of three double crochets sit in neat rows, and the gaps between them form a regular grid of little open holes. The result is a light, mesh-like lace fabric that still holds a crisp square shape.
The style is quiet and minimal, with no color changes and no fussy textures. A smooth single crochet round and a slip stitch finish frame the lace, so the edges look tidy and calm.
The pattern uses US crochet terms throughout. The finished square measures 3.5 in (8.9 cm) on each side after blocking.
Construction is simple. You work 4 rounds of classic granny clusters in the round without turning, then add a 2-round border: 1 round of single crochet followed by 1 round of slip stitch. It is a single piece, worked from the center out, with no joining and no sewing.
Finished Size and Construction
- Finished size: 3.5 in x 3.5 in (8.9 cm x 8.9 cm), blocked
- Skill level: Easy
- Terminology: US crochet terms
- Yarn weight: DK / light (#3), cotton or cotton blend
- Hook: 4.0 mm (US G-6)
- Number of pieces: 1
- Layout: Single square, no assembly
- Piece size: 3.5 in (8.9 cm) square, including border
- Size before border: 3 in (7.6 cm) square, after Round 4
- Border depth: 0.25 in (0.6 cm) on each side (2 rounds)
Materials
Yarn advice: Choose a smooth, tightly plied DK cotton in cream, ivory, or off-white. Mercerized or combed cotton gives the clearest stitch definition and the sharpest holes. Avoid fuzzy or brushed yarns. They blur the open grid that gives this square its lace look.
Yarn quantity:
- Cream (Main Color): 8 g / 20 m
The square itself uses about 5 g / 12 m. The quantity above includes a margin for your gauge swatch, weaving in ends, and small tension differences.
Tools:
- 4.0 mm (US G-6) crochet hook
- Tapestry needle
- Scissors
- 1 stitch marker
- Ruler or tape measure
- Blocking mat and rust-proof pins
- Spray bottle with clean water
Abbreviations (US Terms)
- ch – chain
- sl st – slip stitch
- sc – single crochet
- dc – double crochet
- sp – space
- st(s) – stitch(es)
- rep – repeat
- [ ] – work the instructions inside the brackets as many times as stated
- * to ** – repeat marker range
Special stitch: Granny group. Work 3 dc into the same space. In this pattern, every group is worked into a space (a ring, a ch-1 sp, or a ch-2 sp), never into the top of a stitch.
Corner: (3 dc, ch 2, 3 dc) worked into the same ch-2 corner space.
Note: The ch 3 at the start of each round counts as the first dc of that round.
Gauge and Checkpoints
Exact gauge is not critical for a single motif, but size matters if you want a 3.5 in (8.9 cm) result. The fastest test is to work Rounds 1 and 2 first, then measure before you continue.
Measurement checkpoints (measured flat, unblocked, edge to edge through the center):
| Stage | Size |
|---|---|
| After Round 1 | 1.2 in (3.0 cm) |
| After Round 2 | 1.8 in (4.6 cm) |
| After Round 3 | 2.4 in (6.1 cm) |
| After Round 4 | 3 in (7.6 cm) |
| After Border | 3.5 in (8.9 cm) |
Each granny round adds about 0.6 in (1.5 cm) of width, which is roughly 0.3 in (0.8 cm) on each side.
If your square is too big: Go down to a 3.5 mm hook, or tighten the chains between groups. Loose ch-1 spaces are the most common cause of oversizing.
If your square is too small: Go up to a 4.5 mm hook. Also check that you are pulling the dc loops up to their full height.
A difference of 0.1 in (0.3 cm) at Round 2 is fine. Blocking will correct it.
Pattern: The Lace Granny Center
Work in the round with the right side facing you. Do not turn.
Start: Make a magic ring, or ch 4 and sl st to the first ch to form a ring.
Round 1: Ch 3 (counts as dc), 2 dc into ring, ch 2. [3 dc into ring, ch 2] 3 times. Sl st to top of beginning ch-3. If you used a magic ring, pull the tail firmly to close the center.
Count: 12 dc (4 granny groups), 4 ch-2 corner spaces.
Per side: 3 dc.
Round 2: Sl st in next 2 dc and into the ch-2 corner sp. Ch 3, (2 dc, ch 2, 3 dc) in same corner sp.
*Ch 1**, (3 dc, ch 2, 3 dc) in next corner sp. Rep from * 2 more times, then from * to ** once. Sl st to top of beginning ch-3.
Count: 24 dc (8 granny groups), 4 ch-2 corner sp, 4 ch-1 sp.
Per side: 6 dc, 1 ch-1 sp.
This is a growth round. It adds 12 dc over Round 1, all at the corners.
Round 3: Sl st in next 2 dc and into the ch-2 corner sp. Ch 3, (2 dc, ch 2, 3 dc) in same corner sp.
*Ch 1, 3 dc in next ch-1 sp, ch 1**, (3 dc, ch 2, 3 dc) in next corner sp. Rep from * 2 more times, then from * to ** once. Sl st to top of beginning ch-3.
Count: 36 dc (12 granny groups), 4 ch-2 corner sp, 8 ch-1 sp.
Per side: 9 dc, 2 ch-1 sp.
Round 4: Sl st in next 2 dc and into the ch-2 corner sp. Ch 3, (2 dc, ch 2, 3 dc) in same corner sp.
*[Ch 1, 3 dc in next ch-1 sp] 2 times, ch 1**, (3 dc, ch 2, 3 dc) in next corner sp. Rep from * 2 more times, then from * to ** once. Sl st to top of beginning ch-3. Do not fasten off.
Count: 48 dc (16 granny groups), 4 ch-2 corner sp, 12 ch-1 sp.
Per side: 12 dc, 3 ch-1 sp.
Checkpoint: Your square should now measure 3 in (7.6 cm) across. Lay it flat. It should sit level, with no cupping and no ruffling. Place a stitch marker in the working loop if you need to pause.
The open holes you see in the finished fabric are the ch-1 and ch-2 spaces. Because every group sits directly above a space from the round below, the holes line up into the regular geometric grid shown in the photo.
Border
The border has 2 rounds. Round 1 converts the lace edge into a solid single crochet edge. Round 2 adds a slim slip stitch finish. The border is worked straight onto the square with the same yarn and hook.
Border gauge: About 5.7 sc per inch (2.2 sc per cm) along the edge. That is 17 sc across the 3 in (7.6 cm) side between corner stitches. This is not a separate gauge you need to match. It is simply what you get from working 1 sc per dc and 1 sc per ch-1 sp, as explained below.
Border Round 1 (sc conversion round): Ch 1 (does not count as a st). Sc in same st as join and in next 2 dc. Work 3 sc in the ch-2 corner sp.
*[Sc in next 3 dc, sc in next ch-1 sp] 3 times, sc in next 3 dc, 3 sc in next ch-2 corner sp. Rep from * 2 more times.
[Sc in next 3 dc, sc in next ch-1 sp] 3 times. Sl st to first sc.
How the count works:
- Worked 1 per existing stitch or space, per side: 12 sc (1 in each of the 12 dc) + 3 sc (1 in each of the 3 ch-1 sp) = 15 sc
- All 4 sides: 15 x 4 = 60 sc
- Extra stitches added at corners: 3 sc in each of the 4 corner sp = 12 sc
- Round total: 60 + 12 = 72 sc
Per side, including corners: The middle sc of each 3-sc corner group is the corner stitch. Each side has 15 edge sc + 1 flanking sc at each end = 17 sc between corner stitches, or 19 sc when you include both corner stitches. Each corner stitch is shared by 2 sides, so 19 x 4 = 76, minus 4 shared corners = 72. This matches the round total.
The first 3 sc of the round and the final 12 sc together complete the last side (3 + 12 = 15). Nothing is skipped or doubled.
Border Round 2 (slip stitch finish): Sl st in each sc around, including each corner sc. Keep the stitches loose, about the same height as your sc loops. Sl st to the first sl st to join.
Count: 72 sl st (1 per sc). No stitches are added.
Fasten off, leaving a 6 in (15.2 cm) tail.
Why the math works: On a granny square edge, the top of 1 dc is about as wide as 1 sc. A ch-1 sp is narrow, so 1 sc fills it without gapping. That keeps the edge the same length as the lace beneath it, so the border lies flat.
The 3 sc in each corner turn the corner fully and keep it square. The slip stitch round sits on top and adds almost no width. It just smooths the edge and gives the crisp outline you see in the photo.
Together, the 2 border rounds add 0.25 in (0.6 cm) per side. The calculation is 3 in + 0.25 in + 0.25 in = 3.5 in (7.6 cm + 0.6 cm + 0.6 cm = 8.9 cm, rounded).
Final Blocking
Cotton lace benefits from blocking. It opens the holes and squares the corners.
- Weave in ends first. Weave the center tail and the final tail along the back of the stitches, following the dc posts. Do not trim them yet.
- Pin dry. Place the square on your blocking mat, right side up. Pin one corner, then the opposite corner, to 3.5 in (8.9 cm) apart along each edge.
- Pin all 4 corners. Check that both diagonals measure the same. Each diagonal should be about 4.9 in (12.4 cm).
- Pin the sides. Add 1 pin at the center of each side so the edges run straight, not bowed.
- Mist evenly. Spray until the square is damp throughout but not dripping.
- Shape the holes. Use a fingertip to gently nudge any uneven spaces into line.
- Dry fully. Leave it pinned until completely dry, usually 4 to 8 hours for cotton.
- Trim ends. Unpin, gently stretch the square once on the diagonal, and trim the tails close.
Final Quality-Control Checklist
- Square measures 3.5 in (8.9 cm) on all 4 sides.
- Both diagonals match within 0.1 in (0.3 cm).
- Round 4 has 48 dc, with 12 dc and 3 ch-1 sp per side.
- Border Round 1 has 72 sc, with 3 sc at each corner.
- Border Round 2 has 72 sl st.
- Center ring is closed tight, with no gap.
- Holes form an even grid, and every group sits above a space.
- Edges lie flat, with no waves and no pulling.
- Corners are sharp and square.
- All ends are woven in securely and invisible on the right side.
Troubleshooting
Square cups or curls up at the edges. Your chains are too tight, or you are missing a ch 1 between groups. Check that every round has the correct number of ch-1 spaces, then try a looser chain tension.
Square ruffles or waves. You added an extra group, or your chains are too long. Count the groups per side: Round 4 should have 4 groups per side, counting each corner half as one group.
Corners look rounded. Make sure every corner has a full ch 2, not ch 1. In the border, work all 3 sc into the corner space.
Square slants or twists. This is normal for granny squares worked without turning. Blocking usually fixes it. If it is severe, turn your work at the start of each round, but keep the same stitch counts.
Center hole is too large. Use a magic ring and pull the tail firmly before weaving it in. Weave the tail around the ring once to lock it.
Border pulls the edge in. Your sc are too tight. Go up 0.5 mm for the border rounds only.
Slip stitch round is puckering. Slip stitches tighten easily. Keep each loop loose and the same height as the sc beneath it.
Square is 0.25 in (0.6 cm) off target. Small differences block out. Differences larger than that mean a hook size change is needed for your next square.
Care
Hand wash in cool water with mild soap, press out the water in a towel, and dry flat, reshaping to 3.5 in (8.9 cm). Cotton can be warm-pressed under a cloth if needed.
Final Notes
This square follows a simple measurement chain. Round 1 measures 1.2 in (3.0 cm), and each granny round adds about 0.6 in (1.5 cm). That brings the square to 3 in (7.6 cm) after Round 4.
The 2-round border adds 0.25 in (0.6 cm) per side, for a finished size of 3.5 in (8.9 cm). The stitch counts follow the same steady logic: 12, 24, 36, then 48 dc, followed by 72 sc and 72 sl st in the border.
Check your size at Round 2 and at Round 4, block carefully, and you will have a neat, lacy cream square every time.
Optional: you can make more of these squares if you like, as with the finished one resting in the background of the photo. Each square is a complete project on its own.
Happy crocheting!