

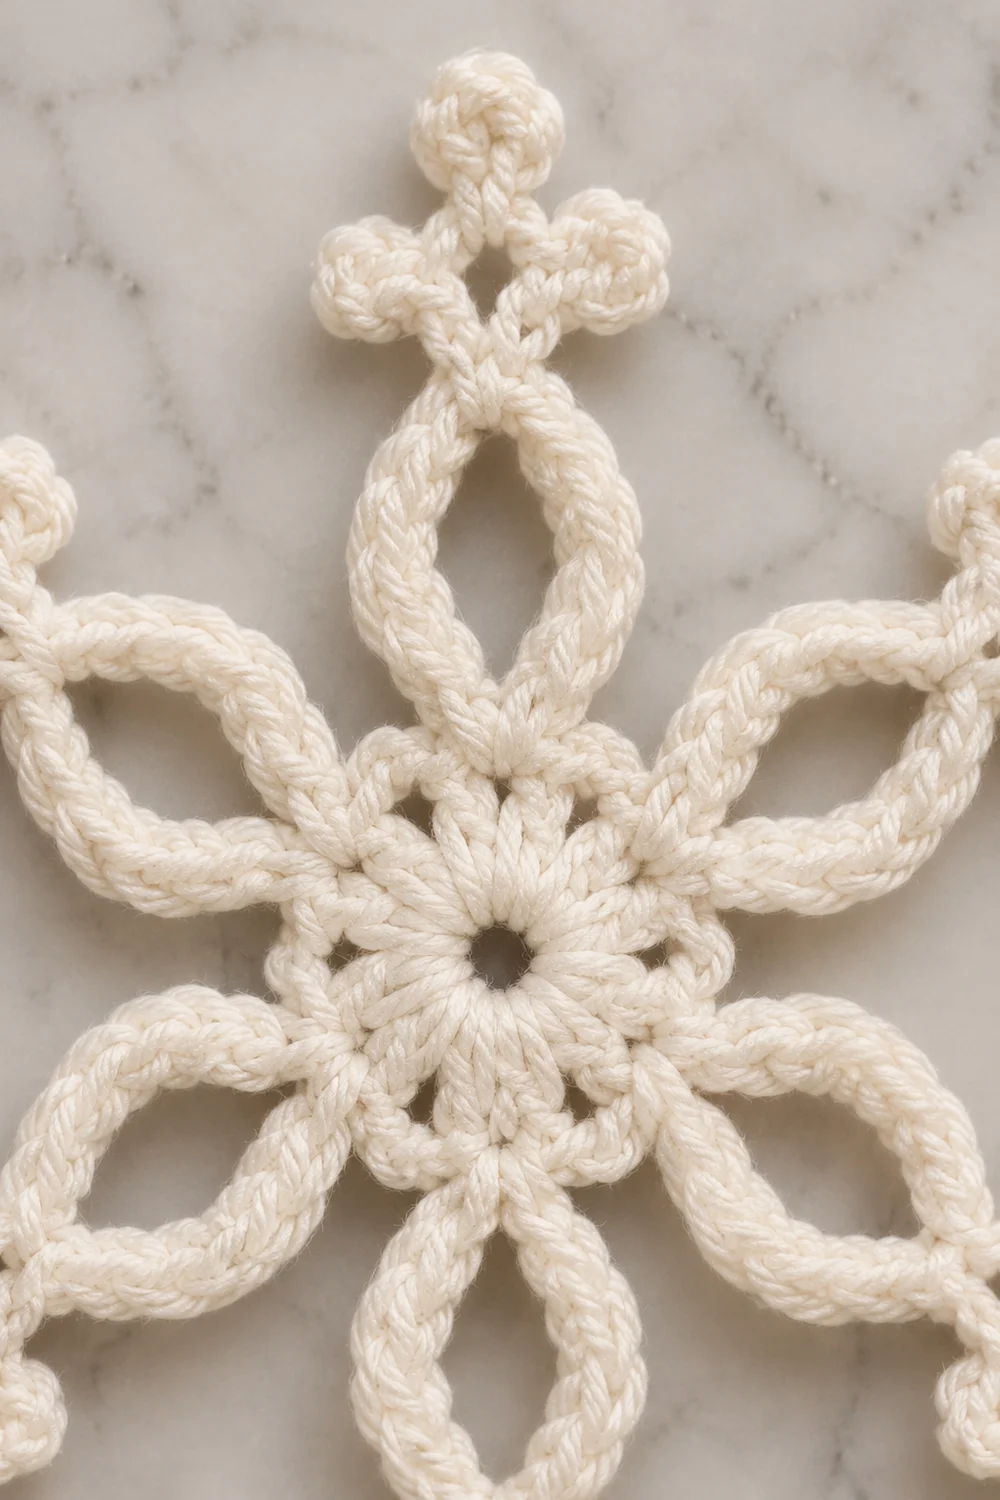
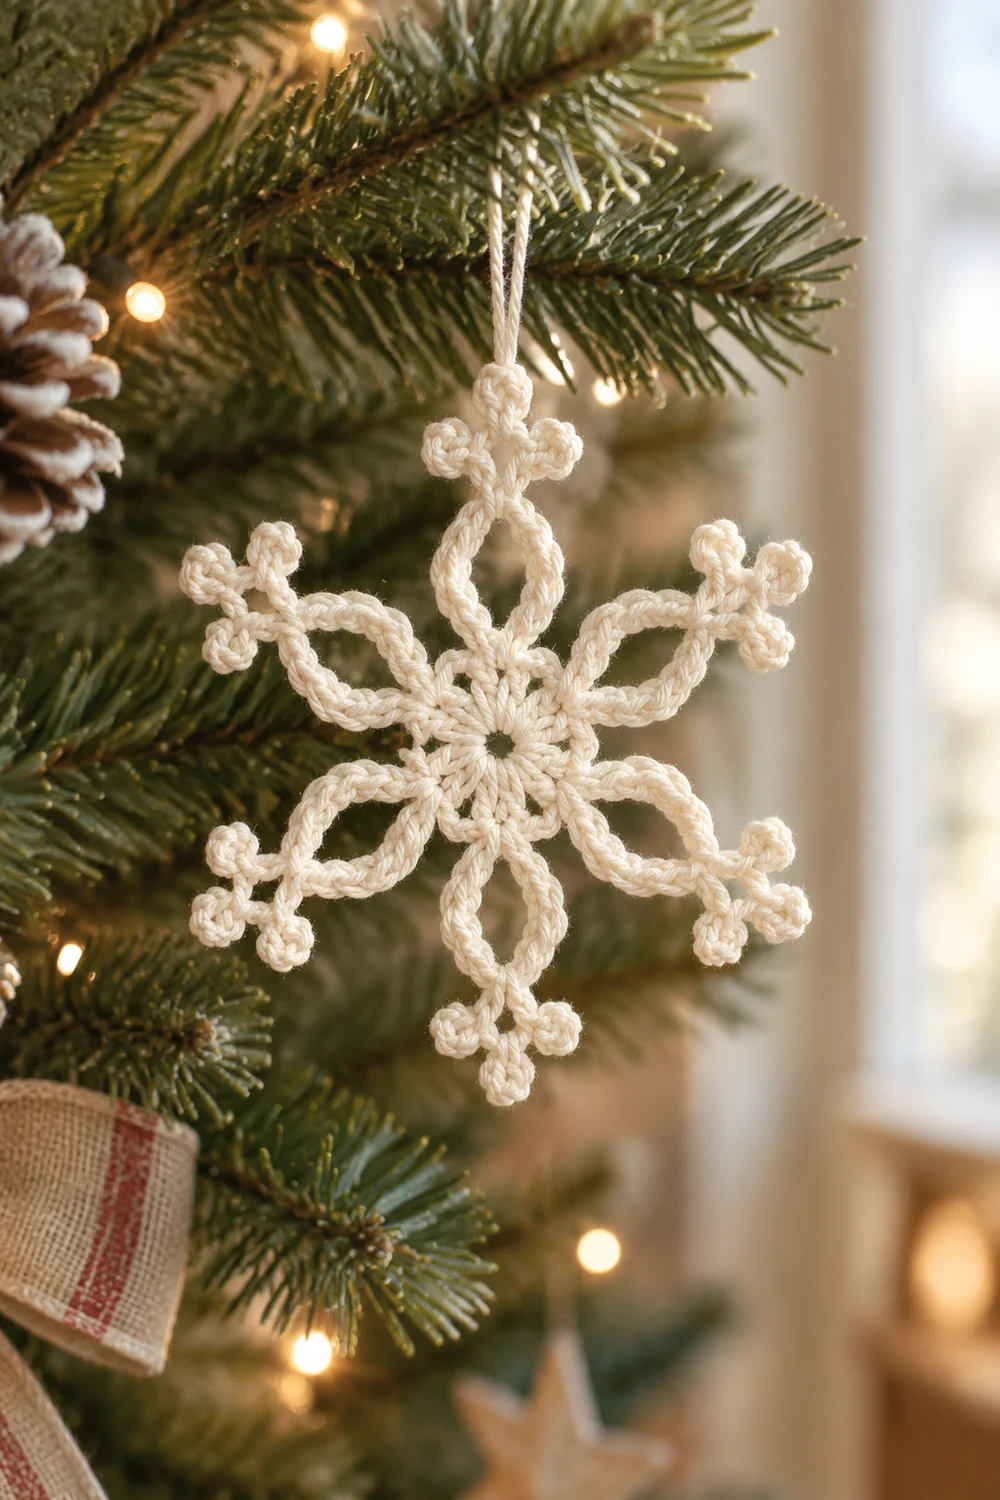
This Frosted Bobble Snowflake is a single six-pointed motif in cream yarn. It has a solid circular center, six arms built from oval chain loops, and small round bobble clusters at the tip of every arm. The result is a lacy, dimensional snowflake with open geometric spaces between the arms.
The motif is shown in one soft off-white color, which gives it a wintry, natural look. A cotton yarn makes the sc-covered chains look rope-like and the bobbles look rounded. It works well as an ornament, gift tag, or table decoration.
This pattern uses US crochet terms. The finished snowflake measures about 4.5 in (11.4 cm) from tip to tip after blocking.
Construction is worked in the round as one piece. You make a dc center, convert it to sc with six arm bases, chain six long loops for the ovals, and then work a final round of sc into every chain. That last round adds the bobble clusters at each arm tip. There is no sewing or joining.
Finished Size and Construction
- Finished size: about 4.5 in (11.4 cm) tip to tip
- Skill level: Advanced beginner
- Terminology: US crochet terms
- Yarn weight: DK / light worsted (weight 3), cotton
- Hook: 3.5 mm (E-4)
- Number of pieces: 1
- Layout: single motif, 6 identical arms around a round center
- Piece size: 4.5 in (11.4 cm) tip to tip
- Size before border: about 4 in (10.2 cm) across the chain loops after Round 3
- Border depth: Round 4 adds about 0.25 in (0.6 cm) at each arm tip, plus thicker arm outlines
Materials
Yarn: Choose a smooth, mercerized or soft cotton in DK / light worsted weight. Cotton holds the oval shapes crisply and blocks flat. Acrylic also works, but it may need firmer blocking or light starch to keep the arms straight.
- Cream / off-white: 8 g, about 18 m (19.7 yd)
Tools:
- 3.5 mm (E-4) crochet hook
- Tapestry needle
- Scissors
- Stitch marker
- Blocking mat or folded towel, plus rust-proof pins
- Spray bottle with water
- Optional: fabric stiffener or spray starch
The yarn quantity includes a margin of about 25% for your gauge test, tails, and small tension differences.
Abbreviations (US Terms)
- ch – chain
- sl st – slip stitch
- sc – single crochet
- dc – double crochet
- st(s) – stitch(es)
- sp – space
- sk – skip
- rep – repeat
- yo – yarn over
- MR – magic ring
Special stitch: Bobble Picot (bp)
Ch 3. Yo, insert hook in the 3rd ch from hook, yo, pull up a loop, yo, pull through 2 loops. Rep from * 2 more times, so you have 4 loops on the hook. Yo and pull through all 4 loops. Sl st in the same ch where you worked the bobble, which is the 3rd ch from hook.
This makes a small, round 3-dc bobble that folds back onto its own base, like a fat picot. It uses 3 ch and does not count as an sc.
Gauge and Checkpoints
Gauge is not critical for an ornament, but it controls the final size. Work Rounds 1 and 2 first and measure them before you continue.
Checkpoints:
- After Round 1: the dc circle measures about 1 in (2.5 cm) across.
- After Round 2: the center measures about 1.5 in (3.8 cm) across, not counting the ch-2 spaces.
- After Round 3: each ch-20 loop, laid flat as an oval, measures about 1.25 in (3.2 cm) long. The snowflake measures about 4 in (10.2 cm) across from loop tip to opposite loop tip.
- After Round 4 and blocking: about 4.5 in (11.4 cm) from bobble tip to opposite bobble tip.
If your center is too big: go down to a 3.25 mm hook, or tighten your chains and dc.
If your center is too small: go up to a 3.75 mm or 4 mm hook.
If only the arms are off: your chain tension differs from your stitch tension. Adjust the size of your chains only. Loose chains give long, floppy ovals. Tight chains make the ovals pucker when you work Round 4.
Pattern
Round 1: Center
Make a MR. Ch 3 (counts as first dc), work 17 dc into the ring. Pull the ring closed, leaving a small hole about the size of a pencil. Sl st to the top of the beginning ch-3 to join.
Count: 18 dc.
The center should lie flat and measure about 1 in (2.5 cm) across.
Round 2: Conversion Round with Arm Bases
This round converts the dc circle to sc and sets up 6 arm bases. It is not a growth round in the granny style. Each dc gets sc, and every 3rd dc gets one extra sc plus a ch-2 space.
Ch 1 (does not count as a st). Sc in the same st as the join (dc 1), sc in next dc (dc 2), (sc, ch 2, sc) in next dc (dc 3).
Sc in next 2 dc, (sc, ch 2, sc) in next dc. Rep from * 4 more times. Sl st to the first sc to join.
Count: 18 sc worked 1 per existing dc + 6 extra sc at the arm bases = 24 sc, plus 6 ch-2 spaces.
Check: 3 dc per repeat × 6 repeats = 18 dc, so every dc from Round 1 is used once.
Between any two ch-2 spaces there are exactly 4 sc. These are the second sc of one base, 2 plain sc, and the first sc of the next base.
Checkpoint: 1.5 in (3.8 cm) across.
Round 3: Oval Loop Frames
This round chains the six long loops that become the ovals. The loops are anchored back to back, so the six ovals sit in sequence around the center.
Sl st in next 2 sc and into the next ch-2 sp. You are now at the first arm base.
(Sc, ch 20, sc) all in the ch-2 sp. Sk next sc, sl st in next 2 sc, sk next sc. Rep from * 5 more times.
On the 6th repeat, the 2 sl sts land in the same sc where you started your travel sl sts. This is correct. Work them under both loops of those sc. The final skipped sc is the first base sc of Arm 1.
Sl st in the first sc of this round to join. Do not fasten off.
Count per arm: 2 sc (anchors) + 1 ch-20 loop + 2 sl st between arms.
Round total: 12 sc, 12 sl st, 6 ch-20 loops.
Before moving on, make sure no loop is twisted. Each loop should lie as a flat, open oval pointing straight out from its ch-2 space.
Checkpoint: each loop is about 1.25 in (3.2 cm) long laid flat. The motif is about 4 in (10.2 cm) across.
Border (Round 4: Arm Edging and Bobble Tips)
Round 4 is the border round for this motif. It thickens each oval into a solid, rope-like outline and adds the bobble clusters at each tip. It is the last round.
Border Gauge
Work 1 sc into each chain of the loop. Insert your hook into the back bump of each ch. This leaves a neat, braided-looking line on the front.
In this round, sc gauge equals chain gauge: 1 sc per ch. The ovals keep their Round 3 length and only get thicker.
Number the chains of each loop 1 to 20, starting at the anchor sc where the loop began.
Round 4 Instructions
Ch 1 (does not count). You are at the first anchor sc of Arm 1.
Each arm:
- Side A: Sc in each of ch 1–9 of the loop (9 sc).
- Left tip junction: Sc in ch 10, then work 1 bp.
- Tip stem and terminal bobble: Ch 3 for the stem, work 1 bp, then sl st in each of the 3 stem chains, working back down toward the loop.
- Right tip junction: Work 1 bp, then sc in ch 11.
- Side B: Sc in each of ch 12–20 (9 sc).
- Travel to next arm: Sl st in the closing anchor sc, sl st in each of the next 2 sl sts, sl st in the next sc (the opening anchor sc of the next arm). That is 4 sl sts.
Rep steps 1–6 for all 6 arms.
On the 6th arm, the 4th travel sl st goes into the first anchor sc of Arm 1, where you made the beginning ch 1. This sl st joins the round. Fasten off, leaving a 6 in (15.2 cm) tail.
Counts per Arm
- Side A: 9 sc + 1 junction sc in ch 10 = 10 sc
- Side B: 1 junction sc in ch 11 + 9 sc = 10 sc
- Total per arm: 20 sc, 3 bp (2 secondary + 1 terminal), 3 stem ch, 3 stem sl st
- Travel: 4 sl st between arms
Round 4 total: 120 sc, 18 bp, 18 stem ch, 18 stem sl st, 24 travel sl st.
Why the Math Works
Each loop has 20 chains, and Round 4 places exactly 1 sc in each chain. That gives 20 sc per arm. The chains split evenly into 10 per side, so the oval stays symmetrical, with the tip sitting between ch 10 and ch 11.
The bobbles and stem are worked off the junction and do not use any loop chains, so they do not change the sc count. Six arms × 20 sc = 120 sc, and six arms × 3 bp = 18 bp.
The travel sl sts match Round 3 exactly: 1 closing anchor + 2 sl sts + 1 opening anchor = 4 per gap. They add no height to the center.
Final Blocking
- Weave in both tails along the back of the sc lines. Leave about 0.5 in (1.3 cm) of the tail end unclipped until after blocking.
- Spray the snowflake until it is evenly damp but not dripping.
- Lay it face up on the blocking mat. Gently push the center hole closed with your fingertip.
- Pin the 6 terminal bobbles first, spaced evenly on a 4.5 in (11.4 cm) circle. Each tip should sit about 2.25 in (5.7 cm) from the center hole.
- Open each oval by pinning once inside it at its widest point. Keep both sides of the oval the same width.
- Pin each pair of secondary bobbles so they point out at an angle on either side of the stem.
- If you want a stiff ornament, apply fabric stiffener or spray starch now.
- Let it dry completely, at least 6 hours, before unpinning. Trim the tails.
Final Quality-Control Checklist
- The center hole is closed tightly and there are no gaps in Round 1.
- Round 2 has 24 sc and 6 evenly spaced ch-2 spaces.
- All 6 loops are untwisted and point straight out.
- Each arm has 10 sc on each side of the oval.
- Each arm has 3 bobbles: 1 at the tip and 2 at the junction.
- The tip stems are straight and the bobbles are round, not flattened.
- The finished size is about 4.5 in (11.4 cm) tip to tip.
- All tails are woven in securely and invisible from the front.
Troubleshooting
The center ruffles or cups. Your dc are too tight for the ring, or the ring was not pulled closed. Redo Round 1 with a slightly looser dc.
The center cups after Round 2. Make sure you worked only 1 extra sc per arm base, for 24 sc total, not 2.
The ovals twist. Before starting Round 4, lay the work flat and check each ch-20 loop. Turning one loop over before working into it fixes a twist.
One arm is longer than the others. You likely made 21 or 19 chains. Count the chains in each loop before Round 4.
The ovals are lopsided. Check that the tip is placed between ch 10 and ch 11. Count 9 sc for Side A, then the junction sc.
The bobbles look flat. Close the bobble firmly, then make the sl st into the base chain snugly so the bobble curls into a ball.
The arms curl after blocking. Re-wet and re-pin, or add a light coat of stiffener.
Care
Hand wash in cool water with mild soap, press out the water in a towel, and re-pin to dry flat. Store flat or hang it by one tip so the arms keep their shape.
Final Notes
The measurement chain for this snowflake is simple. Round 1 sets a 1 in (2.5 cm) center. Round 2 grows it to 1.5 in (3.8 cm) with 24 sc and 6 arm bases. Round 3 adds six ch-20 loops, each about 1.25 in (3.2 cm) long, for a 4 in (10.2 cm) span.
Round 4 places 20 sc into each loop, 10 per side, and finishes every arm with 3 bobbles. This brings the snowflake to its blocked size of 4.5 in (11.4 cm).
If you check your size at each stage, every arm will match and the finished motif will lie flat and even.
Optional: if you want a set, simply repeat the same single motif as many times as you like. The pattern itself stays one snowflake.
Happy crocheting!