

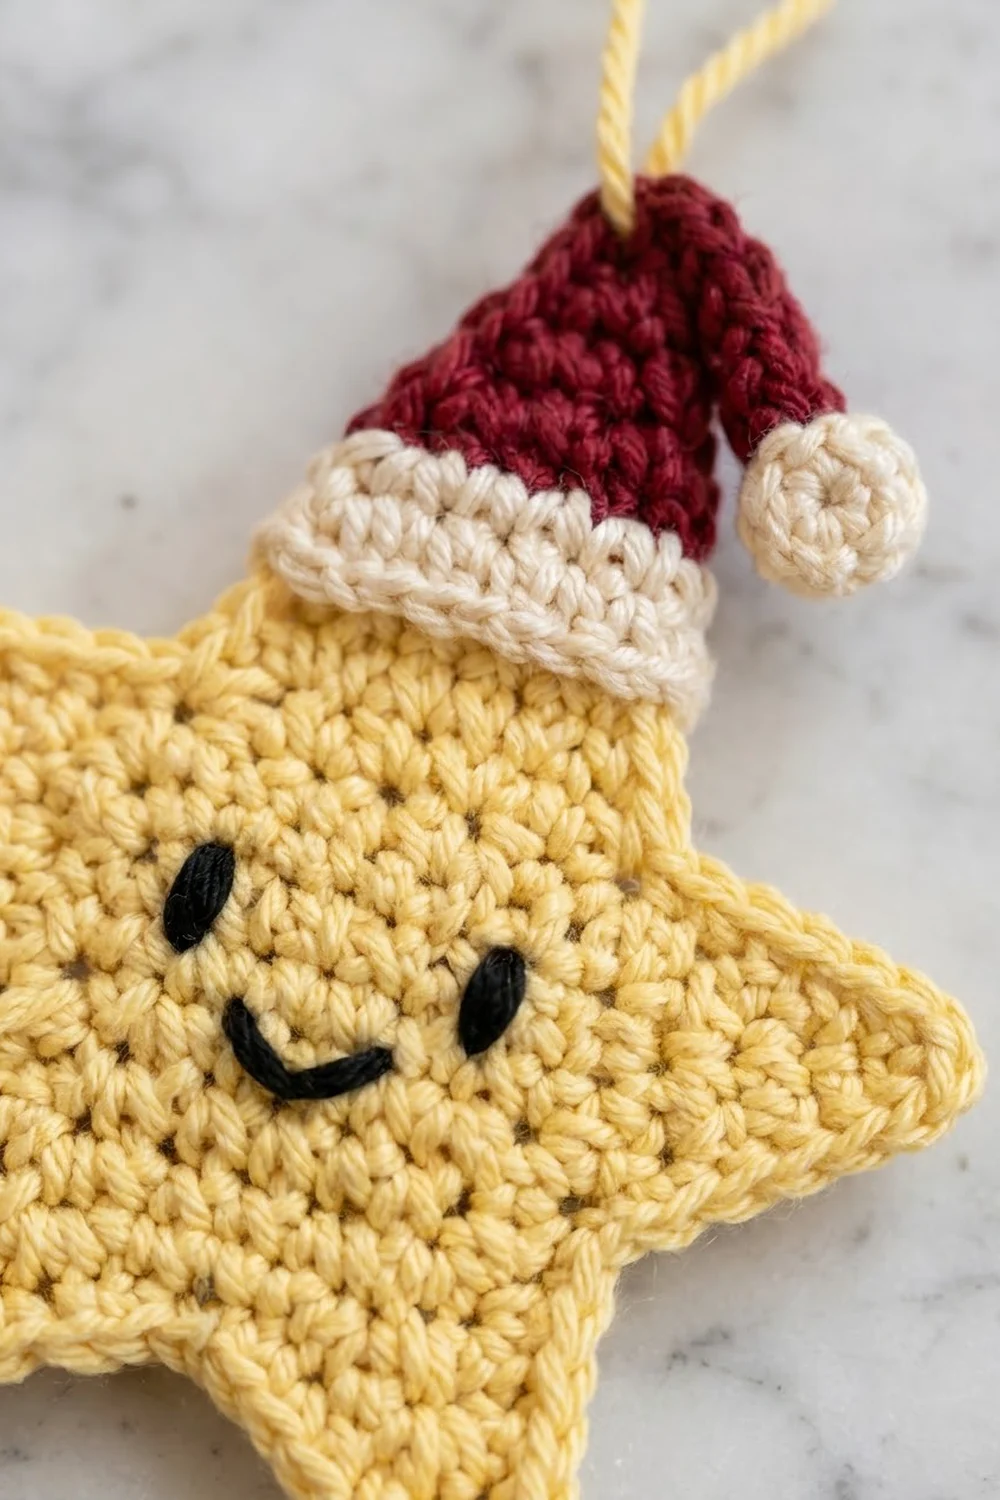
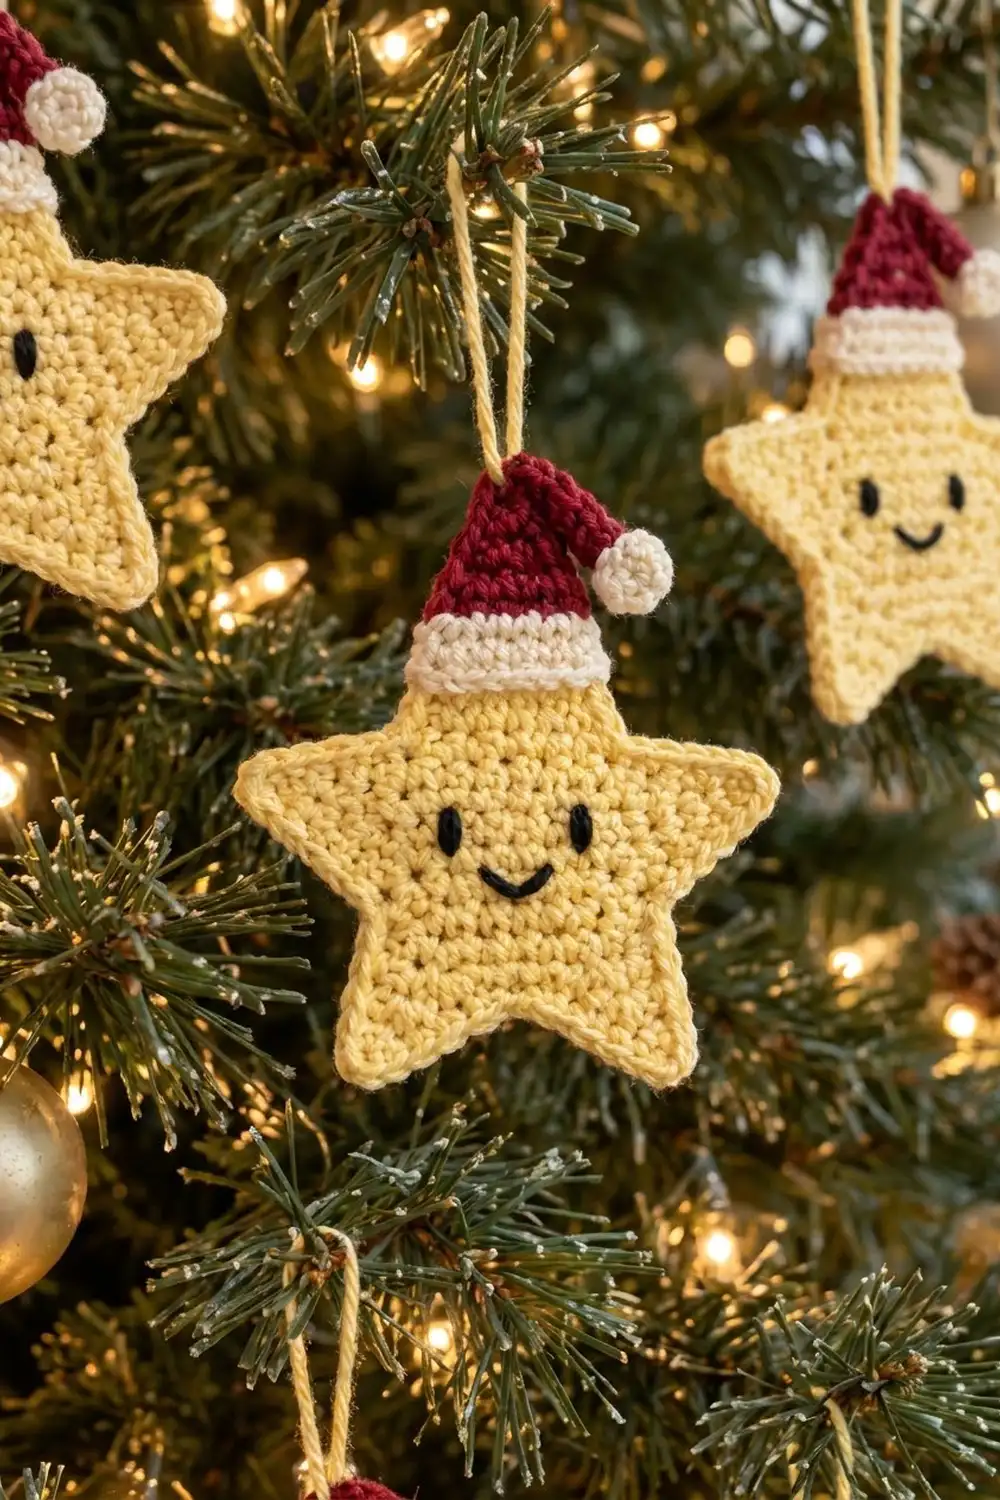
This little star is a quick holiday make with a lot of charm. It’s a flat, butter-yellow five-pointed star with plump points, a sweet embroidered smile and a tiny cranberry Santa hat tipped jauntily to the right. An ivory brim and pompom finish the hat, and a yellow chain loop lets it hang straight on the tree.
The palette is classic and cozy: pale yellow for the star, deep red for the hat, ivory for the trim and black for the face. Because the ornament is flat, it looks crisp from the front and packs easily for gifting.
This pattern uses US crochet terms. The finished star measures 3.5 in (8.9 cm) wide and 3.25 in (8.3 cm) tall. With the hat on, it is about 4 in (10.2 cm) tall, not counting the loop.
You crochet a small round center, then work five points in short rows straight off that center. One edge round tidies the outline. Next you make the hat flat from the brim up, crochet the brim onto it, add a tiny pompom, embroider the face and attach the loop.
Finished Size and Construction
- Finished size: 3.5 in (8.9 cm) wide x 3.25 in (8.3 cm) tall (star only); about 4 in (10.2 cm) tall with hat
- Skill level: Easy
- Terminology: US crochet terms
- Yarn weight: DK (light #3)
- Hook: 3.5 mm (E-4)
- Number of pieces: 1 ornament: star body plus 3 small add-ons (hat with brim, pompom, hanging loop)
- Layout: Single motif; hat appliquéd over the top point
- Star center: 1.1 in (2.8 cm) across after Round 3
- Size before edging: 3.1 in (7.9 cm) wide x 3.0 in (7.6 cm) tall
- Edging depth: 0.2 in (0.5 cm), one round
- Hat size: 1.8 in (4.6 cm) wide at brim x 1.6 in (4.1 cm) tall
Materials
Use a smooth DK yarn. Mercerized cotton or a cotton blend gives the clearest stitches and the flattest result. Soft acrylic also works, but it needs firmer blocking. Avoid fuzzy yarns, because they blur the star outline and the face.
Yarn (per ornament):
– Pale yellow (star and loop): 4 g / 10 m
– Cranberry red (hat): 2 g / 5 m
– Ivory (brim and pompom): 2 g / 5 m
– Black (face): 1 g / 1 m of DK yarn, or 6-strand embroidery floss
These quantities include a margin for tails, swatching and frogging.
Tools:
– 3.5 mm (E-4) crochet hook
– Tapestry needle
– Sharp embroidery needle (if using floss)
– Scissors
– 2 locking stitch markers
– Pins, a foam blocking mat and a spray bottle
– Ruler or tape measure
Abbreviations (US Terms)
- MR – magic ring
- ch – chain
- sl st – slip stitch
- sc – single crochet
- inc – 2 sc in the same stitch
- sc2tog – single crochet 2 together: insert hook in next st, yarn over and pull up a loop; repeat in the following st (3 loops on hook); yarn over and pull through all 3 loops
- st(s) – stitch(es)
- RS / WS – right side / wrong side
Special stitch, valley sc2tog: in the edging round, the first loop of this sc2tog goes into the last row-end of one point and the second loop into the first row-end of the next point. This one stitch fills the inner corner and keeps the valley sharp.
Gauge and Checkpoints
Gauge: 20 sc x 22 rows = 4 in (10.2 cm) in single crochet worked in rows. Work firmly, so there are no gaps between stitches.
Make one full star first and measure it at each stage:
- After Round 3: the center measures 1.1 in (2.8 cm) across.
- After each point: the point measures 1.1 in (2.8 cm) from the center edge to the tip.
- Before edging: the star measures 3.1 in (7.9 cm) wide.
- After edging: the star measures 3.5 in (8.9 cm) wide.
If your star is too big, switch to a 3.25 mm (D-3) hook. If it is too small, switch to a 3.75 mm (F-5) hook. Change the hook, never the stitch counts, so the edging math still works.
Star Body
Use pale yellow. Work the center in joined rounds, with the RS facing you and without turning.
Round 1: Make a MR, ch 1, 10 sc in the ring, pull the ring closed and sl st to the first sc. (10 sts)
Round 2: Ch 1, inc in each st around, sl st to first sc. (20 sts)
Round 3: Ch 1, sc in next st, inc in next st; repeat from * 9 more times, sl st to first sc. (30 sts)*
Check that the center measures 1.1 in (2.8 cm). The 30 stitches divide into 5 groups of 6, one group for each point. Mark the 1st and 7th stitches so the first two groups are easy to see.
Points
Work each point in turned rows over 6 stitches of Round 3. Every row starts with a decrease. Because you turn each row, the decreases alternate edges, which makes a full, slightly rounded point.
Point 1, Row 1 (RS): Ch 1, sc in the same st as the join and in the next 5 sts, turn. (6 sts)
Row 2: Ch 1, sc2tog, sc in next 4 sts, turn. (5 sts)
Row 3: Ch 1, sc2tog, sc in next 3 sts, turn. (4 sts)
Row 4: Ch 1, sc2tog, sc in next 2 sts, turn. (3 sts)
Row 5: Ch 1, sc2tog, sc in next st, turn. (2 sts)
Row 6: Ch 1, sc2tog. (1 st) Fasten off and leave a 4 in (10.2 cm) tail.
Points 2–5: With RS facing, join pale yellow with a sl st in the next unworked stitch of Round 3. Work Rows 1–6 as for Point 1, making the first sc in the joining stitch. Fasten off after each point.
All 30 stitches are now used (5 points x 6 sts = 30), with no gaps between points, so the valleys form naturally. Each point has 6 row-ends along each side and a single tip stitch from Row 6.
Checkpoint: The star measures 3.1 in (7.9 cm) wide and 3.0 in (7.6 cm) tall. Pull the tails to the WS. You will crochet over them in the edging.
Border (Edging Round)
One round of single crochet in pale yellow hides the row-ends and gives a clean outline.
Border gauge: work 1 sc per row-end. At this gauge, sc rows are close to square (20 sts and 22 rows per 4 in / 10.2 cm), so 1 sc per row-end lies flat.
Setup: With RS facing, find a point and look at its left-hand side. Join pale yellow with a sl st in the Row 1 row-end on that side, which is the end of the side, just before a valley. Ch 1.
Edging Round: Valley sc2tog over the current Row 1 row-end and the Row 1 row-end of the next point. Going up the next point, sc in each of the Row 2, 3, 4 and 5 row-ends (4 sts). Work 3 sc in the tip stitch. Going down the other side, sc in each of the Row 5, 4, 3 and 2 row-ends (4 sts). Repeat from * 4 more times. The fifth repeat ends on the side where you joined. Sl st to the first sc2tog. (60 sts)*
Count per point: 1 (valley) + 4 (up) + 3 (tip) + 4 (down) = 12 sts. Then 12 x 5 = 60 sts.
Why the math works: Each side of a point has 6 row-ends. Row 6 is covered by the 3 tip stitches. Rows 2–5 get 1 sc each, which makes 4 per side. The two Row 1 row-ends that meet in a valley share one sc2tog. The tip adds 2 extra stitches, so the edge turns around the point without pulling. The sc2tog removes 1 stitch at each inner corner, so the valleys don’t bulge. Work over the loose tails as you go.
Fasten off and weave in the ends. The star now measures 3.5 in (8.9 cm) wide and 3.25 in (8.3 cm) tall.
Santa Hat
The hat is worked flat from the bottom edge up. Every decrease falls on the left edge, so the right edge stays straight and the tip leans right.
With cranberry red:
Foundation: Ch 8.
Row 1 (RS): Sc in the 2nd ch from the hook and in each ch across, turn. (7 sts)
Row 2: Ch 1, sc2tog, sc in next 5 sts, turn. (6 sts)
Row 3: Ch 1, sc in next 4 sts, sc2tog, turn. (5 sts)
Row 4: Ch 1, sc2tog, sc in next 3 sts, turn. (4 sts)
Row 5: Ch 1, sc in next 2 sts, sc2tog, turn. (3 sts)
Row 6: Ch 1, sc2tog, sc in next st, turn. (2 sts)
Row 7: Ch 1, sc2tog. (1 st) Fasten off and leave a 10 in (25.4 cm) tail.
With RS facing, all the decreases should be stacked on the left edge. The red section measures 1.4 in (3.6 cm) wide at the base and 1.25 in (3.2 cm) tall.
Brim
Turn the hat upside down with RS facing. Join ivory in the first free loop of the foundation chain.
Brim Row 1 (RS): Ch 1, inc in first ch, sc in next 5 ch, inc in last ch, turn. (5 sts worked 1-per-stitch + 2 extra from the incs = 9 sts)
Brim Row 2: Ch 1, sc in each st across. (9 sts) Fasten off and leave a 10 in (25.4 cm) tail.
The brim measures 1.8 in (4.6 cm) wide and 0.35 in (0.9 cm) deep. The whole hat is 1.6 in (4.1 cm) tall.
Pompom
With ivory:
Round 1: MR, 6 sc in the ring, pull closed. (6 sts)
Round 2: Sc in next st, inc in next st; repeat from * 2 more times. (9 sts)*
Round 3: Sc in next st, sc2tog; repeat from * 2 more times. (6 sts)*
Tuck the starting tail inside as stuffing. Fasten off and leave a 6 in (15.2 cm) tail. Thread it through the front loops of the last 6 stitches and pull tight to close. The pompom is about 0.5 in (1.3 cm) across.
Hanging Loop
With pale yellow, ch 30, which is about 5 in (12.7 cm). Fasten off and leave a 6 in (15.2 cm) tail at each end.
Face and Assembly
Face: Use black. Place the eyes on Round 3, about 4 stitches apart, just above the center. Work each eye as a small vertical satin-stitch oval, 2–3 wraps over one sc, about 0.2 in (0.5 cm) tall. For the smile, backstitch a shallow curve across 3 stitches of Round 2, centered below the eyes. Secure all ends on the WS.
Hat: Pin the hat over the top point, with the lower edge of the brim across Rows 2–3 of that point. The brim should overhang both edges of the point slightly. With the ivory tail, whipstitch the brim in place. With the red tail, stitch along both edges of the hat, catching only the front of the star so nothing shows on the back.
Pompom: Sew the pompom to the hat tip so it sits just past the hat’s right edge.
Loop: Fold the chain in half to make a 2.5 in (6.4 cm) loop. Sew both ends to the WS of the star, centered behind the hat about 0.25 in (0.6 cm) below the hat tip. Weave in all ends.
Final Blocking
- Lightly mist the ornament until it is damp.
- Lay it RS up on the blocking mat.
- Pin the center flat first, then pin each tip outward until the star measures 3.5 in (8.9 cm) wide.
- Use a pin to nudge each valley inward so the inner corners stay crisp.
- Smooth the hat flat. Don’t pin the pompom.
- Leave it to dry completely, 6–8 hours.
- Remove the pins and check your final measurements.
Final Quality-Control Checklist
- [ ] Round 3 has 30 sts and measures 1.1 in (2.8 cm)
- [ ] All 5 points have 6 rows and end in 1 st
- [ ] The edging has 60 sts, 12 per point
- [ ] The star measures 3.5 in (8.9 cm) x 3.25 in (8.3 cm)
- [ ] The hat has 7 red rows, all decreases are on the left edge, and the tip leans right
- [ ] The brim has 9 sts in each of its 2 rows
- [ ] The eyes are level and the smile is centered
- [ ] The loop is secure and the ornament hangs straight
- [ ] No tails show on either side
Troubleshooting
The points twist. Ch 1 and turn after every row, and start every point row with sc2tog.
The valleys gape. Work the valley sc2tog through both Row 1 row-ends and pull it snug.
The edging ruffles. You worked extra stitches. Recount for 4 sts per side.
The edging cups. Your tension is too tight. Go up half a hook size for the edging only.
The hat leans left. The decreases are on the wrong edge. Flip the hat and use the other side as the RS.
The ornament tilts. Re-center the loop behind the top point.
Care
Spot clean with cool water and mild soap, then reshape and dry flat. Store flat in tissue between seasons.
Final Notes
Here is the measurement chain. The 30-stitch center measures 1.1 in (2.8 cm). The five 6-row points bring the star to 3.1 in (7.9 cm) wide. The 60-stitch edging adds 0.2 in (0.5 cm) all around, so the finished star is 3.5 in (8.9 cm) wide and 3.25 in (8.3 cm) tall. The 1.6 in (4.1 cm) hat brings the total height to about 4 in (10.2 cm).
If your center checkpoint matches, every later number will follow. Make one star, check it, then stitch a whole tree’s worth.
Happy crocheting!