

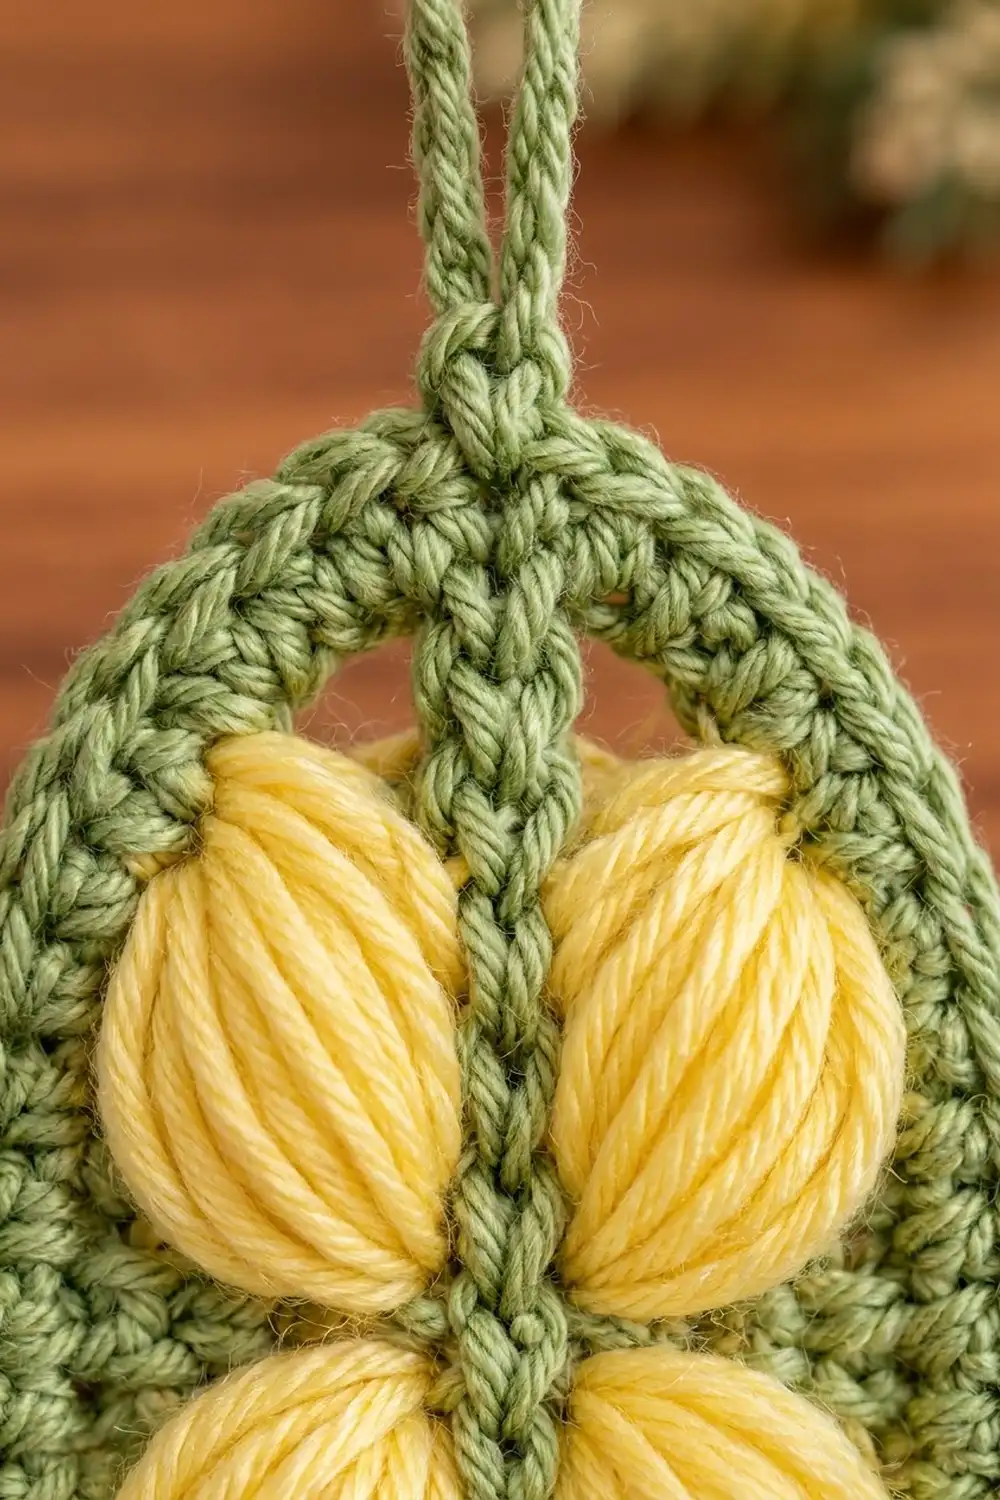
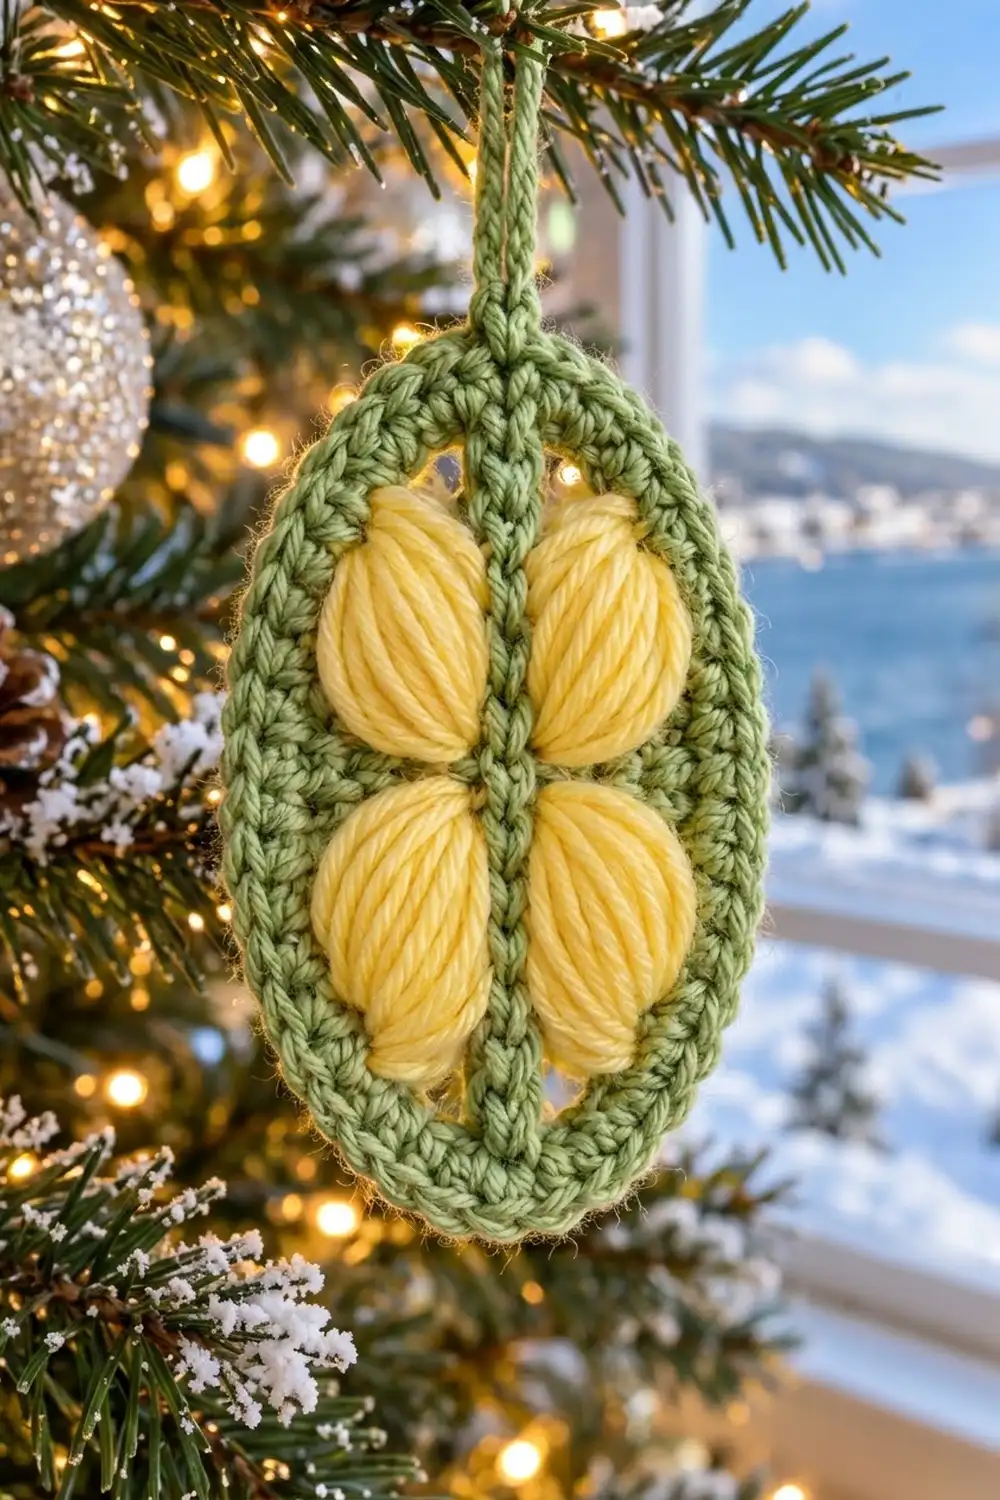
The Lemon Drop Puff Oval is a small hanging ornament. It has a crisp sage-green oval frame, a slim green spine running top to bottom, and four plump buttery-yellow puffs tucked into the openings. Each puff is built from long, wrapped loops, so it looks like a little lemon segment or seed pod with soft, glossy strands.
The palette is just two colors: sage green for the frame, spine, and hanging loop, and pale lemon yellow for the puffs. The style is simple, graphic, and calm. It stands out against a dark tree and also looks good among bright lights.
This pattern uses US crochet terms. The finished ornament measures 2.75″ (7.0 cm) wide by 4″ (10.2 cm) tall. With the 2″ (5.1 cm) hanging loop, the total hanging height is about 6″ (15.2 cm).
The ornament is made in one piece. A chain ring becomes the oval frame. Next you add a chain-and-slip-stitch spine across the opening and work the four yellow puffs from the spine to the frame. A border and a hanging loop finish the edge.
Finished Size and Construction
- Finished size: 2.75″ x 4″ (7.0 x 10.2 cm), plus 2″ (5.1 cm) loop
- Skill level: Easy-Intermediate (the long-loop puff takes practice)
- Terminology: US
- Yarn weight: DK (#3)
- Hook: 3.5 mm (E-4)
- Number of pieces: 1
- Layout: single vertical oval with a center spine and 4 puffs (2 on each side)
- Piece size: 2.75″ x 4″ (7.0 x 10.2 cm)
- Size before border: 2.4″ x 3.6″ (6.1 x 9.1 cm)
- Border depth: about 0.2″ (0.5 cm) on each side
- Inner opening: about 1.65″ x 2.9″ (4.2 x 7.4 cm)
Materials
Choose a smooth, slightly soft DK yarn. Cotton-acrylic blends show the frame stitches clearly. A soft acrylic makes the puffs fuller and shinier. Use the same weight for both colors.
- Sage green (Color A): 10 g, about 23 m
- Pale lemon yellow (Color B): 6 g, about 14 m
These quantities include a margin for your gauge test and weaving in ends. One 50 g ball of each color is enough for several ornaments.
Tools:
– 3.5 mm (E-4) crochet hook with a smooth, straight shaft
– 4 locking stitch markers
– Yarn needle
– Scissors
– Rustproof pins and a blocking mat
– Spray bottle; optional fabric stiffener
Abbreviations (US Terms)
- ch – chain
- sc – single crochet
- sl st – slip stitch
- st(s) – stitch(es)
- inc – 2 sc in the same st
- BLO – back loop only
- yo – yarn over
- rep – repeat
- rnd(s) – round(s)
Special stitch – Lemon Puff (LP): Start with 1 loop on your hook at the spine. *Yo, insert the hook under the inner loop of the next frame st, yo, and draw up a loop back to the spine, about 1″ (2.5 cm) long. Rep from * in each of the 7 frame sts (15 loops on hook). Yo and draw through all 15 loops, then ch 1 firmly to lock. Keep every loop the same length so the strands lie smooth and even.
Gauge and Checkpoints
Gauge: 20 sc and 22 rnds = 4″ (10.2 cm) in sc with a 3.5 mm hook. That works out to 5 sc per 1″ (2.5 cm).
The ornament is small, so the best gauge test is to make one frame (Rnds 1–2) and measure it. Lay it flat and smooth it lightly before you measure. Checkpoints:
- After Rnd 1: about 2″ x 3.25″ (5.1 x 8.3 cm) on the outside; opening about 1.65″ x 2.9″ (4.2 x 7.4 cm)
- After Rnd 2: about 2.4″ x 3.6″ (6.1 x 9.1 cm)
- After the puffs: still 2.4″ x 3.6″ (6.1 x 9.1 cm), with no pulling
- After the border: about 2.75″ x 4″ (7.0 x 10.2 cm)
If the frame is more than 0.25″ (0.6 cm) too large, go down half a hook size. If it is too small, go up half a hook size. A ruffled frame means your increases are looser than the rest of the round. A cupped frame means your tension on the curves is too tight, so loosen it.
Pattern
Frame
With Color A, ch 40. Sl st into the first ch to form a ring, taking care not to twist the chain.
Rnd 1: Ch 1, sc in the same ch and in each ch around; join with sl st to first sc. (40 sc)
Now mark out the oval. Sts 1–5 are the top curve, with st 3 at top center. Sts 6–20 are the right side. Sts 21–25 are the bottom curve, with st 23 at bottom center. Sts 26–40 are the left side. Place markers in st 3 and st 23, then gently pull the ring into an oval with those sts at the top and bottom.
Along the inner edge, each sc now has one free loop of the foundation chain at its base. You will work the spine and the puffs into these inner loops.
Rnd 2: Ch 1. Top curve: inc, sc, inc, sc, inc (8 sts). Right side: sc in each of next 15 sts (15 sts). Bottom curve: inc, sc, inc, sc, inc (8 sts). Left side: sc in each of next 15 sts (15 sts). Join with sl st to first sc. (46 sc)
New map: sts 1–8 top curve, 9–23 right side, 24–31 bottom curve, 32–46 left side. Fasten off and weave in the ends. Check the size: it should be about 2.4″ x 3.6″ (6.1 x 9.1 cm).
Center Spine
With Color A, join with a sl st under the inner foundation loop at the base of Rnd 1 st 3 (top center).
Ch 15. Sl st under the inner foundation loop at the base of Rnd 1 st 23 (bottom center). The chain should lie straight and just taut across the 2.9″ (7.4 cm) opening.
Turn and sl st into the back bump of each of the 15 ch, working back up to the top. Sl st under the inner loop at the base of st 3 again. (15 ch + 15 sl st)
Fasten off and weave the ends into the frame. Doubling the chain with slip stitches gives the spine its braided look. For the next step, number the spine chains 1–15 from top to bottom.
Lemon Puffs
Work all four puffs from top to bottom. Each puff starts at the spine, pulls 7 loops from the frame, and closes back at the spine. On each side, a 3-st gap at the middle of the frame separates the two puffs and forms the “waist” between them.
Upper-right puff: With Color B, join with sl st into the right edge of spine ch 2. Work LP into Rnd 1 sts 5, 6, 7, 8, 9, 10, and 11 in that order (15 loops before closing). Sl st into the right edge of spine ch 6. Fasten off.
Lower-right puff: Join Color B with sl st into the right edge of spine ch 10. Work LP into Rnd 1 sts 15 through 21 (7 sts). Sl st into the right edge of spine ch 14. Fasten off.
On the right side, Rnd 1 sts 12–14 stay empty to form the waist. St 4 and st 22, next to the spine ends, also stay empty.
Upper-left puff: Join Color B with sl st into the left edge of spine ch 2. Work LP into Rnd 1 sts 1, 40, 39, 38, 37, 36, and 35 in that order. Sl st into the left edge of spine ch 6. Fasten off.
Lower-left puff: Join Color B with sl st into the left edge of spine ch 10. Work LP into Rnd 1 sts 31, 30, 29, 28, 27, 26, and 25 in that order. Sl st into the left edge of spine ch 14. Fasten off.
On the left side, Rnd 1 sts 32–34 form the waist, and sts 2 and 24 stay empty. The layout is a mirror image from side to side. Each side uses 1 empty + 7 puff + 3 waist + 7 puff + 1 empty = 19 sts. Add the 2 spine anchor sts and you get 40.
Puff tip: Hold the loops on your hook with your index finger as you go so the earlier loops don’t shrink. Before you draw through all 15 loops, check that the strands lie side by side and don’t cross.
Weave all the yellow ends along the back of the spine, not the frame, so no yellow shows on the green. Gently roll each puff between your fingers to round it. Measure again: the frame should still be 2.4″ x 3.6″ (6.1 x 9.1 cm).
Border
The border has the same gauge as the frame: 5 sc per 1″ (2.5 cm). It adds about 0.2″ (0.5 cm) to each edge.
Rnd 3: Join Color A with sl st in Rnd 2 st 1. Ch 1. Top curve: sc, inc, sc 2, inc, sc 2, inc (8 sts worked = 11 sts). Right side: sc in each of next 15 sts (15 sts). Bottom curve: sc, inc, sc 2, inc, sc 2, inc (11 sts). Left side: sc in each of next 15 sts (15 sts). Join with sl st to first sc. (46 sts worked 1-per-st + 6 extra from increases = 52 sc)
New map: sts 1–11 top curve (st 6 is top center), 12–26 right side, 27–37 bottom curve (st 32 is bottom center), 38–52 left side.
Rnd 4 (rope edge): Sl st in BLO of each st around; join to first sl st. (52 sl st) Work loosely so the edge does not draw in. This round gives a crisp outline but adds almost no width.
Why the math works: Only the curved ends get increases, +3 per curve in each round. As an oval grows outward, the curves get longer but the straight sides stay about the same length. The counts go 40 → 46 → 52. At 5 sc per 1″ (2.5 cm), that gives about 8″, 9.2″, and 10.4″ (20.3, 23.4, and 26.4 cm) of edge, which matches the perimeter each round needs.
Hanging Loop
Do not fasten off after Rnd 4. Sl st across to Rnd 3 st 6 (top center), working through both loops. Ch 22, then sl st into the same st to form a loop. Work 30 sc into the loop, then sl st into the base of the loop. (30 sc) The loop stands about 2″ (5.1 cm) tall. Fasten off and weave in the ends.
Final Blocking
- Lightly mist the ornament until it is damp, not wet.
- Lay it face up on the blocking mat.
- Pin the top center and bottom center 4″ (10.2 cm) apart.
- Pin the widest points of the sides 2.75″ (7.0 cm) apart.
- Smooth the curves so they are even, and make sure the spine lies straight down the middle.
- Shape each puff with your fingertips. Do not flatten them.
- Pin the hanging loop straight up.
- Let it dry completely. For a firmer ornament, brush diluted stiffener onto the frame and spine only.
Final Quality-Control Checklist
- The frame measures 2.75″ x 4″ (7.0 x 10.2 cm).
- Round counts are 40, 46, 52, and 52.
- The spine is straight, centered, and anchored at top and bottom center.
- Each puff used exactly 7 frame sts and closed at the spine.
- The waist gaps are level on both sides.
- No yellow ends show on the front of the frame.
- The rope edge is smooth, not puckered.
- The hanging loop is centered and about 2″ (5.1 cm) tall.
Troubleshooting
- Frame ruffles: Your increases on the curves in Rnd 2 or Rnd 3 are loose. Rework them more tightly, or go down half a hook size.
- Frame cups: Your increases are too tight. Work the curves more loosely.
- Spine sags: Rework it with ch 14 instead of 15.
- Spine bends the frame: Rework it with ch 16.
- Puffs look thin: Pull the loops a little longer, up to 1.25″ (3.2 cm), and keep them all the same length.
- Puffs look messy: The loops are uneven. Hold them on the hook with your index finger as you work.
- Loops slip off the hook: Use a hook with a straight, smooth shaft and keep the tip angled up.
- Edge pulls in: Work Rnd 4 more loosely, or use a larger hook for that round only.
Care
Hand wash in cool water with mild soap, roll in a towel, and dry flat, reshaping the puffs. Store the ornament flat or hanging, where nothing heavy can crush the puffs.
Final Notes
The measurements build in a short chain. At 5 sc per 1″ (2.5 cm), the 40-st ring gives an opening of 1.65″ x 2.9″ (4.2 x 7.4 cm). Rnd 2 brings it to 46 sts and 2.4″ x 3.6″ (6.1 x 9.1 cm). The border takes it to 52 sts and 2.75″ x 4″ (7.0 x 10.2 cm). The 2″ (5.1 cm) loop brings the hanging height to about 6″ (15.2 cm). Check your gauge on the frame first, and every other part will fit.
Happy crocheting!