

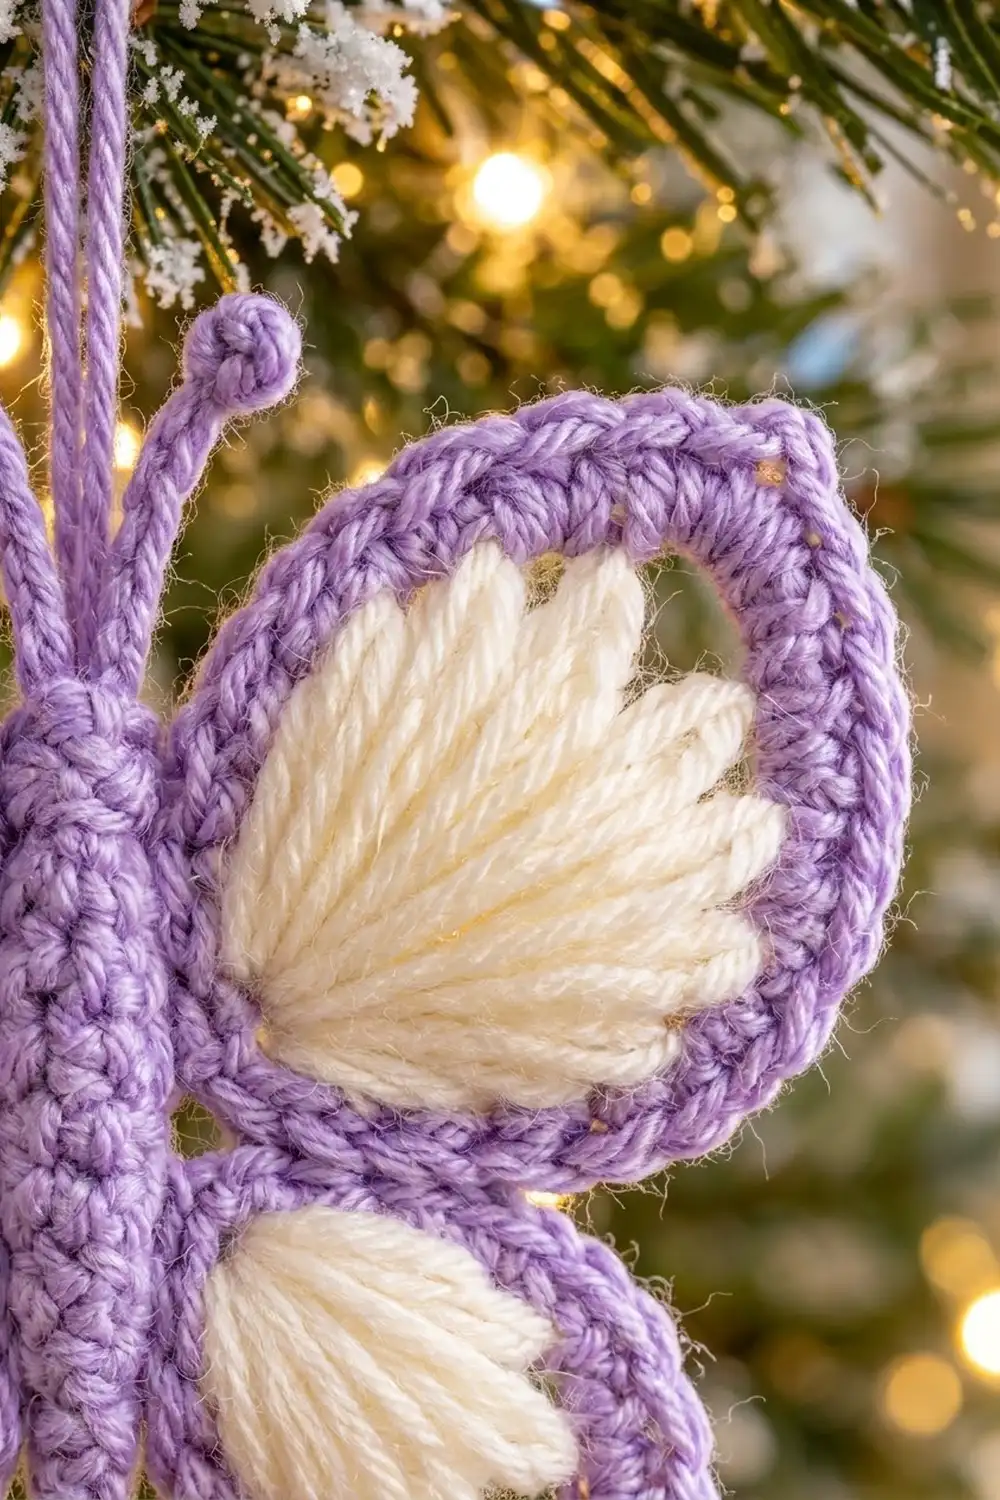
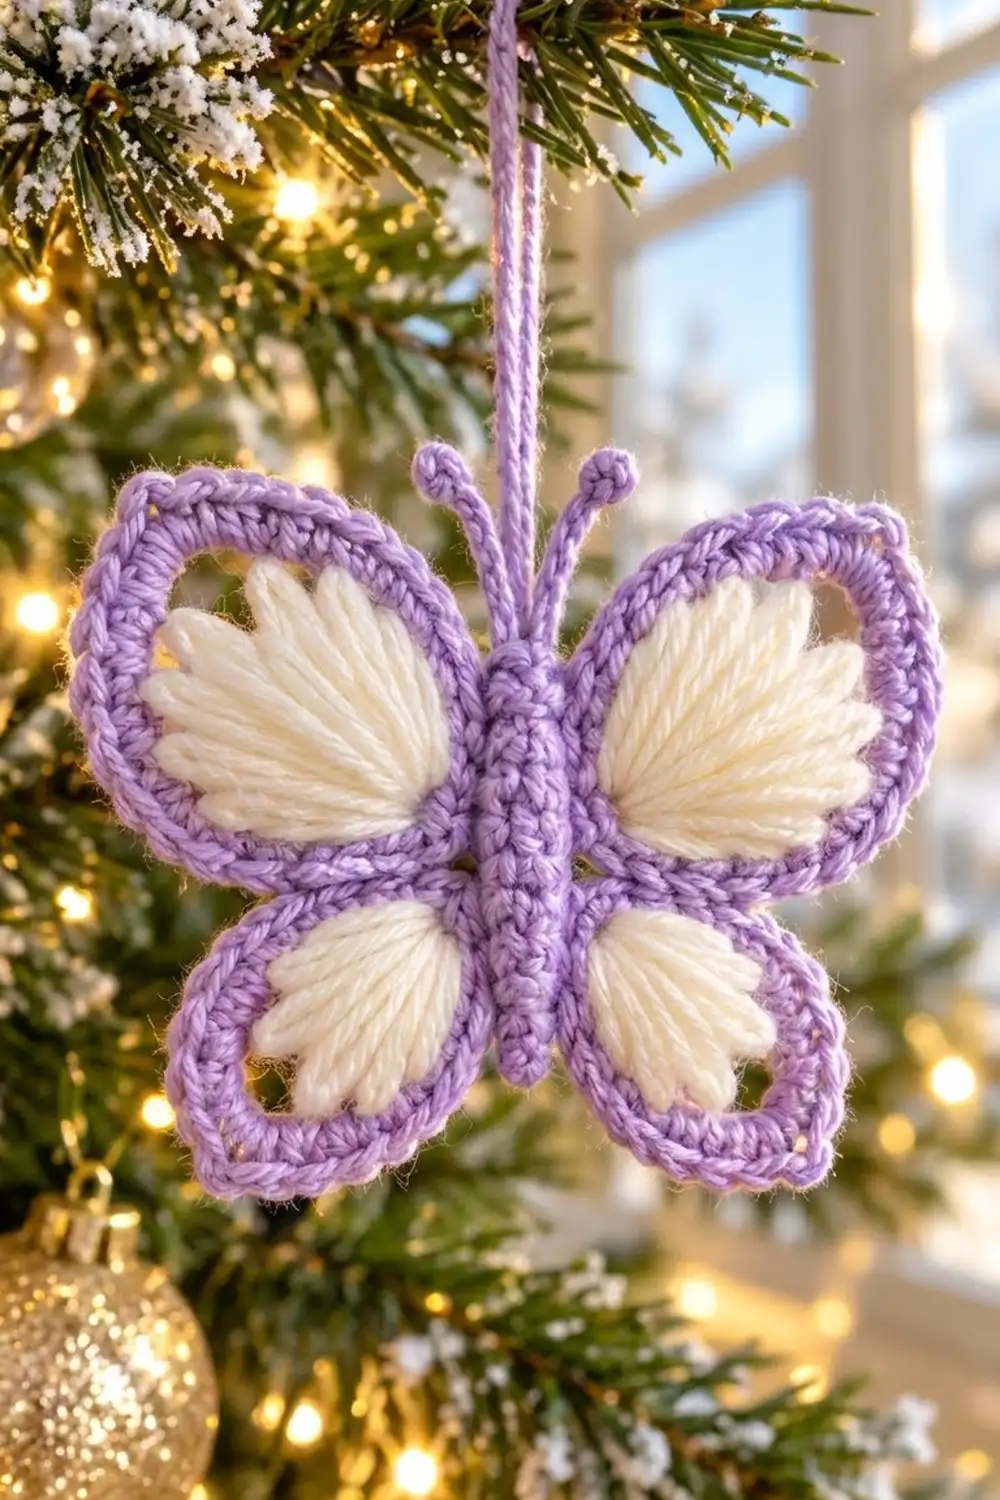
This little butterfly is made to hang on a tree branch. Its lavender wing frames look like soft rope, and each wing is filled with a cream fan of tall stitches that spreads out from the body like feathers. A ridged body, two curled antennae and a chain hanging loop finish the shape.
The colors are calm and wintry: lavender with creamy white. It looks good on a Christmas tree, on a window hook or tied to a gift. You can make several to scatter across the branches, but each butterfly is its own single ornament.
This pattern uses US crochet terms. The finished ornament is 3.5 in (8.9 cm) wide and 3 in (7.6 cm) tall. The antennae add about 0.75 in (1.9 cm) above the head, and the hanging loop is 3 in (7.6 cm) tall.
How it’s made: you work a small oval body first. Next you chain the wing loops straight off the body’s free front loops and cover each loop with single crochet. A round of reverse single crochet makes the corded outer edge. Then you crochet four cream fans and sew them into the frames. The antennae and hanger come last.
Finished Size and Construction
- Finished size: 3.5 in (8.9 cm) wide × 3 in (7.6 cm) tall
- Skill level: Easy-intermediate
- Terminology: US crochet terms
- Yarn weight: DK (weight 3), cotton or cotton blend
- Hook: 3.5 mm (E-4)
- Number of pieces: 1 finished ornament. It’s built from a body with an attached wing frame, plus 4 cream fan fills sewn in.
- Layout: One butterfly with two upper wings and two lower wings
- Piece size: Upper wing 1.4 in (3.6 cm) wide × 1.5 in (3.8 cm) tall; lower wing 1.2 in (3.0 cm) wide × 1.3 in (3.3 cm) tall
- Size before border: 3.3 in (8.4 cm) wide × 2.8 in (7.1 cm) tall
- Border depth: 0.1 in (0.3 cm) on each outer edge
Materials
Yarn: Use a smooth DK cotton or cotton blend. Cotton keeps the wing outlines crisp and shows the stitches clearly. Soft acrylic also works, but the frames will be a little floppier.
- Lavender (Color A): 8 g, about 20 m. Used for the body, wing frames, border, antennae and hanger.
- Cream (Color B): 4 g, about 10 m. Used for the four wing fans.
These amounts include a margin for gauge swatches and weaving in ends.
Tools:
– 3.5 mm (E-4) crochet hook
– Tapestry needle
– Scissors
– Stitch marker
– Blocking mat and rust-proof pins
– Spray bottle with water
– Optional: fabric stiffener for a firmer ornament
Abbreviations (US Terms)
- ch – chain
- sl st – slip stitch
- sc – single crochet
- tr – treble crochet
- dtr – double treble crochet
- BLO – back loop only
- FL – front loop
- st(s) – stitch(es)
- sp – space
- rev sc – reverse single crochet
Special stitch, rev sc (crab stitch): Work from left to right (right to left if you crochet left-handed). Insert the hook into the next stitch to the right, yarn over, pull up a loop, then yarn over and pull through both loops on the hook. This makes the twisted, rope-like edge.
Working around a chain loop: Insert the hook into the open center of the chain loop, not into the chain stitches themselves. The stitches then wrap around the chain and enclose it, which makes the thick, corded wing frame.
Gauge and Checkpoints
Gauge: 20 sc and 22 rows = 4 in (10.2 cm) in sc, which is 5 sc per inch.
Make one test ornament before you make a batch. Small ornaments forgive a lot, but the wing loops depend on how big your chains are.
Checkpoints:
1. Body after Rnd 1: 2 in (5.1 cm) long and 0.5 in (1.3 cm) wide.
2. Upper wing frame after covering: 1.4 in (3.6 cm) wide × 1.5 in (3.8 cm) tall.
3. Lower wing frame after covering: 1.2 in (3.0 cm) wide × 1.3 in (3.3 cm) tall.
4. Whole frame before border: 3.3 in (8.4 cm) × 2.8 in (7.1 cm).
5. After border: 3.5 in (8.9 cm) × 3 in (7.6 cm).
6. Upper fan: about 1.1 in (2.8 cm) from base to feathered edge. Lower fan: about 0.9 in (2.3 cm).
Too big? Go down to a 3.25 mm (D-3) hook, or chain more tightly.
Too small? Go up to a 3.75 mm (F-5) hook.
Fans don’t fit the frames? Change the fan hook by itself, one size up or down. Don’t change the stitch counts.
Body (Color A)
Ch 10.
Rnd 1: Sc in 2nd ch from hook and in next 7 ch (8 sc). Work 3 sc in last ch. Rotate and work along the other side of the foundation chain: sc in next 7 ch, then 2 sc in the same ch as the first sc. Join with sl st to first sc. (20 sc)
Here is how the 20 stitches are laid out:
– Tail end: st 1, st 19 and st 20 (3 sts)
– Side 1: sts 2–8 (7 sts)
– Head end: sts 9–11 (3 sts)
– Side 2: sts 12–18 (7 sts)
Check: 3 + 7 + 3 + 7 = 20.
Rnd 2: Working in BLO, sl st in each st around. (20 sl st)
This round makes the raised ridge on the body. It also leaves the front loop of every Rnd 1 stitch free, and the wings attach to those front loops. Fasten off and weave in the ends.
Checkpoint: 2 in (5.1 cm) long, 0.5 in (1.3 cm) wide.
Wing Frame (Color A)
Work all wing anchors into the free front loops of Rnd 1. Hold the body with the head end (sts 9–11) at the top.
Right Side (Side 1)
- Join A with a sl st in the FL of st 8, the side stitch nearest the head.
- Upper wing loop: Ch 26. Skip sts 7 and 6, then sl st in the FL of st 5.
- Lower wing loop: Ch 20. Skip sts 4 and 3, then sl st in the FL of st 2.
- Cover the lower loop: Work 30 sc around the ch-20 loop. Sl st in the FL of st 5.
- Cover the upper loop: Work 38 sc around the ch-26 loop. Sl st in the FL of st 8.
Fasten off, leaving an 8 in (20.3 cm) tail. (68 sc on this side: 30 + 38)
Keep the stitches packed snugly along each loop so the chain is fully hidden. The loop will round out by itself. There are about 1.5 sc for every chain (30 ÷ 20 = 1.5; 38 ÷ 26 ≈ 1.46). That ratio lets the covered loop lie flat instead of ruffling.
Left Side (Side 2)
Repeat on the other side, mirrored:
- Join A in the FL of st 12.
- Ch 26, sl st in the FL of st 15.
- Ch 20, sl st in the FL of st 18.
- Work 30 sc around the ch-20 loop, sl st in the FL of st 15.
- Work 38 sc around the ch-26 loop, sl st in the FL of st 12.
Fasten off. (68 sc)
The two wing loops on each side share one waist stitch (st 5 on the right, st 15 on the left). That shared stitch makes the “pinched” waist where the upper and lower wings meet.
Checkpoint: the upper wing is 1.4 in (3.6 cm) × 1.5 in (3.8 cm), and the lower wing is 1.2 in (3.0 cm) × 1.3 in (3.3 cm). The whole outline should now measure 3.3 in (8.4 cm) × 2.8 in (7.1 cm).
Wing Fans (Color B)
Each fan is a half-circle of tall stitches all worked into one chain, so they spread out like feathers. A row of chain spaces then gives the tips a feathered edge.
Upper Fan (make 2)
Ch 5.
Row 1: Work 12 dtr in the 5th ch from hook. (13 sts; the skipped ch-4 counts as the first dtr)
Row 2: Ch 1 and turn. Sc in first st, ch 2, sc in next st. Repeat from * to * 11 more times, placing the last sc in the top of the turning ch. (13 sc and 12 ch-2 sps)
Fasten off, leaving a 12 in (30.5 cm) tail for sewing.
Checkpoint: 1.1 in (2.8 cm) from the base point to the feathered edge.
Lower Fan (make 2)
Ch 4.
Row 1: Work 10 tr in the 4th ch from hook. (11 sts; the skipped ch-3 counts as the first tr)
Row 2: Ch 1 and turn. Sc in first st, ch 2, sc in next st. Repeat from * to * 9 more times. (11 sc and 10 ch-2 sps)
Fasten off, leaving a 12 in (30.5 cm) tail.
Checkpoint: 0.9 in (2.3 cm) from base to edge.
Border (Color A)
Border gauge: One rev sc in each sc adds about 0.1 in (0.3 cm) to each outer edge. That takes the width from 3.3 in (8.4 cm) to 3.5 in (8.9 cm), and the height from 2.8 in (7.1 cm) to 3 in (7.6 cm).
Right Side
Join A in the first sc of the upper wing, the one next to st 8. Work so the twisted cord lands on the outer edge of the frame.
- Rev sc in each of the 38 upper-wing sc.
- Rev sc in each of the 30 lower-wing sc.
Fasten off. (68 rev sc)
Left Side
Join A in the first upper-wing sc next to st 12 and repeat. (68 rev sc)
Total border: 68 + 68 = 136 rev sc.
Why the math works: The border uses exactly one rev sc per frame sc, so each side starts with 68 stitches and ends with 68. No increases are needed. The covered frame already has about 1.5 sc for every chain, which is enough stitches to go around the outer curve without cupping. Rev sc is also naturally a little loose, so it sits flat on a curve. The border doesn’t go along the body, so the body’s 20 stitches never enter the count.
Fill Placement and Finishing
- Upper fans: Put the base point of one upper fan at the inside top corner of the upper wing, right beside the body near st 7. The fan should open toward the wing tip. Sew the base point firmly to the frame and body.
- Tack the feathered edge to the inside of the frame at 3 points: the top, the outer side and the bottom. Use a single stitch through one ch-2 sp each time. Leave the rest of the edge free so the small open gaps near the wing tip still show.
- Lower fans: Put the base point beside the body near st 3, opening down and out. Tack the edge to the frame at 3 points the same way.
- Repeat on the left side, mirroring the placement.
- Antennae (make 2): Join A in st 9.
- Ch 7, then sl st in the 4th ch from hook. This makes a small ring, which is the curled tip.
- Sl st in each of the next 3 ch back toward the head, then sl st in st 9.
- Fasten off.
- Repeat in st 11 for the second antenna.
- Hanger: Join A in st 10. Ch 30, which is about 6 in (15.2 cm) long, and sl st back into st 10. This gives a 3 in (7.6 cm) loop. Fasten off.
- Weave in all ends along the frame cords so they disappear.
Final Blocking
- Spray the ornament with water until it is damp but not dripping.
- Lay it face up on the blocking mat.
- Pin the body straight first: 2 in (5.1 cm) long.
- Pin each upper wing out to 1.4 in (3.6 cm) wide and 1.5 in (3.8 cm) tall, keeping the curve smooth.
- Pin each lower wing to 1.2 in (3.0 cm) × 1.3 in (3.3 cm).
- Check the overall size: 3.5 in (8.9 cm) × 3 in (7.6 cm).
- Spread the fans gently so the ch-2 tips fan out evenly.
- Pin the antennae with their tips curling outward.
- If you want a stiff ornament, brush on fabric stiffener now.
- Let it dry completely before you unpin it.
Final Quality-Control Checklist
- Body has 20 sts with a clear raised ridge.
- Each side has 68 frame sc: 38 on the upper wing and 30 on the lower.
- No chain shows through the covered loops.
- Each border side has 68 rev sc, 136 in total.
- Upper fans have 13 sts and lower fans have 11 sts.
- Fans are tacked at 3 points, with small gaps left open near the tips.
- Both sides mirror each other.
- Antennae are even and both tips are curled.
- Hanger is centered at st 10.
- Finished size is 3.5 in (8.9 cm) × 3 in (7.6 cm).
Troubleshooting
Wing frame ruffles: You’ve packed in too many sc. Space them out a little more around the chain, but keep the count the same.
Wing frame cups or puckers: The chain is too tight. Chain the wing loops with a hook one size larger, then go back to the main hook.
Chain shows through the frame: Push the sc closer together along the loop as you go.
Fan is too big for the frame: Make it again one hook size smaller.
Fan is too small: Go up one hook size so the edge reaches the frame. Small gaps near the tips are intentional.
Border flares: Work the rev sc more firmly, or block it flat with more pins.
Butterfly leans when hung: Move the hanger so it’s exactly in st 10.
Antennae flop: Use fabric stiffener or tighten the slip stitches.
Care
Hand wash in cool water, press out the water in a towel, and re-block flat to dry. If you stiffened the ornament, just spot-clean it and store it flat.
Final Notes
Here is the full measurement chain:
- Gauge is 5 sc per inch.
- The body is 20 sts and 2 in (5.1 cm) long.
- Each side’s wing loops are covered with 68 sc, which gives a 3.3 in (8.4 cm) × 2.8 in (7.1 cm) outline.
- A one-to-one border of 136 rev sc adds 0.1 in (0.3 cm) per edge, for a finished size of 3.5 in (8.9 cm) × 3 in (7.6 cm).
- Four cream fans, with 13 sts in the upper fans and 11 in the lower, fill the frames.
If every checkpoint matches, your butterfly will hang straight and ready for the tree.
Happy crocheting!