

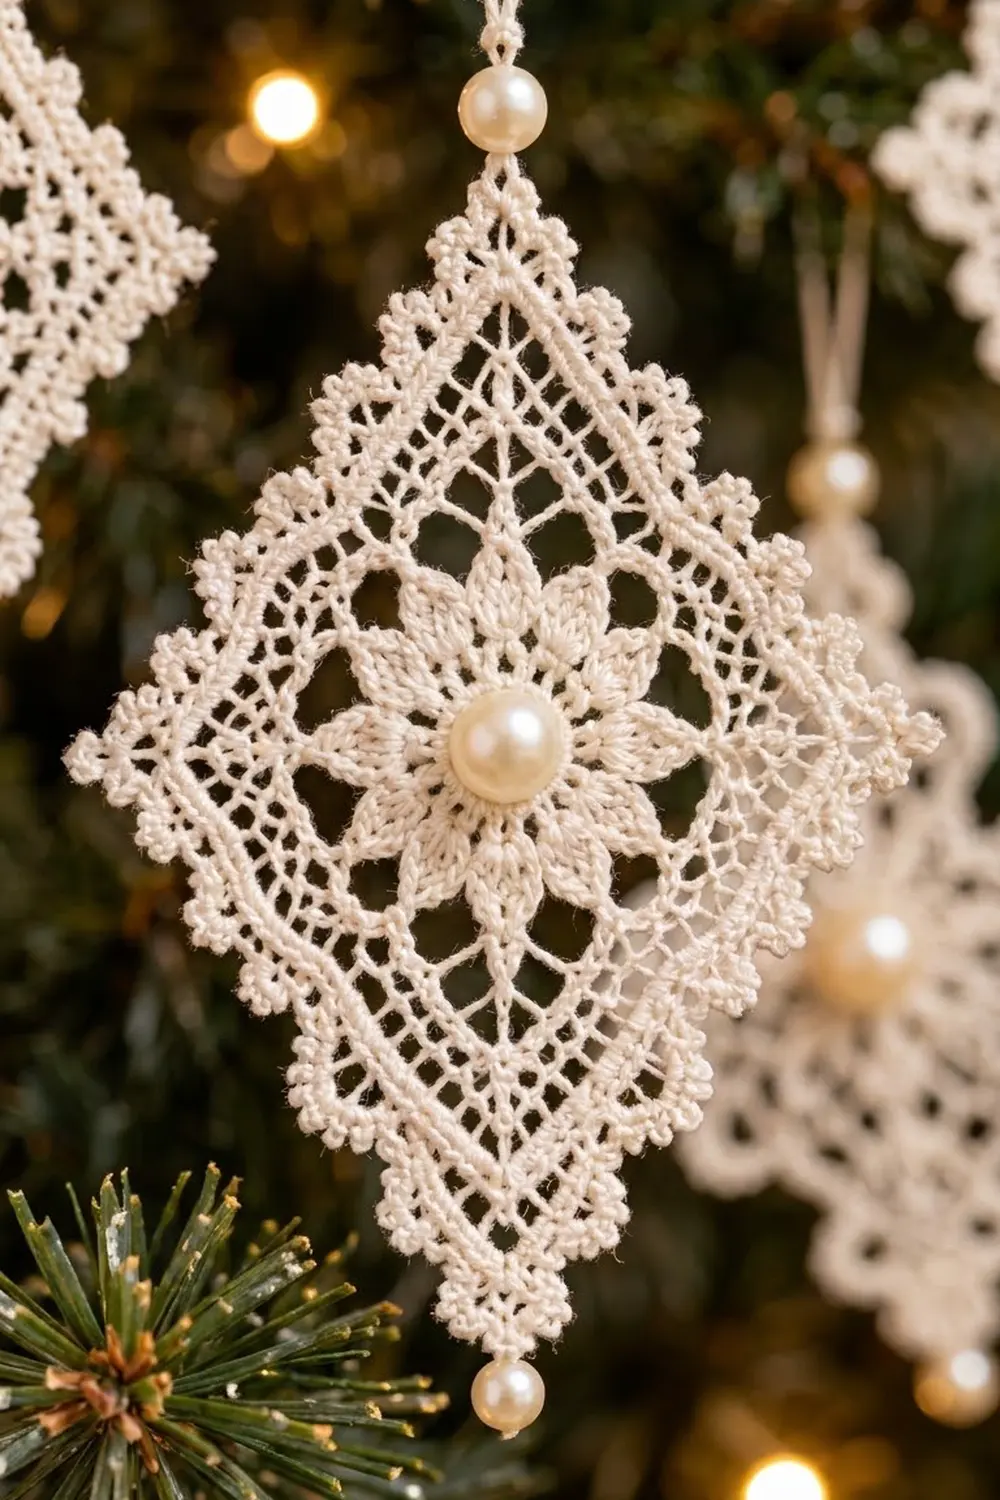
The Pearl Frost Diamond is a lacy thread ornament worked in one piece. It starts with an eight-petal flower that has a pearl sewn into its center. Next comes a ring of open chain loops, a band of filet mesh and a solid frame. A picot shell edge finishes it, and blocking turns it into a tall, slim diamond.
It is worked entirely in ivory cotton thread with three cream pearls: one in the flower center, one dangling from the bottom point, and one threaded onto the hanging loop. The look is soft, classic and a little vintage, the kind of ornament that catches the light on a tree branch.
This pattern uses US crochet terms. The blocked ornament measures 3.75 in (9.5 cm) wide and 5.25 in (13.3 cm) tall, picot points included. The hanging loop and bead dangle are extra.
Construction is simple. You work the flower in the round, square it off with four corners, add mesh and frame rounds, then edge it. Finally you block the square “on point” into a narrow diamond. Lace stretches and shears easily, so the same square that measures 3.25 in (8.3 cm) per side becomes a rhombus whose sides still measure 3.25 in (8.3 cm).
Finished Size and Construction
- Finished size (blocked): 3.75 in (9.5 cm) wide x 5.25 in (13.3 cm) tall
- Skill level: Intermediate (thread lace, working into chain loops, picots)
- Terminology: US crochet terms
- Yarn weight: Size 10 crochet thread (lace, weight 0)
- Hook: 1.5 mm (US steel 8)
- Number of pieces: 1 (single motif, no joining)
- Layout: One square motif hung on point, blocked into a diamond
- Piece size (after border, before blocking): 3.25 in (8.3 cm) per side
- Size before border: 2.75 in (7.0 cm) per side
- Border depth: 0.25 in (0.6 cm), 2 rounds
Materials
Use a mercerized cotton thread in size 10. Mercerized thread gives crisp stitch definition and a slight sheen that suits the pearls. Avoid fuzzy or acrylic thread, because the picots and mesh will lose their shape.
- Ivory / cream size 10 cotton thread: 5 g, about 16 m (17.5 yd) per ornament
- Pearl beads: one 8 mm cream pearl (center), two 6 mm cream pearls (top and bottom)
- 1.5 mm (US steel 8) crochet hook
- Fine tapestry needle or beading needle
- Ivory sewing thread
- Scissors
- Blocking board or foam mat, rustproof pins
- Spray starch or a 1:1 mix of white glue and water
- Ruler or tape measure
The thread quantity includes a margin of about 20% for gauge checks, weaving in and the hanging loop.
Abbreviations (US Terms)
- ch – chain
- sl st – slip stitch
- sc – single crochet
- hdc – half double crochet
- dc – double crochet
- sp – space
- st(s) – stitch(es)
- MR – magic ring
- rep – repeat
Special stitches
- Picot (ch-3 picot): Ch 3, sl st in 3rd ch from hook.
- Large picot (ch-5 picot): Ch 5, sl st in 5th ch from hook.
- Shell: (2 dc, ch-3 picot, 2 dc) all in the same st.
Gauge and Checkpoints
Gauge: 11 dc and 5 rounds of dc = 1 in (2.5 cm) with size 10 thread and a 1.5 mm hook.
Because this is a single ornament, the ornament itself is your gauge test. Measure it at each checkpoint below. If you are off by more than about 0.13 in (0.3 cm), adjust before you keep going.
- After Round 1: ring diameter 0.5 in (1.3 cm)
- After Round 3: flower diameter 1.5 in (3.8 cm), tip to tip
- After Round 5: 2.1 in (5.3 cm) per side, corner to corner
- After Round 6: 2.4 in (6.1 cm) per side
- After Round 7: 2.75 in (7.0 cm) per side
- After Round 9 (border): 3.25 in (8.3 cm) per side
Too big? Go down to a 1.4 mm or 1.3 mm hook, or tighten your chains. Loose chain loops in Round 4 are the most common cause.
Too small? Go up to a 1.65 mm (US steel 7) hook. Slightly small is fine, since blocking will open the mesh.
Measure on a flat surface without stretching. Lace curls before blocking, so gently pat it flat first.
Center Flower
Round 1: Make a MR. Ch 3 (counts as dc), 15 dc in ring. Sl st to top of beginning ch-3. Pull the ring tight. (16 dc)
Round 2: Ch 1, sc in same st. Ch 5, skip 1 dc, sc in next dc; rep from * 6 more times. Ch 5, skip last dc, sl st to first sc. (8 sc, 8 ch-5 loops)
Round 3 (petals): Sl st into first ch-5 loop. In each ch-5 loop work (sc, hdc, 2 dc, ch 2, 2 dc, hdc, sc). Sl st to first sc. (8 petals: 64 sts and 8 ch-2 tip sps)
Each petal rises to a pointed tip at its ch-2 space. That gives you the star-like flower around the center pearl.
Round 4 (open loop ring): Sl st into the next hdc, the next 2 dc and the first ch-2 tip sp. Ch 1, sc in the same tip sp. Ch 8, sc in next petal tip sp; rep from * 6 more times. Ch 8, sl st to first sc. (8 sc, 8 ch-8 loops)
Mark the first sc and every second sc after it (4 sc in total). These are the corner sc. The other 4 sc are mid-side sc.
Squaring the Motif
Round 5 (conversion round): Ch 3 (counts as dc), (dc, ch 3, 2 dc) in the same corner sc. 9 dc in next ch-8 loop, dc in next mid-side sc, 9 dc in next ch-8 loop, (2 dc, ch 3, 2 dc) in next corner sc; rep from * 2 more times. 9 dc in next loop, dc in mid-side sc, 9 dc in last loop. Sl st to top of beginning ch-3.
Count per side: 9 + 1 + 9 = 19 dc worked into the loops and the mid-side sc, plus 2 + 2 = 4 corner dc. (23 dc per side, 92 dc total, 4 corner ch-3 sps)
In this pattern, “per side” always includes the 2 corner dc at each end of that side. The ch-3 corner space is not counted.
Round 6 (filet mesh, growth round): Sl st in next dc and into the corner ch-3 sp. Ch 3 (counts as dc), (dc, ch 3, 2 dc) in same sp. Dc in next dc, [ch 1, skip next dc, dc in next dc] 11 times, (2 dc, ch 3, 2 dc) in corner sp; rep from * 2 more times. Dc in next dc, [ch 1, skip next dc, dc in next dc] 11 times. Sl st to top of beginning ch-3.
The bracketed section covers 1 + 22 = 23 sts of the previous side. It produces 12 dc and 11 ch-1 sps. (27 sts per side: 2 corner dc + 12 dc + 11 ch-1 sps + 2 corner dc; 108 sts total)
This round makes the open lattice that frames the flower.
Round 7 (solid frame, growth round): Sl st in next dc and into the corner ch-3 sp. Ch 3 (counts as dc), (dc, ch 3, 2 dc) in same sp. Dc in each dc and each ch-1 sp across (27 sts), (2 dc, ch 3, 2 dc) in corner sp; rep from * 2 more times. Dc in each st and ch-1 sp across the last side. Sl st to top of beginning ch-3. (31 dc per side, 124 dc total)
Checkpoint: each side should now measure 2.75 in (7.0 cm).
Border
Border gauge: 11 sc = 1 in (2.5 cm), same as the dc gauge. Each shell takes up 4 sts of edge, about 0.36 in (0.9 cm).
Round 8 (trim round): Sl st in next dc and into the corner ch-3 sp. Ch 1, (sc, ch 2, sc) in same sp. Sc in each dc across, (sc, ch 2, sc) in corner sp; rep from * 2 more times. Sc in each dc across the last side. Sl st to first sc.
Count per side: 31 sc worked 1 per existing dc + 2 extra corner sc = 33 sc per side (132 sc total, 4 corner ch-2 sps).
Before working Round 9, choose the two opposite corners that will be the top and bottom of the diamond. Mark them. The other two are the side corners.
Round 9 (picot shell edge): Sl st into the top corner ch-2 sp. Ch 1, (sc, large picot, sc) in same sp.
Along the side: sc in first sc, [skip 1 sc, shell in next sc, skip 1 sc, sc in next sc] 8 times.
At the next corner: if it is a side corner, work (sc, picot, sc) in the ch-2 sp. If it is the bottom corner, work (sc, large picot, sc) in the ch-2 sp.
Repeat the side and corner steps around. End the last side with the final sc, then sl st to first sc. Fasten off and leave a 6 in (15.2 cm) tail.
Per side: 9 sc + 8 shells. In total: 36 side sc and 32 shells, plus 4 corner groups (2 with large picots, 2 with small picots), each with 2 sc.
Why the math works: Each shell repeat (skip, shell, skip, sc) uses exactly 4 sts. One sc starts the side. So 1 + (8 x 4) = 33, which matches the 33 sc per side from Round 8 exactly. Every side ends cleanly on an sc, right next to the corner. The large picots at the top and bottom make those points stand out, which helps the diamond look taller.
Adding the Pearls
- Center pearl: Thread ivory sewing thread on a fine needle. Bring it up through the magic ring, through the 8 mm pearl and back down. Repeat 3 times and knot on the back.
- Bottom dangle: With a 4 in (10.2 cm) piece of thread, sew through the large picot at the bottom point. Thread on a 6 mm pearl so it hangs about 0.5 in (1.3 cm) below the tip. Knot, then hide the ends inside the picot.
- Hanging loop: Cut a 10 in (25.4 cm) length of thread. Pass it through the top large picot and slide on a 6 mm pearl. Push the pearl down to sit just above the point, then knot the ends together to make a loop about 3 in (7.6 cm) long.
If you use a glue-based stiffener, add the pearls after blocking so they stay clean.
Final Blocking
- Weave in all thread tails along the back of the solid frame (Round 7). Do not trim them yet.
- Wet the ornament in cool water and press it gently in a towel until it is just damp.
- On your blocking board, mark a diamond 3.75 in (9.5 cm) wide and 5.25 in (13.3 cm) tall. Draw lines from the center to each of the four points.
- Lay the ornament on point. Pin the top and bottom large picots on the tall points and the side picots on the narrow points.
- Ease each side into a straight line. Pin the tip of every shell picot so that the edge scallops evenly.
- Center the flower. Pin each of the 8 petal tips so the flower stays round while the mesh shears into the diamond.
- Spray with starch, or dab with the glue mix. Let it dry completely, at least 12 hours.
- Unpin, trim the woven tails, then add the pearls if you haven’t yet.
Each edge stays at 3.25 in (8.3 cm). Only the angles change, from 90 degrees to a slim diamond.
Final Quality-Control Checklist
- Round 1 ring is pulled closed with no center hole.
- 8 even, pointed petals.
- 23 / 27 / 31 / 33 sts per side in Rounds 5 to 8.
- 8 shells and 9 sc on every side of Round 9.
- Large picots on the top and bottom points, small picots on the side points.
- Blocked size 3.75 in (9.5 cm) x 5.25 in (13.3 cm).
- Center pearl sits firmly and does not wobble.
- Hanging loop knot is secure and hidden behind the top pearl.
- No visible tails on the front.
Troubleshooting
Flower cups or ruffles: Your Round 4 loops are too short or too long. Check that each loop has exactly ch 8, and try changing hook size by 0.1 mm for that round.
Corners look rounded: Make sure each corner gets the full (2 dc, ch 3, 2 dc), worked into the ch-3 sp and not into a stitch.
Count off by 1 or 2 on a side: Most often the beginning ch-3 was skipped or worked into twice. Remember that it counts as a dc.
Shells don’t end evenly: Recount Round 8. Each side must have exactly 33 sc before the edging will fit.
Diamond won’t stay slim: Use more stiffener, or re-wet and pin it out again. A glue mix holds the shape better than spray starch.
Mesh looks crooked after blocking: Pin the petal tips first, then the outer points. This keeps the stretch even.
Care
Hand wash in cool water with mild soap, then reshape and re-stiffen while damp. Store the ornament flat between tissue paper so the picots and points don’t get crushed.
Final Notes
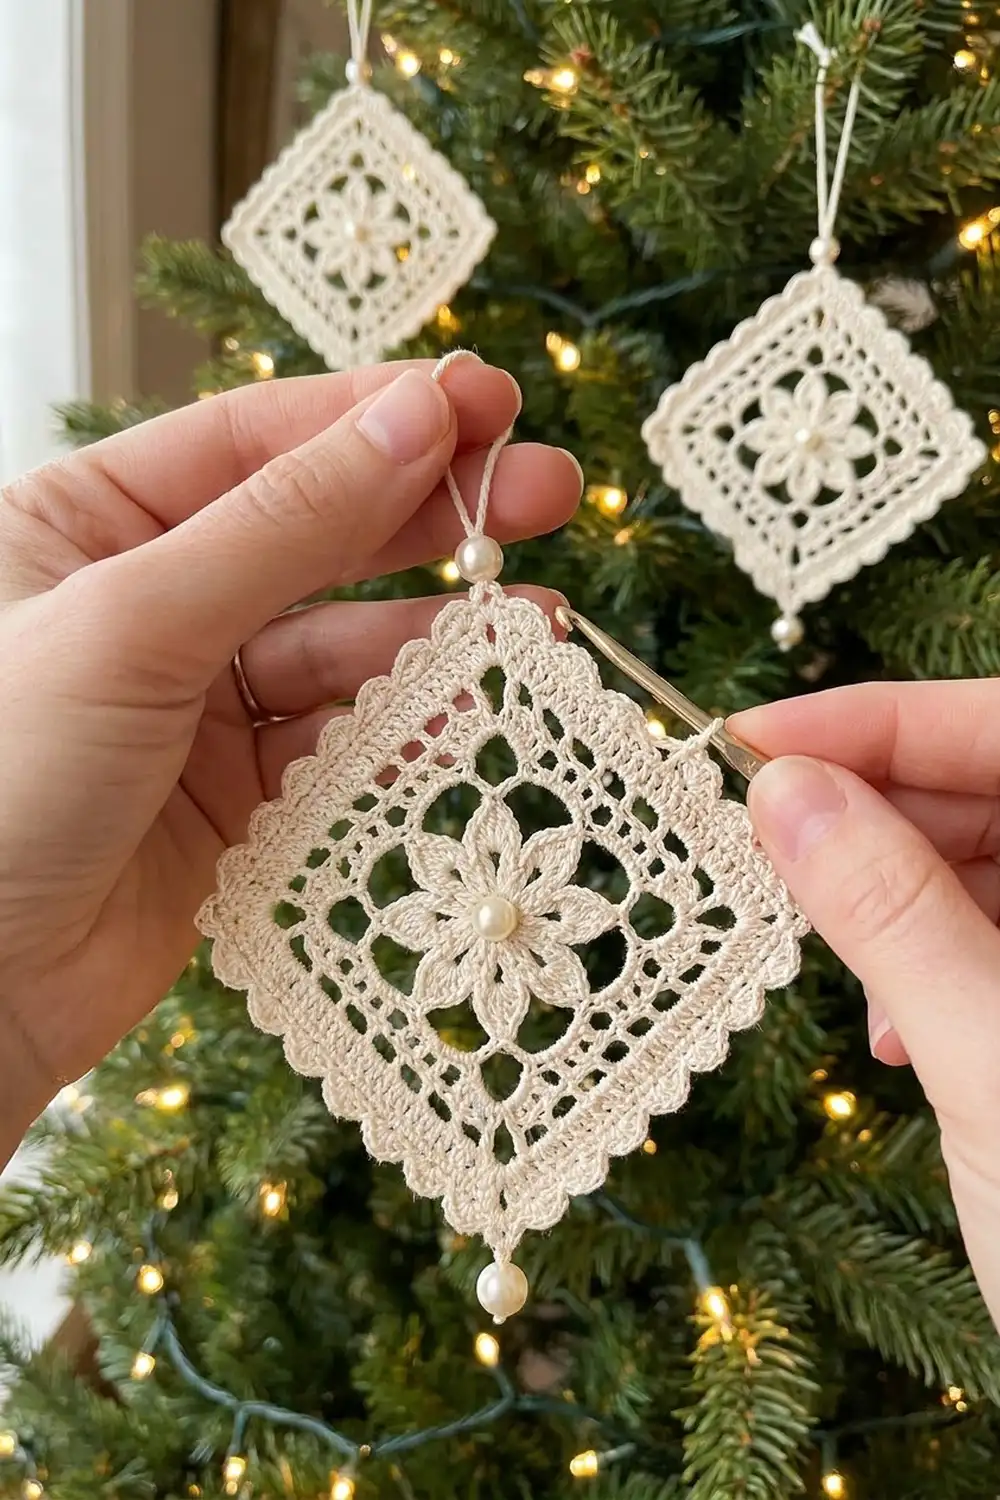
The measurement chain is simple to follow. A 0.5 in (1.3 cm) ring grows into a 1.5 in (3.8 cm) flower. Squaring gives 2.1 in (5.3 cm) per side, then the mesh and frame bring it to 2.4 in (6.1 cm) and 2.75 in (7.0 cm). The border adds 0.25 in (0.6 cm), so each side reaches 3.25 in (8.3 cm). Blocking shears that square into a 3.75 in (9.5 cm) by 5.25 in (13.3 cm) diamond. If you hit each checkpoint, the stitch counts will line up every time: 16 sts in Round 1, 64 petal sts in Round 3, then 23, 27, 31 and 33 per side.
Make one, or a whole set for the tree.
Happy crocheting!