

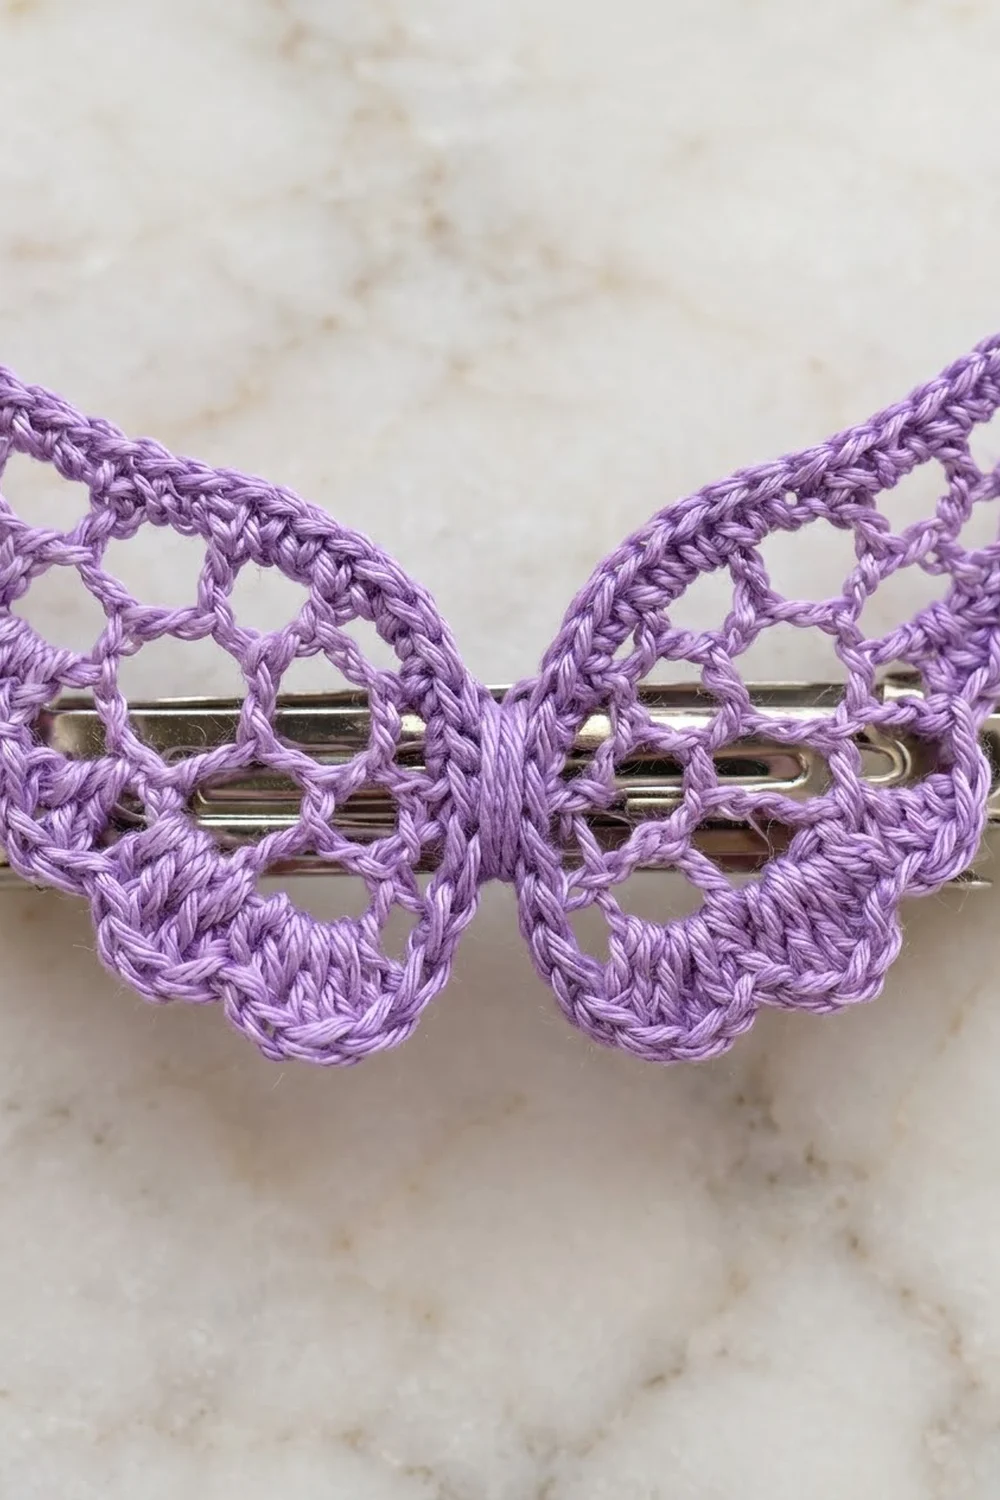
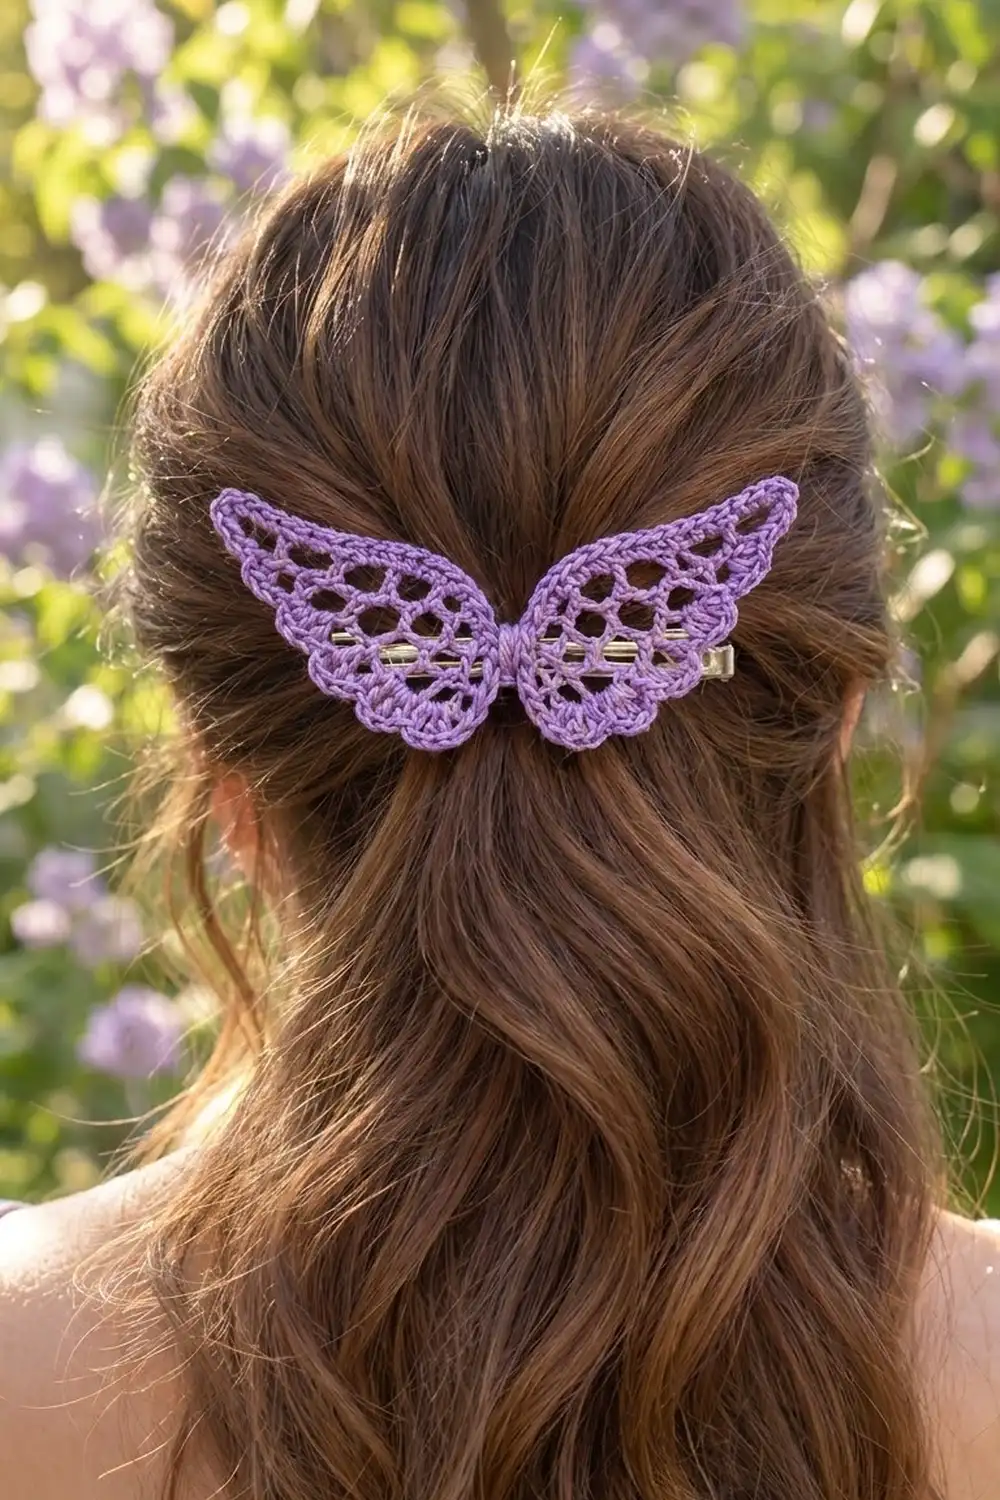
These little lace wings sit on a metal barrette and add a soft, romantic touch to a half-up hairstyle, a bun, or a braid. Each wing has a firm top spine that sweeps up into a pointed tip. Below it is an airy chain-loop mesh, and a row of rounded scallops finishes the lower edge.
The sample uses one color, a soft lavender cotton thread. Mercerized thread gives crisp stitch definition and a light sheen, so the mesh stays open and the scallops hold their shape. The style is delicate and lacy, but the wings are sturdy enough for everyday wear.
This pattern uses US crochet terms. The finished accessory measures 4.25 in (10.8 cm) wide by 1.75 in (4.4 cm) tall after blocking and wrapping the center.
You make 2 identical wings in rows, starting with the top spine and working down through three mesh rows. Then you flip one wing over to mirror it and slip stitch the inner edges together. One border round goes around the joined pair: a single-crochet edge along the top, a pointed tip at each end, and shell scallops along the bottom. To finish, you wrap the center tightly and sew the wings onto the clip.
Finished Size and Construction
- Finished size: 4.25 in x 1.75 in (10.8 cm x 4.4 cm)
- Skill level: Intermediate (fine thread, small loops)
- Terminology: US crochet terms
- Yarn weight: Size 3 crochet thread (CYC 0 Lace)
- Hook: 2.0 mm (US steel 4) steel hook
- Number of pieces: 2 wings
- Layout: 2 wings side by side (2 x 1), mirrored
- Piece size: each wing is 2 in x 1 in (5.1 cm x 2.5 cm) before the border
- Size before border: 4 in x 1 in (10.2 cm x 2.5 cm) once joined
- Border depth: 0.1 in (0.3 cm) along the top, 0.35 in (0.9 cm) at the scallops
Materials
Yarn: Use size 3 mercerized cotton crochet thread. Cotton holds its shape, takes starch well, and won’t fuzz when it rubs against hair. Avoid soft acrylic or wool here, because the mesh will sag and the tips won’t stand up.
- Lavender: 10 g, about 18 m (19.7 yd)
This quantity includes a generous margin for a gauge test, the center wrap, and the sewing tails. The accessory itself uses about 12 m (13.1 yd).
Tools:
- 2.0 mm (US steel 4) steel crochet hook
- 3.5 in (8.9 cm) metal barrette or flat snap clip
- Tapestry needle with a small eye
- Sharp scissors
- Rustproof pins and a foam blocking board
- Spray bottle with water
- Optional: fabric stiffener or spray starch
Abbreviations (US Terms)
- ch – chain
- sl st – slip stitch
- sc – single crochet
- hdc – half double crochet
- dc – double crochet
- st(s) – stitch(es)
- sk – skip
- sp – space
- RS / WS – right side / wrong side
Special stitches:
- Shell: (sc, hdc, 3 dc, hdc, sc) in the same loop = 7 sts.
- Big shell: (sc, hdc, 5 dc, hdc, sc) in the same loop = 9 sts.
Gauge and Checkpoints
Gauge: 9 sc = 1 in (2.5 cm) with a 2.0 mm hook. Each mesh row is about 0.3 in (0.8 cm) tall.
Make one complete wing and measure it before you start the second. The pieces are small, so even a slight tension difference shows up quickly. If you’re unsure, chain 19 and work Row 1 as a quick test strip. It should measure 2 in (5.1 cm).
Checkpoints:
- Row 1: The 18-sc spine measures 2 in (5.1 cm).
- After Row 4: The wing is 2 in (5.1 cm) wide and 1 in (2.5 cm) deep at the inner edge.
- After joining: The pair measures 4 in x 1 in (10.2 cm x 2.5 cm).
- After the border: The pair measures about 4.5 in x 1.75 in (11.4 cm x 4.4 cm).
- After the center wrap: The finished piece measures 4.25 in x 1.75 in (10.8 cm x 4.4 cm).
If it’s too big: Switch to a 1.75 mm hook, or work your chain loops a little tighter.
If it’s too small: Switch to a 2.25 mm hook. Don’t add chains to the loops, because that changes how the shells fit.
Wing (Make 2)
Each wing is worked in rows. The foundation chain becomes the top edge of the wing, and the mesh hangs below it.
Foundation: Ch 19.
Row 1 (spine): Sc in the 2nd ch from the hook and in each ch across. Turn. (18 sc)
Number these sts 1 to 18, starting from the end you just finished. St 1 is the inner (center) end of the wing, and st 18 is the outer tip end.
Row 2 (mesh): Ch 1, sc in st 1, ch 4, sk 2 sts, sc in next st; repeat from * 4 more times. Turn. (6 sc, 5 ch-4 loops)*
The last sc lands in st 16, so sts 17 and 18 stay unworked. Leaving this short end unworked is what narrows the tip.
Row 3: Ch 1, sc in the first ch-4 loop, ch 4, sc in next ch-4 loop; repeat from * 3 more times. Turn. (5 sc, 4 ch-4 loops)*
This row starts at the tip side and ends in the loop nearest the center.
Row 4: Ch 1, sc in the first ch-4 loop, ch 4, sc in next ch-4 loop; repeat from * 2 more times. (4 sc, 3 ch-4 loops)*
This row starts at the center side and ends at the tip side. Fasten off.
Each mesh row has 1 fewer loop than the row before (5, then 4, then 3), so the wing tapers into its sweeping shape.
Inner Edge Row: With the RS facing, join the thread at the center end of Row 1 (st 1). Work down the row ends of the inner edge: 1 sc in the end of Row 1, then 2 sc in the end of each of Rows 2, 3, and 4. Fasten off. (7 sc)
Checkpoint: The wing measures 2 in (5.1 cm) along the spine and 1 in (2.5 cm) deep at the inner edge.
Make All Pieces
- Lavender: 2 wings. Each has an 18-sc spine, 3 mesh rows, and a 7-sc inner edge.
Turn the second wing over so its WS faces up. Because the wings are identical, flipping one gives you a mirror image, and both spines still run along the top.
Layout grid (RS facing, spines at the top):
[ Wing A (flipped) ] | [ Wing B ]
   tip ← ← center    |  center → → tip
Joining
Method: Slip stitch seam through both pieces.
- Hold the 2 wings with their inner edges together and their spines lined up at the top.
- Starting at the spine end, insert the hook through the first inner-edge sc of Wing A and the matching sc of Wing B, then sl st.
- Work 1 sl st through each matching pair down the edge. (7 sl sts total)
Stitch-to-stitch logic: Each inner edge has exactly 7 sc, so the seam joins sc to sc with nothing left over. Neither spine gains or loses any stitches.
Tension: Keep each sl st about as loose as one sc. A tight seam pulls the spines into a V. The center gets cinched later, so for now the seam only needs to lie flat.
Size checkpoint: The joined pair measures 4 in x 1 in (10.2 cm x 2.5 cm), and the two spines form one straight line.
Border
Border gauge: The border uses the main gauge, 9 sc = 1 in (2.5 cm). The sc edge adds 0.1 in (0.3 cm) above the spine, and the shells add 0.35 in (0.9 cm) below the mesh.
The border is one continuous round around the joined pair. On the top edge, you work into the free loops of the foundation chain. On the lower edge, you work into the exposed mesh loops.
Round 1: With the RS facing, join the thread in the free loop of foundation ch 1 of Wing A, next to the seam.
Wing A, top edge: Sc in the free loop of each of chs 1–17, then work (sc, ch 3, sc) in ch 18 for the tip. (19 sc + 1 ch-3 tip)
Wing A, lower edge (tip to center):
- Sc in the top of Row 1 st 17. (1 sc)
- Shell in the tip-most ch-4 loop of Row 2. (7 sts)
- Sc around the end sc of Row 4. (1 sc)
- Shell in the tip-side ch-4 loop of Row 4. (7 sts)
- Shell in the middle ch-4 loop of Row 4. (7 sts)
- Big shell in the center-side ch-4 loop of Row 4. (9 sts)
- (32 sts)
Carry the thread straight across the bottom of the seam without adding any stitches.
Wing B, lower edge (center to tip): Work the same sequence in reverse: big shell, shell, shell, sc around the end sc of Row 4, shell in the tip-most loop of Row 2, sc in Row 1 st 17. (32 sts)
Wing B, top edge: Work (sc, ch 3, sc) in foundation ch 18, then sc in each of chs 17–1. (19 sc + 1 ch-3 tip)
Join with a sl st to the first sc. Fasten off and weave in the ends.
Round total: 2 x (19 + 32) = 102 sts plus 2 ch-3 tips.
Why the math works: On each top edge, you use all 18 foundation chains exactly once. The tip chain gets 2 sc and the other 17 chains get 1 sc each, so 17 + 2 = 19. Both tip sc are already inside that 19, so don’t count them again. On each lower edge, every exposed loop gets exactly one shell, and the two single sc fill the steps between them. The seam adds 0 sts, so the round total is exactly 2 x 51.
Final Blocking
- Spritz the joined wings lightly with water, or brush on fabric stiffener for a crisp hair-clip finish.
- Pin the pair RS up on a blocking board.
- Pin the spines into a gentle upward curve, and pin each ch-3 tip pointing up.
- Open each ch-4 loop with a pin so the mesh spacing looks even.
- Pin out the point of every shell, with the big shells at the bottom center.
- Measure the pair. It should be 4.5 in x 1.75 in (11.4 cm x 4.4 cm). Let it dry completely.
- Unpin. Cut a 40 in (101.6 cm) length of thread and wrap it tightly around the seam 12 times. This cinches the center into a small rounded body about 0.4 in (1.0 cm) wide. Tie the ends at the back.
- Use the tails to sew the body to the clip bar. Add one tack stitch under each wing, 1.25 in (3.2 cm) from the center, so the wings stay flat on the clip.
Final Quality-Control Checklist
- Each wing spine has 18 sc, and Row 1 measures 2 in (5.1 cm).
- The mesh rows have 5, 4, and 3 loops.
- Each inner edge has 7 sc, joined with 7 sl sts.
- On each wing, the border has 19 sc and 1 ch-3 tip on top and 32 sts on the lower edge.
- There are no extra stitches at the seam.
- The wings mirror each other in shape and tip angle.
- The finished size is 4.25 in x 1.75 in (10.8 cm x 4.4 cm).
- The clip opens and closes freely, with no thread caught in the hinge.
Troubleshooting
- The spine ruffles: Your foundation chain is too loose. Chain with a smaller hook, then switch back for Row 1.
- The spine curls tightly: Your chain is too tight. Chain with a hook one size larger.
- The mesh loops collapse: Make your chains slightly firmer, and starch the piece when you block it.
- The shells cup or ripple: Count your stitches. A shell has 7 sts and a big shell has 9. Work the dc loosely.
- The seam pulls into a V: Loosen the sl sts, or redo the seam with a larger hook.
- The wings look lopsided: Check that you flipped one wing over before joining. Rotating it is not enough.
- A tip won’t stand up: Re-block with stiffener and pin the ch-3 point higher.
- The body looks loose: Unwind the wrap and rewrap with firmer tension, keeping each wrap next to the one before it.
Care
Remove the wings from the clip first if the metal could rust. Hand wash in cool water, roll in a towel to press out the water, and dry flat with the tips pinned.
Final Notes
The measurement chain is short and easy to check at each stage:
- 18 sc spine = 2 in (5.1 cm)
- Each wing = 2 in x 1 in (5.1 cm x 2.5 cm)
- Joined pair = 4 in x 1 in (10.2 cm x 2.5 cm)
- After the border = 4.5 in x 1.75 in (11.4 cm x 4.4 cm)
- After the wrap = 4.25 in x 1.75 in (10.8 cm x 4.4 cm)
If every stage matches, the wings will sit neatly across a 3.5 in (8.9 cm) clip, with the tips just past each end. Once you know the pattern, you can make pairs in other thread colors to match different outfits.
Happy crocheting!