

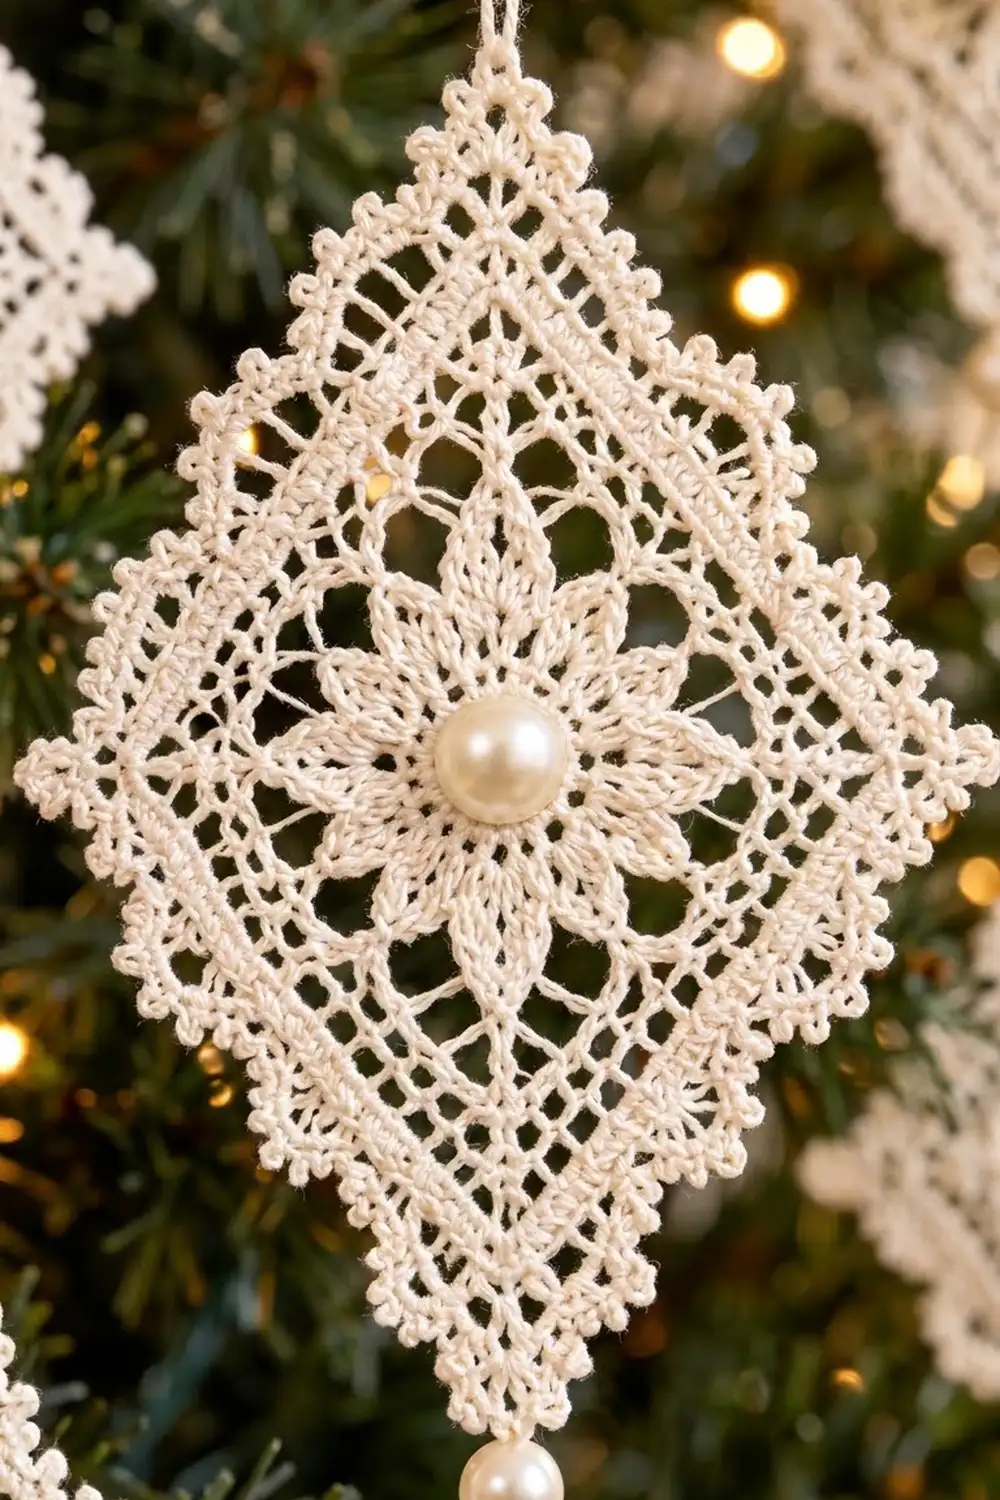
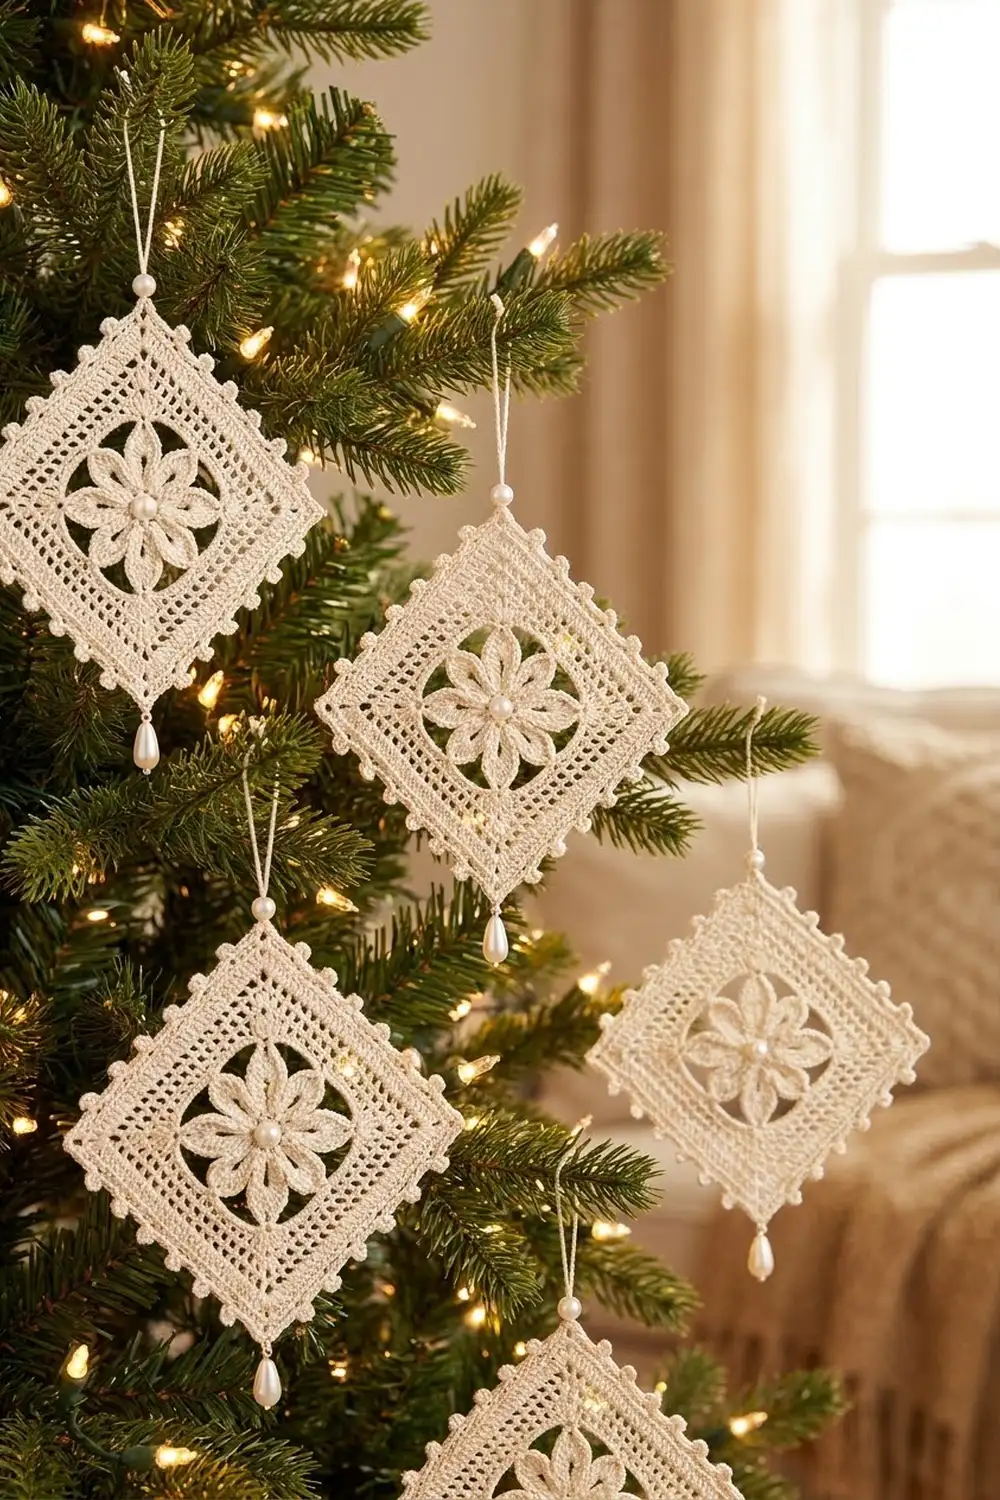
The Pearl Frost Diamond is a small lace ornament worked in ivory cotton thread. It is a square motif hung on point, so it looks like a diamond on the tree. An eight-petal flower sits in the center, circled by open filet mesh, a solid band, and a fine picot edge.
The ornament uses one color, a soft ivory, plus three pearl beads. A large pearl covers the flower center, a small pearl sits on the hanging loop, and a pearl drop hangs from the bottom point. The look is quiet and vintage, and a group of them looks lovely on a green tree with warm lights.
This pattern uses US crochet terms. The finished ornament measures 3 in (7.6 cm) per side and about 4.25 in (10.8 cm) from top point to bottom point, not counting the pearls or hanging loop.
The ornament is one piece worked in the round. You make the flower in Rounds 1–3, turn it into a square in Rounds 4–5, add the mesh in Round 6, and make a solid band in Round 7. Two picot border rounds finish the edge. Then you starch and block it and add the pearls.
Finished Size and Construction
- Finished size: 3 in (7.6 cm) per side; 4.25 in (10.8 cm) point to point
- Skill level: Intermediate (thread crochet)
- Terminology: US
- Yarn weight: Size 10 crochet cotton thread (lace weight)
- Hook: 1.75 mm steel hook (US steel size 6)
- Number of pieces: 1
- Layout: One square motif, hung on point as a diamond
- Piece size after Round 5: 2 in (5.1 cm) per side
- Size before border (after Round 7): 2.75 in (7.0 cm) per side
- Border depth: 0.125 in (0.3 cm) per side, from 2 rounds
Materials
Yarn. Use mercerized size 10 cotton thread. It has a slight sheen that suits the pearls, and it takes starch well. Soft ivory or cream works best. Bright white gives a cooler, more modern look.
- Ivory (only color): 5 g, about 25 m (27 yd) per ornament
This amount includes extra for a test piece, the hanging loop, and sewing tails. One 50 g ball makes about 10 ornaments.
Tools and notions:
- 1.75 mm (US steel 6) steel crochet hook
- Fine tapestry or beading needle that fits size 10 thread
- 1 pearl, 10 mm, half-dome flat-back or sew-through, for the center
- 1 pearl, 8 mm, drilled, for the bottom drop
- 1 pearl, 6 mm, drilled, for the hanging loop
- Ivory sewing thread or a strand of the crochet thread
- Fabric stiffener or starch
- Blocking board, rustproof pins, and a ruler
Abbreviations (US Terms)
- ch – chain
- sl st – slip stitch
- sc – single crochet
- hdc – half double crochet
- dc – double crochet
- sk – skip
- sp(s) – space(s)
- st(s) – stitch(es)
- rep – repeat
Special stitch – picot: Ch 3, sl st in the front loop and left leg of the last sc made.
Gauge and Checkpoints
Gauge matters with thread, because a small difference in each stitch adds up over 25 stitches per side. Make one complete ornament first, and check it at each point below before you make more.
- After Round 3: the flower measures 1.5 in (3.8 cm) across, tip to tip.
- After Round 5: the square measures 2 in (5.1 cm) per side. This is your main gauge check: 19 dc = 2 in (5.1 cm).
- After Round 7: the square measures 2.75 in (7.0 cm) per side.
- After Round 9 and blocking: 3 in (7.6 cm) per side.
If your Round 5 square is larger than 2 in (5.1 cm), switch to a 1.5 mm hook. If it is smaller, switch to a 2 mm hook. Blocking can correct differences of up to 0.125 in (0.3 cm). Keep the mesh chains snug but not tight, or the mesh will pucker.
Pattern
Rounds 1–3: The Flower
Round 1: Ch 6, sl st in first ch to form a ring. Ch 3 (counts as dc), 15 dc in ring. Join with sl st to top of beginning ch-3. (16 dc)
Round 2: Ch 1, sc in same st, ch 5, sk next dc, sc in next dc, ch 5, sk next dc; rep from * 6 more times. Join with sl st to first sc. (8 sc, 8 ch-5 loops)
Round 3: Sl st in first ch-5 loop. Ch 1, (sc, hdc, 2 dc, ch 2, 2 dc, hdc, sc) in ch-5 loop; rep from * in each loop around. Join with sl st to first sc. (8 petals: 64 sts and 8 ch-2 tip sps)
Each petal comes to a point with a ch-2 space at the tip. Checkpoint: 1.5 in (3.8 cm) across.
Rounds 4–5: Squaring the Flower
In Round 4, four petal tips become corners. The four tips between them anchor the middle of each side. This puts a petal pointing into every point of the diamond.
Round 4: Sl st in next hdc, next 2 dc, and into ch-2 tip sp. Ch 3 (counts as dc), (2 dc, ch 2, 3 dc) in same sp (corner made). Ch 4, sc in next petal tip sp, ch 4, (3 dc, ch 2, 3 dc) in next petal tip sp; rep from * 2 more times. Ch 4, sc in next petal tip sp, ch 4. Join with sl st to top of beginning ch-3. (24 dc, 4 sc, 8 ch-4 sps, 4 corner ch-2 sps)
Round 5 (conversion round): Sl st in next 2 dc and into corner ch-2 sp. Ch 3 (counts as dc), (dc, ch 2, 2 dc) in same sp. Dc in next 3 dc, 4 dc in ch-4 sp, dc in next sc, 4 dc in ch-4 sp, dc in next 3 dc, (2 dc, ch 2, 2 dc) in corner sp; rep from * 2 more times. Dc in next 3 dc, 4 dc in ch-4 sp, dc in next sc, 4 dc in ch-4 sp, dc in next 3 dc. Join with sl st to top of beginning ch-3.
Count: 28 dc worked 1-per-existing-st (24 dc + 4 sc) + 32 dc worked into the ch-4 sps + 16 dc added at corners = 76 dc. That is 19 dc per side (2 + 3 + 4 + 1 + 4 + 3 + 2), plus 4 corner ch-2 sps.
Checkpoint: 2 in (5.1 cm) per side.
Round 6: Filet Mesh
Round 6: Sl st in next dc and into corner ch-2 sp. Ch 6 (counts as dc and ch 3), dc in same sp (corner made). Dc in next dc, (ch 2, sk 2 dc, dc in next dc) 6 times, (dc, ch 3, dc) in next corner sp; rep from * 2 more times. Dc in next dc, (ch 2, sk 2 dc, dc in next dc) 6 times. Join with sl st to 3rd ch of beginning ch-6.
Count per side: 9 dc (1 corner dc + 7 mesh dc + 1 corner dc) and 6 ch-2 mesh sps. Total: 36 dc, 24 ch-2 sps, 4 corner ch-3 sps.
Why this works: each side’s 19 dc break down as 1 + (6 × 3). The first dc goes in the first st. Each repeat uses 3 sts (skip 2, work 1), so the last dc lands in the 19th st, right beside the next corner.
Round 7: Solid Band
Round 7 (conversion round): Sl st in corner ch-3 sp. Ch 3 (counts as dc), (dc, ch 2, 2 dc) in same sp. Dc in next 2 dc, (2 dc in next ch-2 sp, dc in next dc) 6 times, dc in next dc, (2 dc, ch 2, 2 dc) in next corner sp; rep from * 2 more times. Dc in next 2 dc, (2 dc in next ch-2 sp, dc in next dc) 6 times, dc in next dc. Join with sl st to top of beginning ch-3.
Count: 36 dc worked 1-per-existing-dc + 48 dc worked into the ch-2 sps + 16 dc added at corners = 100 dc. That is 25 dc per side (2 + 2 + 18 + 1 + 2), plus 4 corner ch-2 sps.
Checkpoint: 2.75 in (7.0 cm) per side.
Border
Border gauge: The two border rounds add 0.125 in (0.3 cm) to each edge. This takes the square from 2.75 in (7.0 cm) to 3 in (7.6 cm) per side.
Round 8: Sl st in next dc and into corner ch-2 sp. Ch 1, (sc, ch 2, sc) in same sp. Sc in each of next 25 dc, (sc, ch 2, sc) in next corner sp; rep from * 2 more times. Sc in each of next 25 dc. Join with sl st to first sc.
Count: 27 sc per side (1 corner sc + 25 + 1 corner sc). Total: 108 sc, 4 corner ch-2 sps.
Round 9: Sl st in corner ch-2 sp. Ch 1, (sc, ch 5, sc) in same sp (corner loop made). Sc in next 2 sc, (picot, sc in next 2 sc) 12 times, picot, sc in next sc, (sc, ch 5, sc) in next corner sp; rep from * 2 more times. Sc in next 2 sc, (picot, sc in next 2 sc) 12 times, picot, sc in next sc. Join with sl st to first sc. Fasten off, leaving a 6 in (15.2 cm) tail.
Count per side: 29 sc (1 corner sc + 27 + 1 corner sc) and 13 picots. Total: 116 sc, 52 picots, 4 ch-5 corner loops.
Why the math works: Round 8 puts 1 sc in each of the 25 dc and adds a corner sc at each end, for 27. In Round 9, those 27 sc break down as 2 + (12 × 2) + 1. Picots come after the 2nd, 4th, 6th, and so on up to the 26th sc, so they are evenly spaced and the same from either corner. The ch-5 corner loops finish each point neatly and give you a place to attach the hanging loop and the pearl drop.
Final Blocking
- Weave in all tails except the 6 in (15.2 cm) tail from Round 9. Keep it for sewing on the drop pearl.
- Soak the ornament in fabric stiffener or strong starch, then gently squeeze out the extra. Do not wring it.
- On a blocking board, mark a 3 in (7.6 cm) square turned on point.
- Pin the four ch-5 corner loops first. Point to point should measure 4.25 in (10.8 cm) both ways.
- Pin the center of each side, then gently open the mesh so every ch-2 space is square.
- Pin each picot slightly outward so it stands clear of the edge.
- Press the petals flat with your fingers and line up each petal tip with its corner or side.
- Let it dry completely, at least 12 hours, before removing the pins.
Adding the Pearls
- Center: Sew the 10 mm pearl over the Round 1 ring with ivory thread. Pass through the ring several times so it stays firmly in place.
- Drop: Turn the ornament so the corner where you fastened off is at the bottom. Use the Round 9 tail to sew on the 8 mm pearl so it hangs about 0.25 in (0.6 cm) below the ch-5 loop. Weave in the tail.
- Hanging loop: Cut 12 in (30.5 cm) of thread and pass it through the top ch-5 loop. Thread the 6 mm pearl onto both strands and slide it down to sit just above the point. Knot the ends to make a 4 in (10.2 cm) loop, then trim.
Final Quality-Control Checklist
- Round 5 has 19 dc per side, 76 dc in total.
- Round 6 has 6 mesh spaces per side, all open and square.
- Round 7 has 25 dc per side, 100 dc in total.
- Round 9 has 13 picots per side, evenly spaced.
- All four sides measure 3 in (7.6 cm).
- Point to point is 4.25 in (10.8 cm) both ways.
- The ornament hangs straight from its top point.
- The center pearl is secure and the drop pearl hangs centered.
- No tails show on the front.
Troubleshooting
The center ring cups. Round 1 is too tight. Relax your tension, or chain 7 for the ring.
The petals curl. This is normal before starching. If they still curl after blocking, work the ch-5 loops in Round 2 more loosely.
The mesh is crooked. Recount Round 5. If a side has 18 or 20 dc, the mesh will not end in the last stitch. Fix Round 5 before you continue.
The edges ruffle. There are too many stitches or the chains are loose. Check that Round 7 has exactly 25 dc per side and that each picot uses 3 chains.
The ornament hangs crooked. The hanging loop is off-center. Thread it through the middle of the top ch-5 loop, and re-block if needed.
Care
Hand wash in cool water with mild soap only when needed, then starch and block it again. Store it flat in tissue paper so the points and picots stay crisp.
Final Notes
The ornament’s size depends on a short series of measurements. The flower is 1.5 in (3.8 cm) across after Round 3. The square is 2 in (5.1 cm) per side after Round 5, with 19 dc per side. The solid band brings it to 2.75 in (7.0 cm) per side after Round 7, with 25 dc per side. The two-round border adds 0.125 in (0.3 cm) to each edge, for a finished 3 in (7.6 cm) square that hangs as a 4.25 in (10.8 cm) diamond.
If each checkpoint matches, your finished ornament will match too. Make one, check it, then make as many as your tree needs.
Happy crocheting!