

The Evergreen Daisy Ornament is a small, cheerful decoration. It pairs a lacy green flower frame with a plump white daisy. The frame has six pointed, open petals. Each one is outlined in two bands of stitches, so the tree lights glow through the gaps. A white daisy with a domed yellow center sits on top, and a chain loop at one tip lets the ornament hang straight from a branch.
The colors are simple: leaf green, soft white and golden yellow. The ornament looks festive but also springlike, so it works on a Christmas tree, on a window hook or tied to a gift.
This pattern uses US crochet terms. The finished ornament measures about 4.5 in (11.4 cm) from one petal tip to the opposite tip, plus a 2 in (5.1 cm) hanging loop. The daisy measures about 3 in (7.6 cm) across.
The ornament is quick to make. You work the green frame in four rounds from a magic ring:
- a center ring
- six chain loops
- a round that fills in the petals
- a single crochet edging that also makes the hanging loop
Then you crochet the daisy in one piece, starting with the yellow dome and ending with the white petals. Finally, you sew it to the center of the frame.
Finished Size and Construction
- Finished size: 4.5 in (11.4 cm) tip to tip, not counting the loop
- Skill level: Easy / Advanced Beginner
- Terminology: US crochet terms
- Yarn weight: Worsted (#4)
- Hook: 4.0 mm (US G-6)
- Number of pieces: 1 ornament, made from 2 crocheted parts (green frame and daisy appliqué) that are stacked and sewn together
- Layout: Single six-petal motif, with the daisy centered on the frame and the white petals lined up over the green petals
- Piece size: Frame 4.5 in (11.4 cm); daisy 3 in (7.6 cm); yellow center 1 in (2.5 cm)
- Size before border: 4 in (10.2 cm) tip to tip after Round 3
- Border depth: 0.25 in (0.6 cm), one round of single crochet
Materials
Choose a smooth worsted yarn that shows stitches clearly. Acrylic or cotton-acrylic blends hold the pointed tips well and survive storage. A slightly brushed white yarn gives the daisy petals a soft look.
- Green (frame and hanging loop): 12 g, about 24 m
- White (daisy petals): 5 g, about 10 m
- Yellow (daisy center): 3 g, about 6 m
These amounts include an extra 25% or so for swatching and tails.
Tools:
- 4.0 mm (US G-6) crochet hook
- Tapestry needle
- Scissors
- Stitch marker
- A small pinch of yellow yarn scraps or fiberfill (optional, to fill the dome)
- Pins, blocking mat and spray bottle
Abbreviations (US Terms)
- ch – chain
- sl st – slip stitch
- sc – single crochet
- hdc – half double crochet
- dc – double crochet
- tr – treble crochet
- sp – space
- st(s) – stitch(es)
- MR – magic ring
- ( ) – work all stitches inside the parentheses into the same stitch or space
- * * – repeat the instructions between the asterisks as directed
Special stitch – Petal (daisy): Worked across 2 stitches. Work (sl st, hdc, dc, 2 tr) in the first st, then (2 tr, dc, hdc, sl st) in the next st. One Petal has 8 working stitches plus 2 sl sts.
Gauge and Checkpoints
Exact gauge isn’t critical for an ornament, but it controls the final size and whether the daisy fits the frame. With worsted yarn and a 4.0 mm hook, aim for 16 sc and 18 rows = 4 in (10.2 cm). That is 4 sc per inch (2.5 cm).
Make one frame first, and check it at each stage before you make a set:
- After Round 1: the center ring is 0.75 in (1.9 cm) across.
- After Round 2: each ch-13 loop, lying flat, reaches about 1.5 in (3.8 cm) out from the ring.
- After Round 3: the frame is 4 in (10.2 cm) tip to tip.
- After Round 4: the frame is 4.5 in (11.4 cm) tip to tip.
- Daisy center after Round 2: 1 in (2.5 cm) across.
- Finished daisy: 3 in (7.6 cm) from petal tip to petal tip.
If your frame is too big, switch to a 3.75 mm (US F-5) hook. If it is too small, switch to a 4.5 mm (US 7) hook. Change the hook for both parts, so the daisy still fits inside the open centers of the frame.
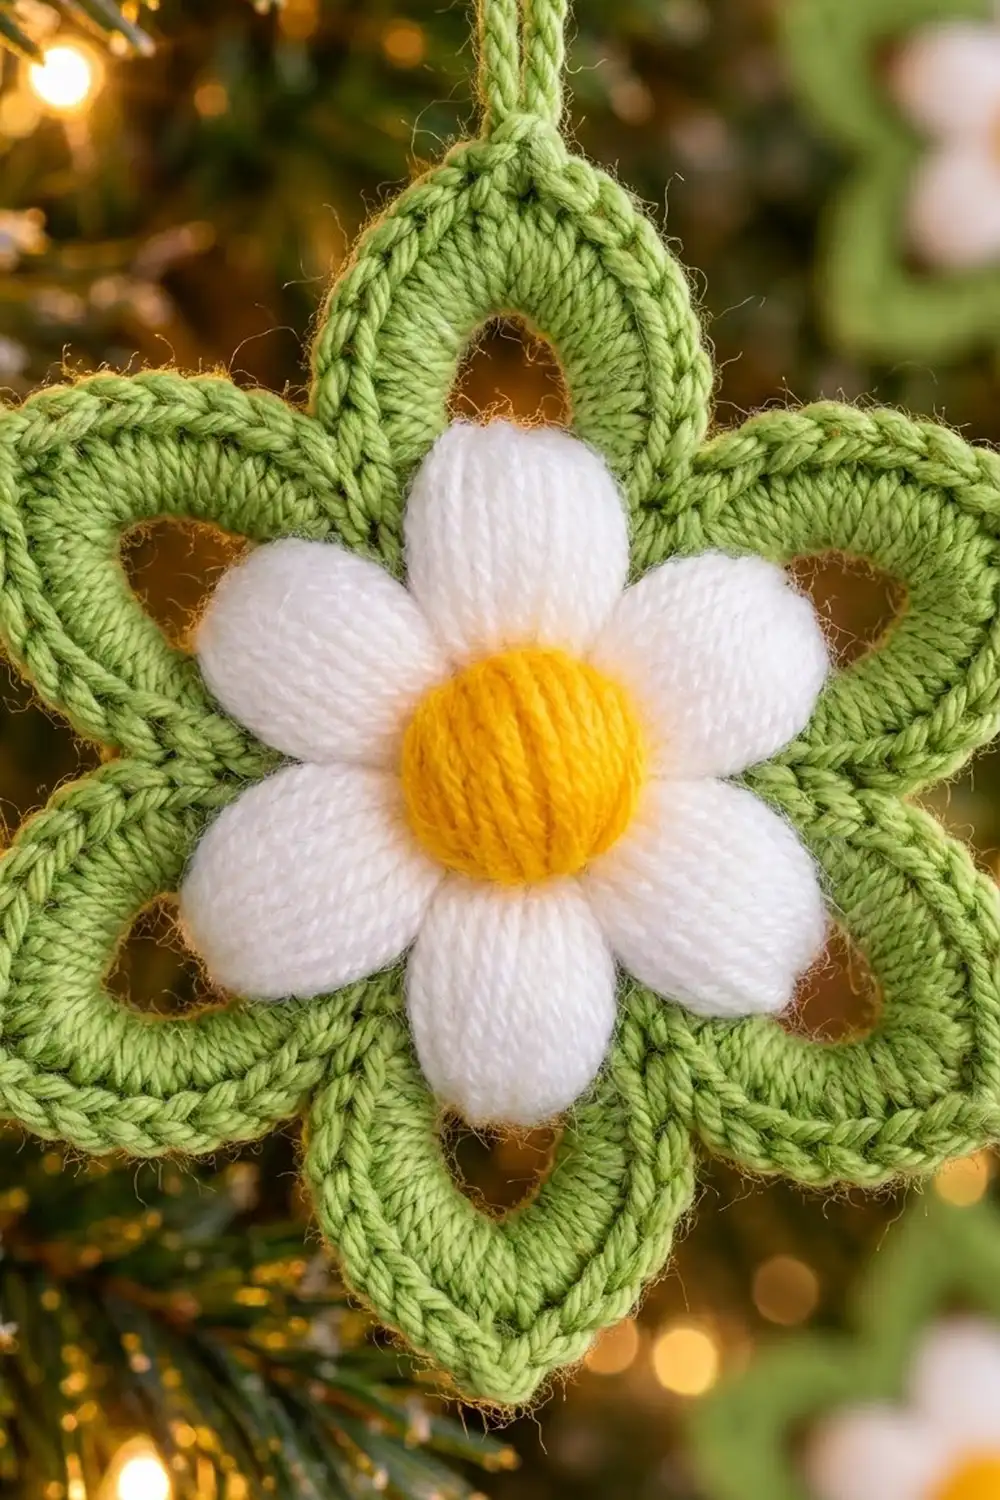
Green Frame
Work the frame in joined rounds with the right side facing you. Do not turn.
Round 1: With green, make a MR. Ch 1 and work 12 sc into the ring. Pull the ring closed, leaving a small hole about 0.25 in (0.6 cm) wide. Sl st to the first sc to join. (12 sc)
Round 2 (loops): Ch 1. *Sc in next st, ch 13, skip next st*; repeat from * to * 5 more times. Sl st to the first sc to join. (6 sc and 6 ch-13 loops)
Each loop springs out from the ring. The space between each loop and the ring becomes the open window inside a petal.
Round 3 (petals): Ch 1. *Sc in next sc. Now work into the chains of the next ch-13 loop. You can use the back bump or the top loop, but use the same one every time: hdc in next 2 ch, dc in next 4 ch, (dc, ch 2, dc) in next ch, dc in next 4 ch, hdc in next 2 ch*; repeat from * to * 5 more times. Sl st to the first sc to join.
Chain check: 2 + 4 + 1 + 4 + 2 = 13 ch used per loop.
Stitch count per petal: 2 hdc + 4 dc + 2 dc + 4 dc + 2 hdc = 14 sts, plus 1 ch-2 sp at the tip.
Round 3 total: 90 sts (84 petal sts + 6 sc) and 6 ch-2 sps.
The stitches grow outward from the chain. The chain forms the inner outline of each window, and the dc band forms the wide outer band. The (dc, ch 2, dc) makes the pointed tip. The short hdc at each end keeps the petal narrow where it meets the ring.
Measure now: 4 in (10.2 cm) tip to tip. This is the size before the border.
Do not fasten off. Go straight on to the border.
Border (Round 4, with Hanging Loop)
Border gauge: 4 sc per inch (2.5 cm) along the petal edge, the same as your main gauge.
Treat each petal as one “side” of the motif. Each side starts with 14 petal sts and 1 tip sp. The valley sc between petals is not a corner stitch. In this round it becomes a sl st that pulls the edge inward.
Round 4: Ch 1.
First petal (with hanging loop): Sl st in the valley sc. Sc in each of the next 7 sts. Work (sc, ch 20, sc) in the ch-2 tip sp. Sc in each of the next 7 sts.
Remaining 5 petals: *Sl st in valley sc. Sc in each of next 7 sts. Work (sc, ch 2, sc) in ch-2 tip sp. Sc in each of next 7 sts*; repeat from * to * 4 more times.
Sl st to the first sl st to join. Fasten off and weave in the ends.
Count per petal: 14 sc worked one into each existing stitch, plus 2 extra sc in the tip sp, for 16 sc. Each petal also has 1 tip chain (a ch-2, or the ch-20 on the first petal).
Round 4 total: 96 sc + 6 sl sts = 102 sts, plus 5 ch-2 tip sps and 1 ch-20 hanging loop.
Why the math works: Every petal stitch gets exactly one sc, so the new edge is the same length as the Round 3 edge and stays flat. The 2 extra sc at each tip add the fullness a sharp outside point needs. The sl st at each valley adds no height, so the inner curve stays tight and the petals stay clearly separate. A sc in the valley would make the dip lumpy.
The ch-20 loop folds in half and stands about 2 in (5.1 cm) above the tip. For a longer or shorter loop, add or remove chains in multiples of 2.
Measure now: 4.5 in (11.4 cm) tip to tip. The 0.25 in (0.6 cm) border adds to the tip at each end: 4 in + 0.25 in + 0.25 in = 4.5 in (10.2 cm + 0.6 cm + 0.6 cm = 11.4 cm).
Daisy Appliqué
The daisy is one piece, worked from the center out. Start with yellow.
Round 1: With yellow, make a MR. Ch 1 and work 6 sc in the ring. Pull it closed. Sl st to the first sc. (6 sc)
Round 2: Ch 1, 2 sc in each st around. Sl st to the first sc. (12 sc)
Measure now: 1 in (2.5 cm) across.
Round 3 (dome): Ch 1, sc in each st around. Sl st to the first sc. (12 sc)
A round with no increases makes the edge cup upward and forms the dome. Switch to white on the last pull-through of the joining sl st. Fasten off yellow, leaving a 4 in (10.2 cm) tail.
For a fuller dome, push a small pinch of yellow scraps or fiberfill into the back. Once the daisy is sewn down, the frame behind it holds the filling in place.
Round 4 (petals): With white, *work a Petal across the next 2 sts*; repeat from * to * 5 more times. (6 Petals)
Count: 6 Petals × 2 sts = 12 sts used, which matches the 12 sc of Round 3. Each Petal has 8 working sts (1 hdc, 1 dc, 4 tr, 1 dc, 1 hdc) plus 2 sl sts. So Round 4 has 48 petal sts + 12 sl sts.
Join with a sl st to the first sl st. Fasten off, leaving a 12 in (30.5 cm) white tail for sewing.
The tr stitches in the middle of each Petal make a rounded, plump tip. The pairs of sl sts at the petal bases sit side by side, so the petals touch at the base but stay separate.
Measure now: 3 in (7.6 cm) tip to tip.
Assembly
- Lay the frame flat, right side up, with the hanging loop at the top.
- Place the daisy in the center, right side up. Turn it so each white Petal points toward a green petal tip. Each white Petal then covers the inner part of one green petal, and the green windows show around it.
- Pin through the center and through two opposite Petals.
- Thread the white tail onto a tapestry needle. Sew through the yellow Round 3 stitches into the frame’s Round 1 ring, using small stitches all the way around.
- Tack the base of each Petal to the frame with 1 stitch. Leave the Petal tips free so they stay puffy.
- Weave in all the ends on the back.
Final Blocking
- Pin the frame face up on a blocking mat at 4.5 in (11.4 cm) tip to tip.
- Put a pin at each of the 6 tips, and pull each one to a sharp point.
- Pin each valley lightly inward to deepen the curve.
- Shape each petal window into an even teardrop with your fingers.
- Mist the green frame until it is damp. Don’t soak the daisy, so it keeps its puffiness.
- Let it dry completely, about 2–4 hours.
- Unpin and fluff the white Petals with your fingertips.
For acrylic yarn, you can steam-block instead. Hold the iron 1–2 in (2.5–5.1 cm) above the frame, and don’t let it touch the yarn or the daisy.
Final Quality-Control Checklist
- The frame measures 4.5 in (11.4 cm) tip to tip.
- All 6 green tips are sharp and evenly spaced.
- All 6 petal windows are open and about the same size.
- The hanging loop is centered on one tip and about 2 in (5.1 cm) tall.
- The daisy measures 3 in (7.6 cm) and sits exactly in the center.
- The white Petals line up with the green petal tips.
- The yellow dome is round and raised.
- No ends show from the front.
- The ornament hangs straight with the loop at the top.
Troubleshooting
The frame ruffles: Your ch-13 loops are too loose. Chain them a little tighter, or use a smaller hook.
The frame cups upward: The ring is too tight for the loops. Open the MR slightly before you work Round 2.
The tips look round instead of pointed: Check that the (dc, ch 2, dc) goes into the 7th ch of the loop, and pin each tip firmly when blocking.
The petal windows close up: You may have worked Round 3 into the loop space instead of into each chain. Work into each individual chain.
The daisy is too big for the frame: Use a smaller hook for the daisy only, or replace the tr in each Petal with dc.
The yellow dome is flat: Add a little filling behind it, or work one more round of 12 sc in yellow.
The ornament tilts when hung: The loop is off-center. Move it so it sits exactly in the tip ch-sp of the top petal.
Care
Spot clean with mild soap and cool water, then reshape and dry flat. Store the ornament flat in tissue paper so the tips and the daisy keep their shape.
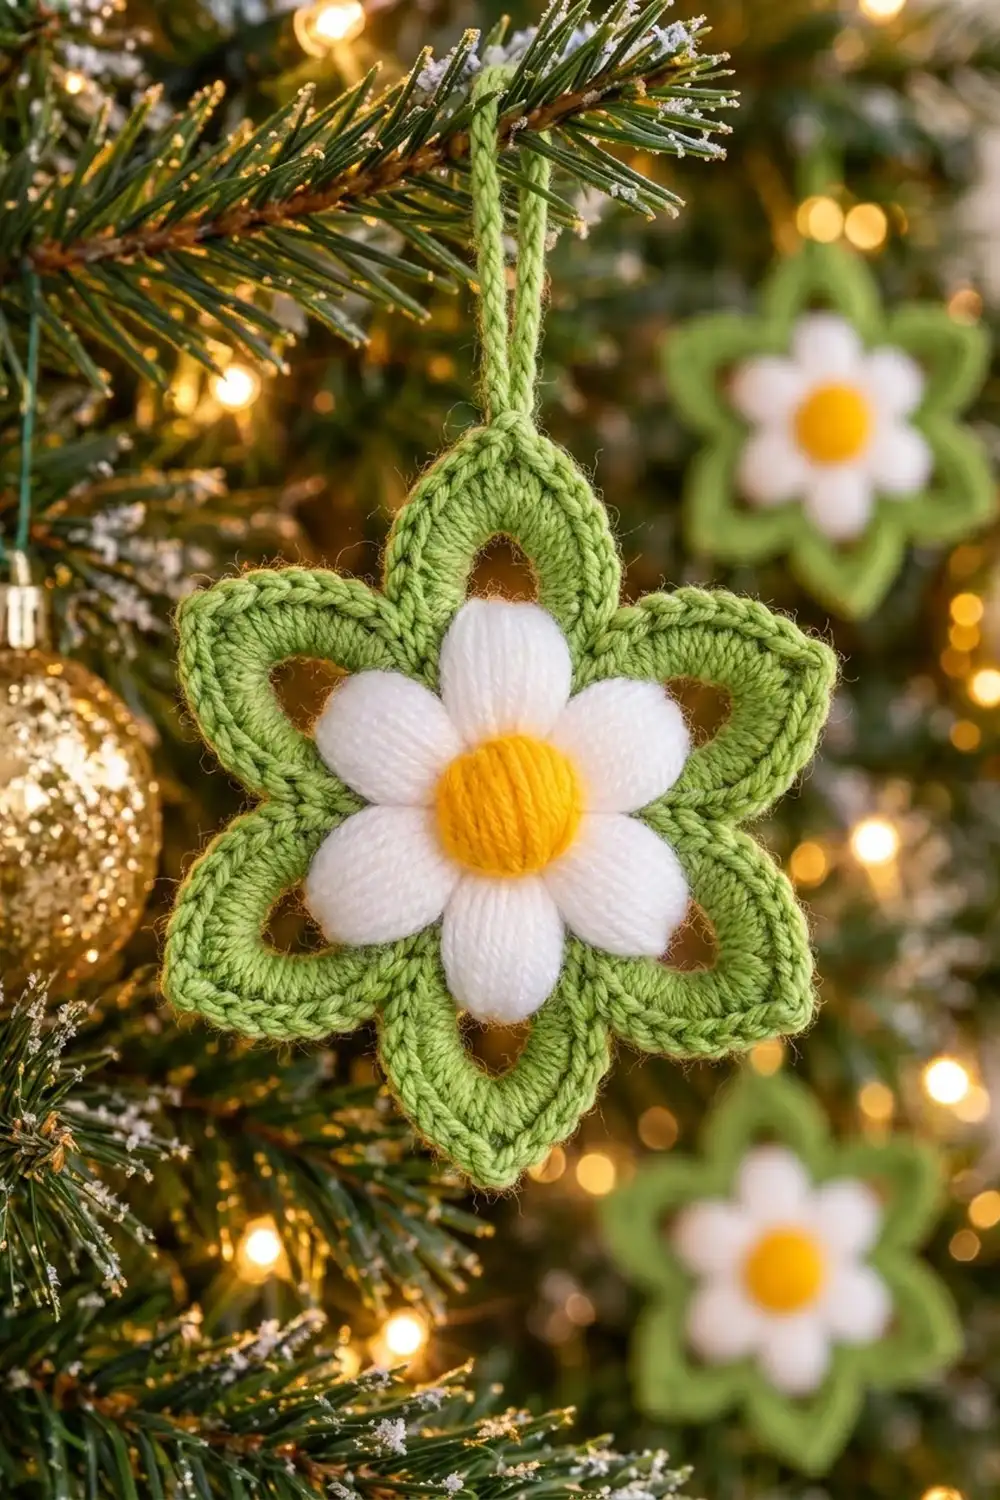
Final Notes
The measurements build on each other in a few short steps. The center ring is 0.75 in (1.9 cm). After Round 3 the frame reaches 4 in (10.2 cm), and the border brings it to 4.5 in (11.4 cm). The daisy’s yellow center is 1 in (2.5 cm), and the finished daisy is 3 in (7.6 cm). That leaves about 0.75 in (1.9 cm) of green petal showing at each tip. If every checkpoint matches, the finished ornament will match too. Make one, check it, then make a set for the tree.
Happy crocheting!