

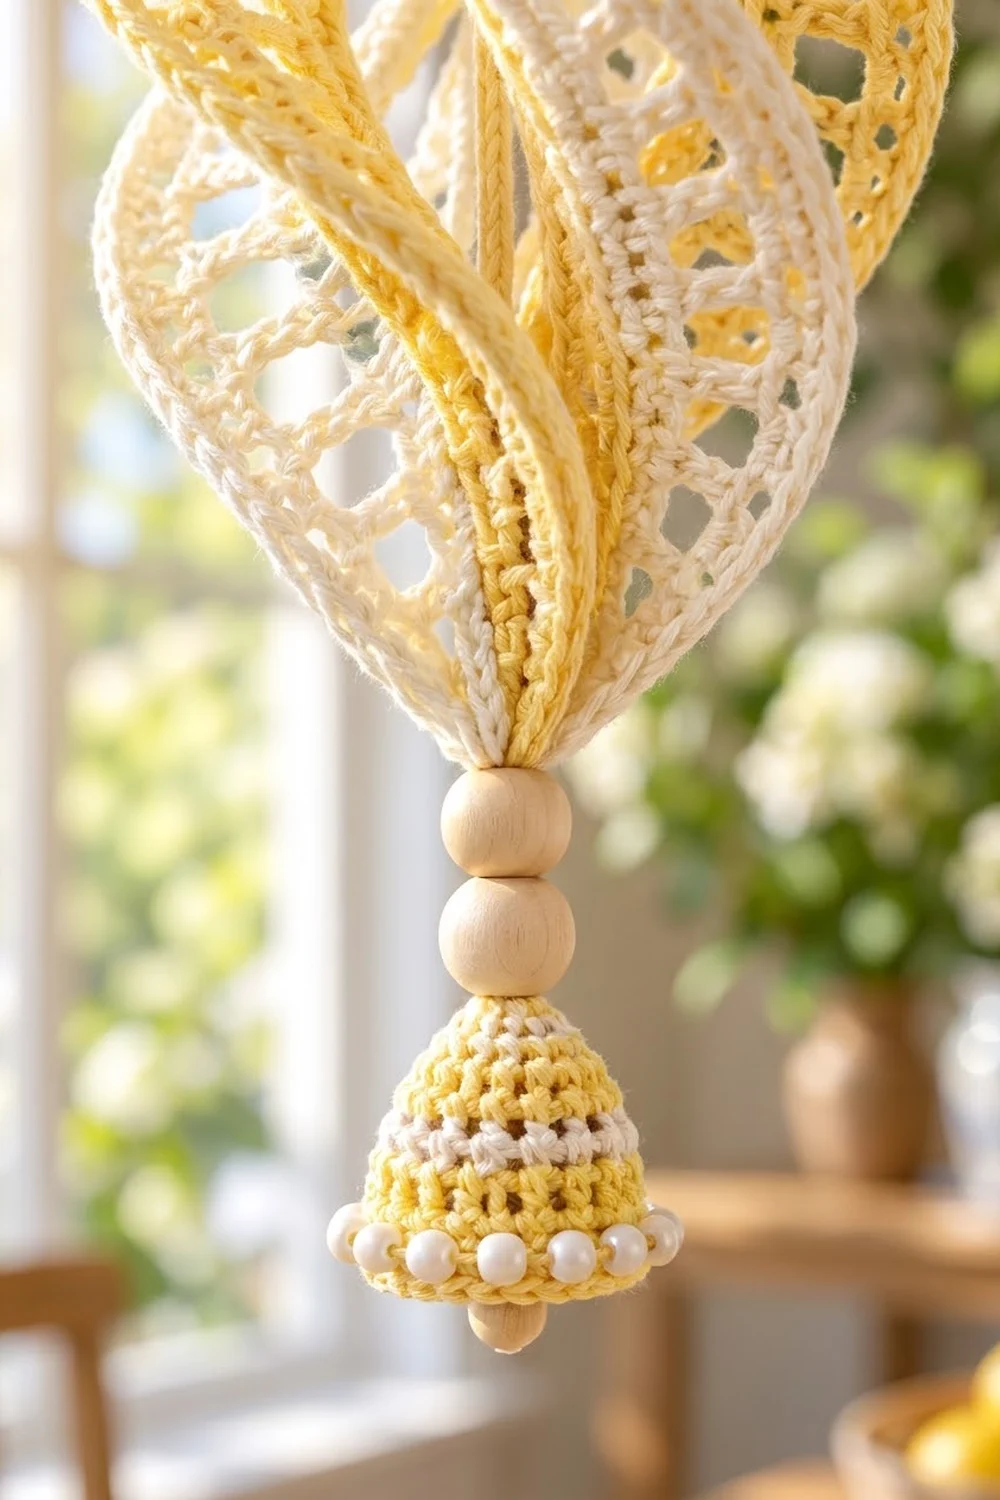
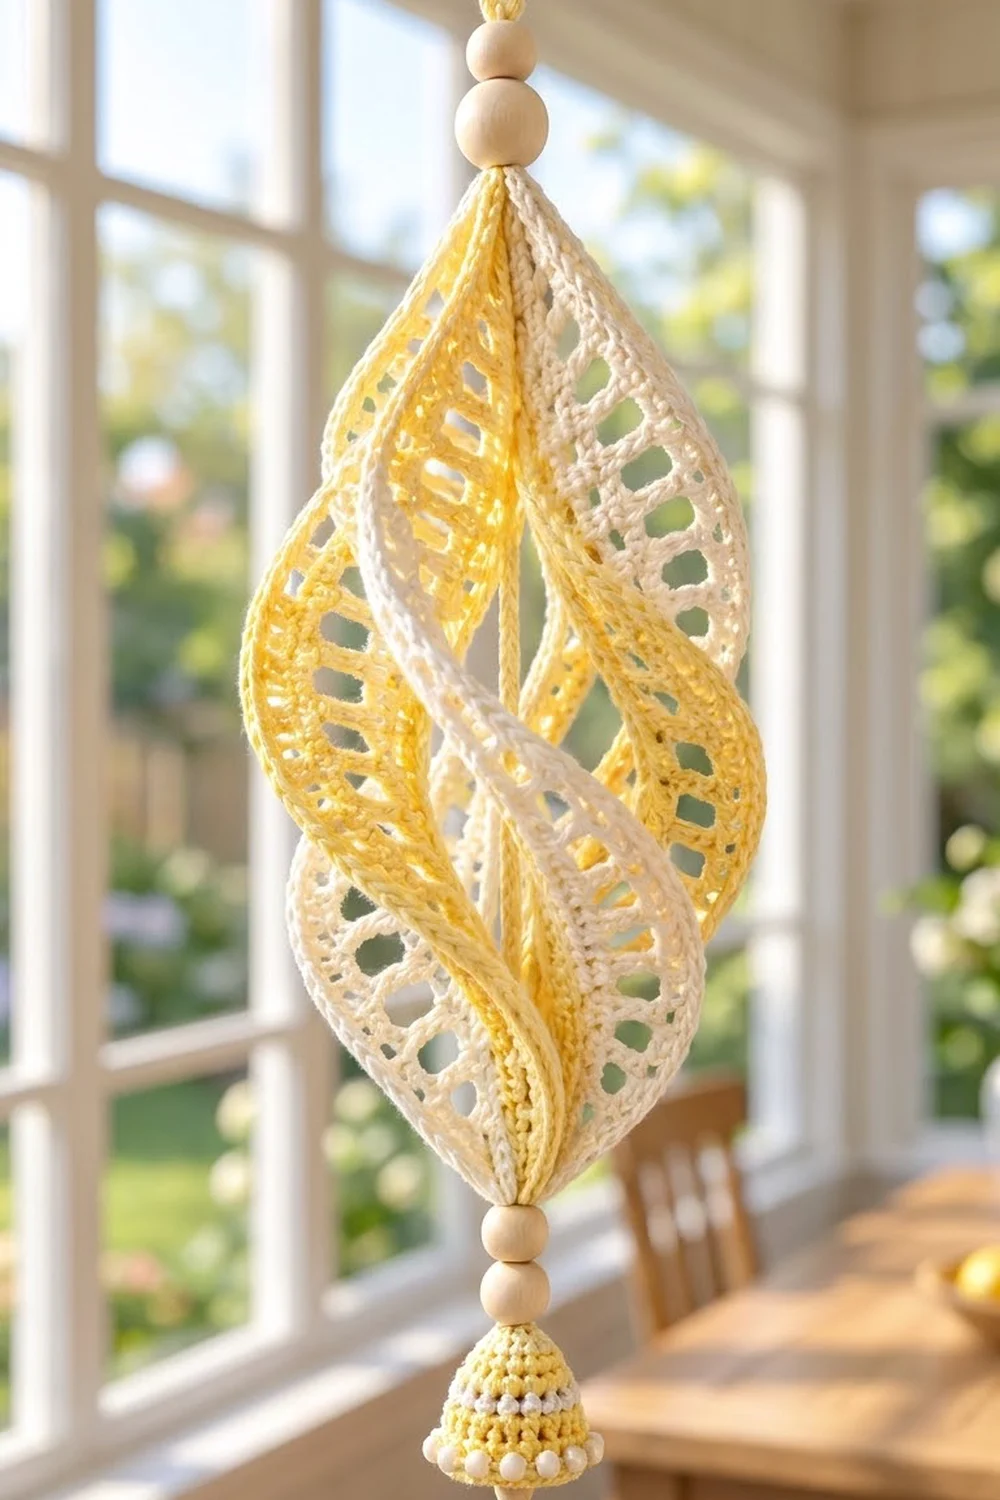
This hanging ornament is made from six openwork ladder strips in soft lemon yellow and warm cream. You gather the strips at the top and bottom and give them a half twist, so they bow outward and spiral around a center cord. Natural wooden beads sit at both ends. A small yellow bell with a cream stripe and a ring of tiny white beads hangs at the bottom.
The ornament looks light and sunny, a little like a wind spinner or a twisted lantern. Each strip has two solid edges and a column of oval windows down the middle, so light shows through as the ornament turns.
This pattern uses US crochet terms. The spiral body is about 9 in (22.9 cm) tall from gather to gather and about 5 in (12.7 cm) wide at its widest point. With the loop, beads, and bell, the whole ornament is about 14 in (35.6 cm) long.
Construction is simple. You crochet six flat strips in rows and edge each one with a round of single crochet. Next you crochet a small bell in the round. Then you gather everything onto a center cord with beads. The spiral comes from turning the bottom gather half a turn before you secure it.
Finished Size and Construction
- Finished size: spiral body 9 in (22.9 cm) tall × 5 in (12.7 cm) wide; total length about 14 in (35.6 cm)
- Skill level: Easy to Intermediate
- Terminology: US crochet terms
- Yarn weight: Sport (#2) cotton
- Hook: 3.0 mm (C/2–D/3)
- Number of pieces: 6 strips, 1 bell, 1 center cord
- Layout: 6 strips in a ring, alternating yellow and cream, with a half twist
- Strip size before edging: 1.5 in (3.8 cm) wide × 12 in (30.5 cm) long
- Strip size after edging: 1.75 in (4.4 cm) wide × 12.25 in (31.1 cm) long
- Edging depth: 1 round of sc, about 0.125 in (0.3 cm) on each side
Materials
Use a smooth cotton with good stitch definition. Cotton holds the curved spiral shape and shows the windows crisply. Avoid fuzzy or stretchy yarn, which blurs the openwork and lets the strips sag.
- Color A, Lemon Yellow: 25 g, about 75 m (82 yd), for 3 strips and the bell
- Color B, Cream: 25 g, about 75 m (82 yd), for 3 strips, the bell stripe, the center cord, and the hanging loop
These quantities include a comfortable margin. Each edged strip uses about 6 g.
Tools and notions:
- 3.0 mm crochet hook
- Tapestry needle
- 2 wooden beads, 14 mm (top)
- 2 wooden beads, 12 mm (bottom)
- 1 wooden bead, 8 mm (bell tip)
- 12 white beads or pearls, 4 mm (bell rim)
- Beading needle and white thread
- Scissors, stitch markers, tape measure
- Pins, spray bottle, foam blocking mat
Abbreviations (US Terms)
- ch – chain
- sl st – slip stitch
- sc – single crochet
- dc – double crochet
- sk – skip
- sp – space
- st(s) – stitch(es)
- MR – magic ring
- FLO – front loop only
Special stitch – window row: a row where the 3 edge stitches on each side are worked in dc and the 4 center stitches are replaced by ch 4. This makes one oval window.
Gauge and Checkpoints
Gauge in pattern: 10 sts = 1.5 in (3.8 cm) wide. One 2-row repeat (1 window row + 1 rung row) = 0.5 in (1.3 cm) tall.
Make one complete strip and measure it before you make the others. All six strips must match, or the spiral will twist unevenly.
Checkpoints:
- After Row 1: the strip is 1.5 in (3.8 cm) wide.
- After 4 repeats (Row 9): the strip is about 2 in (5.1 cm) long.
- After 24 repeats (Row 49): the strip is 12 in (30.5 cm) long.
- After edging: the strip is 1.75 in (4.4 cm) × 12.25 in (31.1 cm).
If your strip is too big, switch to a 2.75 mm hook. If it is too small, switch to a 3.25 mm hook. If only the length is off, check your dc height on the window rows. Short dc give round holes instead of ovals, so pull up each loop slightly taller.
Strips (Make 6: 3 in Color A, 3 in Color B)
Each strip is worked flat in rows. Every rung row has 10 sts. Every window row has 6 dc and one ch-4 sp.
Foundation: Ch 11.
Row 1 (rung row): Sc in 2nd ch from hook and in each ch across, turn. (10 sc)
Row 2 (window row): Ch 3 (counts as dc), dc in next 2 sts, ch 4, sk 4 sts, dc in last 3 sts, turn. (6 dc, 1 ch-4 sp)
Row 3 (rung row): Ch 1, sc in first 3 sts, 4 sc in ch-4 sp, sc in next 2 dc, sc in top of turning ch-3, turn. (10 sc)
The 4 sc in the ch-4 space form a horizontal rung. The 3 sts on each side stack up into the two solid edges.
Rows 4–49: Repeat Rows 2–3 another 23 times, for 24 repeats and 24 windows in all. Row 49 is a rung row. (10 sc)
Row count check: Row 1 + 24 two-row repeats = 49 rows. That is 25 rung rows and 24 window rows.
Don’t fasten off. Go straight into the edging in the Border section below.
Make All Pieces
Make 3 strips in Color A and 3 strips in Color B. All six have 49 rows and the same edging. Lightly block them flat before assembly (see Final Blocking).
The strips sit in a ring around the center cord. Seen from above:
        A
    B       B
    A       A
        B
Clockwise order: A – B – A – B – A – B.
Joining
The strips aren’t sewn to each other along their length. You join them only at their short ends, where they are gathered onto the center cord. This lets each strip bow outward and twist freely.
Center cord: With Color B, make a chain 16 in (40.6 cm) long. Work a sl st in the back bump of each ch back to the start to make a firm cord. Fasten off and leave both tails.
Gathering the top ends:
- Thread the tapestry needle with 12 in (30.5 cm) of Color B.
- Run a running stitch through all 14 edging sts along the top short end of Strip 1.
- Without cutting, continue through the 14 top-end sts of Strips 2 through 6, in A–B order. That is 14 sts × 6 strips = 84 sts on one thread.
- Lay the center cord in the middle, with about 4 in (10.2 cm) of cord above the strips.
- Pull the thread tight so all 84 sts cinch around the cord. Wrap the thread around the gather 3 times and knot it. Stitch through the cord twice to lock it in place.
Twisting and gathering the bottom ends:
- Measure 9 in (22.9 cm) down the cord from the top gather and mark that spot.
- Gather the bottom ends of all 6 strips the same way (84 sts), keeping the same A–B order.
- Hold the top still and turn the bottom gather half a turn (180°) clockwise. The strips will curve into a spiral.
- Cinch the bottom gather around the cord at the marker. Wrap, knot, and stitch through the cord as before.
Tension advice: Pull the gathering thread snug, but don’t let it cut into the yarn. If the strips slide on the cord, add 2 more wraps and one more stitch through the cord.
Size checkpoint: The body should measure 9 in (22.9 cm) from gather to gather and about 5 in (12.7 cm) across. If it’s narrower, the twist is too tight, so ease it back to a half turn. If it’s wider, shorten the cord between the gathers by 0.25 in (0.6 cm) and tie the bottom gather again.
Beads and hanging loop: Slide both 14 mm beads onto the top cord tail and down to the gather. Fold the rest of the cord into a 1.5 in (3.8 cm) loop and stitch it down securely above the beads. Slide both 12 mm beads onto the bottom tail and up to the bottom gather. Leave the rest of the tail for the bell.
The Bell
Work in continuous rounds with Color A. Mark the first st of each round.
Rnd 1: 6 sc in MR. (6)
Rnd 2: Sc in each st around. (6)
Rnd 3: (Sc in next st, 2 sc in next st) 3 times. (9)
Rnd 4: Sc in each st around. (9)
Rnd 5: (Sc in next 2 sts, 2 sc in next st) 3 times. (12)
Rnd 6: Change to Color B. Sc in FLO of each st around. (12)
Rnd 7: Change to Color A. (Sc in next 3 sts, 2 sc in next st) 3 times. (15)
Rnd 8: (Sc in next 4 sts, 2 sc in next st) 3 times. (18)
Rnd 9: (Sc in next 5 sts, 2 sc in next st) 3 times. (21)
Rnd 10: (Sc in next 6 sts, 2 sc in next st) 3 times. (24)
Sl st in the next st and fasten off. The bell is about 1.25 in (3.2 cm) tall and 1.1 in (2.8 cm) across the rim.
Beaded rim: Sew one 4 mm bead to every 2nd st of Rnd 10: 24 sts ÷ 2 = 12 beads.
Attaching: Pull the bottom cord tail down through the MR from inside the bell. Add the 8 mm bead below the bell, knot, and trim. Stitch the top of the bell to the lowest 12 mm bead.
Border
The border is one round of sc worked around each strip right after Row 49. It gives the strips their crisp, cord-like edges.
Border gauge: 2 sc in each window-row end (dc rows), 1 sc in each rung-row end (sc rows), and 1 sc in each st along the short ends.
Edging round: Ch 1, don’t turn.
- Top short end: 3 sc in first st (corner), sc in next 8 sts, 3 sc in last st (corner). (14 sts)
- First long side: Work 1 sc in each rung-row end and 2 sc in each window-row end. (73 sts)
- Bottom short end: Working in the free loops of the foundation ch, 3 sc in first ch (corner), sc in next 8 ch, 3 sc in last ch (corner). (14 sts)
- Second long side: Work as for the first long side. (73 sts)
Sl st to the first sc to join. Fasten off and weave in the ends. Total: 174 sts.
Why the math works: Each short end has 10 sts. Each of its 2 corner sts gets 3 sc, which adds 2 sts per corner: 10 + 2 + 2 = 14. The corners belong to the short ends, so they aren’t counted again on the long sides.
Each long side covers 49 row ends. The 25 rung rows give 25 × 1 = 25 sc, and the 24 window rows give 24 × 2 = 48 sc, so each long side has 73 sc. The round total is 14 + 73 + 14 + 73 = 174 sts.
Each gather uses the 14 sts of each short end: 6 strips × 14 sts = 84 sts. Nothing is added between strips.
Final Blocking
- Before assembly, spray each strip until it is just damp.
- Pin each strip flat to 1.75 in (4.4 cm) × 12.25 in (31.1 cm).
- Open each window with a pin so the ovals look even.
- Let the strips dry completely, at least 6 hours.
- After assembly, hang the ornament and lightly mist the body.
- With your fingers, shape each strip into a smooth outward curve so all six bow by the same amount.
- Let it dry while hanging so the spiral holds its shape.
Final Quality-Control Checklist
- All 6 strips have 49 rows and 24 windows.
- Each edged strip measures 1.75 in (4.4 cm) × 12.25 in (31.1 cm).
- Each edging round has 174 sts: 14 per short end and 73 per long side.
- Colors alternate A–B all the way around.
- The body is 9 in (22.9 cm) tall and about 5 in (12.7 cm) wide.
- The twist is an even half turn, with no flat or kinked strips.
- Both gathers are tight and stitched through the cord.
- The bell has 24 rim sts and 12 evenly spaced beads.
- The hanging loop is secure and all ends are woven in.
Troubleshooting
Windows look round, not oval. Your dc are too short. Pull up taller loops on the window rows.
Strip edges ruffle. There are too many sts on the long sides. Recount: each long side should have 73 sts.
Strip edges pull in. Each dc row end needs 2 sc, not 1.
One strip sticks out farther than the others. That strip is too long. Check its row count, then block it again or remake it.
The spiral looks lopsided. Loosen the gather, spread the strips evenly, and tie it again.
The bell cups inward. Your tension is tight on the increase rounds. Use a hook one size larger for the bell.
Care
Dust gently or spot clean with cool water and mild soap. Reshape it while damp and let it dry hanging, out of direct sun so the yellow doesn’t fade.
Final Notes
Every measurement in this ornament builds on the one before. Ten sts make a strip 1.5 in (3.8 cm) wide. Each 2-row repeat adds 0.5 in (1.3 cm), so 24 repeats give 12 in (30.5 cm). The edging puts 73 sts on each long side and 14 sts on each short end, and the strip finishes at 1.75 in (4.4 cm) × 12.25 in (31.1 cm). Six strips gather into 84 sts at each end. A 9 in (22.9 cm) length of cord between the gathers and a half twist make the strips bow out into a 5 in (12.7 cm) spiral.
Check your first strip and keep all the strips identical, and the spiral will form on its own.
Happy crocheting!