

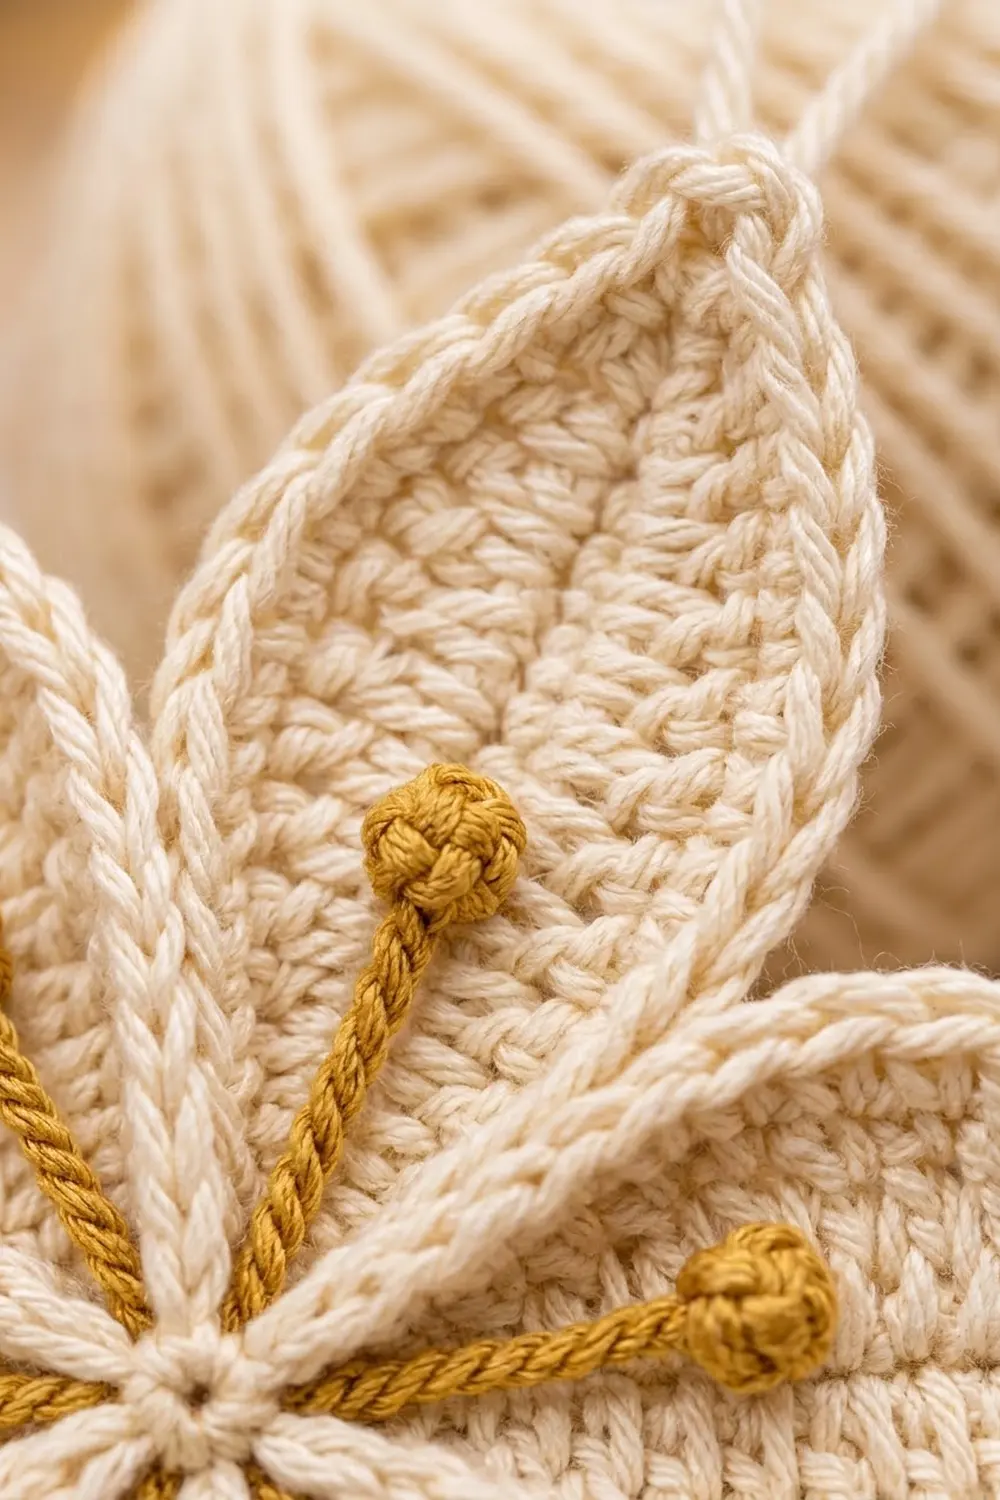
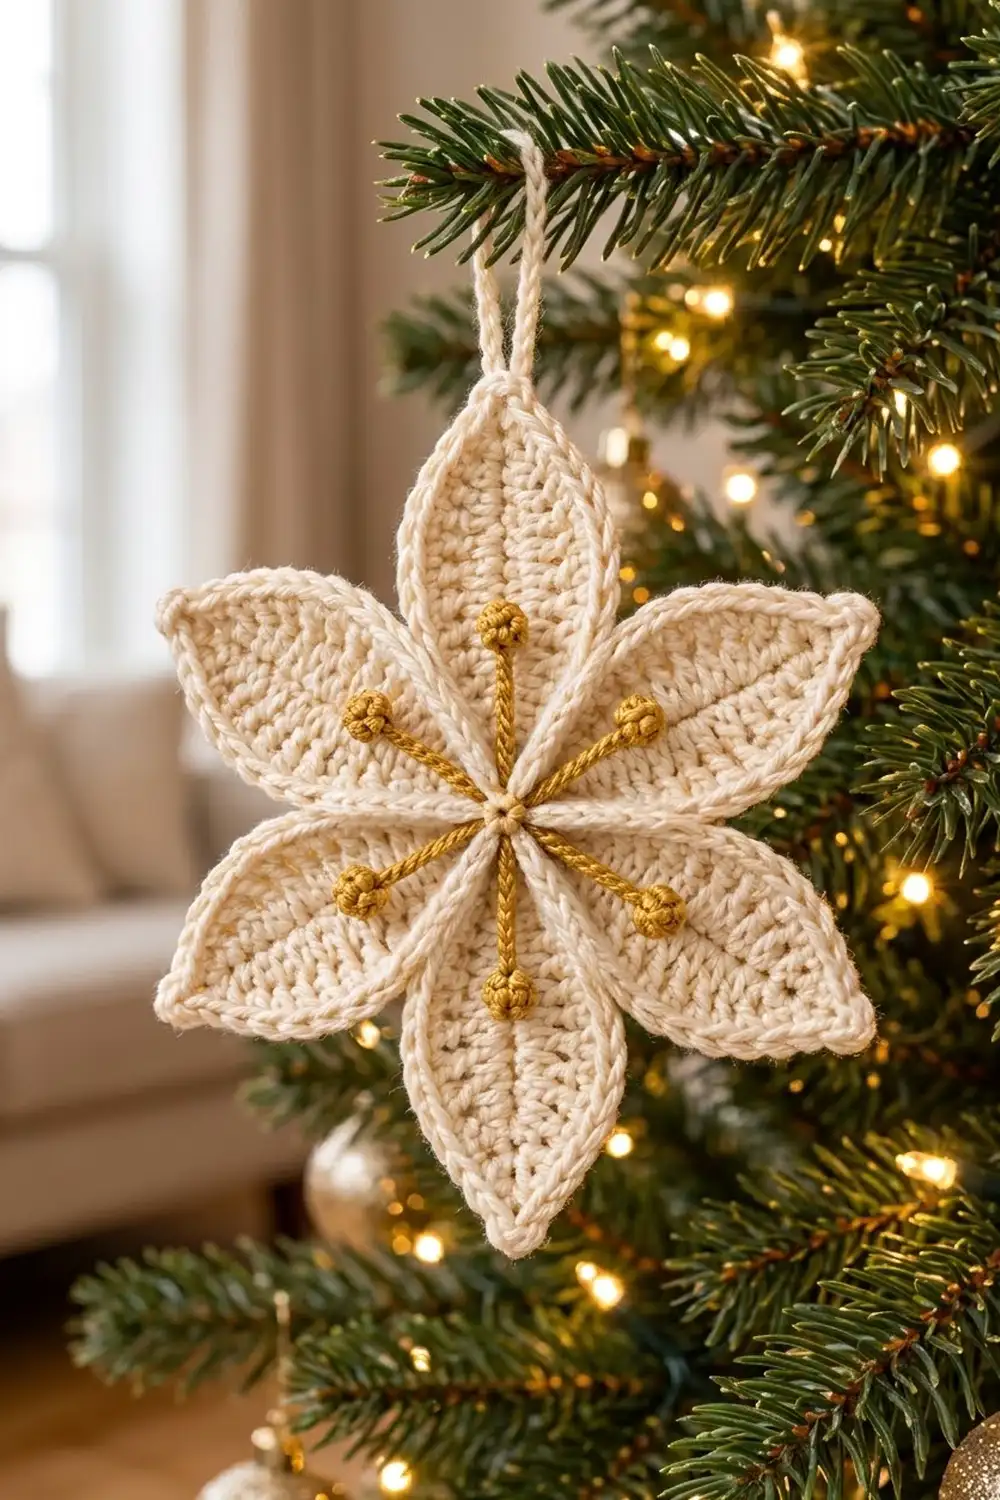
The Golden Stamen Star Lily is a hanging ornament with six petals and a soft, sculpted look. Each almond-shaped petal has a raised center vein and a rope-like crab-stitch edge. Six gold stamens spread out from the middle, and each one ends in a tiny round knot.
The colors are simple: warm cream for the petals and rich gold for the stamens. The ornament looks elegant and neutral, so it fits in well with gold baubles, white lights, or a natural-wood tree.
This pattern uses US crochet terms. The finished ornament measures 7 in (17.8 cm) from one petal tip to the opposite tip. With the hanging loop, it is 8.5 in (21.6 cm) tall.
You make six identical petals, each worked in the round around a foundation chain, and add a cream vein to each one. Next you gather the petals at the center and work one continuous crab-stitch border around the whole flower. Last, you add the gold stamens and a hanging loop.
Finished Size and Construction
- Finished size: 7 in (17.8 cm) tip to tip; 8.5 in (21.6 cm) tall with loop
- Skill level: Intermediate (crab stitch, surface slip stitch, French knots)
- Terminology: US crochet terms
- Yarn weight: Sport weight (#2) cotton or cotton blend
- Hook: 3.5 mm (E-4)
- Number of pieces: 6 identical petals, joined into one ornament
- Layout: Petals spread out from one center point, 60 degrees apart
- Petal size (before border): 3.25 in (8.3 cm) long x 1.5 in (3.8 cm) wide
- Flower size before border: 6.5 in (16.5 cm) tip to tip
- Border depth: about 0.125 in (0.3 cm) on every edge
Materials
Choose a smooth, tightly plied cotton so the stitch texture and the rope edge stay crisp. Mercerized cotton has a soft sheen that pairs well with gold. For the stamens, use gold cotton or a soft metallic yarn of a similar weight.
- Color A, Cream: 15 g, about 45 m (49 yd)
- Color B, Gold: 3 g, about 9 m (10 yd)
Tools:
- 3.5 mm (E-4) crochet hook
- Tapestry needle
- Scissors
- Stitch marker
- Rust-proof pins and a foam blocking mat
- Spray bottle with water
- Ruler or tape measure
The quantities include a margin of about 20 percent for swatching, tails, and the odd round you pull out and redo.
Abbreviations (US Terms)
- ch: chain
- sl st: slip stitch
- sc: single crochet
- hdc: half double crochet
- dc: double crochet
- sp: space
- st(s): stitch(es)
- rev sc: reverse single crochet (crab stitch)
- RS: right side
Reverse single crochet (rev sc): Work from left to right (if you are right-handed). Insert the hook into the next stitch to the right, yarn over, and pull up a loop. Yarn over again and pull through both loops. The stitch twists as it forms, which gives a corded edge.
Surface slip stitch: Hold the working yarn behind the piece. Insert the hook from the front through the fabric, pull up a loop, and draw it through the loop on the hook. Keep every stitch the same length.
Gauge and Checkpoints
Gauge: 22 sc and 24 rows = 4 in (10.2 cm) with a 3.5 mm hook. Gauge matters less here than for a garment, but it decides how wide the finished flower spreads.
Make one complete petal (Rounds 1 and 2) before you make the full set. Measure it at each stage:
- Foundation chain (16 ch, not counting the turning ch): 2.75 in (7.0 cm)
- After Round 1: 3 in (7.6 cm) long x 0.9 in (2.3 cm) wide
- After Round 2: 3.25 in (8.3 cm) long x 1.5 in (3.8 cm) wide
- Joined flower before border: 6.5 in (16.5 cm) tip to tip
- After border: each petal 3.5 in (8.9 cm) x 1.75 in (4.4 cm); flower 7 in (17.8 cm)
If your petal is too big, go down to a 3.25 mm hook. If it is too small, go up to a 3.75 mm hook. Change the hook, not the stitch counts, so the border math stays exact.
Petal (Make 6)
With Color A, ch 17.
Round 1 (RS): Sc in 2nd ch from hook, hdc in next 2 ch, dc in next 10 ch, hdc in next 2 ch, then (sc, ch 2, sc) in last ch for the outer tip. Turn the work so you can crochet along the other side of the foundation chain. Hdc in next 2 ch, dc in next 10 ch, hdc in next 2 ch. For the base tip, work (sc, ch 2) in the first ch, which is the same ch that holds the first sc. Sl st to first sc.
Count: 32 sts and 2 ch-2 sps. Each half has 16 sts: 1 sc + 14 side sts + 1 sc.
The foundation chain now runs in a straight line down the middle of the petal. That line becomes the vein.
Round 2: Ch 1 (does not count as a st). Sc in same st as join, sc in next hdc, hdc in next hdc, dc in next 10 dc, hdc in next hdc, sc in next hdc, sc in next sc, then (sc, ch 2, sc) in outer tip ch-2 sp. Sc in next sc, sc in next hdc, hdc in next hdc, dc in next 10 dc, hdc in next hdc, sc in next hdc, sc in next sc, then (sc, ch 2, sc) in base tip ch-2 sp. Sl st to first sc.
Count: 36 sts and 2 ch-2 sps. That is 32 sts worked 1 per stitch + 4 tip sc added.
Counting from one tip space to the other, each half now has exactly 18 sts: a tip sc at each end and 16 sts between them. The dc section in the middle widens the petal, and the sc and hdc near each end keep both tips pointed.
Fasten off and weave in both tails.
Cream vein: With RS facing and Color A, start a surface sl st at the 8th foundation ch, counting from the base tip. Work 1 surface sl st through the center of each foundation ch toward the outer tip, ending at the 16th ch: 9 surface sl sts in total. Fasten off and weave in on the wrong side. Leave foundation chs 1 to 7 bare, because the gold stamen covers them later.
Pin each petal to 3.25 in (8.3 cm) x 1.5 in (3.8 cm), mist it, and let it dry. When the petals match, joining and bordering go much more evenly.
Make All Pieces
- Color A, Cream: 6 petals, each with Rounds 1 and 2 and a cream vein
- Color B, Gold: none yet; you add the stamens after the border
Layout with the RS facing you. Petal 1 goes at the top and will hold the hanging loop:
            [P1]  12 o'clock
   [P6] 10          2 [P2]
             ( o )
   [P5]  8          4 [P3]
            [P4]  6 o'clock
All base tips point to the center (o). Every petal faces RS up, and the outer tips sit 60 degrees apart.
Joining
The petals are joined only at their base tips. This keeps the center flat and lets the border run cleanly down into each valley and back out again.
- Lay the six petals RS up as shown in the layout.
- Thread a tapestry needle with 18 in (45.7 cm) of Color A.
- Pass the needle through the base ch-2 sp of P1, P2, P3, P4, P5, and P6, always going in from the RS.
- Go around a second time through the same six spaces.
- Pull the strand snug so the six base tips meet. Leave a center opening no wider than 0.25 in (0.6 cm).
- Tie the ends on the wrong side with a square knot, then weave them in along the backs of two different petals.
Tension: pull firmly enough that no gap shows between the base tips, but stop before the petals cup upward. If the center domes, loosen the strand a little and tie it again.
Checkpoint: Lay the flower flat and measure from the tip of P1 to the tip of P4. It should be 6.5 in (16.5 cm), which is two petal lengths of 3.25 in (8.3 cm). Check P2 to P5 and P3 to P6 too, and adjust the petals until all three measurements match.
Border
Border gauge: the crab-stitch round adds about 0.125 in (0.3 cm) to every edge. Worked 1 rev sc per stitch, it lies flat and does not ruffle.
The border is one continuous round that outlines every petal. It goes down to the center and back out to the next tip. Skip the base ch-2 sps, because the join already uses them.
Border Round: With RS facing, join Color A with a sl st in the outer tip ch-2 sp of P1. Ch 1. Working in rev sc (moving left to right):
- Rev sc in the same tip sp.
- Rev sc in each of the 18 sts of the first half of P1, ending at the center.
- Cross over to the next petal. Rev sc in each of the 18 sts of its nearest half, working out toward its tip.
- At that tip, work (rev sc, ch 1, rev sc) in the tip ch-2 sp.
- Rev sc in each of the 18 sts of that petal’s other half, working back down to the center.
- Repeat the last three steps until you reach the second half of P1.
- Rev sc in each of the 18 sts of P1’s second half, then work (rev sc, ch 1) in the starting tip sp. Sl st to the first rev sc.
Count per petal: 18 + 2 + 18 = 38 rev sc and 1 ch-1 sp.
Total: 6 x 38 = 228 rev sc and 6 ch-1 sps.
Why the math works: each petal brings its own 36 sts from Round 2, worked 1 per stitch, plus 2 rev sc at the outer tip. Those 2 tip stitches mirror the (sc, ch 2, sc) of Round 2, so the point stays sharp. Nothing is added at the center. The base tips meet there without any seam stitches, so you don’t need extra rev sc. Adding any would make the valleys ruffle.
Fasten off and weave in.
Tack the petals: With Color A and a tapestry needle, work 2 small stitches on the wrong side to tack the rope edges of each pair of neighboring petals together, about 0.5 in (1.3 cm) out from the center.
Gold stamens: With RS facing and Color B, insert the hook at the center opening. Work 7 surface sl sts outward over the bare foundation chs 1 to 7 of P1. Pull the yarn to the back and fasten off, leaving a 10 in (25.4 cm) tail. Thread the tail onto a needle, bring it up at the end of the gold line, and make a French knot with 4 wraps. Pass the needle back through to the wrong side and weave in the tail. Repeat on all six petals.
Each stamen should be 1.25 in (3.2 cm) long, measured from the center, and end in a round knot about 0.25 in (0.6 cm) across. The gold line ends where the cream vein starts, so each petal shows one continuous spine.
Hanging loop: Join Color A with a sl st in the ch-1 sp at the tip of P1. Ch 18, then sl st in the same sp. Fasten off and weave in. The loop stands about 1.5 in (3.8 cm) tall.
Final Blocking
- Mist the ornament evenly until it is damp, not soaked.
- Lay it RS up on a blocking mat.
- Pin the center opening first, keeping it at 0.25 in (0.6 cm) or less.
- Pin the outer tips so each opposite pair is 7 in (17.8 cm) apart.
- Pin the sides of each petal so it measures 1.75 in (4.4 cm) at its widest point.
- Use a fingertip to straighten the gold lines and cream veins.
- Pin the hanging loop so it stands straight up.
- Let the ornament dry completely, at least 8 hours, before you remove the pins.
Final Quality-Control Checklist
- Six petals, all RS up, all the same shape
- Each petal is 3.5 in (8.9 cm) x 1.75 in (4.4 cm) after the border
- All three tip-to-tip measurements are 7 in (17.8 cm)
- The border has 38 rev sc per petal and a ch-1 sp at every outer tip
- The center opening is 0.25 in (0.6 cm) or less
- Six gold stamens, each 1.25 in (3.2 cm) long and ending in a French knot
- A cream vein runs from the end of each gold line to the outer tip
- The hanging loop is centered on P1 and about 1.5 in (3.8 cm) tall
- All tails are woven in out of sight on the wrong side
Troubleshooting
Petal tips are rounded, not pointed. Check that each tip in Round 2 has exactly (sc, ch 2, sc). Pin the points sharply when you block.
Petal curls along its length. The foundation chain is too tight. Make the chain with a hook one size larger, then switch back for Round 1.
Border ruffles. You probably added stitches at the center or worked 2 rev sc into one stitch. Recount to 38 per petal.
Border pulls the petal narrow. Your rev sc is too tight. Loosen your tension, or work the border with a 3.75 mm hook.
Center domes up. Loosen the joining strand slightly, tie it again, and pin the center flat while it dries.
French knot pulls through. Add a fifth wrap, or bring the needle back down through a nearby strand of yarn instead of the same hole.
Care
Hand wash in cool water with mild soap, press out the water in a towel, and reshape it to dry flat. Store flat or hanging, out of direct sun, so the cream and gold stay bright.
Final Notes
Every measurement builds on the one before. The 16-ch foundation is 2.75 in (7.0 cm). Round 1 makes the petal 3 in (7.6 cm) x 0.9 in (2.3 cm). Round 2 brings it to 3.25 in (8.3 cm) x 1.5 in (3.8 cm), with 36 sts in total and 18 sts per half. Joined at the center, the six petals measure 6.5 in (16.5 cm) across. The 228-stitch crab-stitch border makes each petal 3.5 in (8.9 cm) x 1.75 in (4.4 cm) and the flower 7 in (17.8 cm) across. The hanging loop brings the total height to 8.5 in (21.6 cm).
Happy crocheting!