

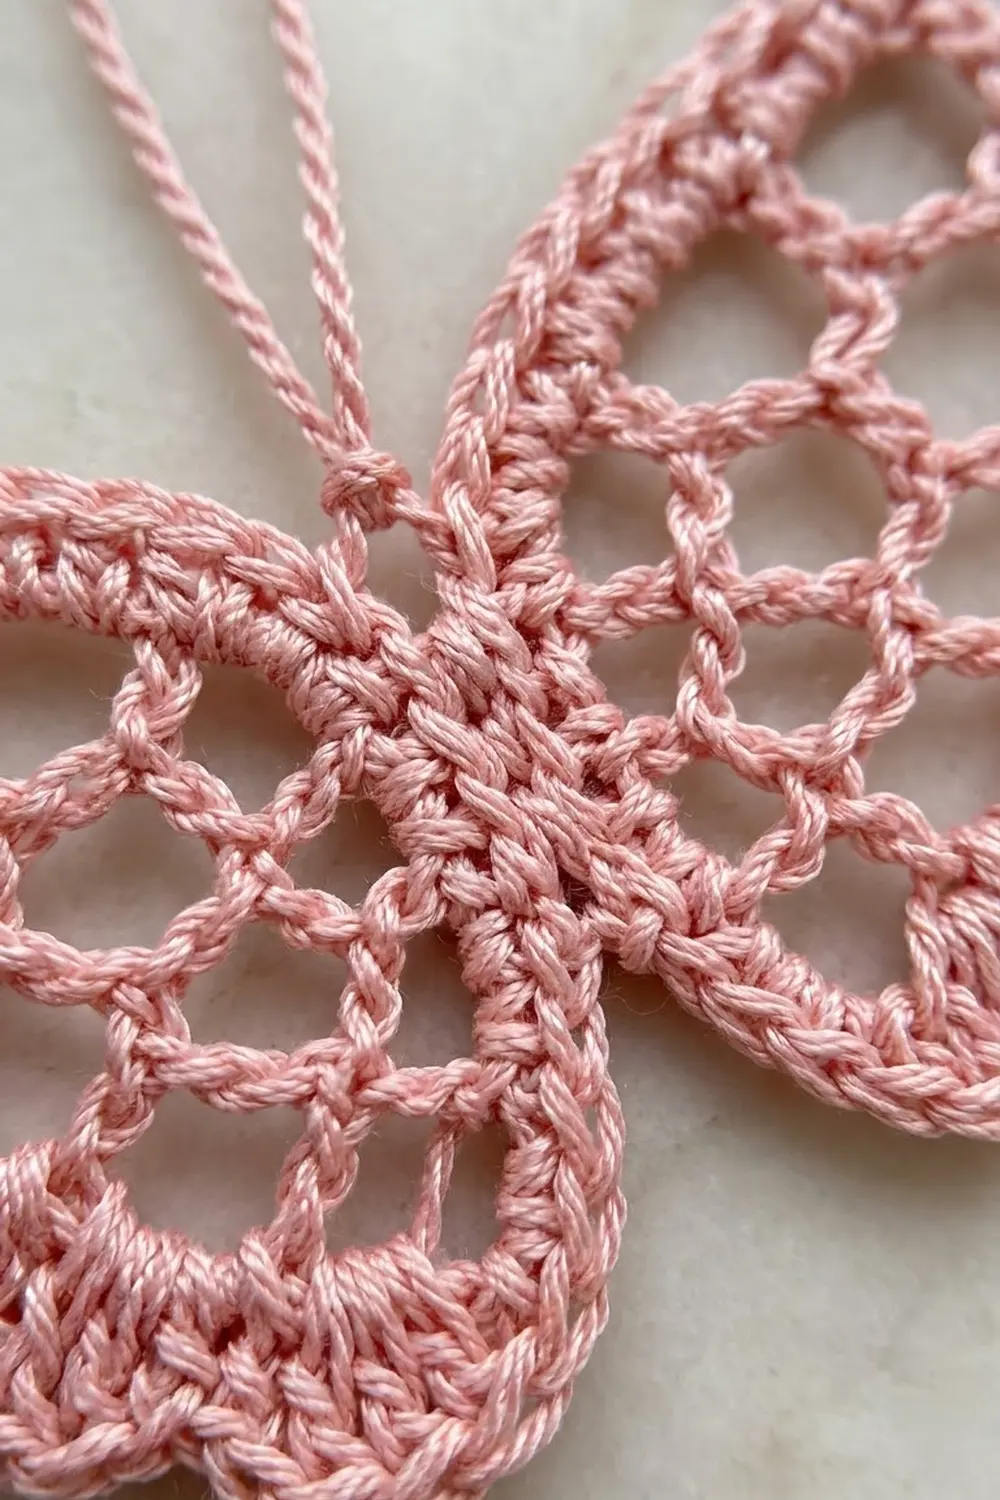
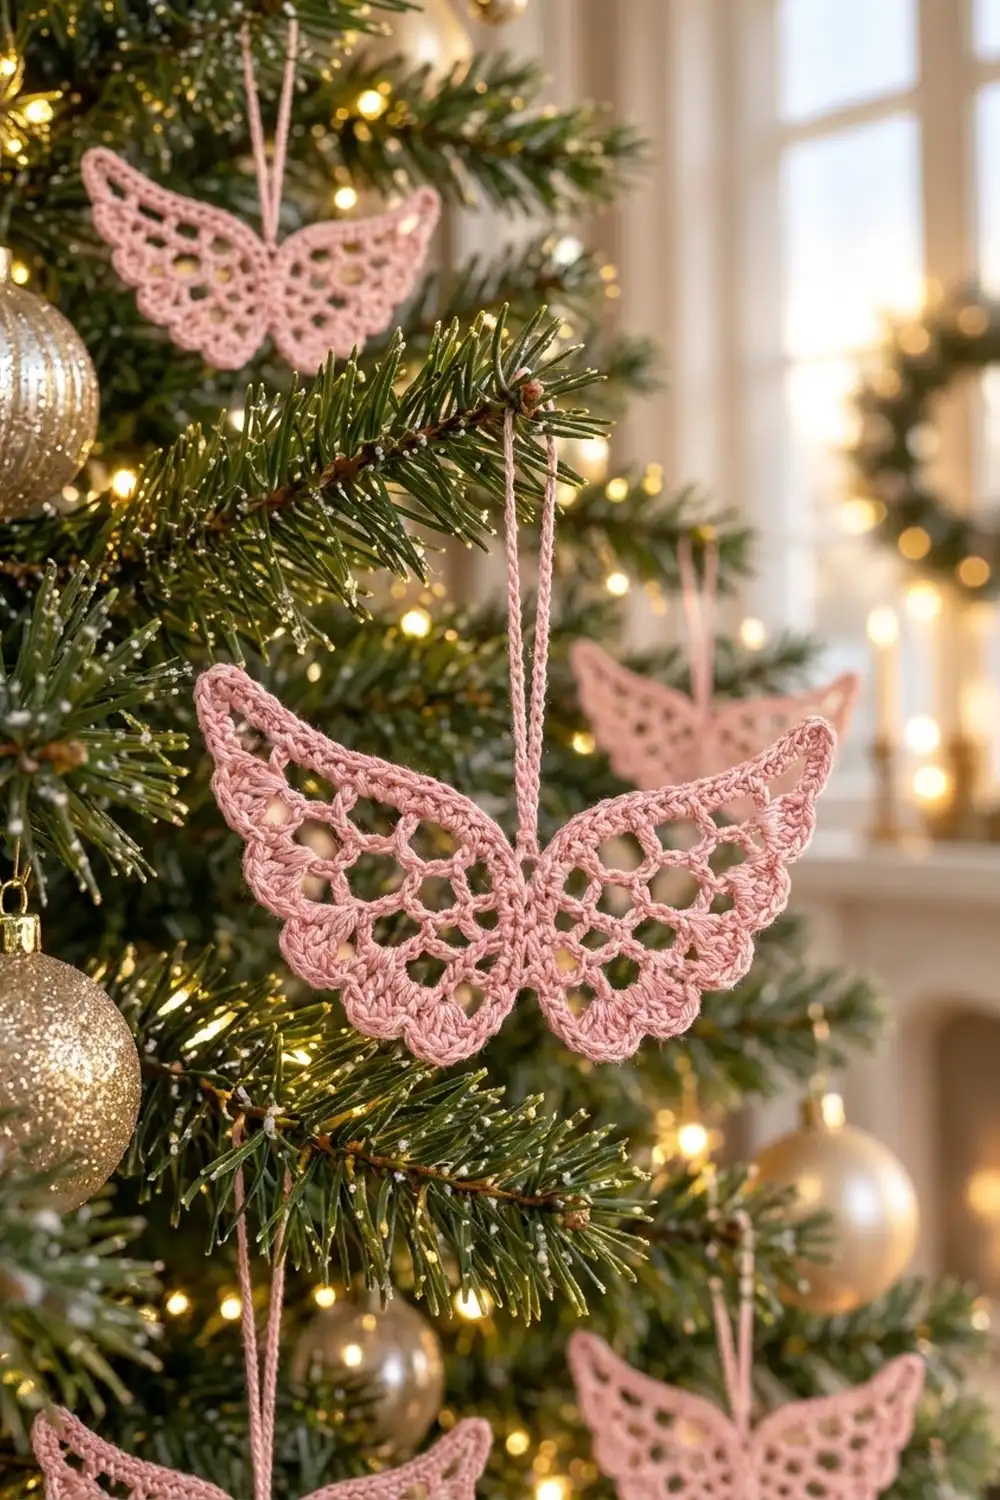
This small ornament is a pair of lacy angel wings worked in soft blush-pink cotton thread. A firm, rope-textured band runs along the top of both wings, an open fishnet lattice fills each wing, and a row of tiny scallops finishes the sloping lower edges. A long chain loop rises from the center so the ornament hangs straight on a tree branch.
The style is delicate and vintage, but the stitches are simple: single crochet, double crochet, chain loops, and one row of reverse single crochet. The pattern uses US crochet terms throughout.
The finished ornament measures 4.5 in (11.4 cm) wide and 2 in (5.1 cm) tall. The hanging loop adds another 3 in (7.6 cm) above the top edge.
The whole ornament is one piece. You chain across the full wingspan and work two solid rows for the top band. Next come five mesh rows that get shorter at both outer ends while a column of 3 double crochet grows down the center. One border round adds the scallops, a reverse single crochet row firms the top edge, and you chain the hanging loop last. There is no sewing or joining.
Finished Size and Construction
- Finished size: 4.5 in (11.4 cm) wide x 2 in (5.1 cm) tall
- Skill level: Intermediate (fine thread and lace mesh)
- Terminology: US crochet terms
- Yarn weight: Size 3 mercerized cotton crochet thread
- Hook: 2.0 mm (US steel 4)
- Number of pieces: 1
- Layout: two mirrored wings joined by a center column, all worked in one piece
- Each wing: 16 stitches, 2 in (5.1 cm) wide at the band
- Center column: 3 stitches, about 0.375 in (1.0 cm) wide
- Size before border: 4.375 in (11.1 cm) wide x 1.75 in (4.4 cm) tall
- Border depth: about 0.125 in (0.3 cm) on the top edge and the scallop edges, and about 0.0625 in (0.2 cm) at each tip
Materials
Thread: Choose a smooth, mercerized size 3 cotton crochet thread. Mercerized cotton holds crisp loops and blocks flat, which lace wings need. Avoid fuzzy or very soft cotton, because the mesh will blur and the scallops will lose their shape.
- Blush pink: 5 g, about 14 m (15.3 yd) per ornament
This amount includes about 25% extra for tails, weaving in, and the hanging loop.
Tools:
- 2.0 mm (US steel 4) crochet hook
- Fine tapestry needle
- Small sharp scissors
- Blocking mat or folded towel
- Rustproof pins
- Spray bottle, plus fabric stiffener or light starch (optional)
- Ruler or tape measure
Abbreviations (US Terms)
- ch – chain
- sl st – slip stitch
- sc – single crochet
- dc – double crochet
- sk – skip
- st(s) – stitch(es)
- sp – space
- loop – a ch-4 space in the mesh
- RS – right side
Special stitch – reverse single crochet (rev sc): Work from left to right (if you are right-handed). Insert the hook into the next stitch to the right, yarn over, and pull up a loop. Yarn over again and pull through both loops on the hook. This stitch makes the rope-like ridge on the top edge.
Gauge and Checkpoints
Gauge: 8 sc and 8 sc rows = 1 in (2.5 cm), so 16 sc = 2 in (5.1 cm). Each mesh row adds about 0.3 in (0.8 cm) of height.
The ornament is small, so your first ornament is your gauge test. Measure at each checkpoint before you continue:
- After Row 2: the band is 4.375 in (11.1 cm) long and 0.25 in (0.6 cm) tall.
- After Row 3: the center height is 0.55 in (1.4 cm).
- After Row 5: the center height is 1.15 in (2.9 cm).
- After Row 7: the piece is 4.375 in (11.1 cm) wide x 1.75 in (4.4 cm) tall at the center.
- After the border: 4.5 in (11.4 cm) wide x 2 in (5.1 cm) tall.
If your band is too long (over 4.5 in / 11.4 cm after Row 2), switch to a 1.75 mm hook. If it is too short (under 4.25 in / 10.8 cm), switch to a 2.25 mm hook. Chain loops vary more than solid stitches, so check gauge on the band, not the mesh.
Pattern
Top Band
Foundation: Ch 36.
Row 1: Sc in the 2nd ch from hook and in each ch across. Turn. (35 sc)
Row 2: Ch 1 (does not count as a st), sc in each sc across. Turn. (35 sc)
The 35 stitches split like this: sts 1–16 are the first wing, sts 17–19 are the center column, and sts 20–35 are the second wing. Put a marker in st 18 to find the center later.
Mesh Rows
Row 3: Ch 1, sc in the first sc, [ch 4, sk 2 sc, sc in the next sc] 5 times, dc in each of the next 3 sc, sc in the next sc, [ch 4, sk 2 sc, sc in the next sc] 5 times. Turn. (10 loops, 3 dc, 12 sc)
Math check: the first wing uses 1 + (5 x 3) = 16 sts, the center uses 3, and the second wing uses 16, for 35 in total.
Row 4: Sl st in each of the first 2 ch of the first loop, ch 1, sc in the same loop, [ch 4, sc in the next loop] 4 times, ch 2, sk the next sc, dc in each of the next 3 dc, ch 2, sk the next sc, sc in the next loop, [ch 4, sc in the next loop] 4 times. Turn. (8 loops, 2 ch-2 sps, 3 dc, 10 sc)
Every loop of Row 3 gets one sc, so each wing now has 4 loops instead of 5. Starting with slip stitches at one end and stopping on the last loop at the other end narrows both wing tips by the same amount.
Row 5: Sl st in each of the first 2 ch of the first loop, ch 1, sc in the same loop, [ch 4, sc in the next loop] 3 times, ch 2, sk the next sc and ch-2 sp, dc in each of the next 3 dc, ch 2, sk the next ch-2 sp and sc, sc in the next loop, [ch 4, sc in the next loop] 3 times. Turn. (6 loops, 2 ch-2 sps, 3 dc, 8 sc)
Row 6: Sl st in each of the first 2 ch of the first loop, ch 1, sc in the same loop, [ch 4, sc in the next loop] 2 times, ch 2, sk the next sc and ch-2 sp, dc in each of the next 3 dc, ch 2, sk the next ch-2 sp and sc, sc in the next loop, [ch 4, sc in the next loop] 2 times. Turn. (4 loops, 2 ch-2 sps, 3 dc, 6 sc)
Row 7: Sl st in each of the first 2 ch of the first loop, ch 1, sc in the same loop, ch 4, sc in the next loop, ch 2, sk the next sc and ch-2 sp, dc in each of the next 3 dc, ch 2, sk the next ch-2 sp and sc, sc in the next loop, ch 4, sc in the next loop. (2 loops, 2 ch-2 sps, 3 dc, 4 sc)
Fasten off. Each wing now has 5, 4, 3, 2, and 1 loops in Rows 3–7, so its lower edge steps up toward the tip. The center column is 5 rows of dc.
Border
Border gauge: Keep the same tension as the body. Five dc in one ch-4 loop should make a rounded scallop about 0.375 in (1.0 cm) wide that lies flat without cupping.
Border Round 1: With RS facing, turn the piece so the foundation chain is on top. Join thread in the first foundation ch at one tip.
- Top edge: 3 sc in the first ch, sc in each of the next 33 ch, 3 sc in the last ch. (39 sc)
- First tip side: sc in the end of Row 1, sc in the end of Row 2. (2 sc)
- First lower edge: [5 dc in the next exposed loop, sl st in the next sc] 5 times. (5 scallops, 25 dc, 5 sl st)
- Center bottom: 2 sc in the next ch-2 sp, sc in each of the next 3 dc, 2 sc in the next ch-2 sp. (7 sc)
- Second lower edge: [sl st in the next sc, 5 dc in the next exposed loop] 5 times. (5 scallops, 25 dc, 5 sl st)
- Second tip side: sc in the end of Row 2, sc in the end of Row 1. (2 sc)
Sl st in the first sc to join. (50 sc, 50 dc, 10 sl st)
On each lower edge, the exposed loops are, from tip to center: the outer loop of Rows 3, 4, 5, and 6, then the single loop of Row 7. Each of the first four already holds an sc from the row above on its top side. Work the dc into the open space below that sc.
Border Round 2 (top ridge): Do not turn. Sl st to the center sc of the nearest tip corner. Work 1 rev sc in each st along the top edge, ending in the center sc of the opposite tip corner. (37 rev sc) Fasten off.
Hanging loop: Join thread in the 19th rev sc. This is the center of the top edge, directly above the center column. Ch 60 (about 6 in / 15.2 cm), then sl st in the same st. Fasten off. The loop hangs 3 in (7.6 cm) above the ornament.
Why the math works: The top edge is a conversion round: 35 sc worked one per foundation ch, plus 4 extra sc (2 extra at each tip corner), for 39. The 3-sc corner keeps each tip pointed without pulling it in. Each lower edge has one scallop for each of the five mesh rows, because every mesh row leaves one outer loop exposed. The center bottom has 3 sc in the dc tops plus 2 sc in each ch-2 sp, for 7 sc, which keeps the column flat. The rev sc row covers 39 − 2 = 37 sts because it starts and stops on the corner centers. Its 19th st sits above foundation ch 18, the true center.
Final Blocking
- Weave in all ends along the solid band or the center column, never through the mesh.
- Soak the ornament in cool water for a few minutes, then press out the water in a towel. Do not wring it.
- Pin it flat on the blocking mat, RS up, with the top edge straight.
- Pin the center column first. Then pin each tip so the width is 4.5 in (11.4 cm).
- Pin the bottom of the center column 2 in (5.1 cm) below the top edge.
- Lift each tip slightly so the top edge curves gently upward toward the tips.
- Open every mesh loop with a pin or the tip of your hook so the loops are round and even.
- Pin the middle of every scallop so each one fans out and lies flat.
- If you want a crisp ornament, spray lightly with stiffener or starch. Let it dry completely before you unpin it.
Final Quality-Control Checklist
- The ornament measures 4.5 in (11.4 cm) x 2 in (5.1 cm).
- Each wing has 5 scallops along its lower edge.
- The wings mirror each other, with the same loop counts and tip height.
- The center column is straight and 5 dc rows long.
- The top ridge is even, with no gaps at the tips.
- The hanging loop is centered and hangs 3 in (7.6 cm).
- All ends are woven in and invisible from the RS.
Troubleshooting
The band curls into a tube. Your sc stitches are tight. Go up a hook size for Rows 1–2 only, and steam-block firmly.
One wing is longer than the other. You probably skipped 1 or 3 sc instead of 2 in Row 3. Check that the center dc land on sts 17–19.
The mesh loops collapse. Ch-4 loops worked too tightly will not open. Keep your chains loose, and re-block with a pin in every loop.
The scallops ruffle. Work 4 dc instead of 5 in each loop, or tighten your tension on the border only.
The center column puckers. The ch-2 connectors are too short for your tension. Try ch 3 on each side of the column in Rows 4–7.
The ornament tilts on the tree. The hanging loop is off center. Remove it and rejoin in the 19th rev sc.
Care
Hand wash in cool water with mild soap, press dry in a towel, and pin back to shape. Store the ornament flat in tissue paper so the tips and scallops keep their shape.
Final Notes
The measurement chain for this ornament is short. A band of 35 sc at 8 sc per inch measures 4.375 in (11.1 cm). Five tapering mesh rows bring the center height to 1.75 in (4.4 cm). The scalloped border and top ridge then bring the ornament to 4.5 in (11.4 cm) x 2 in (5.1 cm). If each checkpoint matches, your finished wings will match too. Make a few in blush pink for a soft, festive tree.
Happy crocheting!