

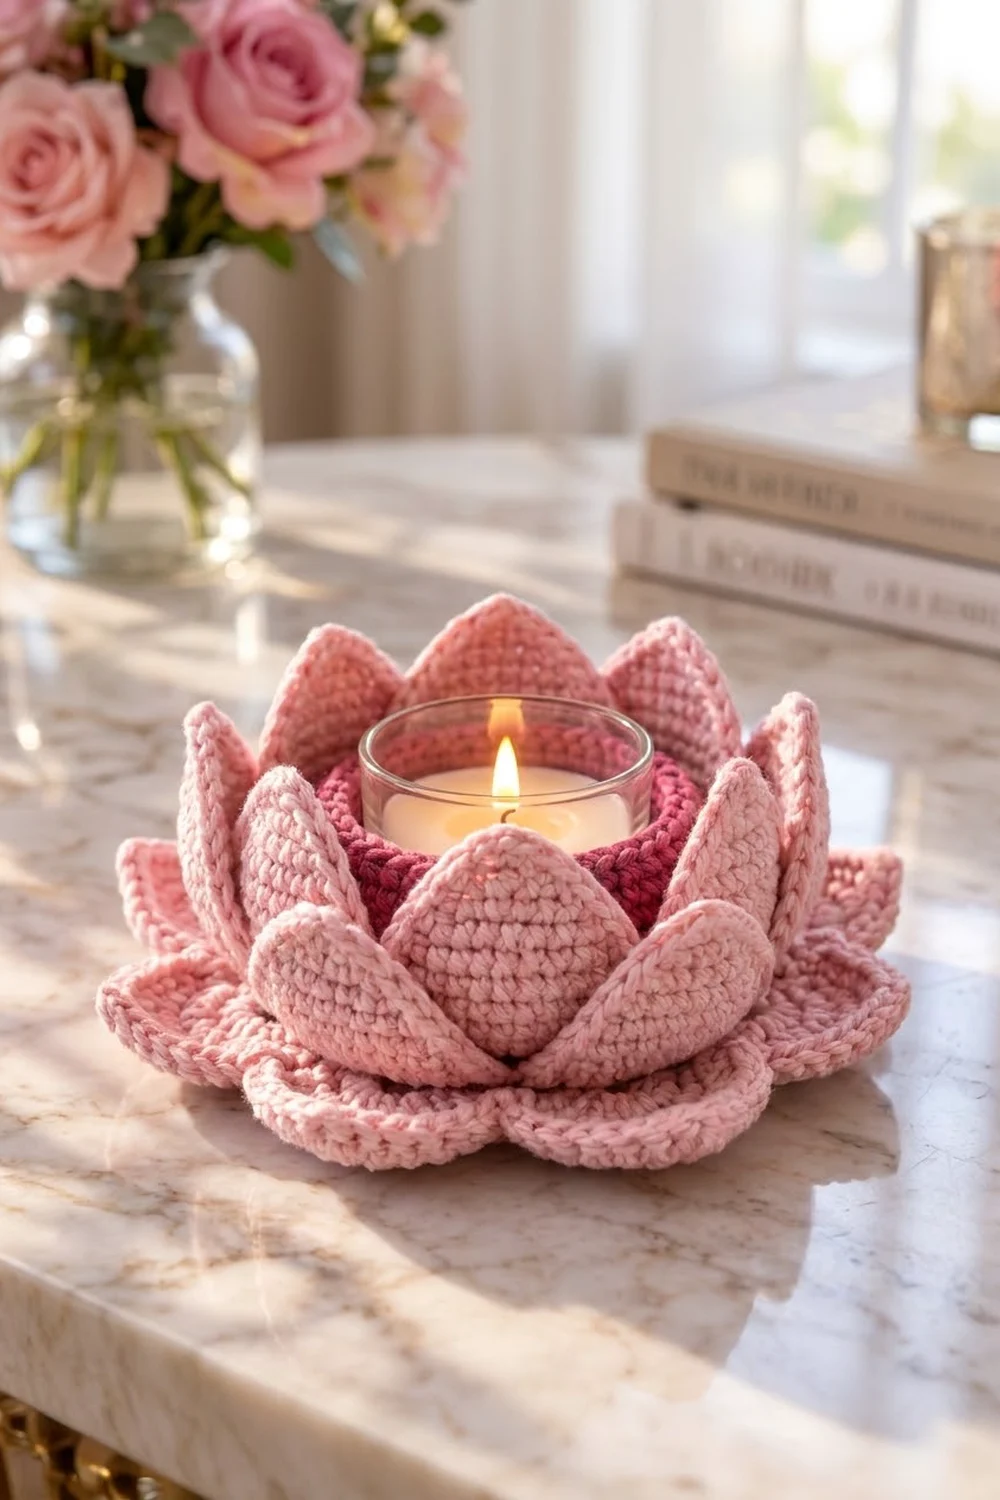
The Blushing Lotus is a soft, sculptural candle holder that looks like a water lily opening on a pond. A scalloped light pink base forms the lily pad. A deep raspberry-rose cup in the center holds a glass votive, and two rings of pointed petals rise around it.
The palette uses just two shades: a pale blush pink for the base and petals, and a darker rose for the cup. The dark center makes the flower look deeper and helps the candle glow stand out. The style is romantic and tidy, made with dense single crochet so the petals hold their shape without stiffener.
This pattern uses US crochet terms. The finished holder is about 6.7 in (17.0 cm) across and about 3 in (7.6 cm) tall. The cup fits a glass votive up to 2.5 in (6.4 cm) wide.
Construction is simple and modular. You work the base as a flat circle with a shell border, then the cup as a small basket, then 16 identical petals worked around a foundation chain. Finally you sew everything together, matching the pieces stitch to stitch.
Finished Size and Construction
- Finished size: 6.7 in (17.0 cm) diameter x 3 in (7.6 cm) tall
- Skill level: Intermediate (simple stitches, careful assembly)
- Terminology: US crochet terms
- Yarn weight: Worsted (#4) cotton
- Hook: 4.0 mm (G-6)
- Number of pieces: 18 (1 base, 1 cup, 16 petals)
- Layout: Cup in the center, 8 inner petals in a ring around the cup, 8 outer petals staggered between them
- Petal size: 3.25 in (8.3 cm) long x 2 in (5.1 cm) wide
- Base size before border: 5.3 in (13.5 cm) diameter
- Border depth: 0.7 in (1.8 cm)
Materials
Use a smooth, mercerized or combed cotton in worsted weight. Cotton gives crisp stitch definition and holds the petal shape. Acrylic will work, but it is more flammable and softer, so the petals may droop.
- Color A, Light Pink (base and petals): 140 g / 270 m (295 yd)
- Color B, Raspberry Rose (cup): 35 g / 70 m (77 yd)
These quantities include a margin of about 15% for your gauge swatch and sewing tails.
Tools:
– 4.0 mm (G-6) crochet hook
– Tapestry needle
– 8–16 locking stitch markers
– Rustproof pins
– Measuring tape
– Glass votive holder, 2.5 in (6.4 cm) wide x 2 in (5.1 cm) tall
– LED tea light (strongly recommended)
Abbreviations (US Terms)
- ch – chain
- sl st – slip stitch
- sc – single crochet
- hdc – half double crochet
- dc – double crochet
- inc – 2 sc in the same stitch
- BLO – back loop only
- MR – magic ring
- st(s) – stitch(es)
- sp – space
- ( ) – work all stitches in parentheses into the same stitch or space
Special stitch – Shell: 7 dc worked into the same stitch.
Gauge and Checkpoints
Gauge: 18 sc and 18 rows = 4 in (10.2 cm) in sc. One round of sc is about 0.22 in tall.
Make one petal first and use it as your gauge test. It is quick, and every later piece depends on the same tension.
Petal checkpoints:
– After Rnd 1: 2.75 in (7.0 cm) long x 0.5 in (1.3 cm) wide
– After Rnd 2: 3 in (7.6 cm) long x 1.6 in (4.1 cm) wide
– After Rnd 3: 3.25 in (8.3 cm) long x 2 in (5.1 cm) wide
Base checkpoints:
– After Rnd 7: 3.1 in (7.9 cm) diameter
– After Rnd 8: 3.6 in (9.1 cm) diameter
– After Rnd 12: 5.3 in (13.5 cm) diameter
Cup checkpoint: wall height 2 in (5.1 cm) measured from the BLO ridge.
If your petal is more than 0.25 in (0.6 cm) too long, go down one hook size. If it is more than 0.25 in (0.6 cm) too short, go up one hook size. Keep the cup and base at the same gauge so the pieces match during assembly.
Base (Color A, Make 1)
Work in joined rounds. Ch 1 at the start of each round does not count as a stitch. Join each round with a sl st to the first sc. Spread out the increases so the circle stays round.
Rnd 1: MR, ch 1, 6 sc in ring, join. (6 sts)
Rnd 2: Ch 1, inc in each st around, join. (12 sts)
Rnd 3: Ch 1, (sc in next st, inc) 6 times, join. (18 sts)
Rnd 4: Ch 1, sc in first st, inc, (sc in next 2 sts, inc) 5 times, sc in last st, join. (24 sts)
Rnd 5: Ch 1, (sc in next 3 sts, inc) 6 times, join. (30 sts)
Rnd 6: Ch 1, sc in next 2 sts, inc, (sc in next 4 sts, inc) 5 times, sc in last 2 sts, join. (36 sts)
Rnd 7: Ch 1, (sc in next 5 sts, inc) 6 times, join. (42 sts)
Checkpoint: 3.1 in (7.9 cm) across. This is the footprint of the cup.
Rnd 8: Ch 1, sc in next 3 sts, inc, (sc in next 6 sts, inc) 5 times, sc in last 3 sts, join. (48 sts)
Rnd 9: Ch 1, (sc in next 7 sts, inc) 6 times, join. (54 sts)
Rnd 10: Ch 1, sc in next 4 sts, inc, (sc in next 8 sts, inc) 5 times, sc in last 4 sts, join. (60 sts)
Rnd 11: Ch 1, (sc in next 9 sts, inc) 6 times, join. (66 sts)
Rnd 12: Ch 1, sc in next 5 sts, inc, (sc in next 10 sts, inc) 5 times, sc in last 5 sts, join. (72 sts)
Checkpoint: 5.3 in (13.5 cm) across and lying flat. Do not fasten off. The border is worked next (see Border).
Cup (Color B, Make 1)
Work in a continuous spiral. Mark the first stitch of each round.
Rnds 1–7: Work exactly as Base Rnds 1–7, but don’t join or ch 1. (42 sts at the end of Rnd 7)
Rnd 8: Sc in BLO of each st around. (42 sts)
The unused front loops of Rnd 7 form a ridge at the bottom of the cup. You will use those 42 loops for sewing later.
Rnds 9–16: Sc in each st around. (42 sts per round)
Sl st in the next st and fasten off, leaving an 18 in (45.7 cm) tail.
Checkpoint: the base is 3.1 in (7.9 cm) across and the wall is 2 in (5.1 cm) tall. Your votive should slide in easily.
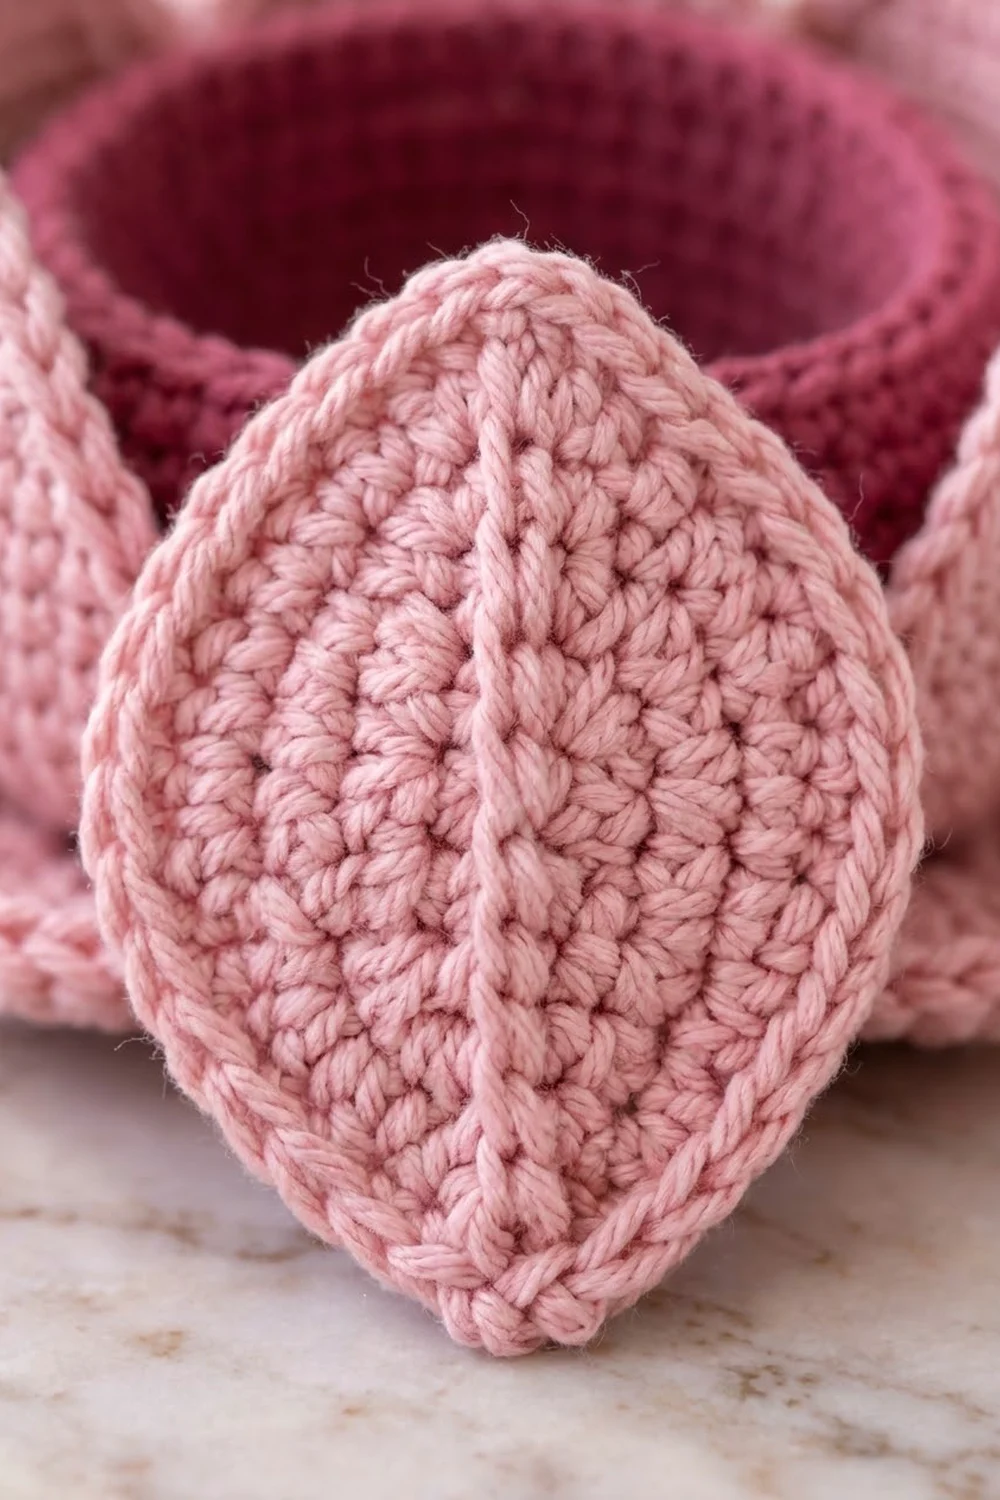
Petals (Color A, Make 16)
Each petal is worked in joined rounds around both sides of a foundation chain. This creates the center spine and pointed ends. The joins all fall at the base end of the petal, where they will be hidden by the sewing.
Ch 12.
Rnd 1: Sc in 2nd ch from hook and in next 9 ch, 3 sc in last ch (tip). Rotate and work along the opposite side of the chain: sc in next 9 ch, 2 sc in last ch (the same ch as the first sc). Join with a sl st to the first sc. (24 sts: 10 + 3 + 9 + 2)
Rnd 2: Ch 1, 2 sc in first st, sc in next 2 sts, hdc in next 2 sts, dc in next 4 sts, hdc in next st, sc in next st, (sc, ch 2, sc) in next st (the center st of the tip), sc in next st, hdc in next st, dc in next 4 sts, hdc in next 2 sts, sc in next 2 sts, 2 sc in each of last 2 sts, join. (28 sts + ch-2 tip sp)
Stitch check: Rnd 2 uses all 24 sts of Rnd 1. The two sides mirror each other (sc, sc, hdc, hdc, dc x 4, hdc, sc), and the base end has 6 sts.
Rnd 3 (outline): Ch 1, sc in first 13 sts, (sc, ch 1, sc) in ch-2 sp, sc in next 15 sts, join. (30 sts = 28 worked 1 per stitch + 2 added at the tip)
Fasten off, leaving a 12 in (30.5 cm) tail for sewing.
Base edge of the petal: On Rnd 3, sts 27–30 and 1–2 make up the 6-st rounded base. For outer petals you will also use st 26, for a 7-st base.
Checkpoint: 3.25 in (8.3 cm) x 2 in (5.1 cm).
Make All Pieces
- Color A: 1 base (bordered) + 16 petals
- Color B: 1 cup
Layout from above (not to scale):
          O   I   O
        I    ___    I
      O     | B |     O
        I   |___|   I
          O   I   O
   ~~~~ scalloped base (A) ~~~~
- B = cup, sewn on Base Rnd 7
- I = 8 inner petals, sewn on Base Rnd 8, 6 sts each
- O = 8 outer petals, sewn on Base Rnd 12, centered between the inner petals
Joining (Assembly)
Sew all pieces with whipstitch. Use the matching yarn tail and go through one loop of each piece per stitch.
1. Cup to base (42 to 42): Center the cup on the base. Line up each of the 42 front loops from cup Rnd 7 with one of the 42 sts of base Rnd 7, catching the base at the ridge where Rnd 8 begins. Because both counts are 42, the cup sits perfectly round with no puckers.
2. Mark the inner ring: Base Rnd 8 has 48 sts. Place a marker every 6 sts, starting at the first st of the round, for 8 sections of 6 sts.
3. Inner petals (6 to 6): Stand one petal upright against the cup wall, with its right side facing out. Sew its 6 base sts (Rnd 3 sts 27–30 and 1–2) to one 6-st section of Rnd 8, one to one. Repeat for all 8 sections. The total is 8 x 6 = 48 sts, so the ring closes exactly. The petals are 2 in (5.1 cm) wide and each is sewn across about 1.3 in (3.3 cm), so neighbors overlap slightly, as on a real lotus.
4. Tack the inner petals: Take one small stitch from the center back of each inner petal into cup Rnd 14. This keeps the petals upright and slightly cupped.
5. Mark the outer ring: Base Rnd 12 has 72 sts, or 8 sections of 9 sts. Place a marker on the Rnd 12 st directly outward from each point where two inner petals meet.
6. Outer petals (7 to 7): Sew each outer petal’s 7 base sts (Rnd 3 sts 26–30 and 1–2) to the 7 sts centered on a marker: the marked st plus 3 on each side. That leaves 2 free sts between neighbors. The total is 8 x (7 + 2) = 72 sts. Sew through the posts of Rnd 12 so the border stitches stay free.
Tension: Pull each whipstitch snug but not tight. The base must still lie flat when you finish. If the base ripples, your stitches are too tight.
Size checkpoint: The outer petals splay at about 45 degrees, and the scallops still show beyond them. The base still measures 6.7 in (17.0 cm).
Border (Base Scallops)
Work the border on the base after Rnd 12, before assembly.
Border gauge: Each scallop uses 6 sts of Rnd 12. That is about 1.3 in (3.3 cm) of the 16 in (40.6 cm) Rnd 12 outer edge.
Rnd 13 (shell round): Ch 1, sc in first st, skip 2 sts, shell (7 dc) in next st, skip 2 sts, sc in next st. Repeat from * 10 more times, then skip 2 sts, shell in next st, skip 2 sts, and join with a sl st to the first sc.
- Per scallop: 6 sts used (1 sc st + 2 skipped + 1 shell st + 2 skipped); 8 sts made (1 sc + 7 dc)
- Total: 12 scallops, 72 sts used, 96 sts made (12 sc + 84 dc)
Rnd 14 (outline): Ch 1, sc in next 2 dc, 2 sc in next dc, sc in next dc, 2 sc in next dc, sc in next 2 dc, sl st in next sc. Repeat from * 11 more times. The last sl st goes into the joining sc. Fasten off and weave in the end.
- Per scallop: 7 dc become 9 sc, plus 1 sl st = 10 sts
- Total: 120 sts (96 worked 1 per stitch + 24 added)
Why the math works: 72 sts divide evenly into 12 repeats of 6, so there are no partial scallops. The 2 increases per scallop in Rnd 14 make up for the longer outer curve of each shell, so the scallops lie flat instead of cupping. The border adds 0.7 in (1.8 cm) on each side: 5.3 in + 0.7 in + 0.7 in = 6.7 in (17.0 cm).
Final Blocking
- Lightly mist the whole holder with water until it is damp, not soaked.
- Lay it upright on a towel and insert the glass votive.
- Smooth the base flat and pin each scallop tip outward to a 6.7 in (17.0 cm) circle.
- Shape each petal by pinching its tip to a point and pressing the center spine forward with your fingers.
- Curve the inner petals inward against the cup and angle the outer petals outward evenly.
- Leave it to dry completely, about 24 hours, before removing the pins.
Final Quality-Control Checklist
- Base Rnd 12 has 72 sts and Rnd 14 has 120 sts
- There are 12 matching scallops, all lying flat
- Cup has 42 sts per round and stands 2 in (5.1 cm) tall
- All 16 petals measure 3.25 in (8.3 cm) x 2 in (5.1 cm)
- 8 inner petals cover all 48 sts of Rnd 8 with no gaps
- 8 outer petals sit evenly, with 2 free sts between each pair
- All ends are woven in and secured
- The votive slides in and out without stretching the cup
Troubleshooting
- Base ruffles: Your tension is too loose or you added increases. Recount each round against the stitch counts.
- Base cups upward: Your increases are stacking or your tension is too tight. Stagger the increases as written, or go up half a hook size.
- Petals curl backward: Block them with the right side facing in, or tighten your Rnd 3 tension.
- Petal tip is blunt: Make sure the (sc, ch 2, sc) goes into the center sc of the 3-sc tip group.
- Cup leans: Re-sew it, checking that all 42 front loops are matched one to one with the base.
- Votive is too tight: Add one wall round to the cup, or use a hook 0.5 mm larger for the cup only.
- Gaps between inner petals: Check that each petal covers exactly 6 base sts.
Care
Hand wash in cool water, press out the water in a towel and reshape to dry flat. Never leave a burning candle unattended, and keep the flame inside the glass. An LED tea light is the safest choice for crochet.
Final Notes
The measurement chain is short and reliable. Petal gauge sets your tension. Base Rnd 7 (42 sts) matches the cup’s 42 sts, Rnd 8 (48 sts) holds 8 inner petals of 6 sts each, and Rnd 12 (72 sts) holds 8 outer petals and 12 scallops. Two border rounds then take the 5.3 in (13.5 cm) circle to a finished 6.7 in (17.0 cm). Check each number as you go and your lotus will open beautifully.
Happy crocheting!