

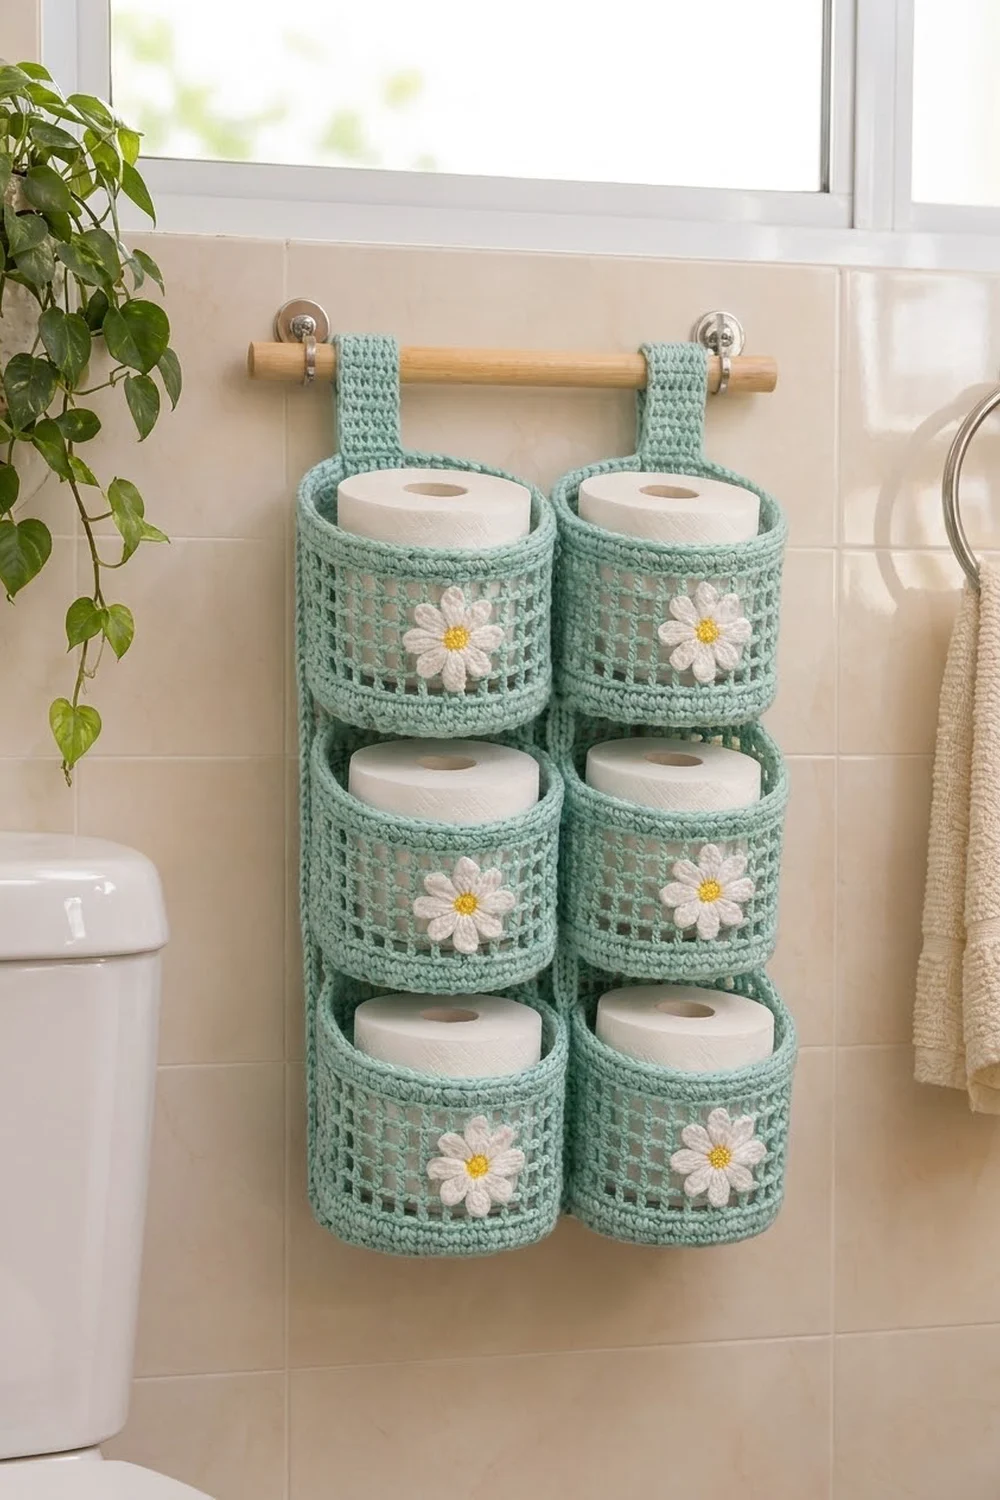
The Daisy Lattice holder is a hanging bathroom organizer made of six round mesh baskets in two neat columns. Each basket holds one standard toilet paper roll, and a small white daisy sits in the middle of every front.
The yarn is a soft mint green, with white petals and a sunny yellow center on each flower. Solid bands at the base and rim give each basket structure, and the open filet mesh keeps it light, airy and quick to dry in a humid bathroom.
This pattern uses US crochet terms. The finished organizer measures about 9.5 in (24.1 cm) wide and 13.5 in (34.3 cm) tall across the baskets, or 15.75 in (40.0 cm) tall including the hanging loops.
You’ll crochet six baskets from the bottom up, starting with a flat single-crochet base, then a bottom band, a mesh section and a top rim band. Next you’ll make six daisies and sew them on. Then you’ll join the baskets into a 2 × 3 grid and finish each column with an edged hanging tab that folds over a dowel.
Finished Size and Construction
- Finished size: 9.5 in × 15.75 in (24.1 cm × 40.0 cm) including loops
- Skill level: Easy–Intermediate
- Terminology: US
- Yarn weight: Worsted (#4), cotton or cotton blend
- Hook: 4.5 mm (US 7)
- Number of pieces: 6 baskets, 6 daisies, 2 hanging tabs (worked onto the top baskets)
- Layout: 2 columns × 3 rows
- Piece size: each basket is 4.75 in (12.1 cm) across × 4.5 in (11.4 cm) tall, with a circumference of 15 in (38.1 cm)
- Tab size before edging: 1.5 in (3.8 cm) wide
- Tab edging depth: about 0.25 in (0.6 cm) per side, so the finished tab is about 2 in (5.1 cm) wide
Materials
Use a smooth worsted-weight cotton or cotton blend. Cotton holds its shape, stays firm enough to stand up as a basket and copes with bathroom humidity. Avoid fuzzy acrylics, which blur the mesh windows.
- Mint green (MC): 250 g / 425 m (465 yd)
- White (petals): 30 g / 51 m (56 yd)
- Yellow (centers): 10 g / 17 m (19 yd)
These quantities include a margin of about 10% for gauge swatching and seaming.
Tools:
– 4.5 mm (US 7) crochet hook
– Tapestry needle
– 8 stitch markers
– Scissors
– Measuring tape
– Wooden dowel, 12 in (30.5 cm) long and 0.75 in (1.9 cm) across
– 2 wall hooks or cup hooks
– Spray bottle and a 4.5 in (11.4 cm) jar or a toilet roll for blocking
Abbreviations (US Terms)
- ch – chain
- sl st – slip stitch
- sc – single crochet
- hdc – half double crochet
- dc – double crochet
- BLO – back loop only
- inc – 2 sc in the same stitch
- sp – space
- st(s) – stitch(es)
- MR – magic ring
Special stitch – mesh unit: 1 dc + 1 ch-1 space. One mesh unit takes up 2 stitches of the round. Stacking dc on dc in every round makes the square windows.
Gauge and Checkpoints
- Single crochet: 16 sts × 18 rnds = 4 in (10.2 cm)
- Mesh: 8 mesh units (16 sts) × 7 rnds = 4 in (10.2 cm)
Make one complete basket first and check it against the measurements below before making the other five.
- After Rnd 10 (base): 4.75 in (12.1 cm) across
- After Rnd 13: wall is 0.7 in (1.8 cm) tall
- After Rnd 18: wall is 3.6 in (9.1 cm) tall
- After Rnd 22: wall is 4.5 in (11.4 cm) tall, and the circumference is 15 in (38.1 cm)
If the basket is too big, go down half a hook size. If it’s too small or too stiff to fit a roll, go up half a size. Don’t change the stitch counts, because everything in this pattern is built on a 60-stitch circumference.
Basket (Make 6)
All rounds are joined, not spiraled. Join each round with a sl st to the first stitch, then ch 1 (this ch 1 doesn’t count as a stitch). The joins stack up into a line at the center back of the basket.
Base
Rnd 1: With MC, MR, 6 sc in ring, join. (6)
Rnd 2: Inc in each st around, join. (12)
Rnd 3: Sc 1, inc 6 times, join. (18)
Rnd 4: Sc 2, inc 6 times, join. (24)
Rnd 5: Sc 3, inc 6 times, join. (30)
Rnd 6: Sc 4, inc 6 times, join. (36)
Rnd 7: Sc 5, inc 6 times, join. (42)
Rnd 8: Sc 6, inc 6 times, join. (48)
Rnd 9: Sc 7, inc 6 times, join. (54)
Rnd 10: Sc 8, inc 6 times, join. (60)
Checkpoint: the base lies flat and measures 4.75 in (12.1 cm) across.
Bottom Band
Rnd 11: Sc in BLO of each st around, join. (60)
Working in the back loops turns the edge sharply upward and leaves a crisp ridge of free front loops from Rnd 10 around the base.
Rnds 12–13: Sc in each st around, join. (60)
Checkpoint: the wall is 0.7 in (1.8 cm) tall.
Mesh Section
Rnd 14 (conversion round): Ch 4 (counts as dc + ch 1), skip next st, dc in next st, ch 1, skip next st 29 times, join with sl st in 3rd ch of beginning ch-4.
Count: 30 dc worked into every other stitch, plus 30 ch-1 spaces over the skipped stitches, for 60 stitches (30 mesh units).
Rnds 15–18: Ch 4 (counts as dc + ch 1), dc in next dc, ch 1 29 times, join in 3rd ch of beginning ch-4. (30 dc + 30 ch-1 sps = 60)
Each dc sits directly on the dc below it, so you get 5 rows of square windows, each about 0.5 in (1.3 cm) across.
Checkpoint: the wall is 3.6 in (9.1 cm) tall.
Top Rim Band
Rnd 19 (conversion round): Ch 1, sc in same st as join, sc in next ch-1 sp, sc in next dc, sc in next ch-1 sp around, join.
Count: 30 sc worked into the dc, plus 30 sc worked into the ch-1 spaces, for 60.
Rnds 20–22: Sc in each st around, join. (60)
Fasten off and weave in the ends. The rim band is 0.9 in (2.3 cm) deep, slightly deeper than the bottom band, as in the finished piece.
Checkpoint: the basket is 4.5 in (11.4 cm) tall and 15 in (38.1 cm) around.
Stitch Map
With the join line at center back, number the stitches of Rnd 22 from 1 to 60, starting at the join.
– Center back: sts 58–60 and 1–3
– Side lines: st 15 and st 45
– Front center: between st 30 and st 31
You’ll use these positions for the daisy, the joins and the tab.
Daisy Appliqué (Make 6)
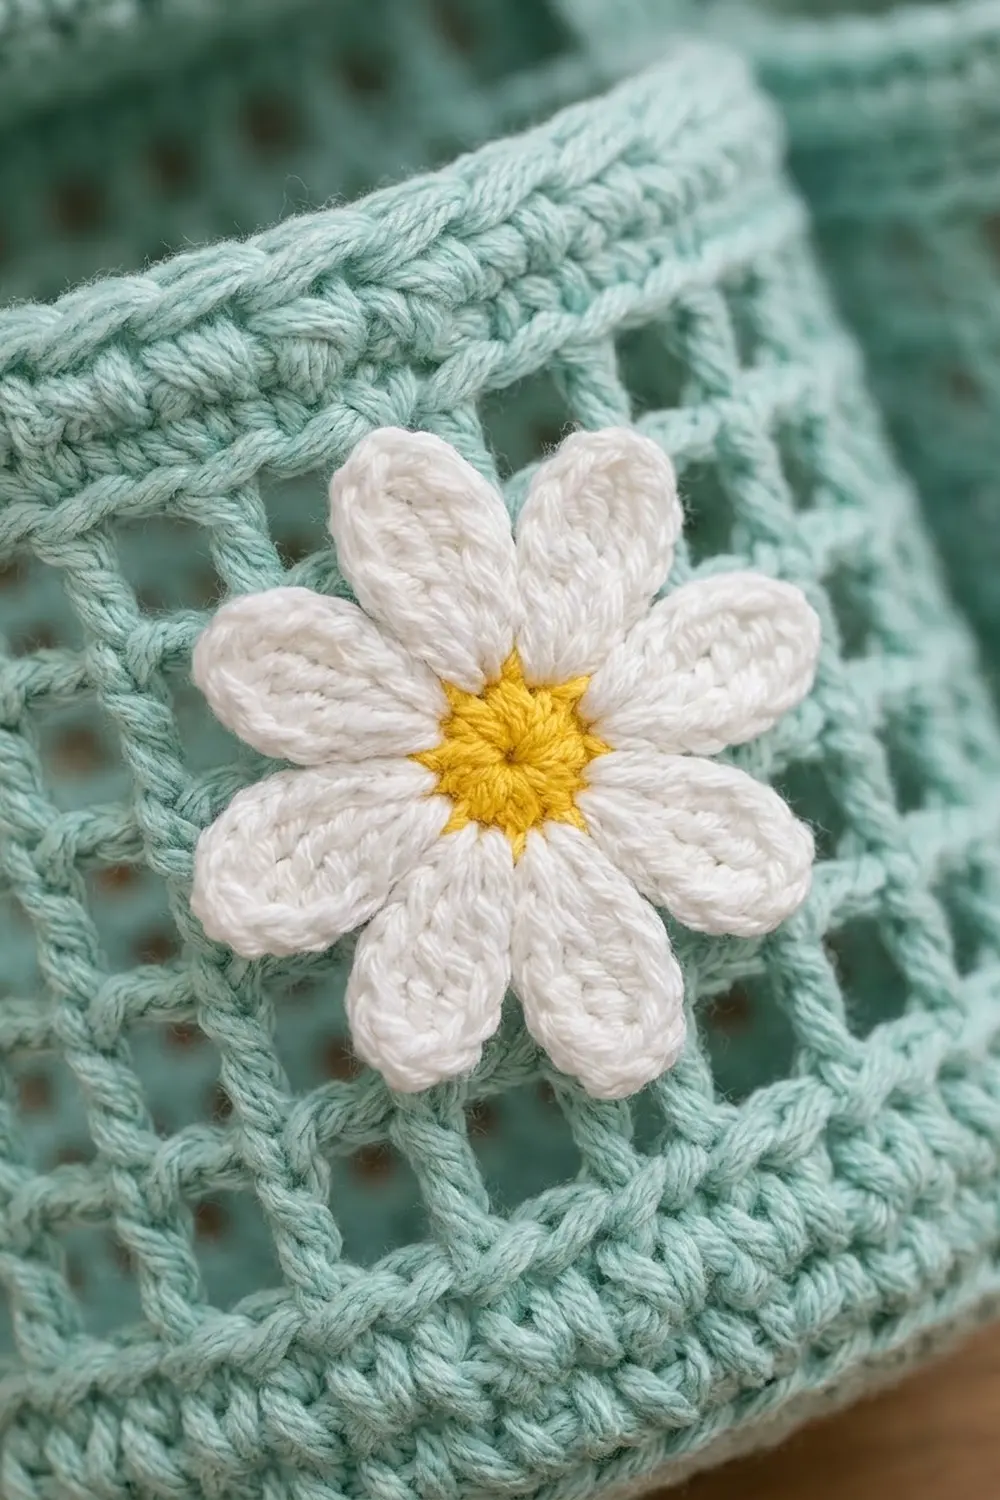
Rnd 1: With yellow, MR, ch 1, 8 sc in ring. Pull the ring tight and join with white in the first sc. Fasten off yellow. (8)
Rnd 2 (petals): With white, ch 6, sc in 2nd ch from hook, hdc in next ch, dc in next 2 ch, hdc in last ch, sl st in next sc of center 8 times. Make the last sl st in the base of the first petal. (8 petals, 5 sts each)
Fasten off, leaving a 12 in (30.5 cm) tail. Each daisy measures about 2.5 in (6.4 cm) across, with petals about 1 in (2.5 cm) long.
Attach: Center the daisy on the front center of the basket (between sts 30 and 31), vertically centered on the mesh section (Rnds 14–18). The mesh section is 2.9 in (7.4 cm) tall, so the daisy fits with a little mesh showing above and below it. Use the white tail to tack each petal tip and the center to the dc posts behind it, working from inside the basket.
Make All Pieces
- Mint baskets: 6
- Daisies: 6 (white petals, yellow centers)
- Hanging tabs: 2, worked later onto the top basket of each column
Layout (front view):
[ Tab ]   [ Tab ]
[ B1  ]   [ B2  ]   ← Row 1 (top)
[ B3  ]   [ B4  ]   ← Row 2
[ B5  ]   [ B6  ]   ← Row 3 (bottom)
Put all six baskets with the daisies facing front and the join lines at the back.
Joining
Joining happens in two steps: down each column, then across each row. Use MC and a tapestry needle, and pull each stitch just snug. If you pull too hard, the rims pucker. If the seams are too loose, the baskets tilt forward when loaded.
Column joins (stacking)
Stack B1 on top of B3, with the join lines lined up at center back.
Whipstitch the free front loops of Rnd 10 (the base ridge) of the upper basket to the top loops of Rnd 22 of the lower basket. Work stitch to stitch across the center back 20 stitches only, sts 51–60 and 1–10, so 20 stitches join to 20 stitches.
The front 40 stitches stay unjoined, so the lower rim can flex open when you slide a roll in. Join B3 to B5, B2 to B4 and B4 to B6 the same way.
Checkpoint: each column measures 13.5 in (34.3 cm) tall (3 × 4.5 in / 11.4 cm).
Row joins (side by side)
Set the columns next to each other, with the left column’s st 45 side line touching the right column’s st 15 side line.
On each basket pair, tack the side lines together once in each of the 7 sc rounds (Rnds 11–13 and 19–22). Then tack once at the dc post nearest the side line in each of the 5 mesh rounds. That’s 12 tacks per pair, and 36 in total.
Checkpoint: the joined body measures 9.5 in × 13.5 in (24.1 cm × 34.3 cm).
Border: Hanging Tabs with Edging
Each column gets one tab. It’s worked straight off the rim of the top basket and then finished with a sc edging. Use the same gauge as the basket: 16 sc × 18 rows = 4 in (10.2 cm).
Row 1: With the right side facing, join MC in st 58 of Rnd 22 on B1. Ch 1, sc in sts 58, 59, 60, 1, 2 and 3. (6)
Rows 2–24: Ch 1, turn, sc in each st across. (6)
Before edging, the tab measures 1.5 in (3.8 cm) wide × about 5.3 in (13.5 cm) long. Don’t fasten off.
Edging round: Ch 1, rotate the tab and work down the long side.
– First long side: 24 sc, 1 per row end, down to the rim.
– Turn the corner: sl st into the rim, then work back up the other long side.
– Second long side: 24 sc, 1 per row end.
– Top end: 3 sc in the first st, sc in the next 4 sts, 3 sc in the last st. That’s 6 sts worked 1 per stitch, plus 4 extra corner stitches, for 10.
– Total: 24 + 24 + 10 = 58 sc.
Sl st to the first edging sc and fasten off, leaving a 16 in (40.6 cm) tail. Repeat on B2.
Why the math works: 6 tab stitches at 4 sts per inch give exactly 1.5 in (3.8 cm). Placing the tab on sts 58–3 centers it over the stacked join line. One sc per row end matches the 18-rows-to-4-in gauge, so the long sides stay flat instead of rippling. With 0.25 in (0.6 cm) of edging on each side, the tab finishes at about 2 in (5.1 cm) wide.
Attach: Fold each tab backward over the dowel. Sew the top end flat to the outside back of the top basket, across Rnds 20–21, behind the tab’s base. The loop should rise about 2.25 in (5.7 cm) above the rim, which brings the total height to 15.75 in (40.0 cm).
Final Blocking
- Weave in all remaining ends on the inside of the baskets.
- Mist each basket with water until it’s damp but not dripping.
- Slip a toilet roll or a 4.5 in (11.4 cm) jar into each basket to round out the walls.
- Straighten the mesh windows with your fingers so the dc columns are vertical.
- Press each daisy flat with your palm and pin the petal tips if they curl.
- Lay the organizer flat and let it dry completely, about 24 hours.
- Slide in the dowel, hang it on the hooks and load the rolls.
Final Quality-Control Checklist
- Every base lies flat and measures 4.75 in (12.1 cm) across.
- Every basket has 60 stitches in Rnd 22 and stands 4.5 in (11.4 cm) tall.
- Each basket has 5 rows of square, upright mesh windows.
- Each daisy has 8 petals and is centered on the front of the mesh.
- All join lines are at the back and hidden.
- Column joins cover 20 stitches each, and the fronts flex open.
- Each side-by-side pair has 12 tacks.
- Tabs are 2 in (5.1 cm) wide and centered on the columns.
- The organizer measures 9.5 in × 15.75 in (24.1 cm × 40.0 cm).
Troubleshooting
- Base cups upward: your tension is too tight, or you missed an increase. Recount to 60 and try a larger hook for the base.
- Base ruffles: you have extra stitches. Recount each round.
- Mesh windows slant: you placed a dc into a ch-1 space instead of the dc below. Rip back to the last correct round.
- The roll won’t fit: go up half a hook size. The interior needs about 4.5 in (11.4 cm).
- The join line drifts sideways: always make the first stitch of the round in the same stitch as the join.
- Daisy petals curl: block flat and pin, or use a slightly looser chain for each petal.
- Pockets lean forward: tighten the column joins or extend them to 24 center-back stitches.
Care
Hand wash in cool water with mild soap, press out the water in a towel, and reshape around a roll to dry flat. Don’t tumble dry.
Final Notes
The measurement chain is simple. A 60-stitch base gives a 15 in (38.1 cm) circumference and a 4.75 in (12.1 cm) basket. Bands of 0.7 in (1.8 cm) and 0.9 in (2.3 cm) plus 2.9 in (7.4 cm) of mesh add up to 4.5 in (11.4 cm) per basket. Three stacked baskets make 13.5 in (34.3 cm), two side-by-side columns make 9.5 in (24.1 cm), and the loops bring the total to 15.75 in (40.0 cm). Check your first basket carefully, and the rest will follow.
Happy crocheting!