

This little tree is a flat, single-piece ornament made to hang from a rearview mirror, a hook, or a branch. It has a clean three-tier outline, a short square trunk, and a neat edging round that keeps every point and notch crisp.
The sample is worked in one solid charcoal gray. Dense single crochet gives it a quiet, modern look, and the simple shape is easy to recognize from across a car or a room. You can use any color, but a single solid shade shows the outline best.
The pattern uses US crochet terms. The finished tree is about 3.8 in (9.7 cm) wide and 4.0 in (10.2 cm) tall, not counting the hanging loop. The loop hangs about 3 in (7.6 cm) above the tree.
Construction is simple. You crochet the trunk first in short rows. Then you add chains and foundation stitches to step out into each tier, and each tier narrows with decreases at both ends. One round of single crochet edges the whole shape, and a chain cord at the top forms the hanger.
Finished Size and Construction
- Finished size: 3.8 in (9.7 cm) wide x 4.0 in (10.2 cm) tall, plus a 3 in (7.6 cm) loop
- Skill level: Easy
- Terminology: US crochet terms
- Yarn weight: DK (light #3)
- Hook: 3.5 mm (E-4)
- Number of pieces: 1 (single flat piece, no joining)
- Layout: trunk at the bottom, three stacked triangular tiers above it
- Piece size before border: 3.6 in (9.1 cm) wide x 3.8 in (9.7 cm) tall
- Border depth: about 0.1 in (0.3 cm) on every edge, adding 0.2 in (0.5 cm) to each dimension
Materials
Choose a smooth DK cotton or cotton blend. Cotton holds a sharp shape, doesn’t fuzz much, and copes well with the heat of a sunny car window. Avoid fuzzy or very splitty yarns, which hide the stitches and soften the tier points.
- Charcoal gray DK yarn: 15 g (about 35 m / 38 yd)
The tree itself uses about 10 g. The amount listed above includes extra for checking your gauge, the hanging loop, and any ripping back.
Tools:
- 3.5 mm (E-4) crochet hook
- Tapestry needle
- Scissors
- Stitch markers (2)
- Ruler or tape measure
- Blocking mat and rust-proof pins
- Spray bottle with water
Abbreviations (US Terms)
- ch – chain
- sc – single crochet
- sc2tog – single crochet 2 together
- fsc – foundation single crochet
- sl st – slip stitch
- st(s) – stitch(es)
- RS – right side
Foundation single crochet (fsc): Use this to extend a row at its end. Insert the hook into the base chain of the last st worked, yarn over, and pull up a loop (2 loops on hook). Yarn over and pull through 1 loop; this is the new base chain. Yarn over and pull through both loops. Repeat, always working into the base chain of the fsc you just made.
sc2tog: Insert the hook in the next st and pull up a loop. Insert the hook in the following st and pull up a loop. Yarn over and pull through all 3 loops.
Turning chains: Every row begins with ch 1 after turning. The ch 1 does not count as a stitch.
Gauge and Checkpoints
Gauge: 20 sc and 22 rows = 4 in (10.2 cm) in sc worked flat. That is 5 sts and 5.5 rows per 1 in (2.5 cm).
Because this is a small project, the tree itself is your test piece. Work through Row 10, then measure. If your numbers match, keep going. If they don’t, change hooks and start over. It only costs a few minutes.
Checkpoints:
- After Row 5 (trunk): 0.8 in (2.0 cm) wide x 0.9 in (2.3 cm) tall
- After Row 10 (bottom tier): 3.6 in (9.1 cm) wide at Row 6, 1.8 in (4.6 cm) tall in total
- After Row 15 (middle tier): 2.7 in (6.9 cm) tall in total
- After Row 21 (top point): 3.8 in (9.7 cm) tall in total
- After border: 3.8 in (9.7 cm) x 4.0 in (10.2 cm)
If your tree is too big: go down 0.5 mm in hook size. Firm, tight fabric works better here than loose fabric.
If your tree is too small: go up 0.5 mm in hook size, or check that you aren’t pulling each loop very tight.
If the width is right but the height is short: your rows are compact. That’s fine for an ornament, but the tree will be a little shorter and wider.
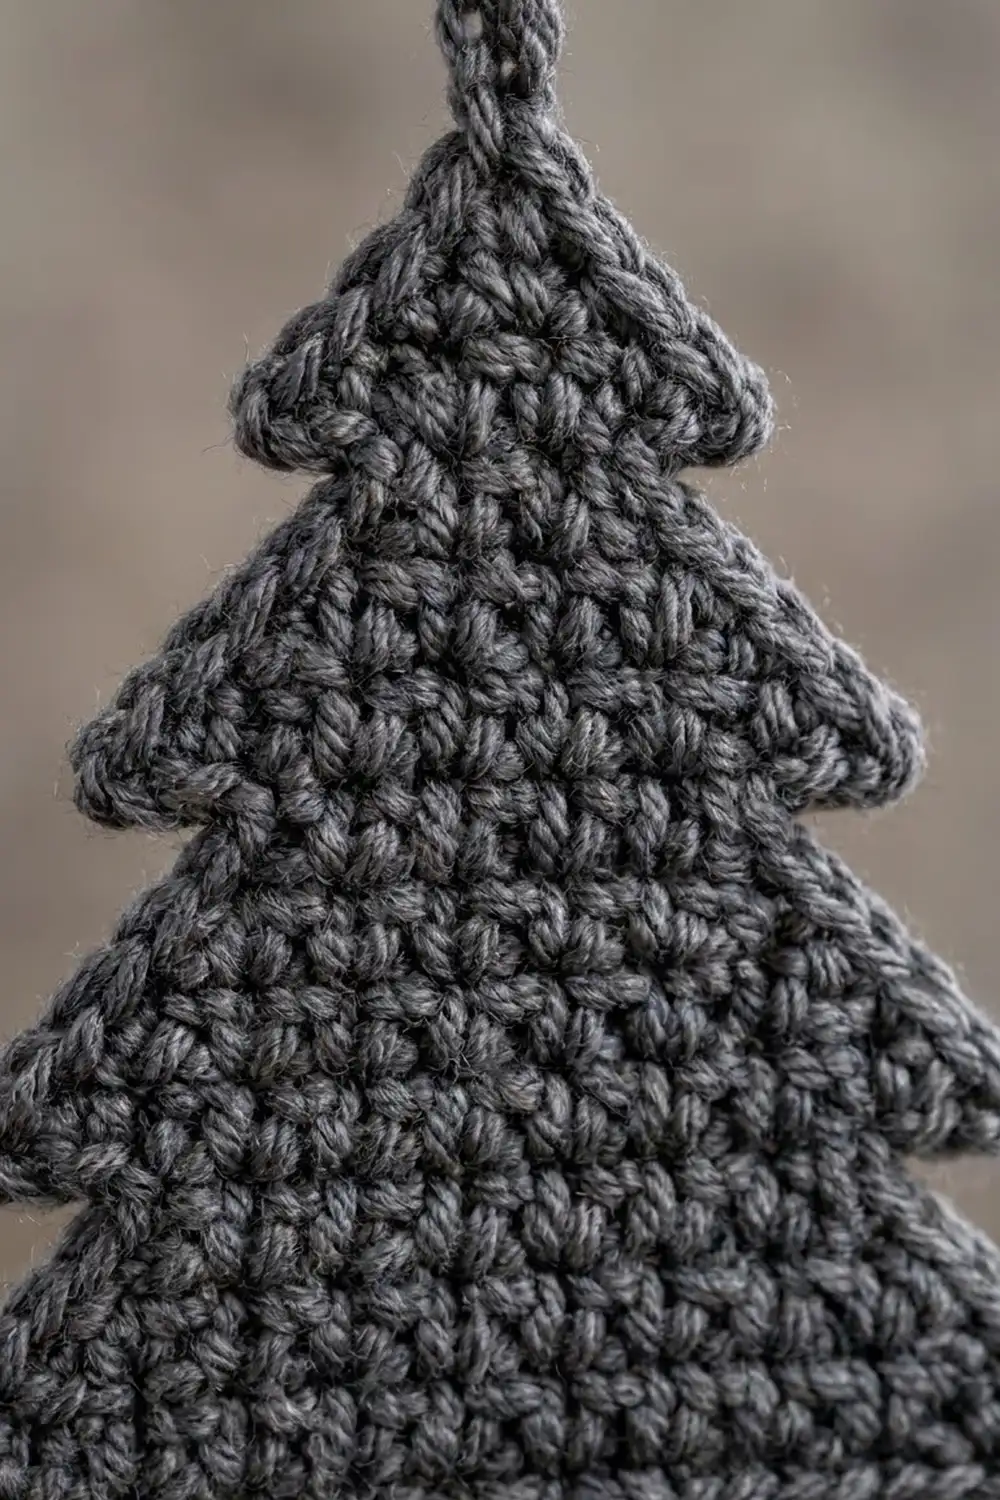
Pattern
You work the tree in turned rows, from the bottom of the trunk to the tip of the top tier. Step-out rows add chains at the start and fsc at the end, so both sides grow evenly.
Trunk
Foundation: Ch 5.
Row 1 (RS): Sc in 2nd ch from hook and in each of next 3 ch, turn. (4 sts)
Rows 2–5: Ch 1, sc in each st across, turn. (4 sts)
Don’t fasten off. Check: the trunk measures 0.8 in (2.0 cm) wide and 0.9 in (2.3 cm) tall.
Bottom Tier
Row 6 (step-out): Ch 8. Sc in 2nd ch from hook and in each of next 6 ch (7 sts). Sc in each of the 4 trunk sts (11 sts). Work 7 fsc, the first one into the base of the last sc made. Turn. (18 sts: 7 + 4 + 7)
This row makes the wide base of the tree. The 7 sts on each side of the trunk stick out past it, which leaves the trunk showing below.
Row 7: Ch 1, sc2tog, sc in each st to last 2 sts, sc2tog, turn. (16 sts)
Row 8: Ch 1, sc2tog, sc to last 2 sts, sc2tog, turn. (14 sts)
Row 9: Ch 1, sc2tog, sc to last 2 sts, sc2tog, turn. (12 sts)
Row 10: Ch 1, sc2tog, sc to last 2 sts, sc2tog, turn. (10 sts)
Check: Row 6 measures 3.6 in (9.1 cm) across. The piece is 1.8 in (4.6 cm) tall.
Middle Tier
Row 11 (step-out): Ch 3. Sc in 2nd ch from hook and in next ch (2 sts). Sc in each of the 10 sts (12 sts). Work 2 fsc. Turn. (14 sts: 2 + 10 + 2)
The 2 new sts on each side stick out past the top of the bottom tier. That small overhang creates the notched, layered look.
Row 12: Ch 1, sc2tog, sc to last 2 sts, sc2tog, turn. (12 sts)
Row 13: Ch 1, sc2tog, sc to last 2 sts, sc2tog, turn. (10 sts)
Row 14: Ch 1, sc2tog, sc to last 2 sts, sc2tog, turn. (8 sts)
Row 15: Ch 1, sc2tog, sc to last 2 sts, sc2tog, turn. (6 sts)
Check: Row 11 measures 2.8 in (7.1 cm) across. The piece is 2.7 in (6.9 cm) tall.
Top Tier
Row 16 (step-out): Ch 3. Sc in 2nd ch from hook and in next ch (2 sts). Sc in each of the 6 sts (8 sts). Work 2 fsc. Turn. (10 sts: 2 + 6 + 2)
Row 17: Ch 1, sc2tog, sc to last 2 sts, sc2tog, turn. (8 sts)
Row 18: Ch 1, sc2tog, sc to last 2 sts, sc2tog, turn. (6 sts)
Row 19: Ch 1, sc2tog, sc to last 2 sts, sc2tog, turn. (4 sts)
Row 20: Ch 1, sc2tog twice, turn. (2 sts)
Row 21: Ch 1, sc2tog. (1 st)
Don’t fasten off. Row 16 measures 2.0 in (5.1 cm) across. The piece is now 3.8 in (9.7 cm) tall and 3.6 in (9.1 cm) wide at its widest point.
Tier summary:
- Trunk: Rows 1–5, 4 sts, 0.8 in (2.0 cm) wide
- Bottom tier: Rows 6–10, 18 down to 10 sts
- Middle tier: Rows 11–15, 14 down to 6 sts
- Top tier: Rows 16–21, 10 down to 1 st
Border
The border is one round of sc worked all the way around the tree. It covers the row ends, sharpens each point, and gives the outline its smooth, rounded edge.
Border gauge: Work 1 sc in each st along stitch edges and 1 sc in each row end along the sides. Sc rows are a little shorter than sc sts are wide, so this ratio lies flat without rippling or cupping.
Placement rules:
- Outer points (the 2 trunk corners, the 6 tier tips, and the treetop): work 3 sc in the corner st.
- Inner corners (where a tier meets the trunk or the tier below): work only the normal 1 sc. Don’t add or skip sts. Blocking will open these notches cleanly.
Round 1
Continue from Row 21 with the working loop at the treetop. Ch 1. Work 3 sc in the Row 21 st (treetop point, 3 sts).
Side A (going down):
- Row ends of Rows 20, 19, 18, 17: 1 sc in each (4 sts)
- Top tier underside: 3 sc in the tip st, 1 sc in the inner st (4 sts)
- Row ends of Rows 15, 14, 13, 12: 1 sc in each (4 sts)
- Middle tier underside: 3 sc in the tip st, 1 sc in the inner st (4 sts)
- Row ends of Rows 10, 9, 8, 7: 1 sc in each (4 sts)
- Bottom tier underside: 3 sc in the tip st, 1 sc in each of the next 6 sts (9 sts)
- Trunk row ends of Rows 5, 4, 3, 2: 1 sc in each (4 sts)
Side A total: 4 + 4 + 4 + 4 + 4 + 9 + 4 = 33 sts
Trunk bottom: Working into the foundation chain, work 3 sc in the first ch, 1 sc in each of the next 2 ch, and 3 sc in the last ch. (8 sts)
Side B (going up): Mirror Side A, in this order:
- Trunk row ends of Rows 2–5 (4 sts)
- Bottom tier underside: 1 sc in each of 6 sts, then 3 sc in the tip st (9 sts)
- Row ends of Rows 7–10 (4 sts)
- Middle tier underside: 1 sc in the inner st, then 3 sc in the tip st (4 sts)
- Row ends of Rows 12–15 (4 sts)
- Top tier underside: 1 sc in the inner st, then 3 sc in the tip st (4 sts)
- Row ends of Rows 17–20 (4 sts)
That gives 33 sts for Side B.
Join with a sl st to the first sc. (77 sts: 3 + 33 + 8 + 33)
Why the math works: Each side has 21 rows. The trunk corner covers Row 1, and the 3-sc tips and treetop cover Rows 6, 11, 16, and 21. That leaves 16 row ends per side, each worked with 1 sc. The undersides add 7 + 2 + 2 = 11 sts per side, plus 2 extra sts at each of the 3 tips (6 sts). So each side has 16 + 11 + 6 = 33 sts. The trunk bottom is 4 sts plus 2 extra at each corner, giving 8. The treetop is 1 st worked 3 times, giving 3. Total: 33 + 33 + 8 + 3 = 77.
The border adds about 0.1 in (0.3 cm) on each edge. The tree grows from 3.6 in (9.1 cm) to 3.8 in (9.7 cm) wide, and from 3.8 in (9.7 cm) to 4.0 in (10.2 cm) tall.
Hanging Loop
After the joining sl st, sl st in the next sc, which is the center sc of the treetop 3-sc group. Ch 30, about 6 in (15.2 cm). Sl st into the same center sc to form a loop. Sl st into each ch around the loop to thicken it into a firm cord. Sl st into the treetop st again. Fasten off, leaving a 7 in (17.8 cm) tail.
Use the tail to sew a few extra passes through the base of the loop. This spot takes the most strain, so secure it well before weaving in the end. The folded loop hangs about 3 in (7.6 cm) above the treetop.
Final Blocking
- Weave in the starting tail and the hanger tail along the border on the wrong side. Don’t trim them yet.
- Lightly mist the tree with water until it is damp, not soaked.
- Lay it RS up on a blocking mat.
- Pin the bottom tier tips so the width measures 3.8 in (9.7 cm) from point to point.
- Pin the treetop so the total height, not counting the loop, is 4.0 in (10.2 cm).
- Pin each middle and top tier tip outward and slightly down so every tier forms a clean triangle.
- Push a pin into each inner notch to sharpen it.
- Pin the trunk corners square.
- Lay the loop flat and straight above the treetop.
- Let it dry completely, then unpin and trim the tails.
Final Quality-Control Checklist
- Tree measures 3.8 in (9.7 cm) wide and 4.0 in (10.2 cm) tall.
- Trunk is centered and 4 sts wide.
- Both sides of every tier stick out by the same amount.
- Border has 77 sts, with 3 sc at all 9 outer points.
- Inner notches are visible and not puckered.
- Fabric lies flat with no cupping or rippling.
- Loop is firm, centered, and securely anchored.
- All tails are woven in and can’t be seen from the RS.
Troubleshooting
Tiers are lopsided: You may have missed an sc2tog at one end. Count after every decrease row; each one should drop exactly 2 sts.
The fsc edge is tighter than the chain edge: Work the fsc a little looser, or go up 0.5 mm for the fsc only.
Border ripples: You probably worked 2 sc into some row ends. Keep it to exactly 1 sc per row end.
Border cups or pulls the points inward: Check that each outer point has 3 sc, not 1 or 2.
Notches look rounded: Pin the inner corners firmly during blocking and let them dry fully.
Loop stretches over time: Make sure you worked the sl sts along the chain. Sew the tail through the base of the loop twice.
Tree is floppy: Your gauge is too loose. Go down a hook size for firmer fabric.
Care
Hand wash in cool water with mild soap, then press the water out in a towel and dry flat, reshaping the points. Keep it out of the dryer, which can soften the crisp outline.
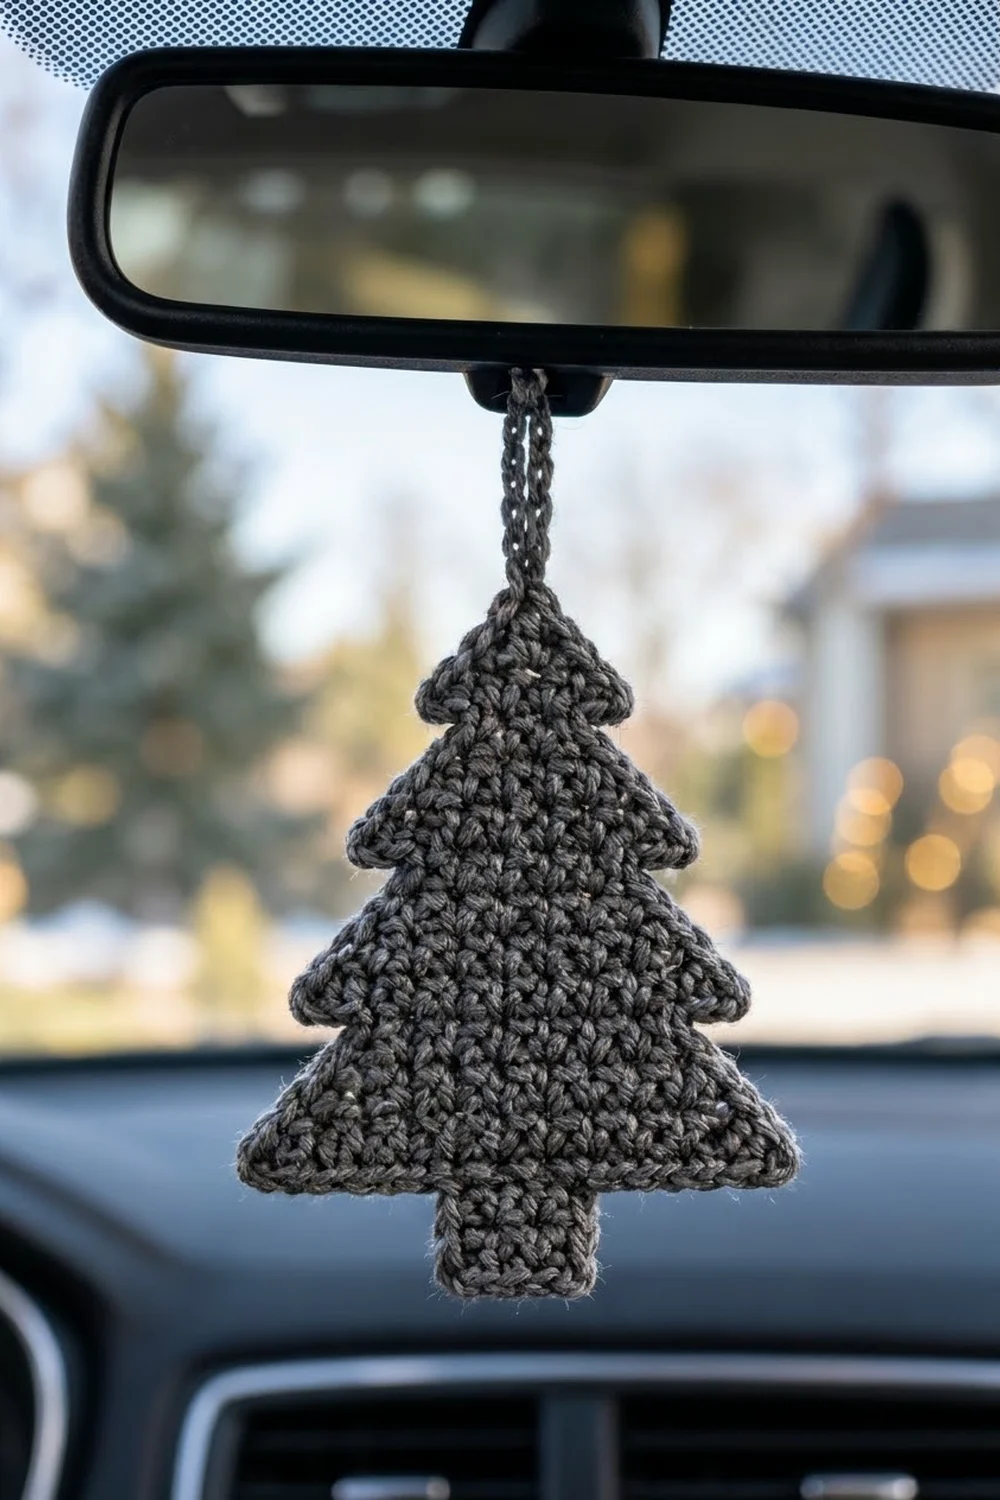
Final Notes
Everything comes down to a chain of measurements. A gauge of 5 sts and 5.5 rows per 1 in (2.5 cm) gives a 0.8 in (2.0 cm) trunk and an 18-st bottom tier of 3.6 in (9.1 cm). Twenty-one rows reach 3.8 in (9.7 cm) tall. One 77-st border round brings the tree to 3.8 in (9.7 cm) by 4.0 in (10.2 cm), and a 30-ch cord adds a 3 in (7.6 cm) loop. Check each stage and your finished tree will match.
Happy crocheting!