

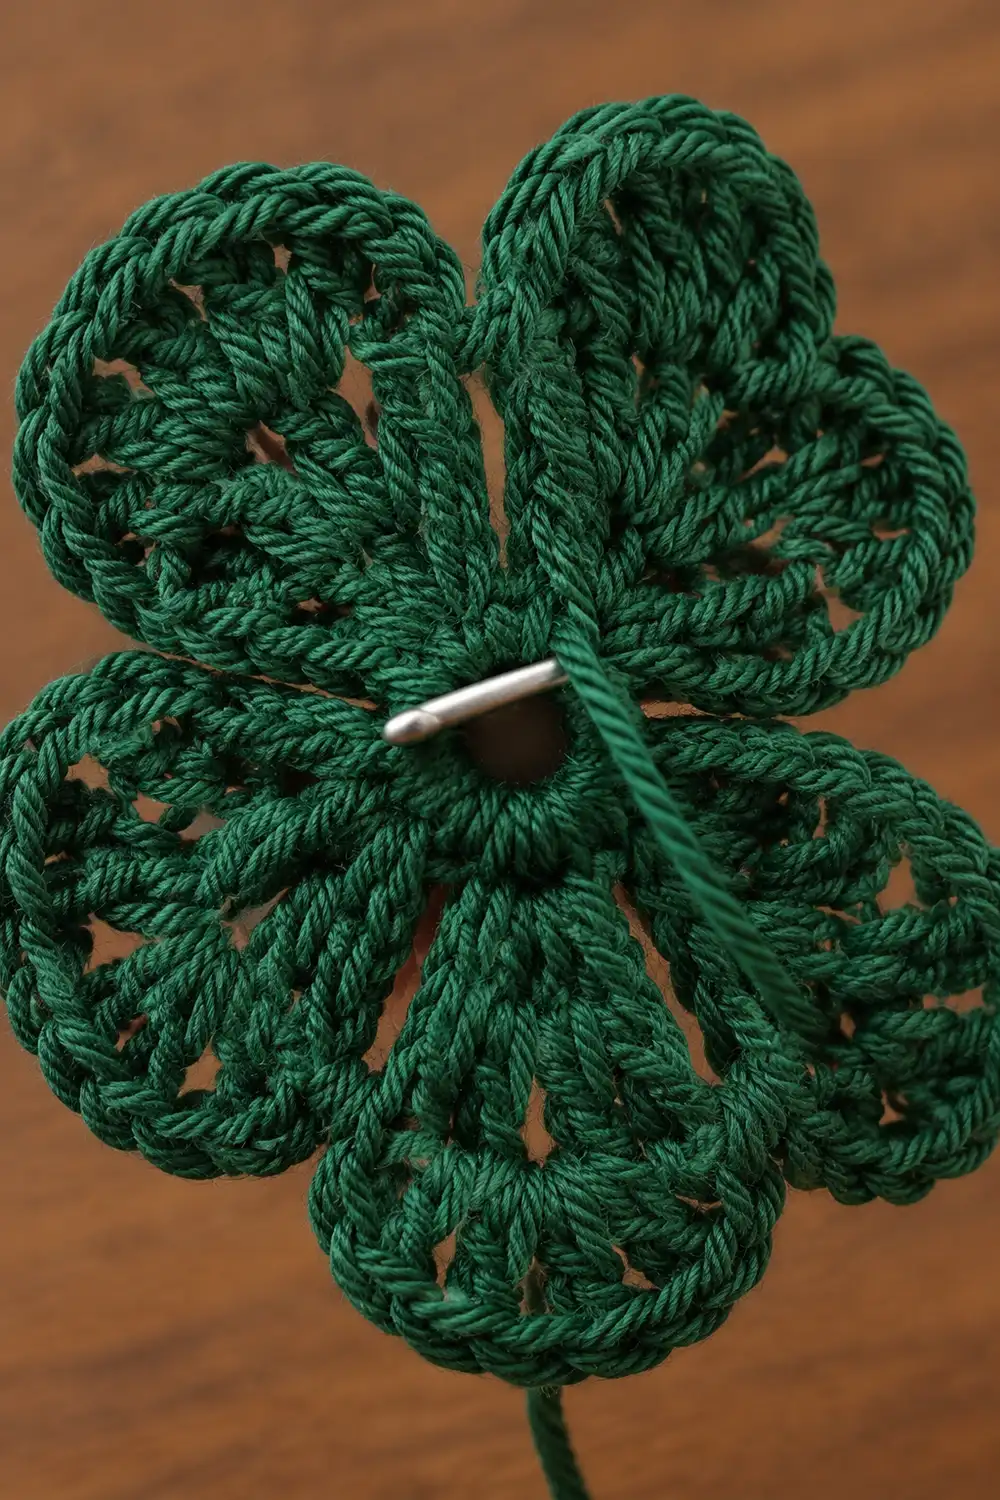
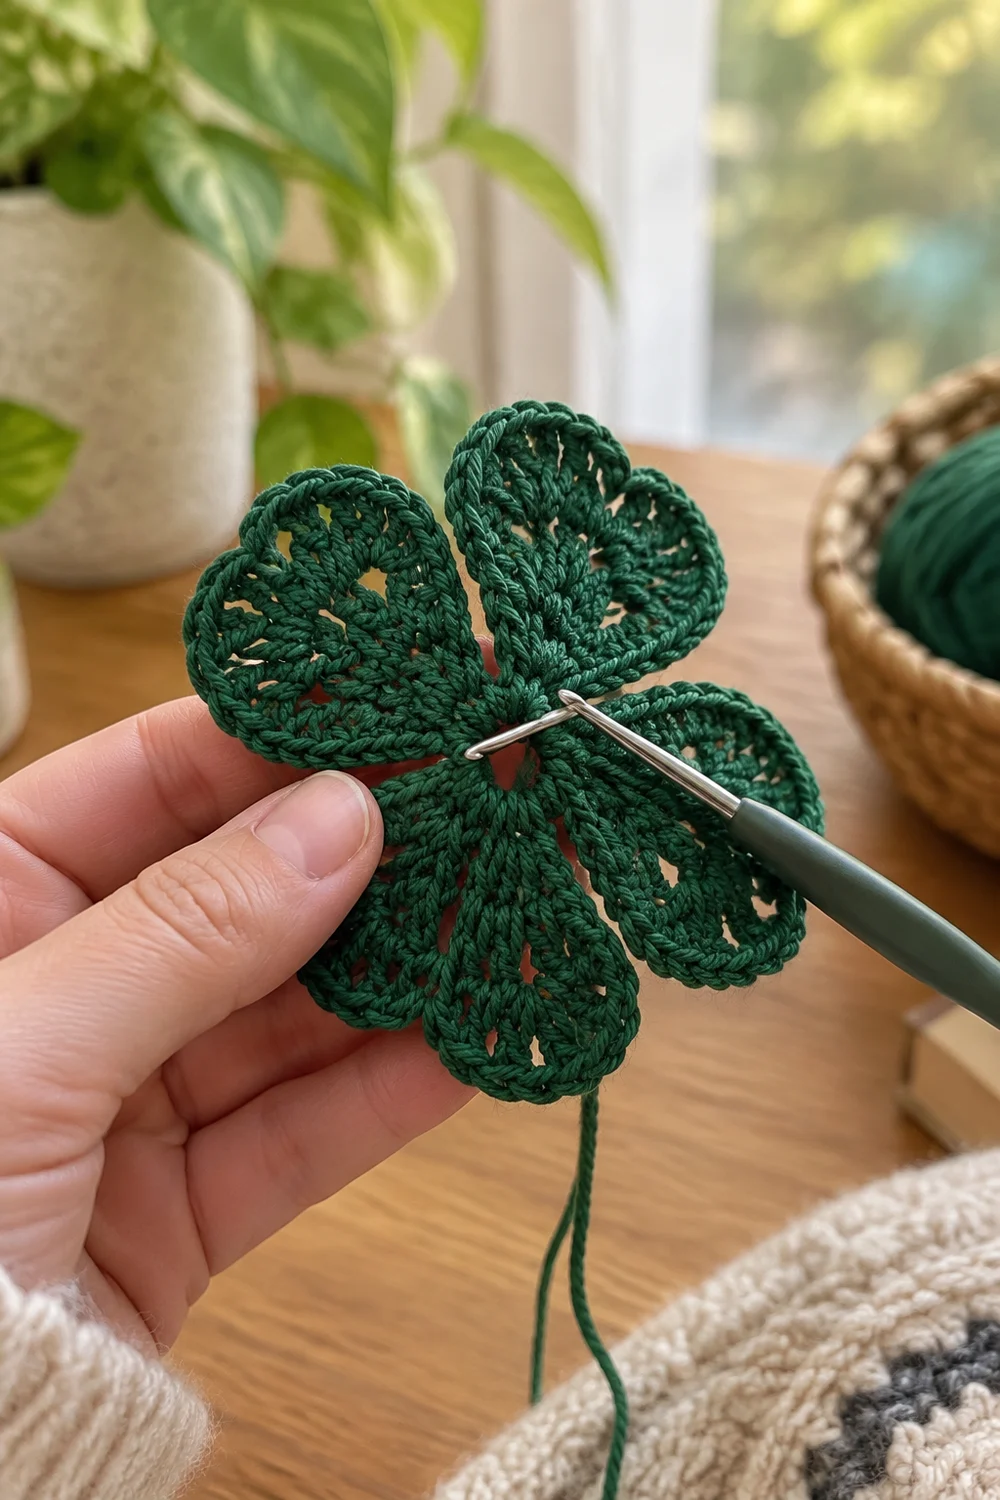
This little four-leaf clover is a single crocheted motif in deep forest green. Four rounded petals sit around a small central ring, and each petal is worked as an open fan of tall stitches with chain gaps between them. The result is light, lacy, and easy to read even at a small size.
The pattern uses one color only: a dark forest green. The open stitches catch the light and leave little windows in each petal, while a plain single crochet edging frames each leaf and gives it a smooth, rounded outline.
All instructions are written in US crochet terms. The finished clover measures 3 in (7.6 cm) across, petal tip to opposite petal tip. With a finer yarn and smaller hook, the same pattern lands near 2.5 in (6.4 cm).
Construction is simple and worked in one continuous piece. You start with a magic ring, build a base round of four chain loops, work one open fan petal into each loop, and finish with a single crochet edging around all four petals. There is no sewing or assembly. Weave in the tails, block, and the clover is done.
Finished Size and Construction
- Finished size: 3 in (7.6 cm) across, petal tip to opposite petal tip
- Skill level: Easy (beginner-friendly once you know dc and tr)
- Terminology: US crochet terms
- Yarn weight: DK / light (#3), cotton or cotton blend recommended
- Hook: 3.5 mm (E-4)
- Number of pieces: 1
- Layout: Single motif, four petals around a central ring, no assembly
- Piece size: 3 in (7.6 cm) across after edging
- Size before border: 2.5 in (6.4 cm) across after Round 3
- Border depth: 0.25 in (0.6 cm) on each petal edge, adding 0.5 in (1.3 cm) to the total width
Materials
Yarn advice: Choose a smooth, tightly plied DK cotton. Cotton shows the open fan stitches crisply and holds its shape after blocking. Fuzzy or very soft acrylics blur the gaps and make the petals look solid. Pick a dark, saturated forest green for the look in the photo.
Yarn quantities:
- Dark Forest Green: 5 g, about 12 m (13.1 yd)
The quantity above includes a margin for your gauge swatch, the starting tail, and weaving in ends. The motif itself uses roughly 3 g.
Tools:
- 3.5 mm (E-4) crochet hook
- Tapestry needle
- Scissors
- 1 stitch marker
- Rust-proof pins
- Foam blocking mat or folded towel
- Spray bottle with cool water
- Ruler or tape measure marked in inches and cm
Abbreviations (US Terms)
- ch – chain
- sl st – slip stitch
- sc – single crochet
- hdc – half double crochet
- dc – double crochet
- tr – treble crochet (yarn over twice, insert hook, pull up a loop, [yarn over, pull through 2 loops] 3 times)
- MR – magic ring
- sp – space
- st(s) – stitch(es)
- sk – skip
- Rnd – round
Special Stitch: Open Fan Petal
Worked entirely into one ch-4 space:
(sc, hdc, dc, ch 1, tr, ch 1, tr, ch 1, tr, ch 1, tr, ch 1, dc, hdc, sc)
Each Open Fan Petal contains 10 stitches (1 sc, 1 hdc, 1 dc, 4 tr, 1 dc, 1 hdc, 1 sc) and 5 ch-1 spaces. The graded stitch heights (sc to tr and back down) create the rounded leaf shape. The ch-1 gaps create the lacy openings.
Gauge and Checkpoints
Gauge is not critical for a small motif, but it controls the final size. Work one complete clover as your test piece before making more.
Fabric gauge: 5 sc = 1 in (2.5 cm), worked in the Rnd 4 edging.
Measurement checkpoints:
- After Rnd 1: The ring measures about 0.5 in (1.3 cm) across, pulled fully closed.
- After Rnd 2: The base measures about 1 in (2.5 cm) across, with four even loops lying flat.
- After Rnd 3: The clover measures about 2.5 in (6.4 cm), petal tip to opposite petal tip.
- After Rnd 4: The clover measures 3 in (7.6 cm), petal tip to opposite petal tip.
Measure on a flat surface without stretching. A tolerance of 0.25 in (0.6 cm) either way is fine.
If your clover is too big: Go down to a 3.25 mm hook, or check that your tr stitches are not loose and loopy.
If your clover is too small: Go up to a 3.75 mm hook, or relax your tension on the tall stitches.
For a 2.5 in (6.4 cm) clover: Use sport-weight yarn and a 3.0 mm hook. The stitch counts stay the same.
The Pattern
Rnd 1: Center Ring
Make a magic ring. Ch 1 (does not count as a stitch). Work 12 sc into the ring. Pull the tail firmly to close the center. Sl st to the first sc to join.
Stitch count: 12 sc.
Checkpoint: about 0.5 in (1.3 cm) across. Leave a 6 in (15.2 cm) starting tail; you will use it to snug the center later.
Rnd 2: Petal Base Loops
Ch 1 (does not count as a stitch). Sc in the same st as the join. Ch 4, sk the next 2 sts.
[Sc in the next st, ch 4, sk the next 2 sts] 3 times.
Sl st to the first sc to join.
Stitch count: 4 sc and 4 ch-4 spaces.
The 4 sc sit on stitches 1, 4, 7, and 10 of Rnd 1, so the four loops are evenly spaced. Each loop uses 3 sts of Rnd 1 (1 sc plus 2 skipped), and 4 x 3 = 12, which matches Rnd 1 exactly.
Checkpoint: about 1 in (2.5 cm) across, lying flat with four equal loops. Place a stitch marker in the first sc to mark the start.
Rnd 3: Open Fan Petals
Sl st into the first ch-4 space.
[Work 1 Open Fan Petal in the ch-4 space, sl st in the next sc] 4 times.
The fourth sl st lands in the marked sc from Rnd 2, closing the round. Move the marker to this sl st.
Stitch count per petal: 10 sts and 5 ch-1 spaces.
Round total: 40 sts, 20 ch-1 spaces, and 4 sl sts between petals.
Each petal should cup slightly and fan outward from its loop. The sl st between petals pulls the petal bases together at the center, giving the classic clover notch.
Checkpoint: about 2.5 in (6.4 cm), petal tip to opposite petal tip. Each petal should measure about 1.25 in (3.2 cm) from the center of the ring to its tip.
Border
The border is a single round of plain sc around each petal. It smooths the edge, defines the rounded leaf outline, and adds 0.25 in (0.6 cm) of depth at every petal edge.
Border gauge: 5 sc = 1 in (2.5 cm), the same as the fabric gauge. The border is not worked tighter or looser than the rest of the motif.
Rnd 4: Petal Edging
Ch 1 (does not count as a stitch). For each petal, work the following:
- Sc in the first sc of the petal.
- Sc in the hdc.
- Sc in the dc.
- [2 sc in the next ch-1 space, sc in the next tr] 4 times.
- 2 sc in the last ch-1 space.
- Sc in the dc.
- Sc in the hdc.
- Sc in the last sc of the petal.
- Sl st in the sl st between petals.
Repeat steps 1–9 for all 4 petals. The final sl st lands in the marked sl st and closes the round. Fasten off, leaving a 6 in (15.2 cm) tail.
Count per petal (the “per side” for this motif):
- Steps 1–3: 3 sc
- Step 4: 4 x (2 + 1) = 12 sc
- Step 5: 2 sc
- Steps 6–8: 3 sc
- Total: 20 sc per petal
Round total: 4 x 20 = 80 sc, plus 4 sl sts between petals.
This is a conversion round. Of the 20 sc per petal, 10 are worked one-per-existing-stitch into the petal’s 10 stitches, and 10 are added in the 5 ch-1 spaces (2 sc each). So each petal is 10 + 10 = 20 sc. It is not a continuation of Rnd 3’s fan growth.
Why the math works:
- At 5 sc per inch, 20 sc covers 4 in (10.2 cm) of edge per petal. That matches the outer edge of a 1.25 in (3.2 cm) rounded petal: two short sides near the center plus a wide curved top.
- The 14 sc across the top of the fan (step 4 plus step 5) sit on the widest, most curved part of the petal. The extra stitches in the ch-1 spaces let the edging stretch around the curve without pulling the petal into a cup.
- The 3 sc on each side (steps 1–3 and 6–8) sit on the short, straight petal base. One stitch per stitch keeps the base snug, so the notch between petals stays tight.
Checkpoint: 3 in (7.6 cm), petal tip to opposite petal tip.
Final Blocking
- Finish the center. Tug the magic ring tail once more to close any gap. Use your crochet hook at the center to draw the tail through to the back, then thread it on a tapestry needle and weave it through the Rnd 1 sc.
- Weave the second tail. Weave the ending tail along the back of the nearest petal’s edging. Do not trim either tail yet.
- Dampen. Mist the clover with cool water until it is evenly damp, not dripping.
- Pin the center. Pin the center ring flat on the blocking mat, right side up.
- Pin the tips. Pin the tip of each petal so opposite tips measure 3 in (7.6 cm) apart. Check both diagonals; they should match within 0.25 in (0.6 cm).
- Shape the curves. Ease each petal’s edge into a smooth, rounded curve with your fingers. Add 2 pins on each side of the curve if needed.
- Open the lace. Gently nudge each ch-1 gap open so all four petals show matching windows.
- Dry completely. Let the clover dry flat, then remove the pins.
- Trim tails. Trim both tails close to the fabric.
Final Quality-Control Checklist
- [ ] Rnd 1 has 12 sc, and the center is pulled closed.
- [ ] Rnd 2 has 4 sc and 4 evenly spaced ch-4 loops.
- [ ] Each petal in Rnd 3 has 10 sts and 5 ch-1 spaces.
- [ ] Rnd 4 has 20 sc per petal, 80 sc total, plus 4 sl sts.
- [ ] All four petals are the same size and shape.
- [ ] The notch between petals is tight with no large gaps.
- [ ] The edging lies flat with no ruffling or cupping.
- [ ] Finished size is 3 in (7.6 cm) tip to tip, within 0.25 in (0.6 cm).
- [ ] Both tails are woven securely and trimmed.
Troubleshooting
The center has a hole.
Pull the magic ring tail tighter, then weave the tail through the Rnd 1 sc once more to lock it.
One petal is bigger than the others.
Your tension changed mid-round, usually on the tr. Count that petal’s stitches; if the count is correct, block that petal slightly smaller to match.
Petals cup upward.
The edging is too tight. Redo Rnd 4 with a slightly looser hand, or go up 0.25 mm in hook size for the border only, keeping 20 sc per petal.
The edging ruffles.
You likely worked 3 sc in a ch-1 space or doubled up a stitch. Recount to 20 sc per petal.
Petals look solid, not lacy.
Your yarn may be too fuzzy, or the ch-1 spaces are too tight. Use a smooth cotton and make each ch 1 a full-size chain. Blocking also opens the gaps.
The clover is 2.75 in (7.0 cm) or 3.25 in (8.3 cm).
This is within a normal range for a single motif. For an exact 3 in (7.6 cm), adjust your hook size by 0.25 mm and remake.
Gaps between petals at the center.
Make sure each Rnd 3 sl st goes into the Rnd 2 sc, not into a chain. In Rnd 4, the sl st must go into that same sl st.
Care
Hand wash in cool water with mild soap, press out the water in a towel, and dry flat. Re-pin to 3 in (7.6 cm) if the petals lose their shape.
Final Notes
The size of this clover builds in a clear chain: a 0.5 in (1.3 cm) ring of 12 sc, a 1 in (2.5 cm) base of four ch-4 loops, four Open Fan Petals reaching 2.5 in (6.4 cm) across, and a 20-sc-per-petal edging that brings the finished clover to 3 in (7.6 cm). Check each stage as you go, and your four petals will match every time.
Happy crocheting!