

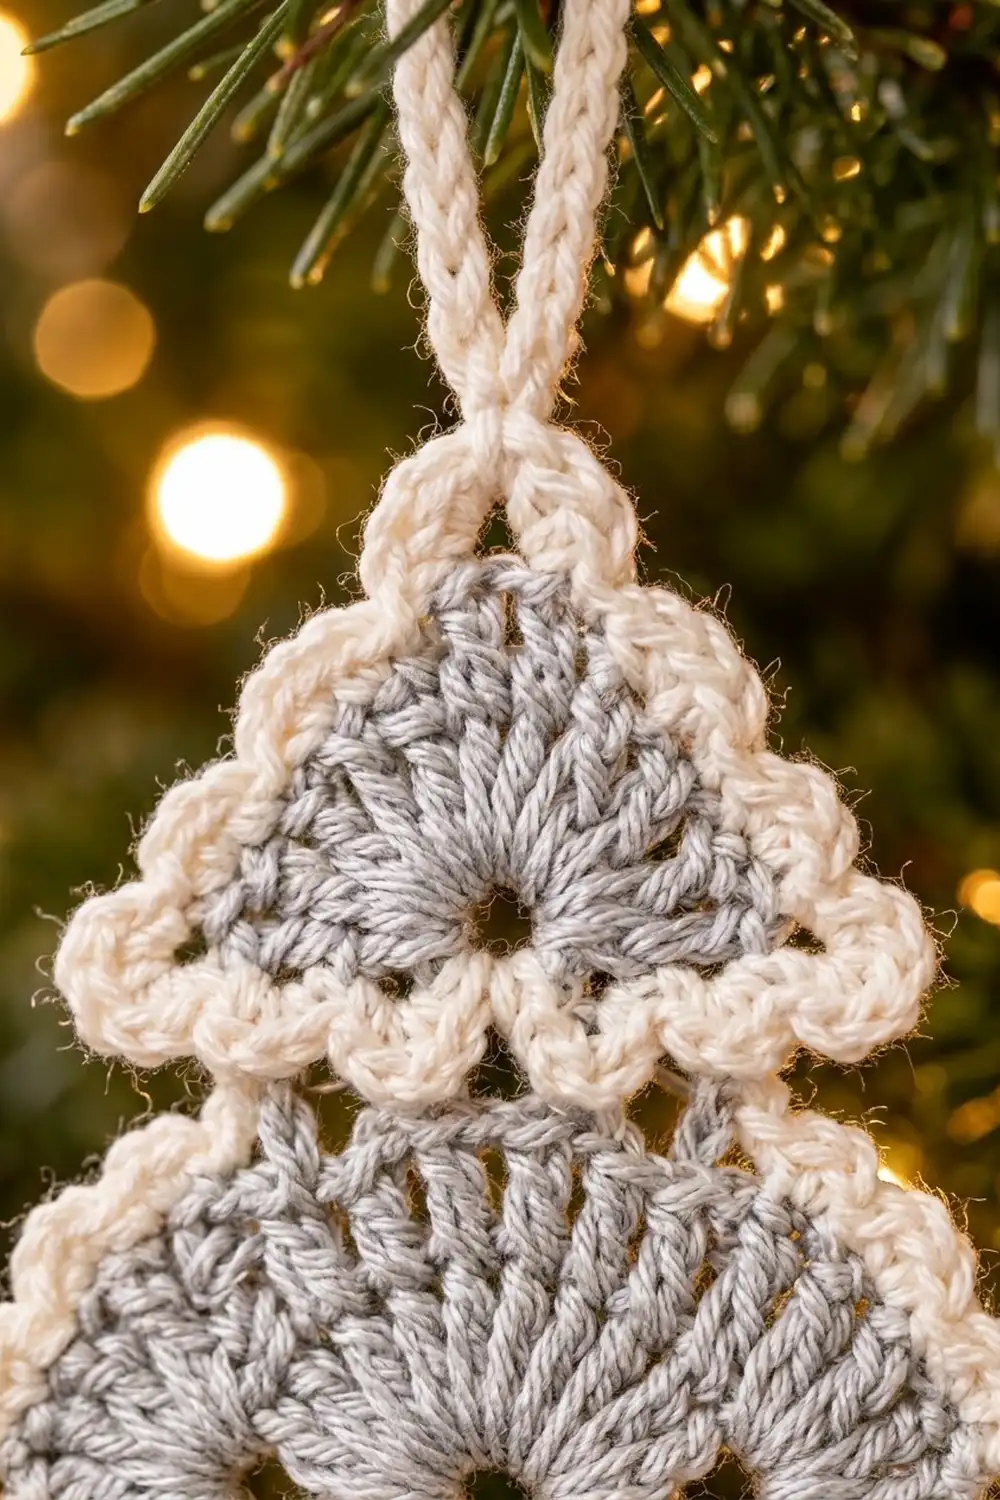
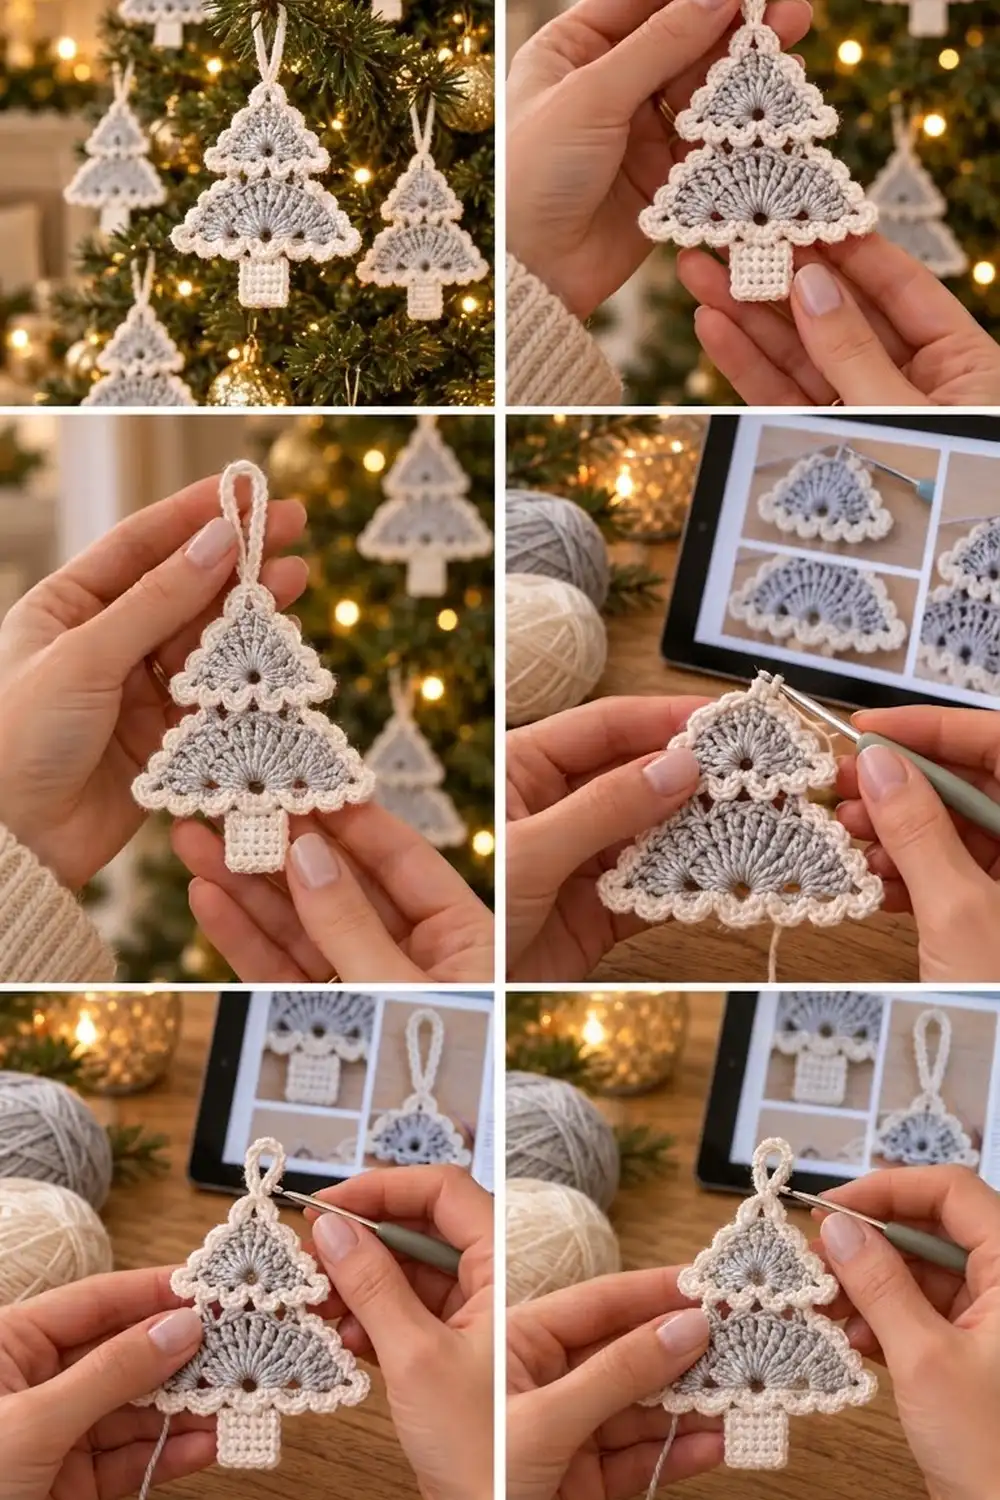
This little tree ornament is made from two soft gray fans stacked on top of each other. Each fan is trimmed with cream scallops, and a small cream trunk sits underneath. The double crochet stitches spread out from a small open ring at the base of each tier, so the tiers look a little like frosted branches.
The colors are a light silver-gray and a warm cream. The ornament looks quiet and Scandinavian on a green tree, and it works just as well as a gift tag or a package topper. The pattern uses US crochet terms throughout.
The finished ornament is about 3.5 in (8.9 cm) wide and 4.1 in (10.4 cm) tall, not counting the hanging loop. The loop adds about 1.2 in (3.0 cm).
Here is how it’s made. You work two half-circle fans in rows from a chain ring: a small one for the top tier and a larger one for the bottom tier. You then edge each fan in cream, crochet a small trunk rectangle, overlap the three parts and stitch them together, and add a cord loop at the top.
Finished Size and Construction
- Finished size: 3.5 in wide x 4.1 in tall (8.9 x 10.4 cm), loop not included
- Skill level: Easy / advanced beginner
- Terminology: US crochet terms
- Yarn weight: DK (light, #3) cotton or cotton blend
- Hook: 3.5 mm (E-4)
- Number of pieces: 1 ornament made from 3 parts (top tier, bottom tier, trunk) plus a loop
- Layout: top tier overlaps bottom tier by 0.6 in (1.5 cm); bottom tier overlaps trunk by 0.3 in (0.8 cm)
- Top tier: 1.9 x 0.95 in (4.8 x 2.4 cm) before border; 2.7 x 1.75 in (6.9 x 4.4 cm) after border
- Bottom tier: 2.7 x 1.35 in (6.9 x 3.4 cm) before border; 3.5 x 2.15 in (8.9 x 5.5 cm) after border
- Trunk: 1.0 x 1.1 in (2.5 x 2.8 cm)
- Border depth: 0.4 in (1.0 cm) on every edge
Materials
Choose a smooth, mercerized DK cotton of about 120 m per 50 g. Cotton gives the scallops a crisp outline and keeps the spokes of the fan clearly defined. Fuzzy acrylic will blur the eyelets.
- Color A, light silver-gray: 5 g, about 12 m (tiers)
- Color B, cream: 8 g, about 19 m (borders, trunk, loop)
These quantities include a margin for gauge swatching and weaving in ends. One ornament uses far less than a full ball, so leftovers will make a whole tree’s worth.
Tools:
– 3.5 mm (E-4) crochet hook
– Tapestry needle
– Scissors
– Stitch marker
– Ruler or tape measure
– Blocking mat and rust-proof pins
– Spray bottle with water
Abbreviations (US Terms)
- ch – chain
- sl st – slip stitch
- sc – single crochet
- hdc – half double crochet
- dc – double crochet
- st(s) – stitch(es)
- sk – skip
- RS – right side
- rep – repeat
Special stitch: Shell. Work (hdc, dc, hdc) all in the same stitch. Each shell counts as 3 sts.
Gauge and Checkpoints
Gauge: 20 sc and 22 rows = 4 in (10.2 cm). In double crochet, 20 dc and 10 rows = 4 in (10.2 cm), which means each dc row adds 0.4 in (1.0 cm) to the fan’s radius.
On a piece this small, a full swatch isn’t really needed. Make the top tier first and use it as your test piece.
Checkpoints (flat width across the straight bottom edge):
– After Row 1: 1.1 in (2.8 cm)
– After Row 2: 1.9 in (4.8 cm). This completes the top tier.
– After Row 3: 2.7 in (6.9 cm). This completes the bottom tier.
– After border: top tier 2.7 in (6.9 cm), bottom tier 3.5 in (8.9 cm)
If your piece is too big, go down to a 3.25 mm (D-3) hook. If it’s too small, go up to a 3.75 mm (F-5) hook. If your fan cups or ruffles, look at the Troubleshooting section before you change hooks, because the cause is usually tension rather than hook size.
Top Tier (Color A)
The top tier is a half circle worked in turned rows. The ring sits at the center of the flat bottom edge.
Foundation: With Color A, ch 4 and sl st in the first ch to form a ring. The ring leaves a hole about 0.25 in (0.6 cm) wide.
Row 1 (RS): Ch 3 (counts as first dc), 6 dc in ring. Turn. (7 dc)
All of these stitches sit on the upper half of the ring. Leave the lower half of the ring empty, because that becomes the open hole at the base of the tier.
Row 2: Ch 3 (counts as dc), dc in first st, 2 dc in each remaining st across, including the top of the turning ch. Turn. (14 dc)
Check the width: 1.9 in (4.8 cm). The fan should lie flat as a half circle. Fasten off Color A and do not turn.
Bottom Tier (Color A)
Foundation and Rows 1–2: Work exactly as for the top tier. (Row 2: 14 dc)
Row 3: Ch 3 (counts as dc), dc in first st, dc in next st, 2 dc in next st, dc in next st; rep from * to * 6 more times, ending in the top of the turning ch. (21 dc)
Check the width: 2.7 in (6.9 cm). Fasten off Color A.
Trunk (Color B)
Foundation: Ch 6.
Row 1: Sc in 2nd ch from hook and in each ch across. Turn. (5 sc)
Rows 2–6: Ch 1 (does not count as a st), sc in each st across. Turn. (5 sc)
Fasten off, leaving a 10 in (25.4 cm) tail for sewing. The trunk measures 1.0 x 1.1 in (2.5 x 2.8 cm) and shows tidy vertical columns of single crochet.
Border
The cream border goes around each tier separately, before you assemble the ornament. Both tiers are bordered with the same two rounds; only the counts change.
Border gauge: 5 sc = 1 in (2.5 cm). The sc round adds about 0.2 in (0.5 cm), and the scallop round adds another 0.2 in (0.5 cm), for a total border depth of 0.4 in (1.0 cm).
Each tier has two edges:
– the curved edge, which is the tops of the last row’s stitches
– the straight edge, which is the row-ends, with the ring in the middle
Top Tier Border
Round 1 (conversion round): With RS facing, join Color B with a sl st in the first st of Row 2 (one bottom corner). Ch 1 and work as follows:
- Curved edge: Sc in each of the first 7 sts, 2 sc in the 8th st, sc in each of the last 6 sts. That’s 14 sts worked one per stitch, plus 1 extra = 15 sc. The extra stitch marks the peak of the tree.
- Straight edge: 2 sc in each of the 2 row-ends down to the ring (4 sc), 1 sc in the ring at its lower edge, then 2 sc in each of the 2 row-ends on the other side (4 sc). That’s 4 + 1 + 4 = 9 sc.
- Join with a sl st to the first sc.
(Round total: 14 one-per-stitch + 1 extra + 9 on the straight edge = 24 sc)
Round 2 (scallops): Ch 1, sc in next st, sk 1 st, Shell in next st; rep from * to * around. Join with a sl st to the first sc.
- Curved edge: 5 repeats (5 sc + 5 shells = 20 sts)
- Straight edge: 3 repeats (3 sc + 3 shells = 12 sts)
(Round total: 8 sc + 8 shells = 32 sts)
Fasten off. Each skipped stitch leaves a small eyelet beside its scallop, which gives the edge the lacy look in the photo.
Bottom Tier Border
Round 1 (conversion round): Join Color B in the first st of Row 3. Ch 1 and work as follows:
- Curved edge: Sc in each st across. That’s 21 sts worked one per stitch, plus 0 extra = 21 sc.
- Straight edge: 2 sc in each of the 3 row-ends (6 sc), 3 sc in the ring at its lower edge, then 2 sc in each of the 3 row-ends on the other side (6 sc). That’s 6 + 3 + 6 = 15 sc.
- Join with a sl st to the first sc.
(Round total: 21 one-per-stitch + 0 extra + 15 on the straight edge = 36 sc)
Round 2: Work as for the top tier.
- Curved edge: 7 repeats (28 sts)
- Straight edge: 5 repeats (20 sts)
(Round total: 12 sc + 12 shells = 48 sts)
Fasten off, leaving a 12 in (30.5 cm) tail on the bottom tier.
Why the Math Works
Each scallop repeat uses exactly 3 stitches of Round 1. Every edge count is a multiple of 3:
– Top tier: curved 15, straight 9
– Bottom tier: curved 21, straight 15
That means each edge finishes on a complete scallop, with no half repeats at the corners. The arc lengths match too. The top tier’s curve is about π x 0.95 in = 3.0 in (7.6 cm), and 15 sc at 5 per inch is 3.0 in. The bottom tier’s curve is about π x 1.35 in = 4.2 in (10.7 cm), and 21 sc is 4.2 in. The border therefore lies flat without pulling.
Assembly and Hanging Loop
Join the tiers:
1. Lay the bottom tier RS up.
2. Place the top tier over it, centered, so the top tier’s straight edge sits 0.6 in (1.5 cm) below the peak of the bottom tier.
3. Pin in place.
4. Using a strand of Color B, whipstitch from the back, catching only the back loops of the top tier’s Round 1 sc and the gray dc of the bottom tier underneath.
Keep these stitches loose. If you pull them snug, they’ll pucker the gray fan.
Join the trunk:
1. Center the trunk behind the bottom tier’s straight edge so that 0.3 in (0.8 cm) of the trunk is hidden.
2. Sew it on with the trunk tail, catching the back of the ring and the Round 1 sc only.
The trunk should show 0.8 in (2.0 cm) below the scallops.
Size checkpoint: The assembled ornament should measure 3.5 in (8.9 cm) wide and 4.1 in (10.4 cm) tall. Check how the height adds up: top tier 1.75 in + bottom tier 2.15 in − 0.6 in overlap + 0.8 in visible trunk = 4.1 in.
Hanging loop:
1. With Color B, ch 17.
2. Sl st in 2nd ch from hook and in each ch across. (16 sl st)
3. Fold the cord in half and sew both ends to the back of the top tier’s peak, at the doubled stitch from Round 1.
The finished loop stands about 1.2 in (3.0 cm) tall.
Final Blocking
- Weave in all ends on the back, staying inside stitches of the same color.
- Mist the ornament until it’s damp but not wet.
- Pin it RS up on the blocking mat to 3.5 x 4.1 in (8.9 x 10.4 cm).
- Pin the bottom straight edge of each tier dead straight, and pin the peak of each tier upward.
- Place a pin in the center of every scallop on the curved edges so the shells fan out evenly.
- Use a pin tip to nudge each eyelet and the ring holes open.
- Let it dry completely, about 4–6 hours.
- For a stiffer ornament, brush on a light fabric stiffener before drying.
Final Quality-Control Checklist
- Top tier Row 2 has 14 dc, and bottom tier Row 3 has 21 dc.
- Border Round 1 has 24 sc (top) and 36 sc (bottom).
- Border Round 2 has 8 scallops (top) and 12 scallops (bottom).
- The ring holes are open and centered on the straight edges.
- The tiers are centered, with a 0.6 in (1.5 cm) overlap.
- The trunk is centered, and 0.8 in (2.0 cm) of it shows.
- No sewing stitches show on the RS.
- The finished size is 3.5 x 4.1 in (8.9 x 10.4 cm).
- The loop is firmly attached at the peak.
Troubleshooting
The fan ruffles. Your dc are too short or tight for the number of increases. Loosen up, or go up a hook size.
The fan cups into a cone. You may have missed an increase. Recount Row 2 (14) and Row 3 (21).
The ring hole closed up. You worked stitches across the whole ring in Row 1. Keep all 7 dc on the upper half.
A half scallop is left at a corner. Your Round 1 count is off. Recount each edge: it should be 15/9 on the top tier and 21/15 on the bottom tier.
The straight edge flares. Your row-end sc are too loose. Work 2 sc in each row-end with a firmer tension.
The trunk is lopsided. You added or dropped a stitch at a row end. Count 5 sc on every row.
The ornament flops on the branch. Use fabric stiffener, or sew a matching cream felt backing to it.
Care
Hand wash in cool water with mild soap, press out the water in a towel, and reshape and dry it flat. Store it flat or hang it, away from sunlight, so the cream stays bright.
Final Notes
Here’s the whole measurement chain for this ornament:
- Gauge: 20 dc and 10 rows = 4 in (10.2 cm), so each dc row adds 0.4 in (1.0 cm).
- Top tier: 2 rows give 1.9 in (4.8 cm) across, or 2.7 in (6.9 cm) after the border.
- Bottom tier: 3 rows give 2.7 in (6.9 cm), or 3.5 in (8.9 cm) after the border.
- Trunk: 5 sc by 6 rows gives 1.0 x 1.1 in (2.5 x 2.8 cm).
- Assembled: with the overlaps set, the ornament comes out 3.5 x 4.1 in (8.9 x 10.4 cm).
Check each number as you reach it, and your tree will lie flat and look crisp. Make one in an evening, then make a whole forest.
Happy crocheting!