
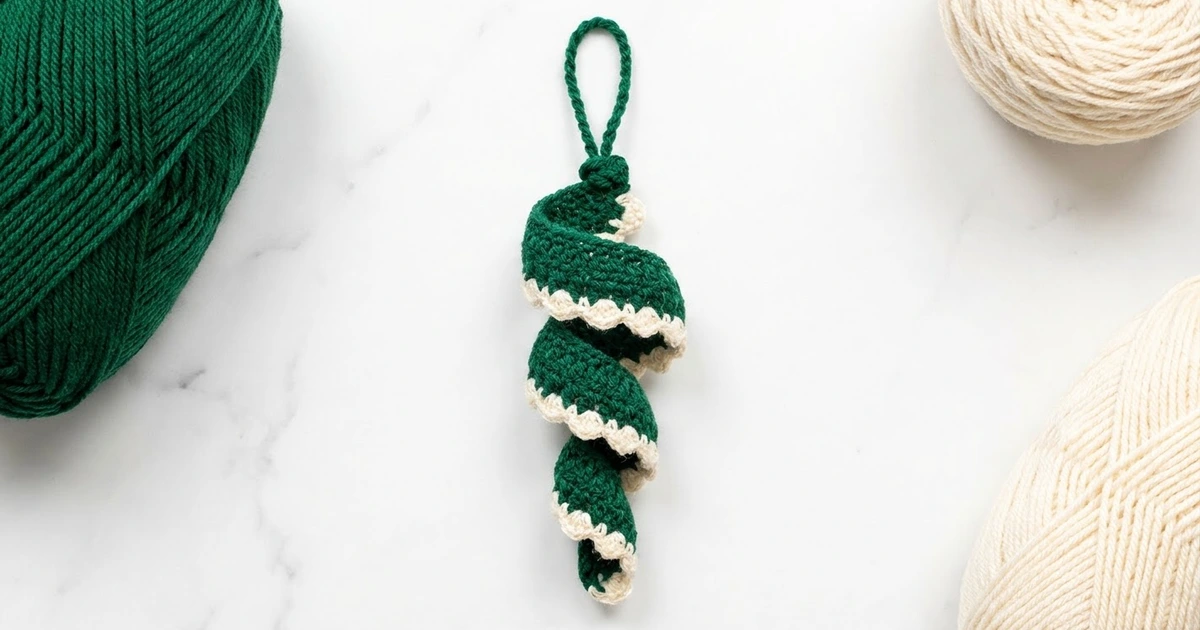
The Evergreen Twist is a small corkscrew Christmas ornament. You crochet it flat as one short strip, and it curls into a spiral on its own. The body is deep emerald green and the outer edge has tiny cream scallops, so each turn of the spiral is outlined in a soft frosted line.
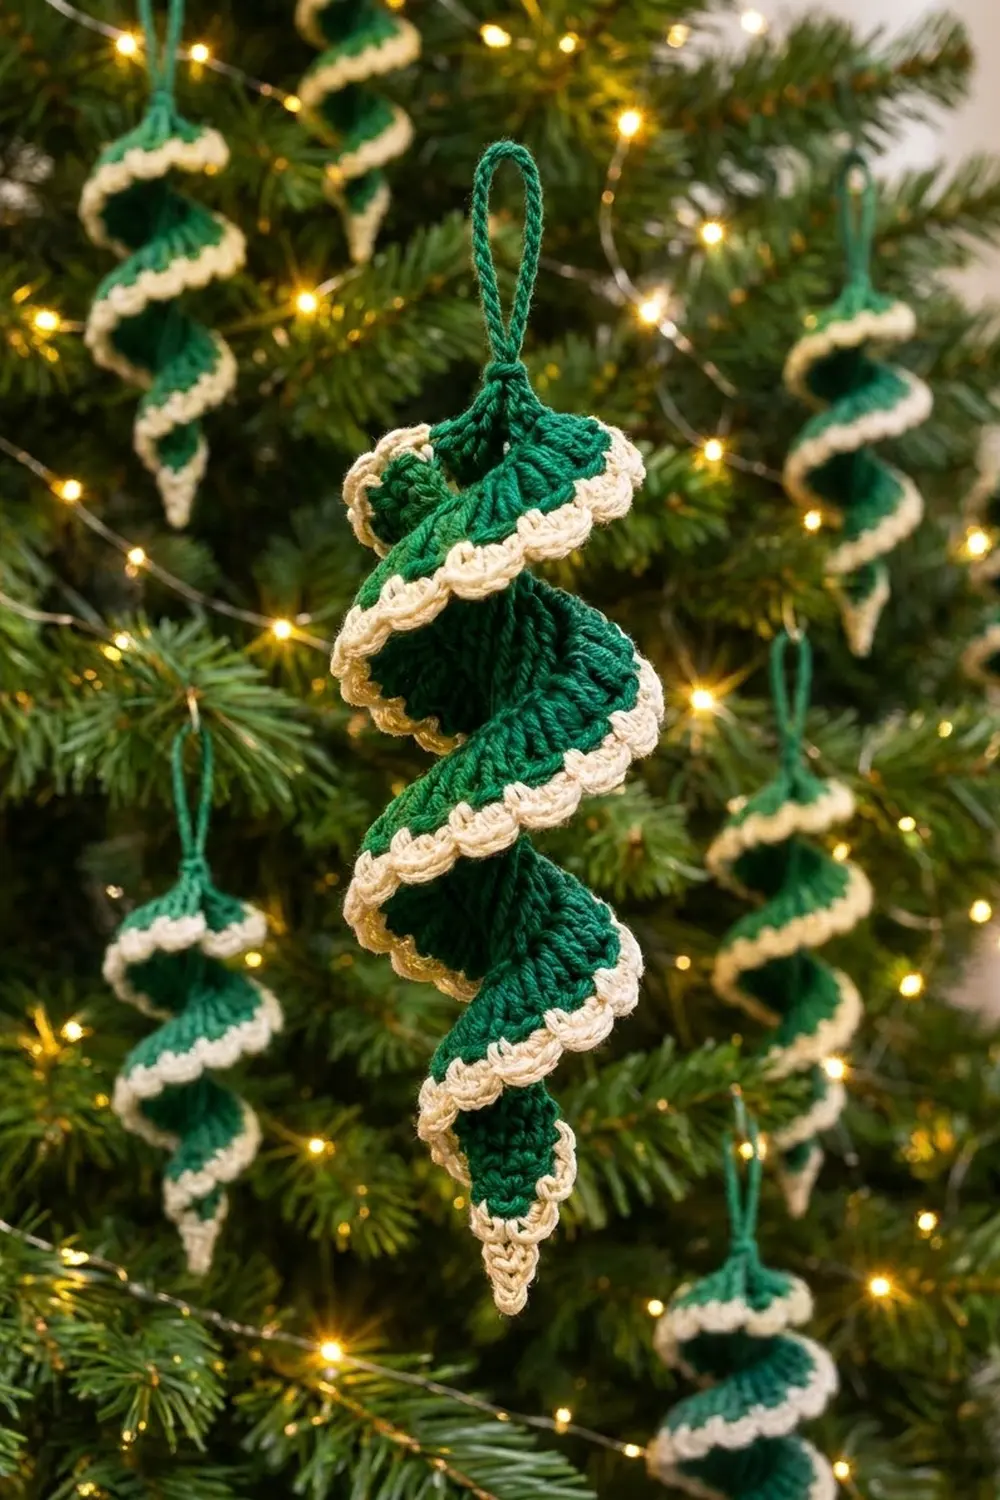
The ornament is wide at the top and narrows to a slim point at the bottom, like an icicle. A small green chain loop at the top lets you hang it on a branch, gift tag, or window hook. It looks classic and a little vintage, and a set of them looks lovely spread across a tree.
This pattern uses US crochet terms. The finished ornament is about 5.5 in (14.0 cm) tall and 2 in (5.1 cm) wide at the widest turn. Add about 2 in (5.1 cm) for the hanging loop, for a total length of about 7.5 in (19.1 cm).
To make it, you crochet a single crochet spine first. On the next row you put 2 stitches into every spine stitch, using taller and taller stitches as you go. That extra length along the outer edge is what forces the strip to twist. A cream scallop row finishes the edge. Then you gather the top, add a loop, and shape the spiral while blocking.
Finished Size and Construction
- Finished size: 5.5 in (14.0 cm) tall × 2 in (5.1 cm) wide, plus a 2 in (5.1 cm) loop
- Skill level: Easy
- Terminology: US crochet terms
- Yarn weight: DK (#3), cotton or cotton blend
- Hook: 3.5 mm (E-4)
- Number of pieces: 1 (a single strip)
- Layout: one strip twisted into a tapered corkscrew
- Piece size (flat, before twisting): spine 7.2 in (18.3 cm) long; strip width from about 0.5 in (1.3 cm) at the tip to about 1 in (2.5 cm) at the top
- Size before border: 7.2 in (18.3 cm) spine; green strip 0.75 in (1.9 cm) wide at the top end
- Border depth: about 0.25 in (0.6 cm) of cream scallops
Materials
Yarn: Use a smooth, mercerized DK cotton. It shows the stitches clearly, holds the spiral well, and takes starch nicely. Acrylic will work, but the spiral may relax over time unless you stiffen it.
- Color A, Emerald Green: 8 g, about 18 m (20 yd)
- Color B, Cream: 4 g, about 9 m (10 yd)
These quantities include a margin of about 30% for your gauge swatch, tails, and the hanging loop. One standard 50 g ball of each color is enough for several ornaments.
Tools:
– 3.5 mm (E-4) crochet hook
– Tapestry needle
– Scissors
– Spray starch or a fabric stiffener diluted 1:1 with water (optional, but recommended)
– A pencil, chopstick, or thin dowel for shaping
– Rust-proof pins and a foam blocking mat
Abbreviations (US Terms)
- ch – chain
- sl st – slip stitch
- sc – single crochet
- hdc – half double crochet
- dc – double crochet
- tr – treble crochet (yarn over twice, insert hook, pull up a loop, [yarn over, pull through 2 loops] 3 times)
- sk – skip
- st(s) – stitch(es)
- RS – right side
Special stitch – Scallop: Work 3 hdc in the same stitch.
Standing sc: Start with a slip knot on your hook. Insert the hook into the stitch, yarn over, pull up a loop, yarn over, and pull through both loops.
Gauge and Checkpoints
Gauge: 20 sc and 22 rows = 4 in (10.2 cm) in single crochet with a 3.5 mm hook.
Since the ornament is only one small strip, the ornament can act as your gauge test. Measure carefully at each checkpoint below before you move on.
- Checkpoint 1 (after Row 1): 36 sc should measure 7.2 in (18.3 cm) when laid flat. Ten sc should measure 2 in (5.1 cm).
- Checkpoint 2 (after Row 2): The strip should already be twisting. Without stretching it, the tip end should be about 0.4 in (1.0 cm) wide and the top end about 0.75 in (1.9 cm) wide.
- Checkpoint 3 (after Row 3): The cream scallops should add about 0.25 in (0.6 cm). The widest end should then measure about 1 in (2.5 cm) flat.
- Checkpoint 4 (after blocking): The spiral should be about 5.5 in (14.0 cm) tall and 2 in (5.1 cm) wide.
If your strip is too long: If Row 1 is longer than 7.6 in (19.3 cm), go down one hook size to 3.25 mm (D-3). A loose spine makes a long, floppy spiral.
If your strip is too short: If Row 1 is shorter than 6.8 in (17.3 cm), go up one hook size to 3.75 mm (F-5). A tight strip twists very hard and can bunch up.
Don’t change the stitch counts to fix the size. The spiral shape depends on the 1:2 ratio between the spine and the outer edge.
Main Pattern: The Spiral Strip
Row 1 – Spine (Color A, Green)
With green, ch 37, leaving a 6 in (15.2 cm) starting tail.
Row 1: Sc in the 2nd ch from the hook and in each ch across. Turn. (36 sc)
Check Checkpoint 1 now. The starting tail is at the end where Row 2 begins, and that end will become the narrow bottom tip.
Row 2 – Growth Row (Color A, Green)
This row doubles the stitch count along the outer edge, and that is what makes the strip twist. The stitches get taller as you go, so the strip widens from the tip toward the top.
Row 2: Ch 1 (does not count as a stitch).
– Sc in each of the first 3 sts. (3 sts worked)
– 2 hdc in each of the next 9 sts. (18 sts worked)
– 2 dc in each of the next 12 sts. (24 sts worked)
– 2 tr in each of the next 12 sts. (24 sts worked)
Row 2 total: 69 sts (3 sc + 18 hdc + 24 dc + 24 tr).
To check: 3 + 9 + 12 + 12 = 36 sts of Row 1 used, and every Row 1 st is worked into once.
Fasten off green, leaving an 8 in (20.3 cm) tail at the treble end. You’ll use this tail later to gather the top.
The strip will now ruffle and turn like a ribbon. This is supposed to happen, so don’t try to flatten it.
Row 3 – Scallop Edge (Color B, Cream)
The cream edging is covered in full in the Border section below. Work it now, then continue to the finishing steps.
Gathering the Top
Thread the 8 in (20.3 cm) green tail at the treble end onto a tapestry needle. Weave it through the ends of Rows 1 and 2 at that short edge, and also through the first 2 sc of the spine. Pull it firmly so the top of the strip cinches into a small, tight knot. Make 2 small stitches to lock it, but don’t cut the tail.
Hanging Loop (Color A, Green)
With the same green tail still attached at the gathered top, insert your hook at the center of the gather and pull up a loop.
Loop: Ch 18, then sl st into the gathered top to close the loop. Sl st once more into the same spot to reinforce it.
The loop should hang about 2 in (5.1 cm) above the top of the ornament. For a firmer, twisted look like the one in the photo, twist the chain 4 or 5 times clockwise before you make the closing slip stitch. Fasten off and weave the tail down into the spine.
Bottom Tip
Thread the 6 in (15.2 cm) starting tail at the narrow end. Pull it through the first 2 spine sts to close the tip into a neat point, then weave it in.
Border: Cream Scallop Edge
Border gauge: Each scallop repeat uses 4 stitches of Row 2. On the hdc, dc, and tr sections, 4 stitches equal 2 original spine stitches, or about 0.4 in (1.0 cm) of spine. So the scallops sit at an even spacing all along the outer edge, no matter how tall the green stitches below them are.
Starting count: The border is worked along one edge only, the outer edge of Row 2, which has 69 sts.
Row 3: With RS facing, join cream with a standing sc in the first sc of Row 2 at the narrow tip end. (1 sc)
Sk next st, 3 hdc in the next st (scallop), sk next st, sc in the next st. Repeat from * to * 16 more times, for 17 scallops in total. The final sc lands in the last tr of Row 2.
Row 3 total: 69 sts worked = 1 starting sc + 17 × (3 hdc + 1 sc) = 1 + 68.
Stitches of Row 2 used: 1 + 17 × 4 = 69. Every stitch is accounted for, with no extra stitches at either end.
Fasten off cream, leaving a 4 in (10.2 cm) tail, and weave both cream tails into the back of the green stitches.
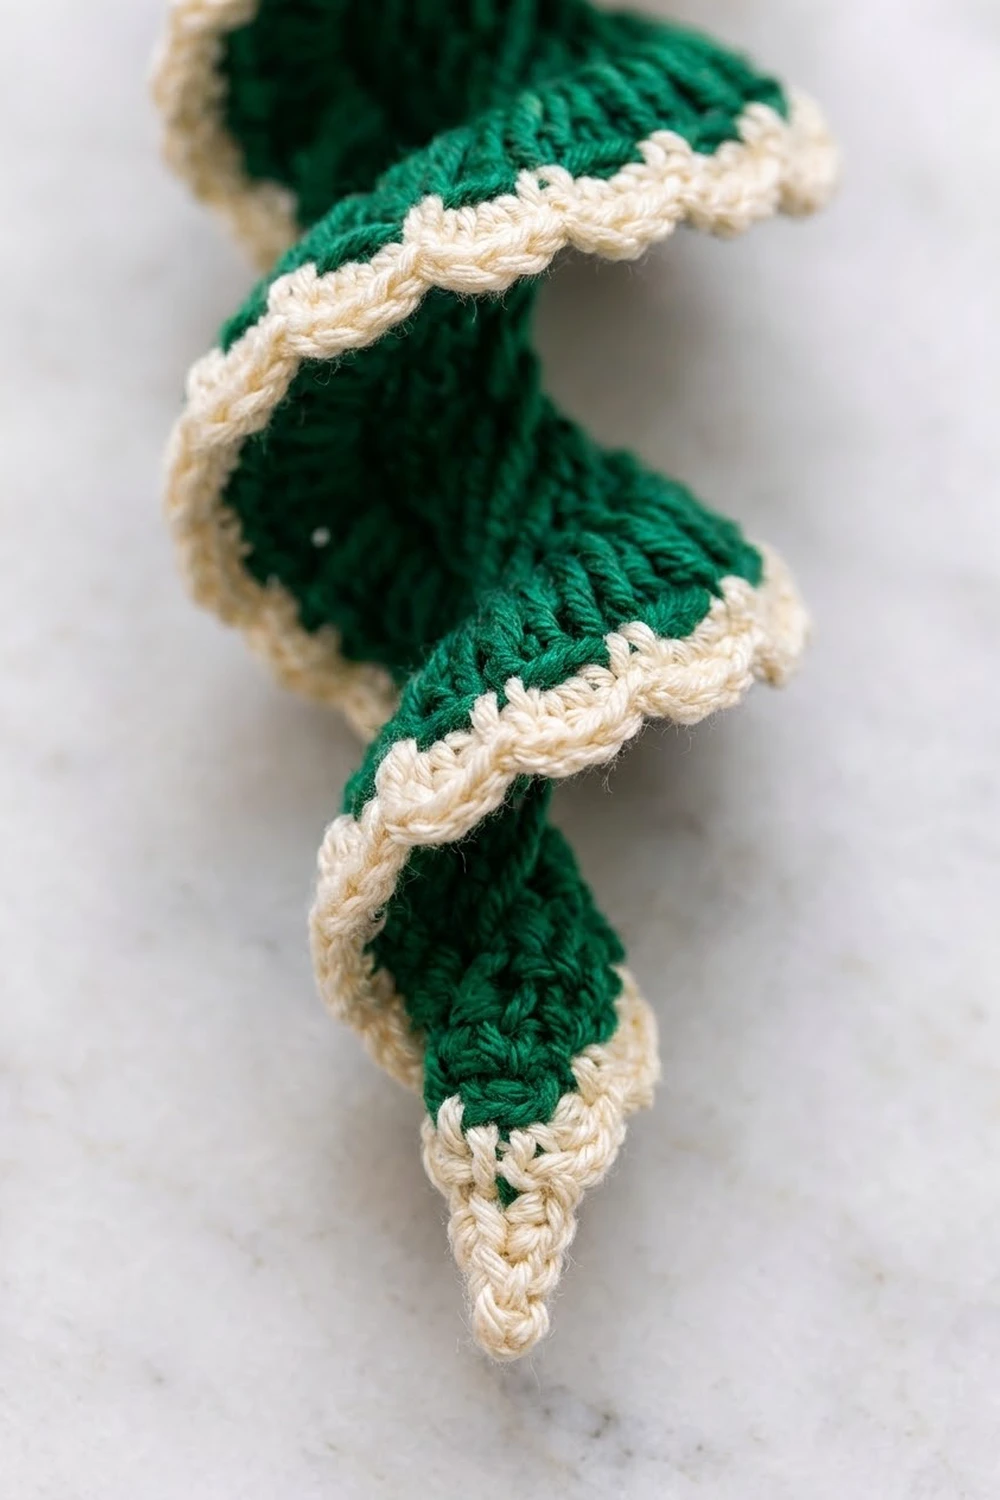
Why the math works: The scallop repeat is 4 stitches wide, and 69 − 1 = 68 = 4 × 17, so the pattern comes out exactly even. Because the cream row uses every Row 2 stitch once (worked into or skipped), the outer edge stays the same length as Row 2. The scallops don’t pull the edge tight, so the spiral isn’t flattened, and they don’t add extra length that would make the edge ripple. Across the spiral, the 17 scallops show as the small cream bumps you see on each turn.
Placement guide by section:
– Sc section (sts 1–3): the starting sc and the first half of scallop 1
– Hdc section (sts 4–21): about 4.5 scallops
– Dc section (sts 22–45): 6 scallops
– Tr section (sts 46–69): 6 scallops, ending with the final sc
Scallops on the taller sections look slightly more open. This is what gives the top turns their soft, fuller edge.
Final Blocking
Blocking turns a ruffled strip into a neat, even corkscrew.
- Wet the piece. Soak the ornament in cool water for 5 minutes, then gently press out the water in a towel. Don’t wring it.
- Stiffen (optional). Dip it in fabric stiffener diluted 1:1 with water, or spray it well with starch. Squeeze out any extra so no film is left between the scallops.
- Wrap the spine. Hold the gathered top against the top of a pencil or thin dowel. Wind the spine around it so the spine runs down the center and the scalloped edge spirals outward. Aim for 4 to 5 full turns.
- Space the turns. Ease the turns apart so the gaps are even, and make sure the spiral narrows toward the tip. Measure: the spiral should be about 5.5 in (14.0 cm) from the gathered top to the tip.
- Check the width. The widest turn near the top should be about 2 in (5.1 cm) across. The bottom turn should be about 0.75 in (1.9 cm) across.
- Open the scallops. Use a fingertip or pin to roll each cream scallop slightly outward so it sits on the edge, not tucked under.
- Dry fully. Hang the ornament by its loop, or stand the dowel upright in a jar, and leave it to dry for at least 12 hours. Slide the dowel out once it is completely dry.
Final Quality-Control Checklist
- Row 1 has 36 sc and measures 7.2 in (18.3 cm) flat.
- Row 2 has 69 sts: 3 sc, 18 hdc, 24 dc, 24 tr.
- Row 3 has 17 scallops plus the starting sc, and ends in the last tr.
- The cream edge runs along the full outer edge, from tip to top.
- The top is gathered tightly with no visible gap.
- The hanging loop is closed with 2 slip stitches and hangs about 2 in (5.1 cm).
- The bottom tip comes to a neat point.
- The spiral has 4 to 5 even turns and measures 5.5 in (14.0 cm) × 2 in (5.1 cm).
- All tails are woven into the green fabric and none show on the cream edge.
- The ornament hangs straight and doesn’t tilt to one side.
Troubleshooting
The strip won’t twist and just ruffles flat. You may have worked 1 stitch instead of 2 into some spine stitches. Count Row 2 again. It must have exactly 69 sts.
The spiral is too tight and bunches up. Your Row 2 tension is probably much looser than your Row 1 tension. Try the next hook size up for Row 1 only.
The scallops come out uneven at the end. Check that you started in the very first sc of Row 2. Starting 1 stitch late leaves a short repeat at the top end.
The cream edge is curling under. The scallops are pulled too tight. Work them with a slightly looser hand, and roll them outward while blocking.
The ornament hangs crooked. The loop is off-center. Undo the loop and remake it from the exact middle of the gathered top.
The spiral sags after a few weeks. Re-block it with full-strength stiffener, or switch to mercerized cotton for future ornaments.
The gap at the top is visible. Weave the gathering tail through 1 or 2 more spine stitches and pull firmly before you make the loop.
Care
Spot clean with cool water and mild soap, then reshape around a pencil and let it air dry. If you starched the ornament, re-starch after washing to restore the crisp spiral.
Final Notes
The whole ornament depends on one simple chain of measurements. Thirty-six spine stitches at 5 sc per inch give a 7.2 in (18.3 cm) spine. Row 2 doubles this to 69 outer stitches, which makes the strip twist. The 17 scallops use all 69 stitches exactly, so the edge length stays the same as Row 2. Wound into 4 to 5 turns, the strip blocks to 5.5 in (14.0 cm) tall and 2 in (5.1 cm) wide, with a 2 in (5.1 cm) loop on top.
Check your gauge at Row 1, count carefully at Row 2, and let blocking do the rest. Once you’ve made one, the next takes only about 20 minutes, which makes it easy to fill a whole tree with green and cream twists.
Happy crocheting!