

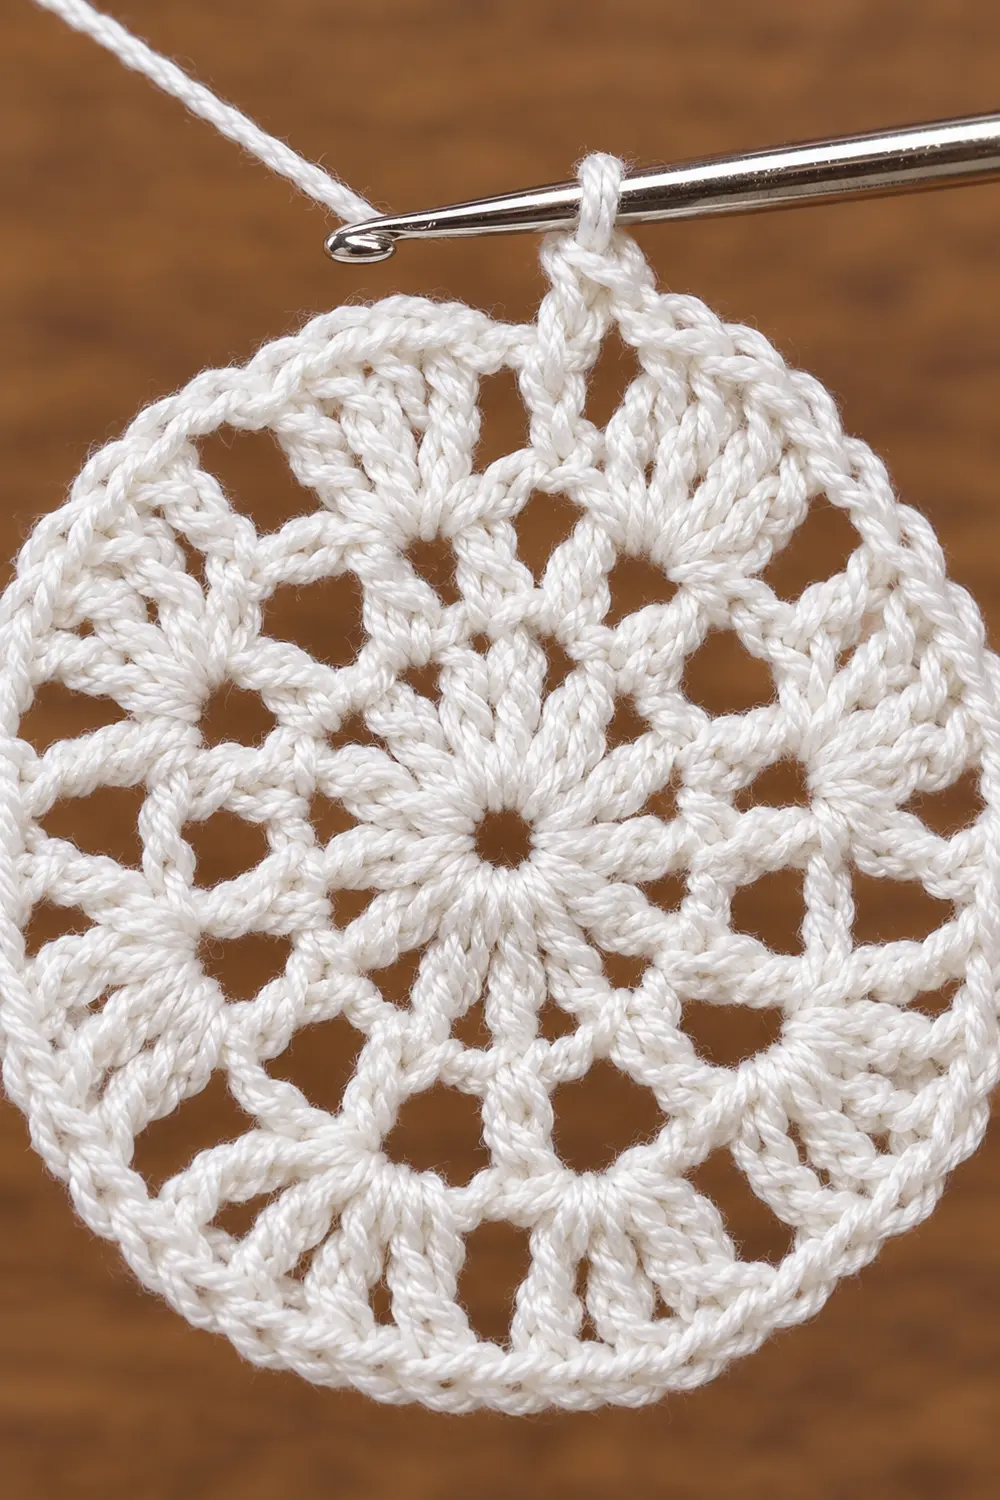
The Frost Fan Lace Motif is a small, round piece of crochet lace worked in cream thread. It starts with a tight double crochet center and opens into a ring of chain spaces. It finishes with a round of shell stitches and a final fan edge. The result looks delicate and semi-transparent, with regular openings all the way around.
This is a single motif, worked in one continuous piece from the center out. It has no seams and no joins. While you work, the motif may cup slightly into a shallow dome. Blocking at the end relaxes it into a flat circle.
The pattern uses US crochet terms throughout. The finished motif measures 3 in (7.6 cm) in diameter after blocking.
Construction is simple. You make a magic ring, work five rounds of body (double crochet, spaced double crochet, solid double crochet, chain loops, and shells), then add one fan border round. Each section below gives stitch counts and a diameter checkpoint, so you can confirm your size as you go.
Finished Size and Construction
- Finished size: 3 in (7.6 cm) diameter, blocked
- Skill level: Easy intermediate (comfortable with magic ring, dc, and working into chain spaces)
- Terminology: US crochet terms
- Yarn weight: Lace (0), size 10 cotton crochet thread
- Hook: 1.75 mm steel hook
- Number of pieces: 1
- Layout: Single circular motif, worked in the round from the center
- Piece size: 3 in (7.6 cm) diameter
- Size before border: 2.5 in (6.4 cm) diameter after Round 5
- Border depth: 0.25 in (0.6 cm) on each side, adding 0.5 in (1.3 cm) to the total diameter
Materials
Yarn advice: Use a mercerized size 10 cotton crochet thread. Mercerized cotton has a slight sheen and crisp stitch definition, and it holds the open shells well after blocking. Avoid fuzzy or acrylic threads, because they blur the openwork and do not block as sharply.
Color:
- Cream or off-white, size 10 cotton thread: 5 g, about 28 m (based on a thread of roughly 5.6 m per gram)
The quantity includes a margin of about 30% for your gauge swatch, tails, and any frogging. The motif itself uses closer to 3.5 g.
Tools:
- 1.75 mm steel crochet hook
- Fine tapestry needle or small-eye embroidery needle
- Small scissors
- Rustproof pins
- Foam blocking mat or folded towel
- Spray bottle with water (optional: light spray starch)
- Ruler or tape measure marked in inches and cm
- 1 stitch marker
Abbreviations (US Terms)
- ch – chain
- sl st – slip stitch
- sc – single crochet
- dc – double crochet
- sp(s) – space(s)
- st(s) – stitch(es)
- rep – repeat
- * * – repeat the instructions between asterisks as directed
Special stitches:
- Shell: (3 dc, ch 2, 3 dc) worked into the same space.
- Fan: 7 dc worked into the same space.
Gauge and Checkpoints
Gauge matters for any small lace piece. Even a small change in tension shows clearly at this size. Work the motif through Round 3 as your test piece and measure it flat before you continue.
Gauge: Rounds 1–3 = 1.5 in (3.8 cm) in diameter, unblocked and gently flattened.
Checkpoints (unblocked, gently flattened):
- After Round 1: 0.6 in (1.5 cm)
- After Round 2: 1.1 in (2.8 cm)
- After Round 3: 1.5 in (3.8 cm)
- After Round 4: 2 in (5.1 cm)
- After Round 5: 2.5 in (6.4 cm)
- After Round 6 (border), blocked: 3 in (7.6 cm)
A tolerance of about 0.125 in (0.3 cm) at each stage is normal.
If your piece is too big: Change to a 1.5 mm hook, or pull the working thread a little snugger, especially on the chain stitches.
If your piece is too small: Change to a 2 mm hook. Also check that your chains are not overly tight, because tight chains are the most common cause of a small, cupped motif.
If the piece cups heavily: Your chains are likely too tight compared to your dc. Loosen the chains before you change hooks.
Pattern
Leave a 6 in (15.2 cm) tail at the start. Do not turn at the end of any round. The right side faces you throughout.
Round 1 – Center
Make a magic ring.
Ch 3 (counts as first dc). Work 15 dc into the ring. Pull the tail to close the ring snugly. Join with a sl st to the top of the beginning ch-3.
Count: 16 dc.
Checkpoint: 0.6 in (1.5 cm).
Round 2 – Spaced Double Crochet
Ch 5 (counts as first dc plus ch 2). *Dc in next dc, ch 2*. Rep from * to * 14 more times. Join with a sl st to the 3rd ch of the beginning ch-5.
Count: 16 dc and 16 ch-2 sps.
This round creates the first ring of small openings around the solid center.
Checkpoint: 1.1 in (2.8 cm).
Round 3 – Solid Ring
Sl st into the first ch-2 sp. Ch 3 (counts as first dc), then work 2 dc in the same sp. Work 3 dc in each remaining ch-2 sp around. Join with a sl st to the top of the beginning ch-3.
Count: 48 dc (16 sps × 3 dc).
This round has its own complete count of 48 dc. The dc from Round 2 are covered over, not added to it.
Checkpoint: 1.5 in (3.8 cm). This is your gauge check. Measure it now before going on.
Round 4 – Chain Loops
Ch 1. Sc in the same st as the join. *Ch 4, skip 2 dc, sc in next dc*. Rep from * to * 14 more times. Ch 4, skip the last 2 dc, and join with a sl st to the first sc.
Count: 16 sc and 16 ch-4 loops (48 dc ÷ 3 = 16 repeats).
Keep your ch-4 loops even. They become the base for the shells, so uneven loops will produce uneven shells.
Checkpoint: 2 in (5.1 cm).
Round 5 – Shells
Sl st into the first ch-4 loop.
Ch 3 (counts as first dc). Work (2 dc, ch 2, 3 dc) in the same loop. This completes the first shell.
*Sc in next ch-4 loop, shell in next ch-4 loop*. Rep from * to * 6 more times. Sc in the last ch-4 loop. Join with a sl st to the top of the beginning ch-3.
Count: 8 shells and 8 sc. That is 48 dc plus 8 sc, for 56 sts total, plus 8 ch-2 sps at the shell tips.
The 16 loops alternate shell, sc, shell, sc. Because 16 is even, the pattern closes cleanly with no leftover loop.
Checkpoint: 2.5 in (6.4 cm). This is the size before the border.
Border
The border is a single round of fans. Each fan sits on top of one shell, and each sc anchors the valley between fans. Together they make the scalloped edge.
Border gauge: The border uses the same hook and tension as the body. Each fan should rise about 0.25 in (0.6 cm) above the Round 5 shell tips. This adds 0.5 in (1.3 cm) across the full diameter.
Round 6 – Fan Edge
Sl st in the next 2 dc and into the first ch-2 sp, so the hook sits at the tip of the first shell.
Ch 3 (counts as first dc). Work 6 dc in the same ch-2 sp. This completes the first fan.
*Sc in next sc, fan (7 dc) in next ch-2 sp*. Rep from * to * 6 more times. Sc in the last sc. Join with a sl st to the top of the beginning ch-3.
Count per section: 1 fan (7 dc) + 1 sc = 8 sts.
Total: 8 sections × 8 sts = 64 sts (56 dc + 8 sc).
This round is its own complete round. It is not a continuation of Round 5’s count. The dc of each Round 5 shell are skipped and covered by the fan above them, and only the ch-2 sps and the sc are worked into.
Fasten off, leaving a 6 in (15.2 cm) tail.
Why the math works:
- Round 1 has 16 dc, which creates 16 spaces in Round 2.
- In Round 3, 16 spaces × 3 dc = 48 dc.
- In Round 4, 48 is divisible by 3, which gives 16 loops.
- In Round 5, 16 loops alternate shell and sc, which gives 8 shells and 8 sc.
- In Round 6, each of the 8 shells gets 1 fan and each of the 8 sc is worked once, which gives 8 even scallops.
Every step divides cleanly, so the edge closes with no leftover stitches.
Final Blocking
- Weave in ends first. Weave each tail through the backs of the dc for about 1 in (2.5 cm). Then reverse direction for a few stitches and trim close.
- Wet the motif. Soak it in cool water for a few minutes, then press the water out gently in a towel. Do not wring it.
- Optional stiffening. For an ornament or appliqué, mist lightly with spray starch.
- Mark the size. On your mat, draw or note a 3 in (7.6 cm) circle. A ruler crossed through a center point works well.
- Pin the center. Lay the motif face up and flatten the center ring.
- Pin the fans. Place one pin at the center dc of each fan. Start with opposite pairs, 4 pins in a cross, then add the remaining 4. All 8 fan tips should touch the 3 in (7.6 cm) circle.
- Open the shells. Use a pin tip to nudge each ch-4 loop and shell into an even shape.
- Dry fully. Leave it pinned until it is completely dry, usually several hours. Unpin and measure.
Final Quality-Control Checklist
- [ ] Round 1 has 16 dc and the center ring is fully closed.
- [ ] Round 2 has 16 evenly sized ch-2 sps.
- [ ] Round 3 has 48 dc.
- [ ] Round 4 has 16 ch-4 loops of equal size.
- [ ] Round 5 has 8 shells and 8 sc, alternating.
- [ ] Round 6 has 8 fans of 7 dc each, with 64 sts total.
- [ ] The diameter is 2.5 in (6.4 cm) before the border and 3 in (7.6 cm) blocked.
- [ ] The motif lies flat after blocking, with no ruffling or cupping.
- [ ] All ends are woven in securely and invisibly.
- [ ] All 8 scallops are the same height, about 0.25 in (0.6 cm).
Troubleshooting
The center has a hole. The magic ring was not pulled tight. Weave the starting tail around the base of the Round 1 dc and cinch it closed.
The motif ruffles. You have too many stitches or loose dc. Recount Round 3 (48) and Round 6 (64). If the counts are correct, go down a hook size.
The motif cups and won’t flatten. Your chains are too tight. Rework Rounds 2 and 4 with looser chains.
The shells lean to one side. Make sure each shell goes fully into a single ch-4 loop, with the ch-2 at the center of the shell.
The last repeat doesn’t fit. A stitch was skipped or doubled earlier. Count loops in Round 4 (16) before starting the shells.
The fans look flat. Work each fan into the ch-2 sp, not into the dc around it, so all 7 dc share one base.
The finished size is off by more than 0.125 in (0.3 cm). Re-block, pinning to the 3 in (7.6 cm) circle. If it is still off, adjust your hook size for the next motif.
Care
Hand wash in cool water with a mild soap, press dry in a towel, and re-block flat to 3 in (7.6 cm). Re-apply light starch if you want a crisp finish.
Final Notes
The measurement chain for this motif is:
- Round 1 = 0.6 in (1.5 cm)
- Round 2 = 1.1 in (2.8 cm)
- Round 3 = 1.5 in (3.8 cm), your gauge check
- Round 4 = 2 in (5.1 cm)
- Round 5 = 2.5 in (6.4 cm), before the border
- Fan border adds 0.25 in (0.6 cm) per side, for a blocked finish of 3 in (7.6 cm)
The stitch counts follow the same steady logic: 16 → 16 sps → 48 → 16 loops → 8 shells → 64.
Check your size at Round 3, keep your chains relaxed, and block carefully. You will end up with a crisp, even lace circle.
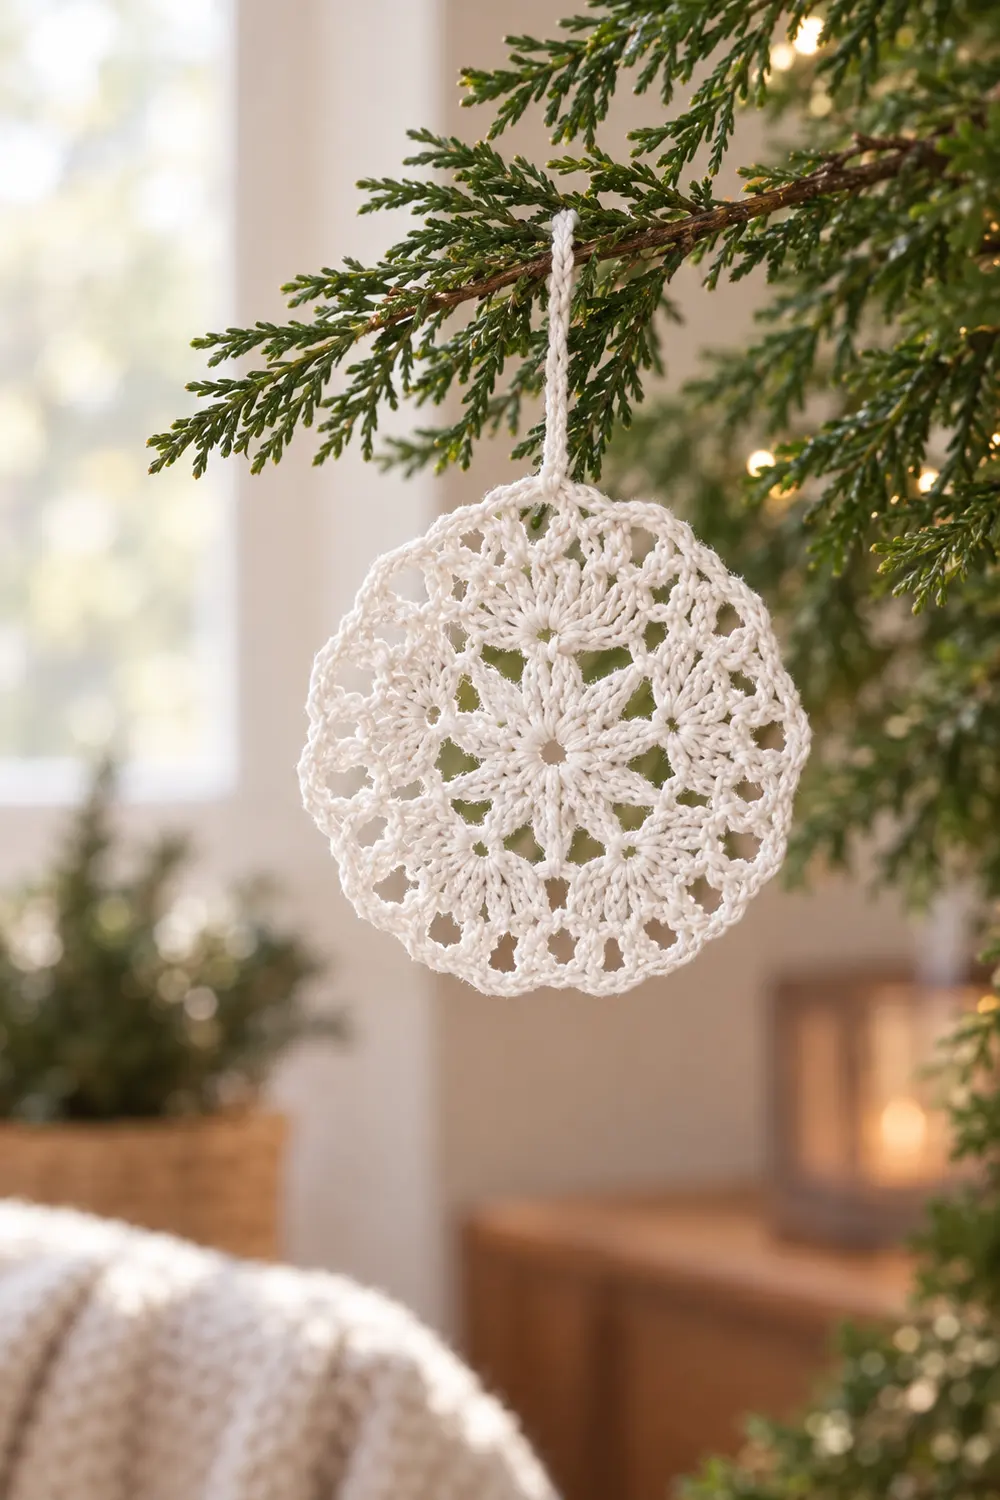
Optional: if you enjoy this motif, you can make several for ornaments, gift tags, or appliqués. The pattern above, however, is for a single motif.
Happy crocheting!